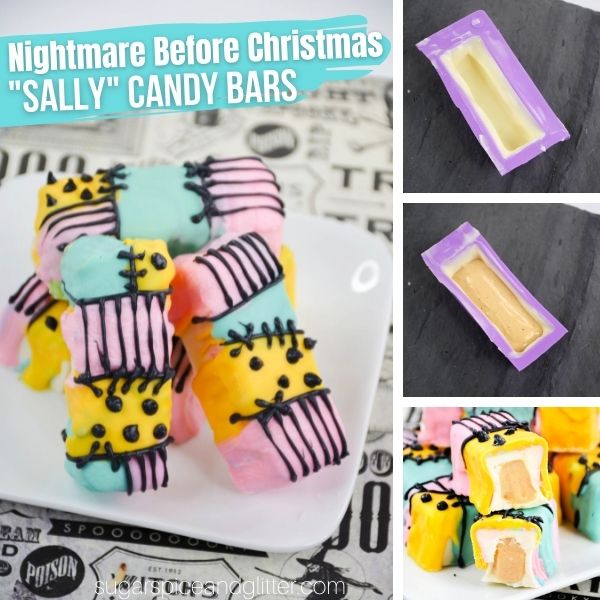
Nightmare Before Christmas Sally Candy Bars
Welcome to Sugar, Spice & Glitter! Please note, this post may contain affiliate links. For more details, see our Full Disclosure.


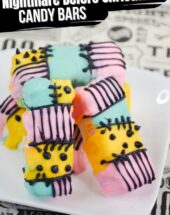
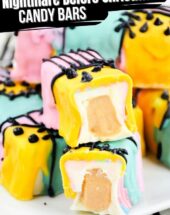
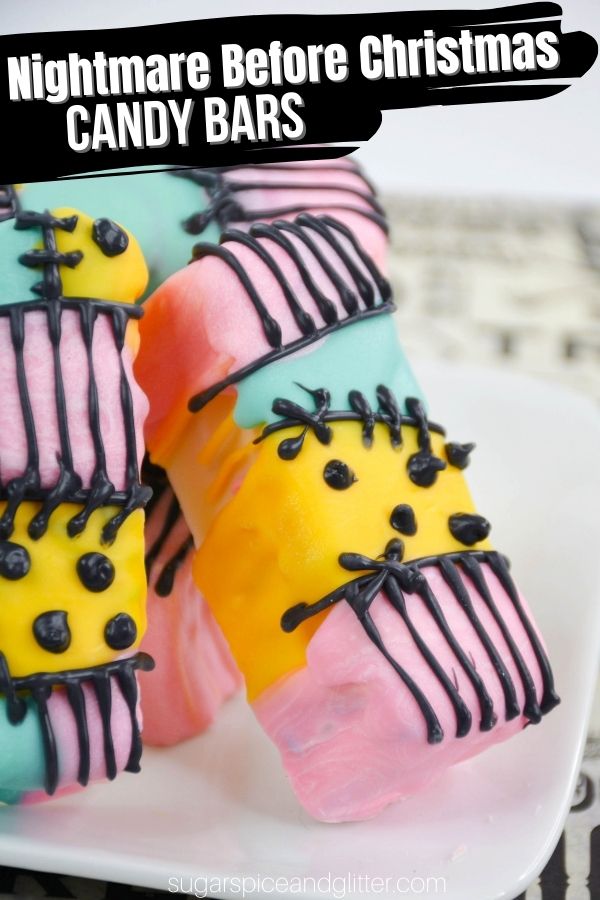
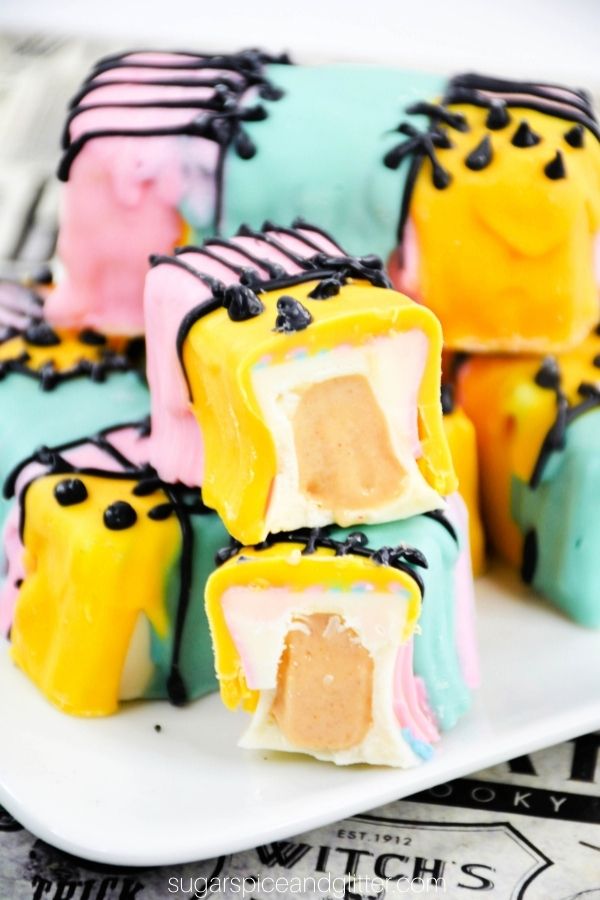
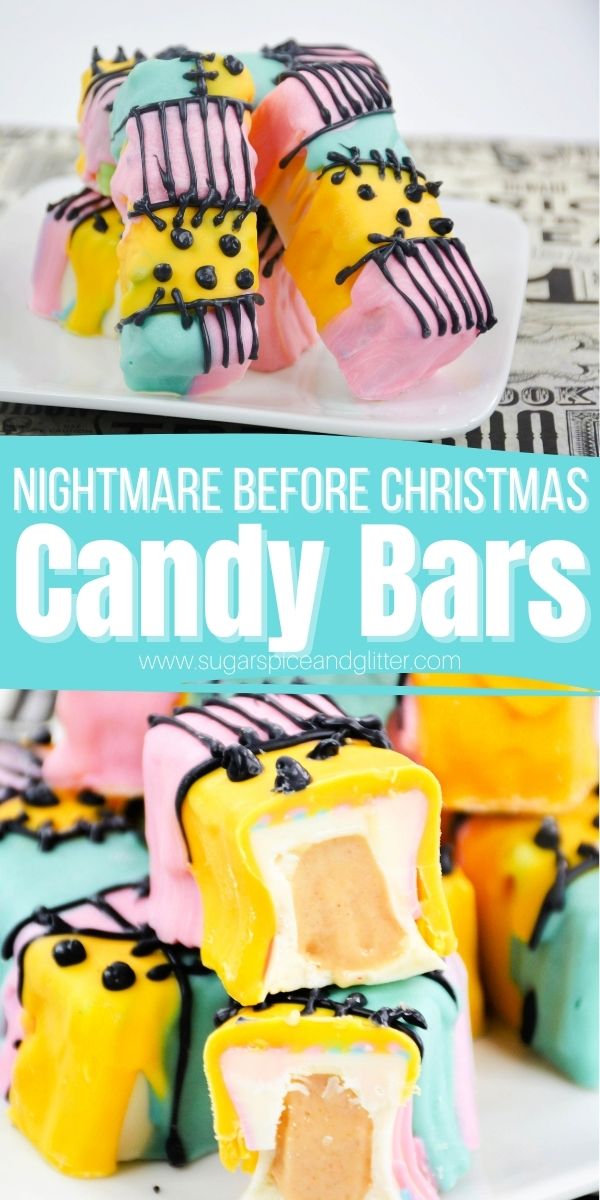
A deceptively simple yet undeniably adorable Nightmare Before Christmas dessert, today’s Sally Candy Bars pay homage to the Pumpkin Queen’s iconic patchwork dress and contain a delicious, soft peanut butter nougat filling encased in a white chocolate shell as a nod to the character’s undeniable sweetness.
Nightmare Before Christmas Dessert Recipe
Whether you’re planning a Nightmare Before Christmas party or movie night, or just want something fun to surprise your friends and family with, these White Chocolate Sally Bars with a decadent peanut butter filling will definitely fit the bill!
We had so much fun decorating these candy bars to gift to some friends that I actually think decorating the candy bars would make for a fun party or movie night activity!
For the filling on these white chocolate candy bars, we made a cheater peanut butter nougat filling.
Normally, nougat fillings require a lot of technical skill, including tempering the candy mixture just right and then slowly combining it into eggs that have been whipped into stiff peaks. There’s a lot of room for error – and frustration. While I sometimes love a good kitchen challenge (hello, Cheese Soufflé and Lobster Thermidor), for this project I preferred to focus my energy on that cute patchwork candy bar decoration.
If you’re not a fan of peanut butter nougat fillings, you can swap it out with:
- wafer cookies
- mini pre-made chocolate cookies
- graham cracker cookies sandwiched with peanut butter in the middle
- chocolate cream cheese filling
- turkish delights
- soft caramel filling
Recipe Tips
While I always have an assortment of candy melt colors on hand for my baking experiments, I know sometimes the stores have shortages or it can get pricey to go out and buy 4 different bags of candy melts. A work-around can be using these candy colorings and just purchasing a large bag of white candy melts and the small bag of black candy melts. (Note that you can’t just use regular food dye to dye candy melts as the water content in standard food dye will cause the candy melts to seize up and take on a grainy, lumpy texture.)
For the candy bar molds, you may find it easier to cut each candy bar mold out separately (as shown in the pictures below) so it’s not as flimsy to handle.
To store these candy bars, keep them in an airtight container at room temperature for up to a week. They can be refrigerated for up to two weeks, but note that the candy melts will develop a bit of condensation when moved from a chilled fridge to room temperature. They are best enjoyed within 48 hours of preparation.

More Nightmare Before Christmas Crafts and Recipes:
- Sally Dawn Stuffie Sewing Project
- Zero Stuffie Sewing Project
- Jack Skellington Sewing Project
- Jack Skellington Paper Ornaments
- Cricut Nightmare Before Christmas Coffee Cup
- Jack Skellington Sugar Cookies
- Nightmare before Christmas Kitchen Gifts
- Jack Skellington Cupcakes
- Jack Skellington Pull-Apart Cupcake Cake from my friend Stacey over at the Soccer Mom Blog
- NBC Sally Sugar Cookies from my friend Jana over at Whiskey and Sunshine
White Chocolate Candy Bar Ingredients
Peanut Butter Nougat Ingredients:
- Butter, room temperature
- White Sugar
- Evaporated Milk
- Marshmallow Fluff
- Creamy Peanut Butter
- Vanilla Extract
Chocolate Candy Bar Shell Ingredients:
- Ghirardelli White Chocolate Melting Wafers
- Pink Candy Melts
- Yellow Candy Melts
- Light Blue Candy Melts
- Black Candy Melts
Scroll down to the printable recipe card for full measurements.
Tip: if desired, you can use candy colorings to dye white candy melts for the pink, yellow and blue candy melts needed for this recipe.
Kitchen Tools You May Find Helpful
- Saucepan
- Measuring Cups and Spoons
- Spatula <– I like these spatulas because they are one solid piece and don’t have removable heads for bacteria to get trapped underneath. Plus they are heat-resistant and have a lifetime warranty.
- Medium-sized Microwave-safe Bowls
- Large Bowl
- 2 Candy Bar Silicone Molds
- 2 Piping Bags
How to Make Nightmare Before Christmas Candy Bars
How to Make Peanut Butter Nougat:
In a medium saucepan, stir together the butter, sugar and evaporated milk.
Place saucepan over medium-high heat and bring the mixture to a boil for 5 minutes
Remove from heat and fold in the marshmallow fluff, peanut butter, and vanilla until smooth.
Pour into a medium-sized bowl, then cover and refrigerate overnight to set.
How to Assemble Sally Candy Bars:
Place half of the white chocolate wafers in a microwave-safe bowl and heat in the microwave for 45 seconds. Stir well, then reheat as needed until smooth.
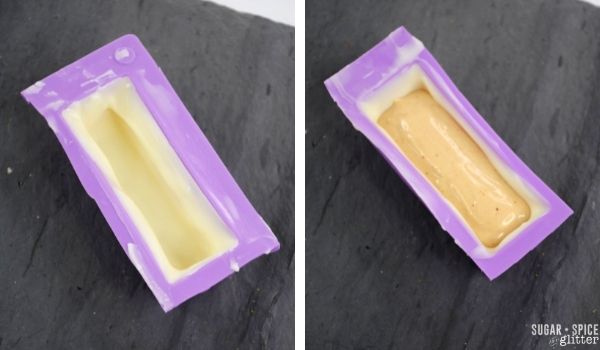
Spoon about 3 Tablespoons of the melted chocolate into each cavity of the silicone candy bar mold, ensuring that the chocolate coats each side of the mold. Flip the mold upside down, over the bowl of melted chocolate, and gently shake to allow the excess chocolate to drip out. Repeat with all candy bar molds.
Place the candy bar molds in the fridge for 10 minutes to harden.
Remove the candy molds and slightly hardened peanut butter nougat from the fridge.
Scoop the peanut butter nougat into a large piping bag and cut off the tip. Use the piping bag to fill each candy bar about 3/4 of the way full with the peanut butter filling.
Place the candy bar molds back in the fridge for 30 minutes.
Re-melt the white chocolate at the 30 minute mark, stirring and reheating as needed.
Remove the candy bar molds from the fridge and spoon about 1 Tablespoon of the white chocolate over top of the nougat and smooth down.
Place the molds back in the fridge for an hour to completely harden.
Use three small microwave-safe bowls to melt the yellow, blue and pink candy melts. Heat for 35 seconds, stir and reheat as needed until smooth.
Place a wire rack over a cookie sheet covered in tinfoil for easy clean-up.
Carefully remove the candy bars from the molds and place on a the wire rack.
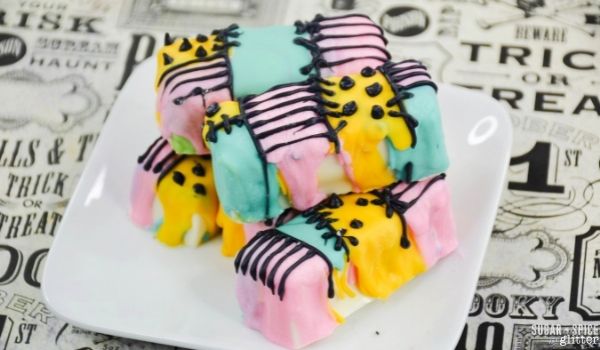
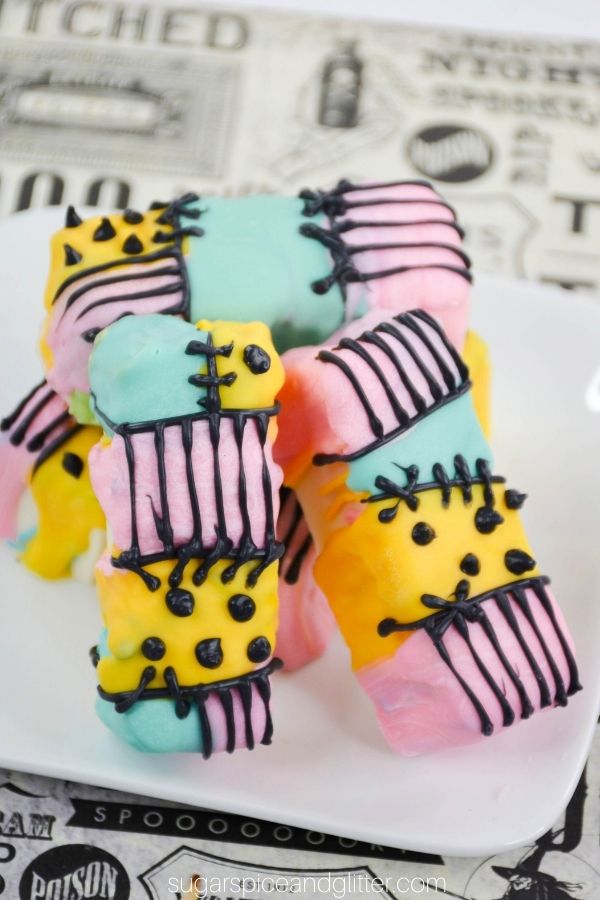
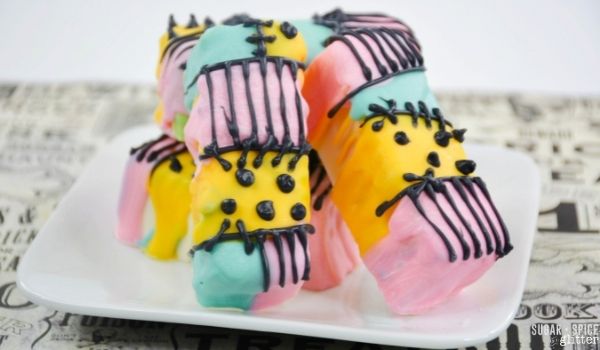
Spoon the melted candy melts in rough stripes over the candy bars, creating a patchwork pattern similar to Sally’s dress.
Once the bars are coated in the candy melts, gently tap the wire rack onto the cookie tray to allow excess candy melts to drip off onto the tray.
Allow the colored candy melts to harden at room temperature, about 10-15 minutes.
Use a small microwave-safe bowl to melt the black candy melts. Heat for 35 seconds, stir and reheat as needed until smooth. Allow to cool for 1 minute, then scoop into a piping bag. Make a very small cut to the end of the piping bag to make a narrow hole.
Pipe lines of black candy melts along the edges of the colored stripes, then go back over the black lines to create a “stitched” effect. Pipe small yellow dots onto the yellow candy melt sections and black vertical lines onto the pink candy melt sections.
Allow the black candy melts to dry and harden completely before storing or serving.
Pin this Easy Nightmare Before Christmas Dessert Idea for your Halloween Baking:
Grab your free printable recipe card for our Sally candy bar recipe:
Want to Save This Recipe?
Enter your email & I'll send it to your inbox. Plus, get great new recipes from me every week!
By submitting this form, you consent to receive emails from Sugar, Spice and Glitter.
Nightmare Before Christmas Sally Candy Bars
A deceptively simple method for making the cutest Nightmare Before Christmas dessert, these Sally Candy bars feature a white chocolate shell and peanut butter nougat filling and are decorated to look like Sally's iconic patchwork dress. These homemade candy bars look complicated but couldn't be easier to whip up!
Ingredients
Peanut Butter Nougat Ingredients:
- 8 Tablespoons Butter, room temperature
- 2 cups White Sugar
- 1⁄2 cup Evaporated Milk
- 14oz Marshmallow Fluff
- 1⁄2 cup Creamy Peanut Butter
- 2 teaspoons Vanilla Extract
Chocolate Candy Bar Shell Ingredients:
- 30 oz Ghirardelli White Chocolate Melting Wafers
- 8oz Pink candy melts
- 8oz yellow candy melts
- 8oz light blue candy melts
- 4oz black candy melts
Instructions
How to Make Peanut Butter Nougat:
- In a medium saucepan, stir together the butter, sugar and evaporated milk.
- Place saucepan over medium-high heat and bring the mixture to a boil for 5 minutes
- Remove from heat and fold in the marshmallow fluff, peanut butter, and vanilla until smooth.
- Pour into a medium-sized bowl, then cover and refrigerate overnight to set.
How to Assemble Sally Candy Bars:
- Place half of the white chocolate wafers in a microwave-safe bowl and heat in the microwave for 45 seconds. Stir well, then reheat as needed until smooth.
- Spoon about 3 Tablespoons of the melted chocolate into each cavity of the silicone candy bar mold, ensuring that the chocolate coats each side of the mold. Flip the mold upside down, over the bowl of melted chocolate, and gently shake to allow the excess chocolate to drip out. Repeat with all candy bar molds.
- Place the candy bar molds in the fridge for 10 minutes to harden.
- Remove the candy molds and slightly hardened peanut butter nougat from the fridge.
- Scoop the peanut butter nougat into a large piping bag and cut off the tip. Use the piping bag to fill each candy bar about 3/4 of the way full with the peanut butter filling.
- Place the candy bar molds back in the fridge for 30 minutes.
- Re-melt the white chocolate at the 30 minute mark, stirring and reheating as needed.
- Remove the candy bar molds from the fridge and spoon about 1 Tablespoon of the white chocolate over top of the nougat and smooth down.
- Place the molds back in the fridge for an hour to completely harden.
- Use three small microwave-safe bowls to melt the yellow, blue and pink candy melts. Heat for 35 seconds, stir and reheat as needed until smooth.
- Place a wire rack over a cookie sheet covered in tinfoil for easy clean-up.
- Carefully remove the candy bars from the molds and place on a the wire rack.
- Spoon the melted candy melts in rough stripes over the candy bars, creating a patchwork pattern similar to Sally's dress.
- Once the bars are coated in the candy melts, gently tap the wire rack onto the cookie tray to allow excess candy melts to drip off onto the tray.
- Allow the colored candy melts to harden at room temperature, about 10-15 minutes.
- Use a small microwave-safe bowl to melt the black candy melts. Heat for 35 seconds, stir and reheat as needed until smooth. Allow to cool for 1 minute, then scoop into a piping bag. Make a very small cut to the end of the piping bag to make a narrow hole.
- Pipe lines of black candy melts along the edges of the colored stripes, then go back over the black lines to create a "stitched" effect. Pipe small yellow dots onto the yellow candy melt sections and black vertical lines onto the pink candy melt sections.
- Allow the black candy melts to dry and harden completely before storing or serving.
Recommended Products
As an Amazon Associate and member of other affiliate programs, I earn from qualifying purchases.
-
 8 Cavity Rectangle Granola Bar Silicone Mold, 2 Pack Cereal Energy Bar Mold Butter Mold for Ganache, Chocolate Bar, Truffles, Cheesecake, Pudding
 -
Jet-Puffed Marshmallow Creme Spread (7 oz Jar)
-
Wilton Blue Candy Melts Candy, 12 oz.
-
Ghirardelli Melting Wafers Variety Pack with Ghirardelli White Chocolate Melting Wafers and Ghirardelli Dark Chocolate Melting Wafers. One Stop Shopping for the Best Tasting Melting Chocolate Wafers.


Nutrition Information:
Yield:
20Serving Size:
1Amount Per Serving: Calories: 647Total Fat: 23gSaturated Fat: 13gTrans Fat: 0gUnsaturated Fat: 9gCholesterol: 18mgSodium: 125mgCarbohydrates: 107gFiber: 3gSugar: 81gProtein: 5g
I hope your family loves these Sally Candy Bars as much as we did – though I think decorating them was the most fun part!
Check out our full Disney recipe collection here:

Check out our full No-Bake Dessert collection here:

Or check out our full dessert collection here: