
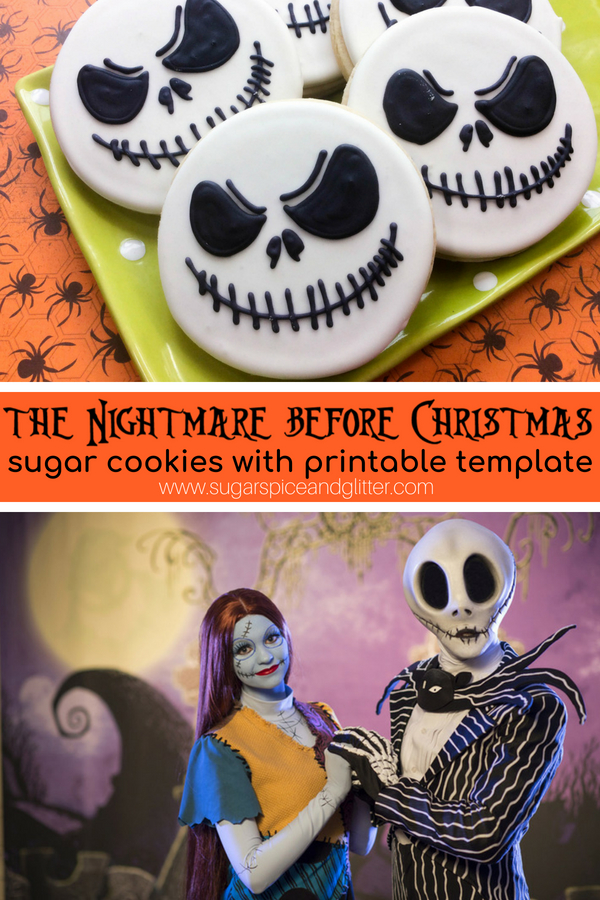
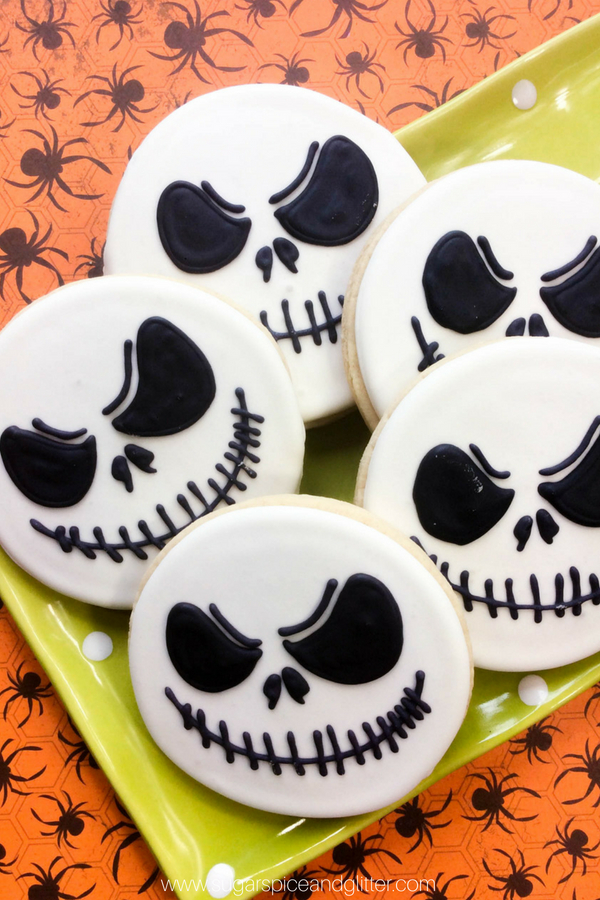
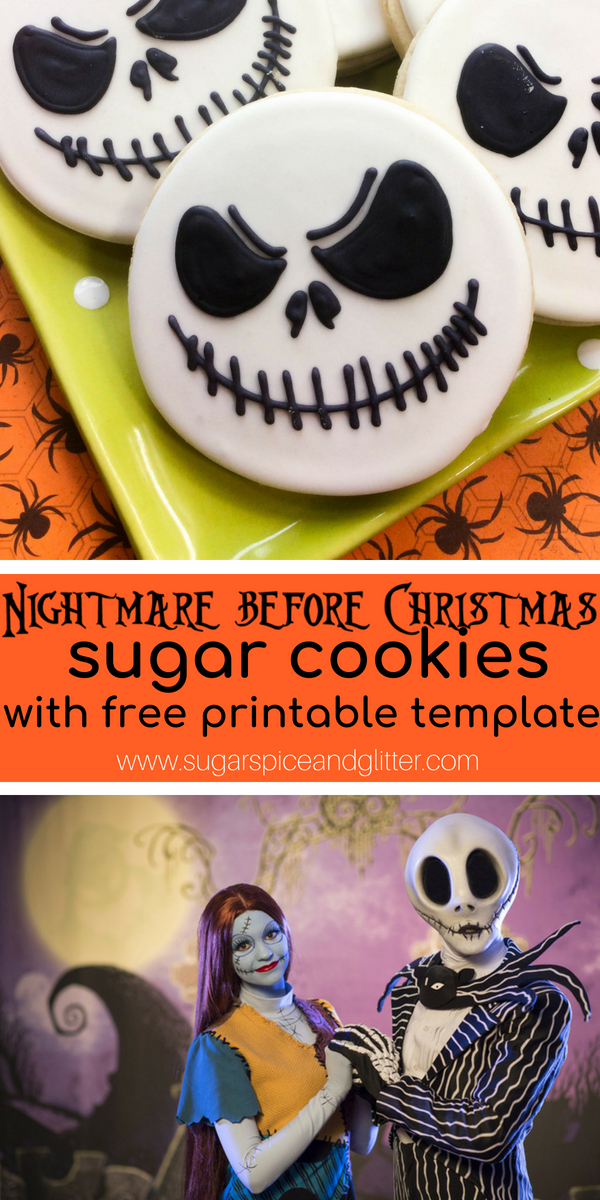
Jack Skellington Sugar Cookies
Welcome to Sugar, Spice & Glitter! Please note, this post may contain affiliate links. For more details, see our Full Disclosure.
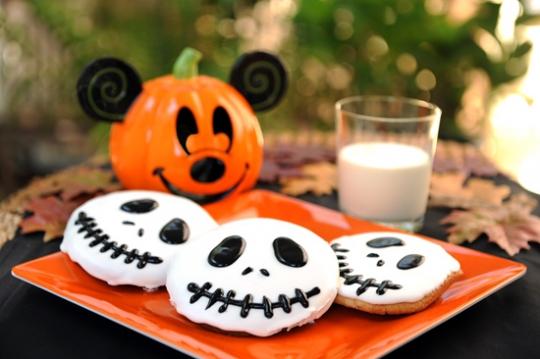
A fun Halloween cookie recipe, or a Nightmare Before Christmas-themed dessert for a movie night, these Jack Skellington cookies are super easy to make. (I’m even sharing a free printable template to make decorating these cookies a breeze.)
Nightmare before Christmas Cookies Recipe
I’ve wanted to share a Disney’s Nightmare Before Christmas-themed cookie ever since we attended our first Mickey’s Not So Scary Halloween.
Two of the first characters always out are Jack Skellington (not Jack Skeleton) and his Sally from Tim Burton’s classic, The Nightmare Before Christmas.
They’ve always been an odd pairing for Disney, but they really work perfectly at the party. They aren’t too scary for kids passing by, yet add a distinctly Halloween touch to the festivities.

Disney is amazing at theming snacks to their special events – and they spare no details for Halloween! Honestly, my three favorite things about attending their special events are:
- the special characters that you can only meet at special events (ie., all 7 Dwarves)
- the special performances (for Halloween, you get to see an assortment of villains)
- running around the park trying to sample all of the special edition treats
Some of the past Halloween Party-only desserts inspired by The Nightmare Before Christmas have included:
- Ooogie Boogie Meringue with Jell-O
- Zero (Jack’s dog) Waffles and Ice Cream
- Jack Skellington Cake Push Pop
I definitely need to try those push pops, but for today, we’re keeping things simple with a simple Nightmare Before Christmas cookie that would be perfect for a Halloween party (or even a thank-you gift for guests).
This cookie is inspired by the Jack Skellington cookie that is being served for this year’s Halloween party at Tony’s Town Square (the Italian restaurant inspired by Lady and the Tramp). We won’t be there this year to try them – but we can make our own version at home!

I’ve had to slowly warm my daughter up to the Jack Burton classic, The Nightmare Before Christmas.
We’d get about 10 minutes farther into the movie every time before she would inevitably cover her eyes and demand it be turned off.
But this year, just in time for Halloween, she has finally watched the full thing! So to celebrate, I’m sharing this Jack Skellington Sugar Cookie for your own movie night pleasure.
More Nightmare Before Christmas Crafts and Recipes:
- Sally Dawn Stuffie Sewing Project
- Zero Stuffie Sewing Project
- Jack Skellington Sewing Project
- Jack Skellington Paper Ornaments
- Cricut Nightmare Before Christmas Coffee Cup
- Jack Skellington Sugar Cookies
- Sally White Chocolate Candy Bars
- Jack Skellington Cupcakes
Ingredients for Jack Skellington Cookies
- Unsalted butter, room temperature
- White Sugar
- Large Egg, room temperature
- Vanilla Extract <– I also like adding almond extract to our sugar cookies for even better flavor
- All-purpose Flour, plus more for rolling
- Baking Powder
- Salt
Royal Icing Ingredients:
- Egg Whites
- Cream of Tartar
- Vanilla Extract
- Powdered Icing Sugar, as needed
- Black Food Coloring <– this set of food coloring has lasted me forever and I love that it creates highly saturated colors with just a drop
Scroll down to the printable recipe card for full measurements.
Kitchen Tools You May Find Helpful:
- Medium size circle cookie cutter
- 2 disposable piping bags fitted with a number 2 tip <– a basic piping set will have all you need
- 1 squeeze bottle
- Measuring cups and spoons
- Mixing bowl
- Electric mixer <– this is a great hand mixer if you don’t want to make the investment into a stand mixer
- Cutting board
- Rolling pin
- Sharp kitchen knife
- Cookie Sheets
- Cooling racks <– I have and love these tiered cooling racks, they save so much counter space and are also oven-safe
How to Make Nightmare Before Christmas Sugar Cookies
Preheat oven to 350 degrees
Cover two cookie sheets with parchment paper and set aside
Place the butter and sugar in a large bowl and beat until light and fluffy, about 2 minutes.
Add the egg and vanilla extract, and beat to incorporate, about 2 minutes.
In a small separate bowl, whisk together the flour, baking powder and salt. Add half of the flour mixture to the sugar-butter mixture, combine, and then add the remaining half.
Lightly flour a cutting board and knead the cookie dough a couple of times
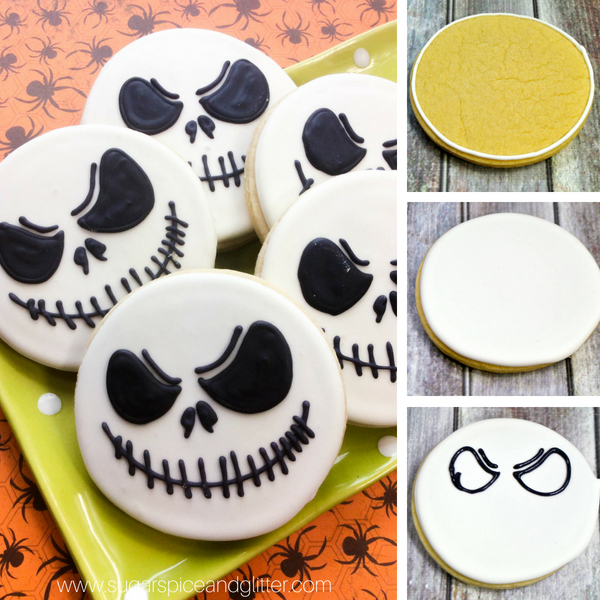
Roll out the dough to about 1/2 inch thick.
Cut out your circles, re-rolling out the dough as needed, and place onto the prepared cookie sheets.
Bake for 8-12 minutes or until lightly golden brown at the edges.
Let cookies cool completely.
Royal Icing Directions:
Using the standing mixer, combine the egg whites, cream of tarter, vanilla and powdered icing sugar and mix until stiff peaks form
Scoop 1 cup of the royal icing into a small bowl and mix in a few drops of black gel coloring, until you achieve the color you desire.
Scoop 1 cup of the white icing into a piping bag fit with a number 2 Wilton tip, and repeat with the black icing. Set aside.
Add in a few tablespoons of water into the remaining white icing and mix until combined to make a “looser” or “thinner” frosting. Pour this white icing into the squeeze bottle.
Using the white piping bag with the thicker frosting, pipe an outline around the cookies. (This will serve as a barrier to keep in the thinner white frosting.)
Fill in with the thinner white icing
Let cookies dry overnight, or until the thin icing is completely set/dry.
Using the black piping bag, pipe the detail of Jack Skellington’s eyes onto the cookie and fill in. You can use our template to make impressions by going over the template with a skewer, or cut out the facial shapes to trace with an edible food pen.
Pipe a line for a smile onto the bottom part of the cookie
Pipe small lines for stitching onto the line for the smile
Let cookies dry for an hour before enjoying.
Pin this Jack Skellington Cookie with free printable template for your Halloween festivities!
Grab your free printable for our easy Jack Skellington sugar cookies recipe:
Want to Save This Recipe?
Enter your email & I'll send it to your inbox. Plus, get great new recipes from me every week!
By submitting this form, you consent to receive emails from Sugar, Spice and Glitter.
Jack Skellington Sugar Cookies
A simple Disney Halloween recipe, these Nightmare Before Christmas cookies are perfect for a Halloween movie night or a homemade Halloween treat
Ingredients
- 3/4 cup unsalted butter, room temperature
- 3/4 cup white sugar
- 1 large egg, room temperature
- 2 teaspoons vanilla extract
- 2 and 1/4 cups all-purpose flour, plus more for rolling
- 1/2 teaspoon baking powder
- 1/2 teaspoon salt
Royal Icing Ingredients:
- 4 egg whites
- 1/2 teaspoon cream of tarter
- 1/2 teaspoon vanilla
- 4 1/2 cup powdered icing sugar
- Black gel food coloring
Instructions
- Preheat oven to 350 degrees
- Cover two cookie sheets with parchment paper and set aside
- Place the butter and sugar in a large bowl and beat until light and fluffy, about 2 minutes.
- Add the egg and vanilla extract, and beat to incorporate, about 2 minutes.
- In a small separate bowl, whisk together the flour, baking powder and salt. Add half of the flour mixture to the sugar-butter mixture, combine, and then add the remaining half.
- Lightly flour a cutting board and knead the cookie dough a couple of times
- Roll out the dough to about 1/2 inch thick.
- Cut out your circles, re-rolling out the dough as needed, and place onto the prepared cookie sheets.
- Bake for 8-12 minutes or until lightly golden brown at the edges.
- Let cookies cool completely.
Royal Icing Directions:
- Using the standing mixer, combine the egg whites, cream of tarter, vanilla and powdered icing sugar and mix until stiff peaks form
- Scoop 1 cup of the royal icing into a small bowl and mix in a few drops of black gel coloring, until you achieve the color you desire.
- Scoop 1 cup of the white icing into a piping bag fit with a number 2 Wilton tip, and repeat with the black icing. Set aside.
- Add in a few tablespoons of water into the remaining white icing and mix until combined to make a "looser" or "thinner" frosting. Pour this white icing into the squeeze bottle.
- Using the white piping bag with the thicker frosting, pipe an outline around the cookies. (This will serve as a barrier to keep in the thinner white frosting.)
- Fill in with the thinner white icing
- Let cookies dry overnight, or until the thin icing is completely set/dry.
- Using the black piping bag, pipe the detail of Jack Skellington's eyes onto the cookie and fill in. You can use our template to make impressions by going over the template with a skewer, or cut out the facial shapes to trace with an edible food pen.
- Pipe a line for a smile onto the bottom part of the cookie
- Pipe small lines for stitching onto the line for the smile
- Let cookies dry for an hour before enjoying.
Recommended Products
As an Amazon Associate and member of other affiliate programs, I earn from qualifying purchases.


Nutrition Information:
Yield:
30Serving Size:
1Amount Per Serving: Calories: 138Total Fat: 5gSaturated Fat: 3gTrans Fat: 0gUnsaturated Fat: 2gCholesterol: 18mgSodium: 54mgCarbohydrates: 23gFiber: 0gSugar: 21gProtein: 1g
Sugar, Spice and Glitter uses an auto-generate nutrition calculator. Nutrition information isn’t always accurate unless analyzed in a scientific lab, so these should be considered more of a guideline than medical information.
This fun and easy Nightmare Before Christmas dessert is easy enough for inexperienced cookie decorators thanks to our free printable template. They would make a great addition to a family movie night or a Halloween party!
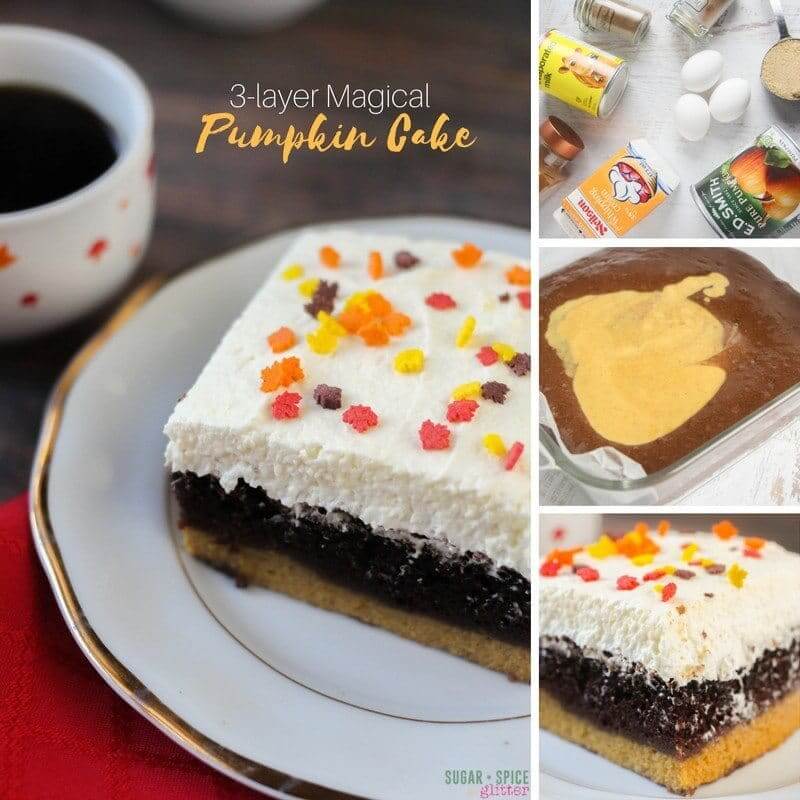
For more delicious Halloween dessert ideas, check out our Magical Pumpkin Cake recipe or our Caramel Popcorn recipe.

Check out our other delicious Cookie Recipes:


You nneed to be a part of a baking contest, you have the best ideas!
Hello-how do I get the free printable template? Thanks!