
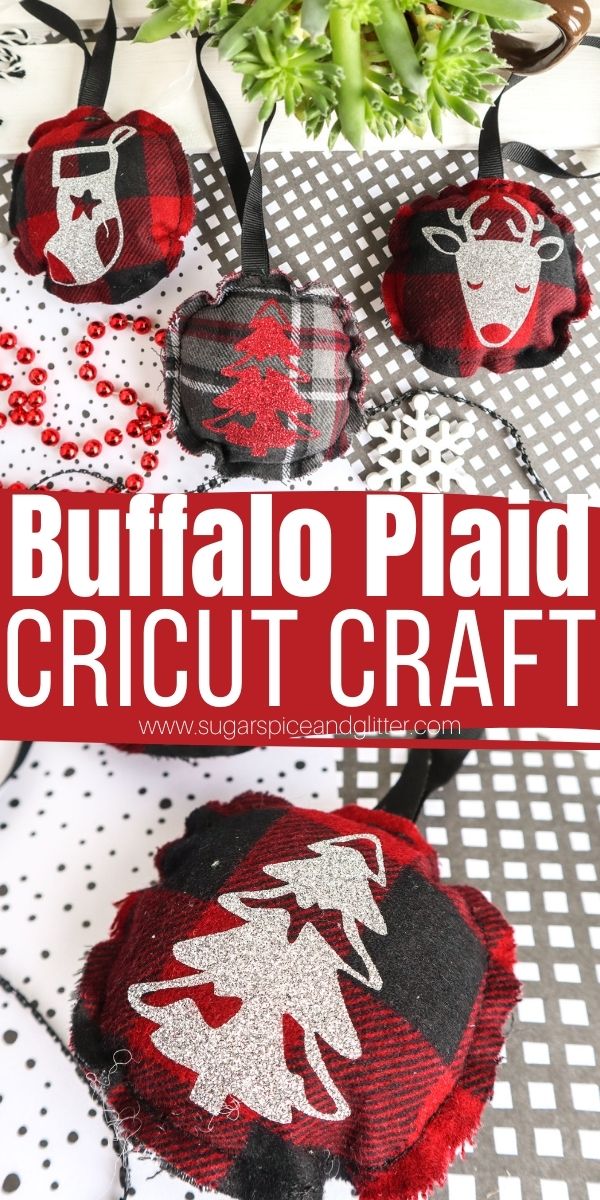
Buffalo Plaid Cricut Craft


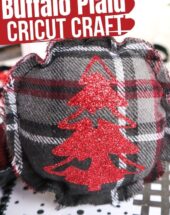
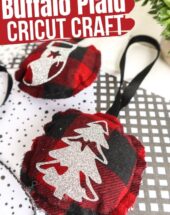
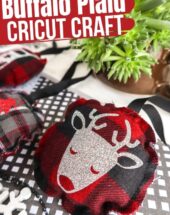
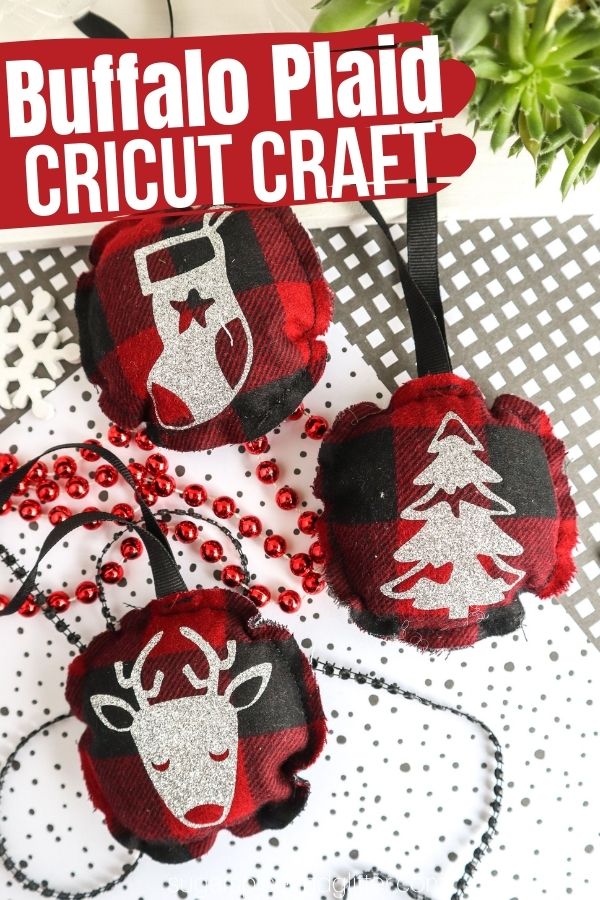
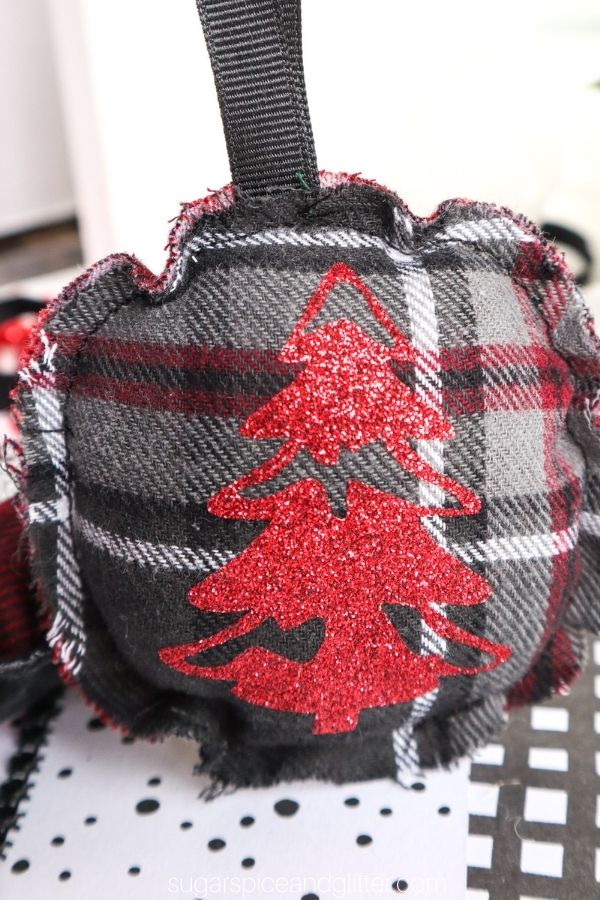
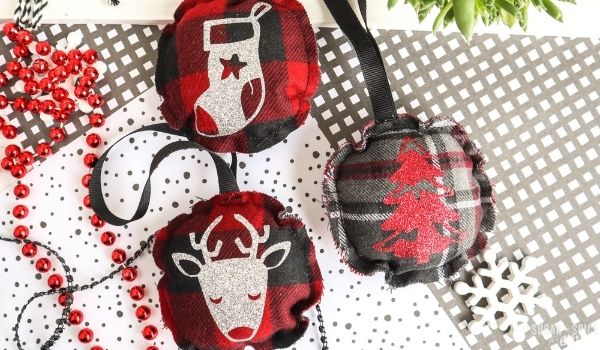
A fun DIY primitive ornament to bring a rustic touch to your Christmas decorations, these Cricut Buffalo Plaid Ornaments can be made with any favorite fabric or pattern.
Cricut Christmas Ornaments Craft
My daughter is obsessed with all things Buffalo Plaid. We just got the cutest matching outfit with Buffalo Plaid sweaters, fleece PJ bottoms and I also custom made PJ shirts using the Cricut Buffalo Plaid infusible ink.
I’m going to be sharing that PJ shirt tutorial ASAP, but for today I have these adorable Buffalo Plaid ornaments that combine a rustic, farmhouse feel with glittery vinyl embellishments. These will be going in the mini tree that I have set up in her bedroom and I am so excited to see her reaction!
I used a sewing machine to make our ornaments, but you can hand-sew these or even use fabric glue to make these no-sew.
And while I used buffalo plaid fabric (and a complementary tartan fabric), you can opt for any fabric or pattern that you prefer or already have on hand.
I’m providing an SVG file below with the deer head SVG, Christmas tree SVG and stocking SVG that I used, but you can customize these buffalo plaid ornaments with whichever designs you like. (I think a little truck would be cute if you’re making these for a Hallmark movie fan.)
More Cricut Christmas Crafts
- Felt Penguin Ornament with Penguin SVG
- Rolling Pin Ornament with Let It Snow SVG
- Emboidery Hoop Ornaments with Noel SVG
- Cricut Rainbow Ornaments

Cricut Christmas Ornament Materials
- Stocking.Deer.Tree SVG file
- Woven Flannel Fabric in Buffalo Plaid Pattern
- Cricut Maker with Fine Point Blade and Rotary Blade
- Glitter Iron On Vinyl <– we used red and silver
- Cricut Strong Grip Mat and Fabric Grip Mat
- Weeding Tool
- EasyPress <– we used the Mini for this project but any size with work
- EasyPress Mat or Towel
- Sewing Machine
- Matching Thread Color
- Fabric Scissors
- Batting
- Grosgrain ribbon, ¼” wide in black
- Fabric scissors
Tip: you can use fabric glue to seal these ornaments if you don’t want to sew them.

How to Make Cricut Christmas Ornaments
Preparing the Images:
Open Cricut Design Space.
Click on the “+” sign to start a new project, opening up a blank canvas.
Click on the “Upload” button from the toolbar and browse your downloaded files to insert the Stocking.Deer.Tree SVG file.
The images will appear on the canvas.
Change the image colors if desired to match with your material color.

Cutting the Iron-On Vinyl:
Select “Make It” in the upper right corner to proceed with cutting.
Click the “Mirror” toggle button to on for all mats with images to be cut in Glitter Iron-On material.
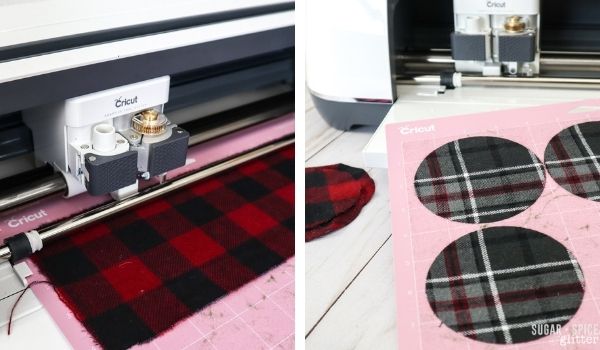
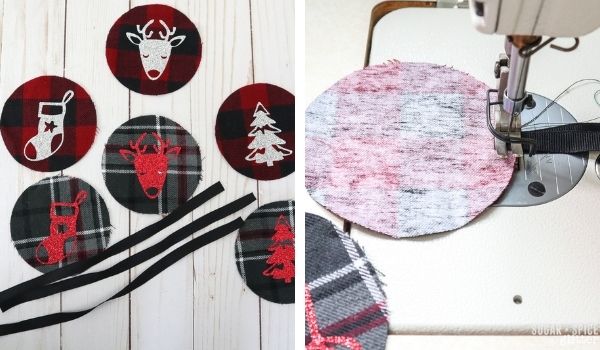
For cutting the circle shapes, choose flannel fabric from the list of options in the drop down menu.
Place a piece of flannel fabric on a fabric grip mat and proceed with cutting.
Remove the circle shapes from the mat and repeat for more circle shapes in a coordinating flannel fabric.
Following the instructions prompted on the screen, cut out the flannel.
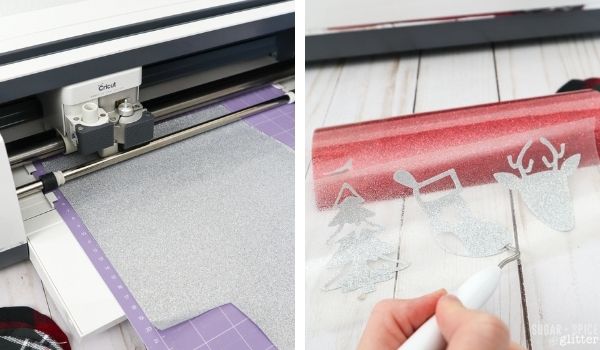
For cutting the stocking, deer and tree shapes, choose Glitter Iron-On Vinyl from the list of options in the drop down menu.
Place the Iron-On vinyl directly onto the strong grip Cricut mat with the SHINY SIDE DOWN.
Following the instructions prompted on the screen, cut out the vinyl.
Remove the Glitter Iron-On Vinyl from the mat and using a weeding tool, peel away the excess vinyl leaving only the deer, stocking and tree images.
Cut around each of the images.
Applying the Image with the Cricut EasyPress Mini:
Position the mat or a towel on a flat surface.
Set the temperature and time on the machine following the chart for the type of vinyl and material being used or use this EasyPress Interactive Quick Reference Guide (https://home.cricut.com/easypress-heat-settings-guide).
For a 100% Cotton flannel and Glitter Iron-On Vinyl, set the EasyPress Mini to medium heat.
Preheat each of the ornaments for 5 seconds.
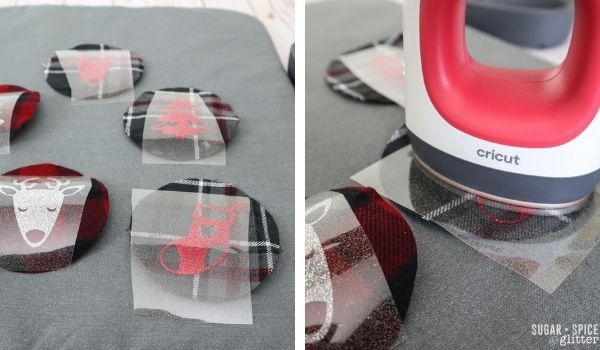
Place one image in the center of each circle with the shiny side up.
Press the image on to the ornament for 25 seconds, constantly moving EasyPress Mini as you press.
Turn the ornament upside down and apply heat for another 15 seconds.
While vinyl is still warm, peel the plastic part of the vinyl off carefully and discard.
Make sure you do not place an iron or the EasyPress Mini directly over the vinyl without the protective plastic cover.
Sewing the Ornaments:
Cut a piece of grosgrain ribbon 10” long for each ornament.
Fold the ribbon in half and place the cut ends at the top of the ornament and stitch it in place.
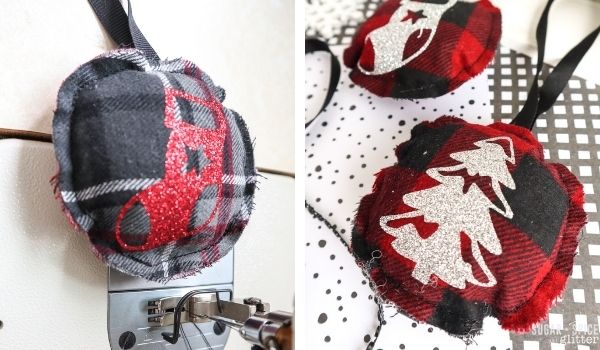
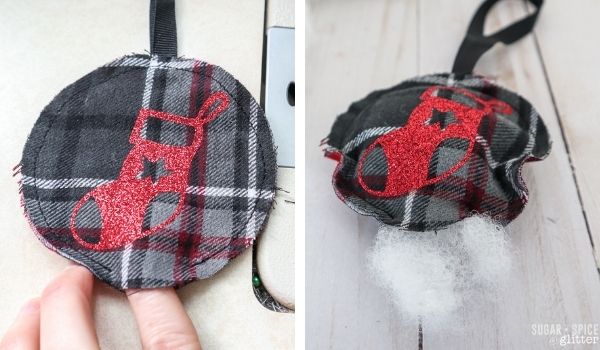
Place two circle shapes with the wrong sides together. Stitch around the outer edge with a ¼” seam allowance leaving a 1” gap opening. Make sure the tops for each ornament are aligned on the front and back.
Insert batting into the opening and then sew the opening closed.
Pin this Cricut Christmas Craft to add some rustic charm to your Christmas decor:
Grab your free printable instructions for our Cricut Christmas Ornaments craft:
Want to Save This Recipe?
Enter your email & I'll send it to your inbox. Plus, get great new recipes from me every week!
By submitting this form, you consent to receive emails from Sugar, Spice and Glitter.
Buffalo Plaid Cricut Craft
A step-by-step tutorial for how to make rustic Christmas fabric ornaments using your Cricut machine. We used buffalo plaid fabric and glitter heat transfer vinyl for a fun and unique Cricut Christmas Ornament.
Materials
- Stocking, Deer and Tree SVG file
- Woven Flannel Fabric in Buffalo Plaid Pattern
- Glitter Iron On Vinyl in red and silver
- Batting
- Grosgrain ribbon, ¼” wide in black
Tools
- Cricut Maker with Fine Point Blade and Rotary Blade
- Cricut Strong Grip Mat and Fabric Grip Mat
- Weeding Tool
- Scissors
- EasyPress Mini
- EasyPress Mat or Towel
- Sewing machine and matching thread color
- Fabric Scissors
Instructions
Preparing the Images:
- Open Cricut Design Space.
- Click on the “+” sign to start a new project, opening up a blank canvas.
- Click on the “Upload” button from the toolbar and browse your downloaded files to insert the Stocking.Deer.Tree SVG file.
- The images will appear on the canvas.
- Change the image colors if desired to match with your material color.
Cutting the Iron-On Vinyl:
- Select “Make It” in the upper right corner to proceed with cutting.
- Click the “Mirror” toggle button to on for all mats with images to be cut in Glitter Iron-On material.
- For cutting the circle shapes, choose flannel fabric from the list of options in the drop down menu.
- Place a piece of flannel fabric on a fabric grip mat and proceed with cutting.
- Remove the circle shapes from the mat and repeat for more circle shapes in a coordinating flannel fabric.
- Following the instructions prompted on the screen, cut out the flannel.
- For cutting the stocking, deer and tree shapes, choose Glitter Iron-On Vinyl from the list of options in the drop down menu.
- Place the Iron-On vinyl directly onto the strong grip Cricut mat with the SHINY SIDE DOWN.
- Following the instructions prompted on the screen, cut out the vinyl.
- Remove the Glitter Iron-On Vinyl from the mat and using a weeding tool, peel away the excess vinyl leaving only the deer, stocking and tree images.
- Cut around each of the images.
Applying the Image with the Cricut EasyPress Mini:
- Position the mat or a towel on a flat surface.
- Set the temperature and time on the machine following the chart for the type of vinyl and material being used.
- For a 100% Cotton flannel and Glitter Iron-On Vinyl, set the EasyPress Mini to medium heat.
- Preheat each of the ornaments for 5 seconds.
- Place one image in the center of each circle with the shiny side up.
- Press the image on to the ornament for 25 seconds, constantly moving EasyPress Mini as you press.
- Turn the ornament upside down and apply heat for another 15 seconds.
- While vinyl is still warm, peel the plastic part of the vinyl off carefully and discard.
- Make sure you do not place an iron or the EasyPress Mini directly over the vinyl without the protective plastic cover.
Sewing the Ornaments:
- Cut a piece of grosgrain ribbon 10” long for each ornament.
- Fold the ribbon in half and place the cut ends at the top of the ornament and stitch it in place.
- Place two circle shapes with the wrong sides together. Stitch around the outer edge with a ¼” seam allowance leaving a 1” gap opening. Make sure the tops for each ornament are aligned on the front and back.
- Insert batting into the opening and then sew the opening closed.
Notes
Swap out the plaid fabric for any favorite fabric or whatever you already have on hand.
Recommended Products
As an Amazon Associate and member of other affiliate programs, I earn from qualifying purchases.
-
 Warm & Natural Cotton Batting-Craft Size 34"X45"
 -
40 Buffalo Lodge Christmas Charm Pack, 5 inch Precut Cotton Homespun Fabric Squares by JCS
-
Silver Glitter Heat Transfer Vinyl 8 ft. Roll HTV - Easy to Weed Tshirt Iron on Vinyl for Silhouette Cameo, Cricut, Heat Press, All Craft Cutters by Craftables
-
Cricut Easy Press 2 - Heat Press Machine For T Shirts and HTV Vinyl Projects, Raspberry, 9" x 9"
-
Cricut, Basic Tool Set, Core Colors


I hope you love how these rustic buffalo plaid Cricut Christmas Ornaments turn out for you!
Check out our full collection of Cricut Crafts here.


Wow! This is so beautiful. Nice Craft. Thank you for sharing this with us.