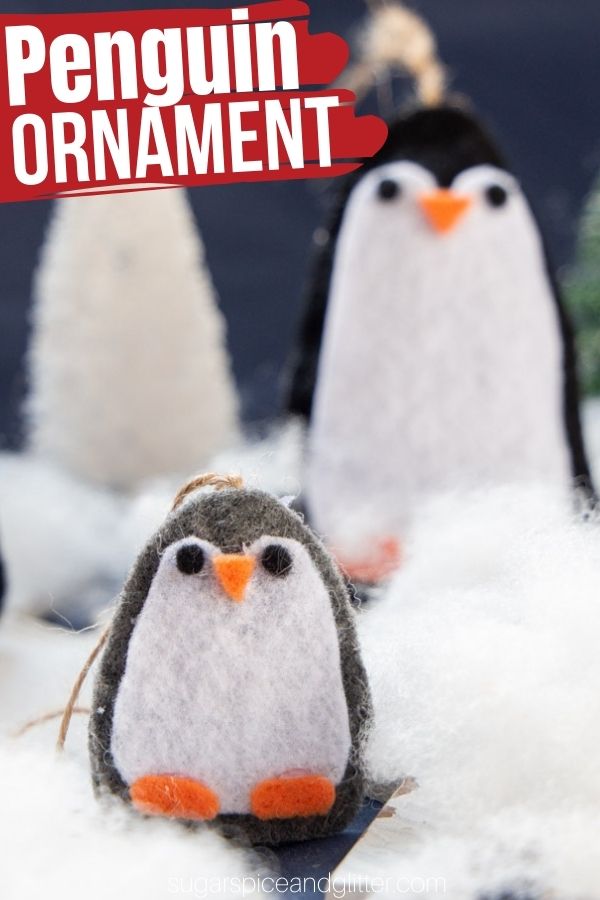
Penguin Christmas Ornaments
Welcome to Sugar, Spice & Glitter! Please note, this post may contain affiliate links. For more details, see our Full Disclosure.
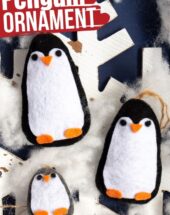
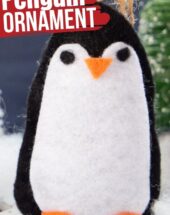
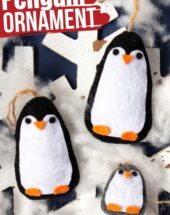
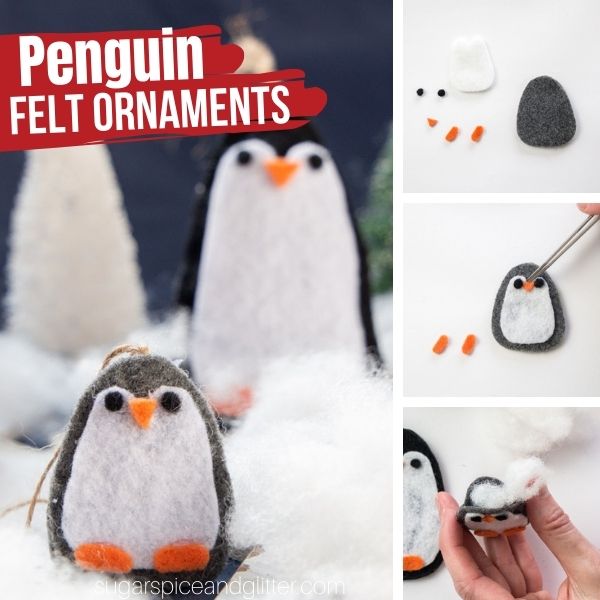
A cute Cricut Penguin craft using our free Penguin SVG file, these Penguin Ornaments make an adorable addition to your Christmas decor.
Penguin Ornament Craft using Penguin SVG
How adorable are these little penguin ornaments?!
Normally when we make felt ornaments, we cut our patterns by hand and sew them. This time, I wanted to experiment with my Cricut to cut out our felt fabric for us – and then I took a definite shortcut by using some hot glue instead of hand sewing. These two little hacks make these penguin ornaments super quick and easy.
Of course, if you want to sew these ornaments, you can with a simple whip stitch or even your sewing machine instead of hot glue.
There are so many ways to make these cute felt penguins:
- ornaments (like we did)
- attach a magnet to the back for a cute felt penguin magnet
- enlarge the SVG file to make a penguin pillow or stuffie
- attach to a present as a cute gift tag
More Cricut Christmas Crafts
- Buffalo Plaid Cricut Christmas Ornaments
- Rolling Pin Ornament with Let It Snow SVG
- Emboidery Hoop Ornaments with Noel SVG
- Cricut Rainbow Ornaments
Penguin Christmas Ornament Materials
- Felt: Black, White, Orange, Charcoal
- Fabric scissors
- Printable Penguin Pattern Template
- Glue gun with clear hot glue sticks
- Cotton Batting
- Twine
- Tweezer (optional)
Tip: if you want to sew these ornaments instead of using hot glue, use a simple whip stitch around the edges and catch stitches to attach the penguin’s features.
How to Make Cricut Penguin Ornaments
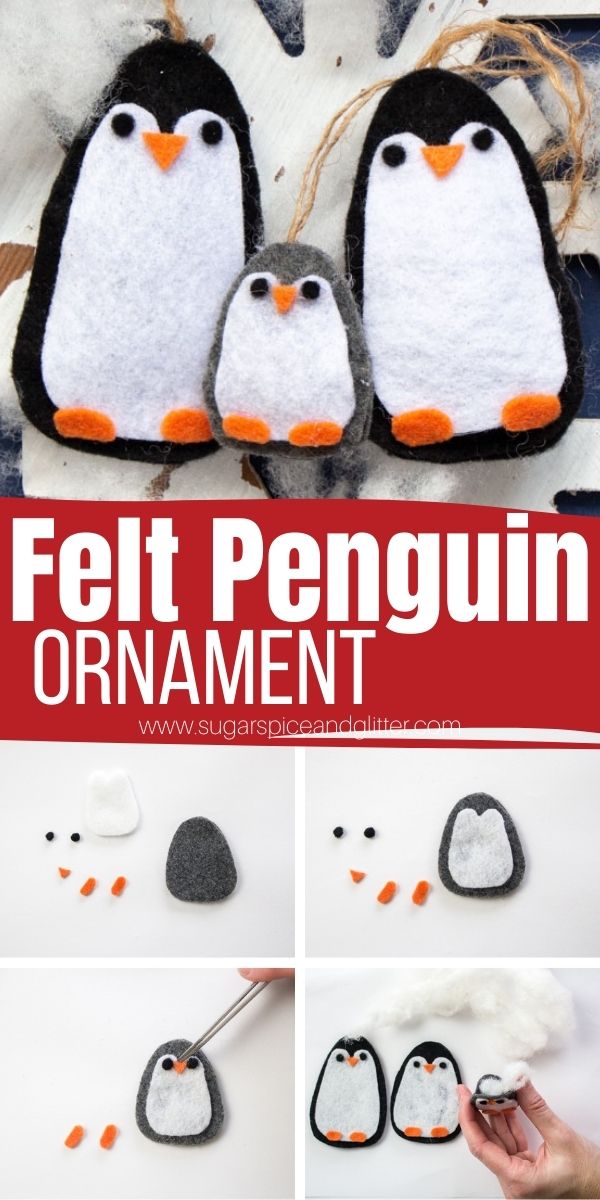
Print off pattern template on 8.5 x 11 sheets of paper.
For Baby Penguin:
Using fabric scissors, cut 2 of the large body pieces in a charcoal felt color.
Using fabric scissors, cut 1 of the smaller body pieces in a white felt color.

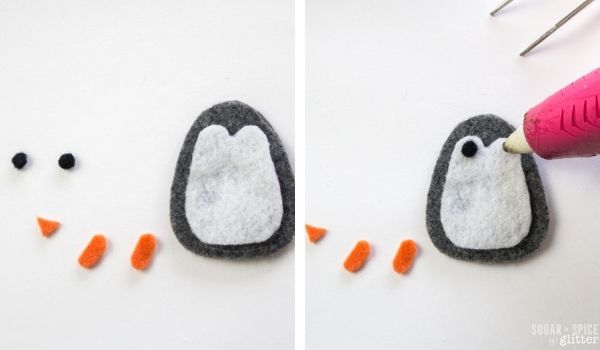
Using fabric scissors, cut the 2 smaller circular eye pieces in a black felt color.
Using fabric scissors, cut 1 triangular beak pieces in an orange felt color.
Preheat the hot glue gun.
On one side of the large charcoal piece, apply a bead of glue along the perimeter of the lower half as shown.
Place the other charcoal piece on top of the glued area and press in place until glue sets.
Add glue to the back side of the white piece press in place onto the black penguin.
Tip: For more control and to avoid touching the hot glue, use a pair of tweezers to place smaller felt pieces.
Add a dab of glue to the white piece in the penguin face/eye area and press black eye in place. Repeat with the second eye.
Add a dab of glue to the white piece in the penguin face/nose area and press the orange beak in place.
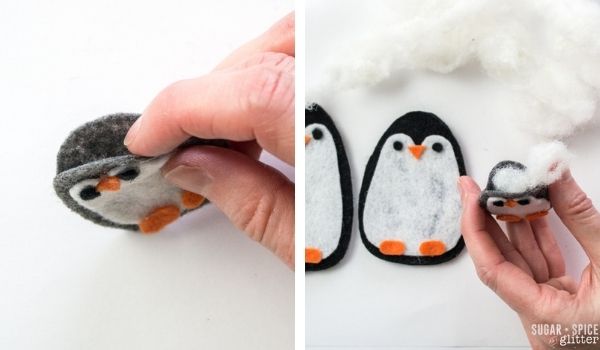
Add glue to the back side of the orange feet pieces and press in place.
Trim any excess felt edges that are misaligned.
Insert bits of badding into the penguin.
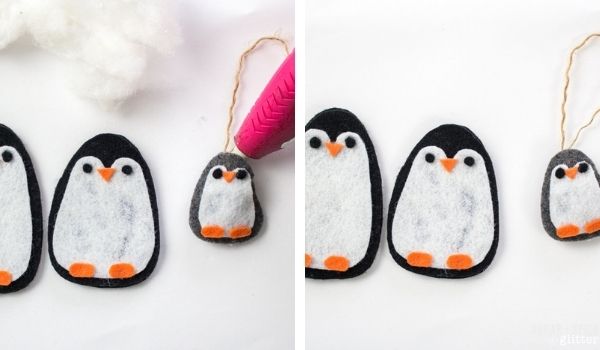
Cut a piece of twine 8” long. Fold in half to form loop.
Sandwich the loop ends inside the penguin at the top.
Glue the remaining open edges of the penguin closed.
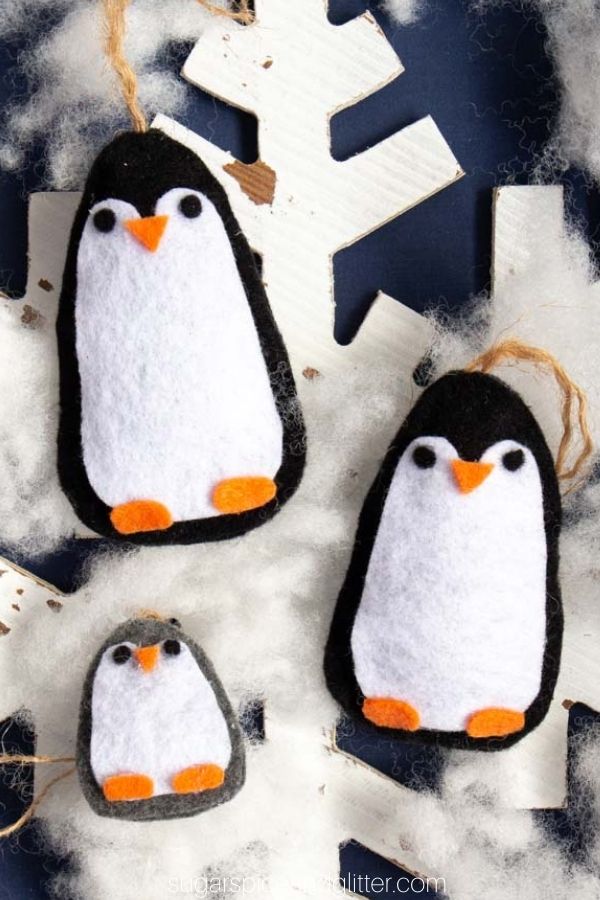
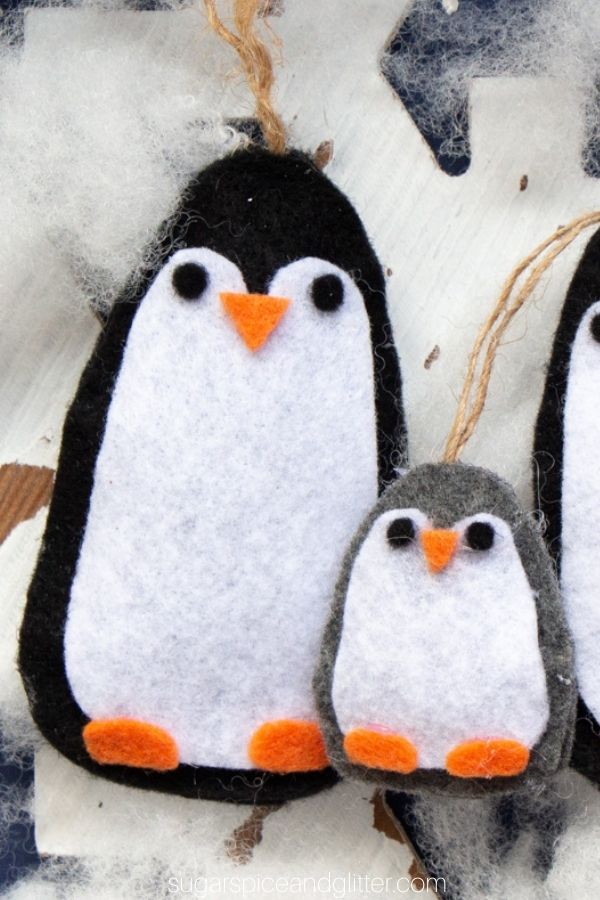
For Mama and Papa Penguins:
Follow the same instructions as the baby penguins, except use black felt instead of charcoal for the large body pieces.
Pin this Cricut Penguin Ornament for your winter crafting sessions:
Grab your free printable instructions for our Cricut felt penguin ornaments:
Want to Save This Recipe?
Enter your email & I'll send it to your inbox. Plus, get great new recipes from me every week!
By submitting this form, you consent to receive emails from Sugar, Spice and Glitter.
Penguin Christmas Ornaments
A family of cute penguin ornaments made using your Cricut machine using our penguin svg file. This craft can be sewn or made no-sew using hot glue.
Materials
- Felt: Black, White, Orange, Charcoal
- Printable Penguin Pattern Template
- Cotton Batting
- Twine
Tools
- Cricut machine
- Fabric scissors
- Glue gun with clear hot glue sticks
- Tweezer (optional)
Instructions
- Print off pattern template on 8.5 x 11 sheets of paper.
For Baby Penguin:
- Using fabric scissors, cut 2 of the large body pieces in a charcoal felt color.
- Using fabric scissors, cut 1 of the smaller body pieces in a white felt color.
- Using fabric scissors, cut the 2 smaller circular eye pieces in a black felt color.
- Using fabric scissors, cut 1 triangular beak pieces in an orange felt color.
- Preheat the hot glue gun.
- On one side of the large charcoal piece, apply a bead of glue along the perimeter of the lower half as shown.
- Place the other charcoal piece on top of the glued area and press in place until glue sets.
- Add glue to the back side of the white piece press in place onto the black penguin.
- Tip: For more control and to avoid touching the hot glue, use a pair of tweezers to place smaller felt pieces.
- Add a dab of glue to the white piece in the penguin face/eye area and press black eye in place. Repeat with the second eye.
- Add a dab of glue to the white piece in the penguin face/nose area and press the orange beak in place.
- Add glue to the back side of the orange feet pieces and press in place.
- Trim any excess felt edges that are misaligned.
- Insert bits of badding into the penguin.
- Cut a piece of twine 8” long. Fold in half to form loop.
- Sandwich the loop ends inside the penguin at the top.
- Glue the remaining open edges of the penguin closed.
For Mama and Papa Penguins:
- Follow the same instructions as the baby penguins, except use black felt instead of charcoal for the large body pieces.
Notes
Tip: if you want to sew these ornaments instead of using hot glue, use a simple whip stitch around the edges and catch stitches to attach the penguin's features.
Recommended Products
As an Amazon Associate and member of other affiliate programs, I earn from qualifying purchases.
-
 Warm & Natural Cotton Batting-Craft Size 34"X45"
 -
E.Durable Mini Glue Gun Tool Kit Kids Friendly with Glue Sticks for School Projects, DIY Crafts, Delicate Items Like Foam, Thermocal, Floral, etc (30W)
-
flic-flac 44PCS 4 x 4 inches (10 x10cm) Assorted Color Felt Fabric Sheets Patchwork Sewing DIY Craft 1mm Thick


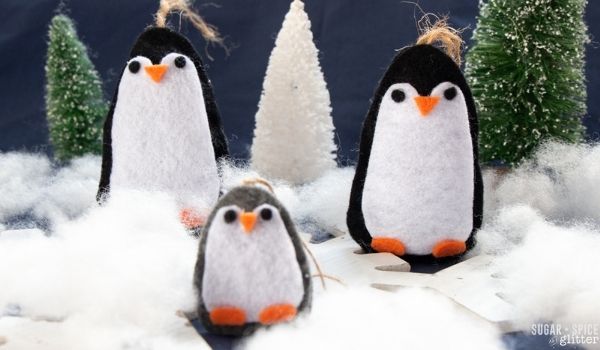
This cute family of penguin ornaments are super quick and easy to make and will add some cuteness and whimsy to your winter decor.
Check out our full collection of Cricut Crafts here.