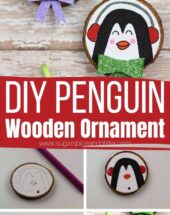
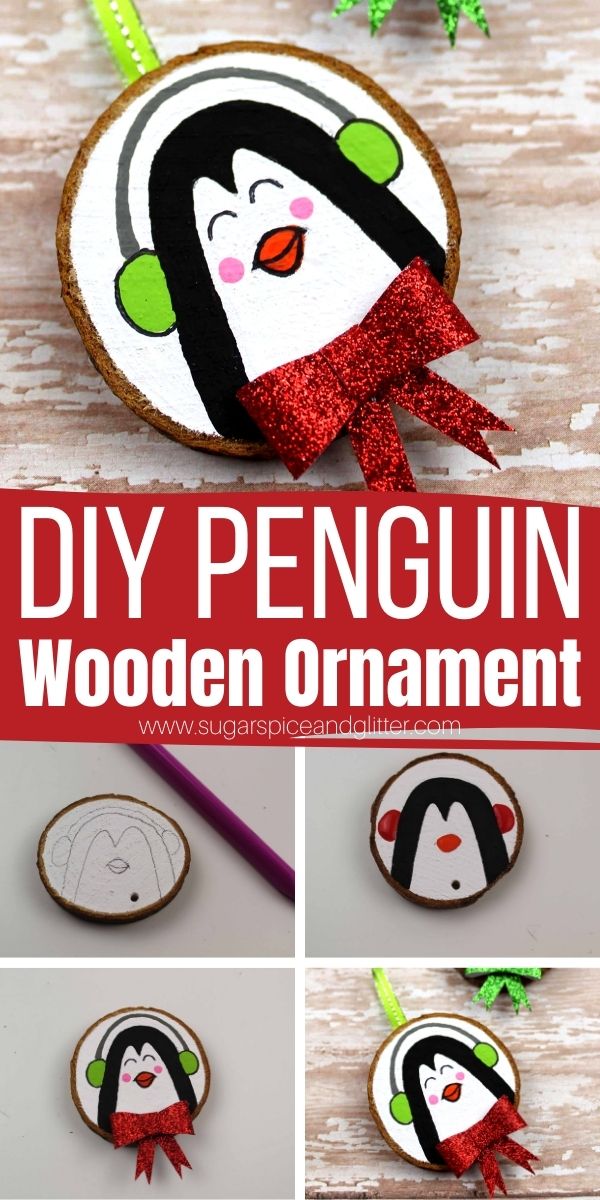
Wooden Slice Penguin Ornament
Welcome to Sugar, Spice & Glitter! Please note, this post may contain affiliate links. For more details, see our Full Disclosure.
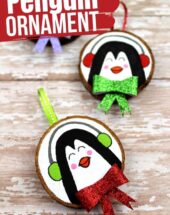

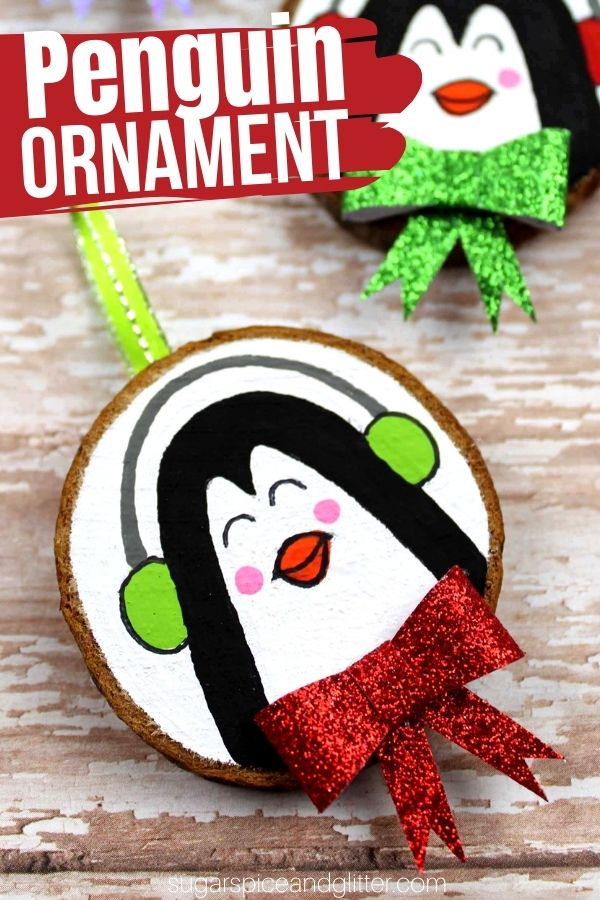
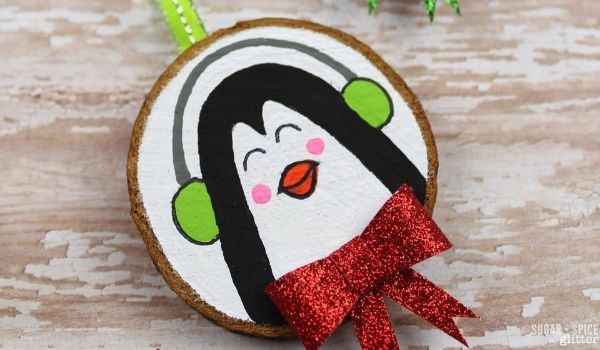
A fun penguin ornament to add some cuteness to your Christmas decor, these Wood Slice Penguin Ornaments are super simple to make with kids!
Wood Slice Penguin Ornament Craft
We are keeping the penguin theme going strong with another fun penguin Christmas ornament!
This year, we bought a package of unfinished wood slice ornaments to paint as one of our Advent activities and we’ve been having so much fun coming up with different ideas and designs.
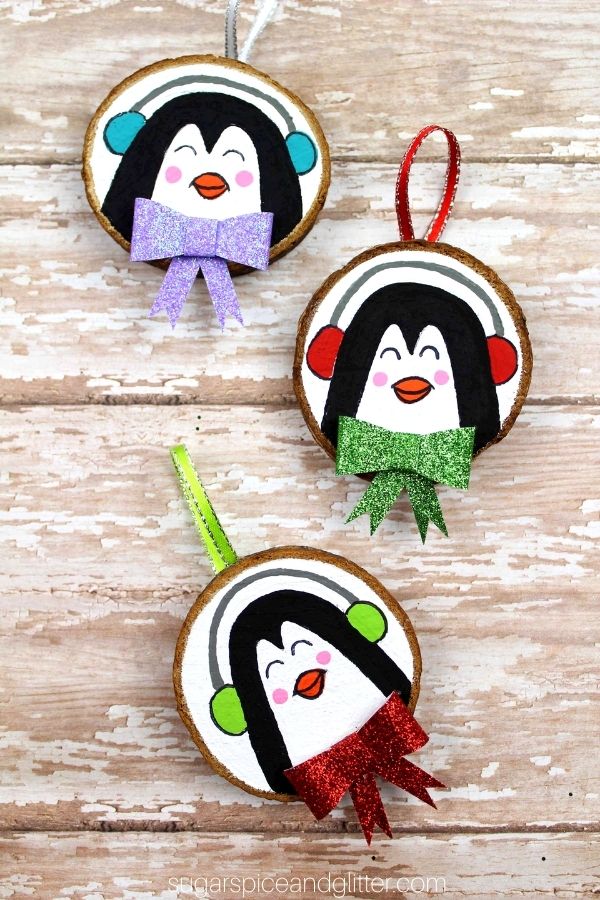
These penguin ornaments were hand-painted without a template, but they are so incredibly easy – I bet you can’t tell which ones were painted by my 8 year old and which ones were painted by me! (That may say more about me than anything… that I paint like an 8 year old…)
To make our glitter paper bows, we used this tutorial. You can also use pre-made bows to embellish your craft. (I will have a tutorial soon on how to make paper bows using a Cricut machine, soon!)
If you plan to use these ornaments year after year, I highly recommend using a craft sealant to prevent the ornaments from fading or being damaged in storage.

Penguin Ornament Materials
- Wood Slices Ornaments
- Craft Glitter Bows or Glitter Paper
- Baker’s Twine, optional
- Scissors <– these are the ones we have in our daycare, super easy to use and actually cut through things (unlike a lot of safety scissors). They’ve lasted for over 5 years
- Glue
- Paint Pens
- Acrylic Paint: Black, white, orange and a color for the ear muffs
- Paintbrushes
- Craft Sealant
Tip: tie a bow using glittery ribbon or make your own out of glitter craft paper if you can’t find glitter craft bows. You can also leave this embellishment off.
How to Make Wood Slice Penguin Ornaments
Remove the string from the ornament, if already threaded, and set aside.
Paint one side of the wooden slices with your chosen background color, leaving the bark edges unpainted. (We used white paint for the background.)
Allow the paint to dry fully before sketching on your penguin.
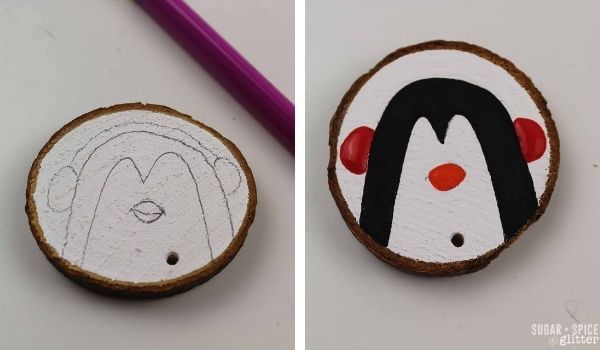
To make the penguin, make a large “M” shape on the bottom of the ornament. Draw a large half oval shape around the M shape.
Add in penguin’s beak and earmuffs.
Use your paint or paint pens to paint your penguin.
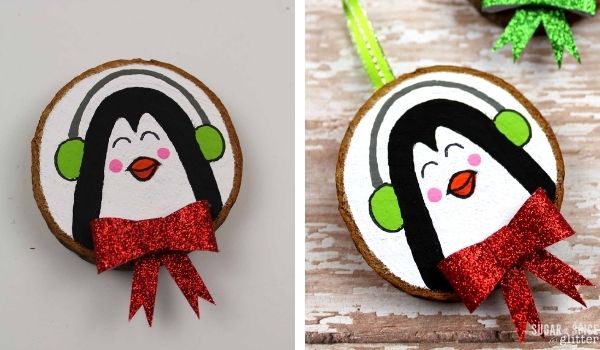
Allow the paint to dry fully before sealing the craft with craft sealant, if using.
If attaching a bow, you can glue in place or if your bows come with wires like ours did, thread them through the drill hole and secure in place.
If you didn’t use the drill hole for the bow, restring the twine or use a pretty baking twine or ribbon for the ornament loop. If you used the drill hole for the bow or didn’t leave it at the top of the ornament, form a loop of ribbon or string and glue to the back of the ornament.
Let dry fully before hanging.
Pin this Easy Penguin Ornament for your holiday crafting:
Grab your free printable instructions for our wood slice penguin ornaments craft:
Want to Save This Recipe?
Enter your email & I'll send it to your inbox. Plus, get great new recipes from me every week!
By submitting this form, you consent to receive emails from Sugar, Spice and Glitter.
Wooden Slice Penguin Ornament
A step-by-step tutorial for how to make penguin wood slice ornaments, a fun and whimsical Christmas ornament kids can make. These cheerful little penguins add some rustic charm to your Christmas decor
Materials
- Wood Slice Ornaments
- Craft Glitter Bows
- String or Baker's Twine, optional
- Acrylic Paint: Black, white, orange and a color for the ear muffs
Tools
- Scissors
- Glue
- Paint Pens
- Paintbrushes
- Craft Sealant
Instructions
- Remove the string from the ornament, if already threaded, and set aside.
- Paint one side of the wooden slices with your chosen background color, leaving the bark edges unpainted. (We used white paint for the background.)
- Allow the paint to dry fully before sketching on your penguin.
- To make the penguin, make a large "M" shape on the bottom of the ornament. Draw a large half oval shape around the M shape.
- Add in penguin's beak and earmuffs.
- Use your paint or paint pens to paint your penguin.
- Allow the paint to dry fully before sealing the craft with craft sealant, if using.
- If attaching a bow, you can glue in place or if your bows come with wires like ours did, thread them through the drill hole and secure in place.
- If you didn't use the drill hole for the bow, restring the twine or use a pretty baking twine or ribbon for the ornament loop. If you used the drill hole for the bow or didn't leave it at the top of the ornament, form a loop of ribbon or string and glue to the back of the ornament.
- Let dry fully before hanging.
Recommended Products
As an Amazon Associate and member of other affiliate programs, I earn from qualifying purchases.
-
 Mod Podge CS11302 Waterbase Sealer, Glue and Finish, 16 oz, Matte
 -
Paintigo Acrylic Paint Pens,12 Colors, Water-Based, Permanent & Waterproof Ink, 0.7mm Extra Fine Tip, Ideal for Rock Painting, Fabric, Wood, Glass, Metal, Ceramic, Porcelain, Canvas, Mug, DIY Crafts.
-
5ARTH Natural Wood Slices - 30 Pcs 2.4-2.8 inches Craft Unfinished Wood kit Predrilled with Hole Wooden Circles for Arts Wood Slices Christmas Ornaments DIY Crafts


I hope your kids love getting to make their own DIY Penguin Ornaments!
More Wood Slice Ornaments for Kids
- Wood Slice String Art Ornament from Happy Brown House
- Hand Lettered Wood Slice Ornament from the Soccer Mom Blog
- Wood Slice Stacked Snowman Ornament
- Snowman Wood Slice Ornament with Winter Scene
- Wood Slice Chalkboard Ornament from Fireflies and Mudpies
- Rudolph Wood Slice Ornament
- Grinch Wood Slice Ornament