Wood Slice Grinch Ornament
Welcome to Sugar, Spice & Glitter! Please note, this post may contain affiliate links. For more details, see our Full Disclosure.
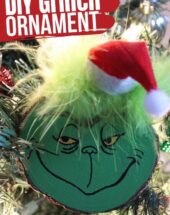
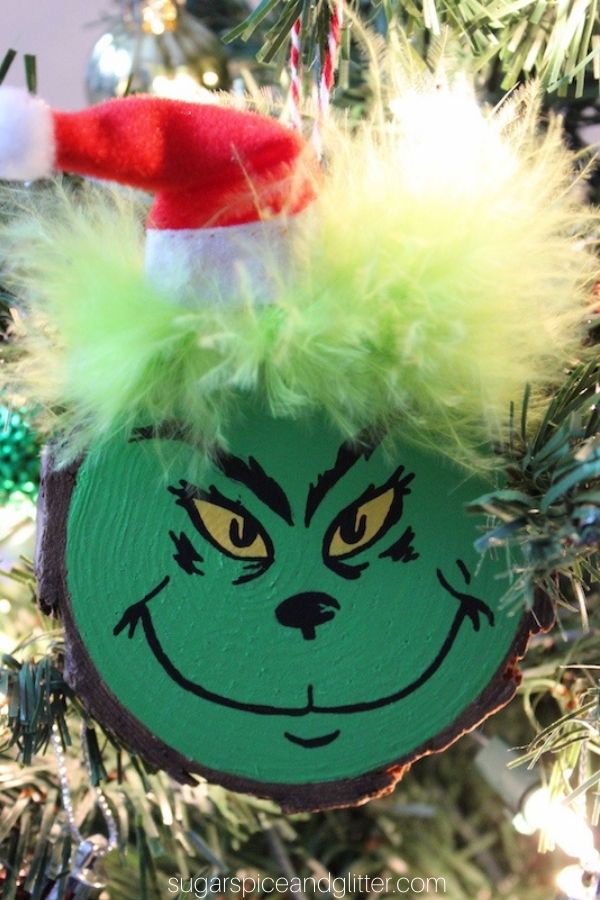
An easy Grinch craft for kids, this DIY Grinch Ornament is a fun way to add some whimsy to your Christmas decor.
DIY Grinch Ornament Craft
Anyone else put up multiple Christmas trees for the holidays?
We have one main tree in our living room and three smaller ones throughout the house. The main tree is always decorated with our special family ornaments and then we get a little creative with the smaller trees – theming them, making fun homemade ornaments for them, etc.
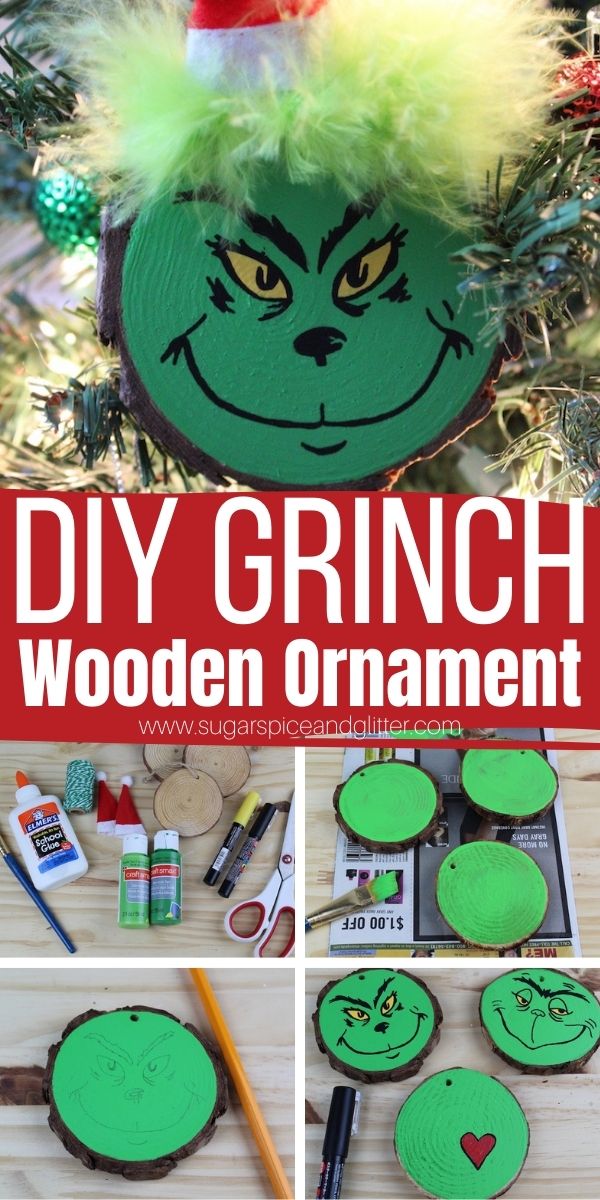
This year, we bought a package of unfinished wood slice ornaments to paint as one of our Advent activities and we’ve been having so much fun coming up with different ideas and designs.
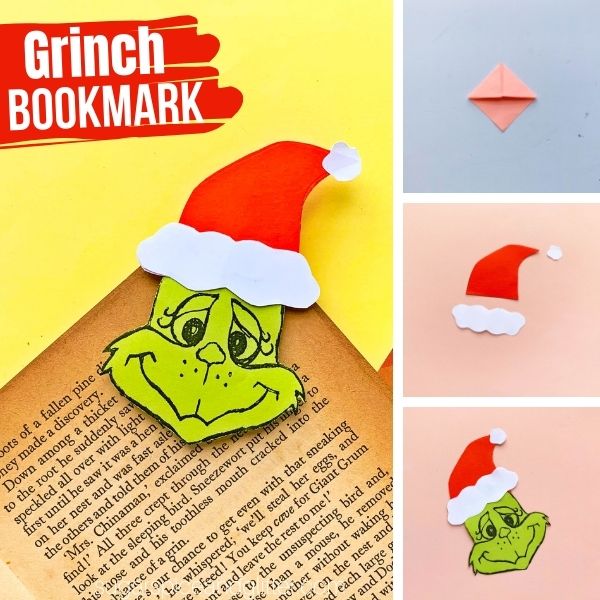
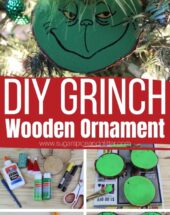
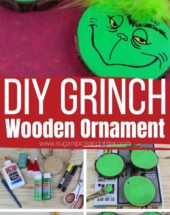
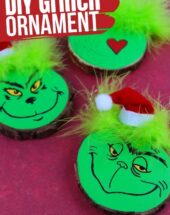
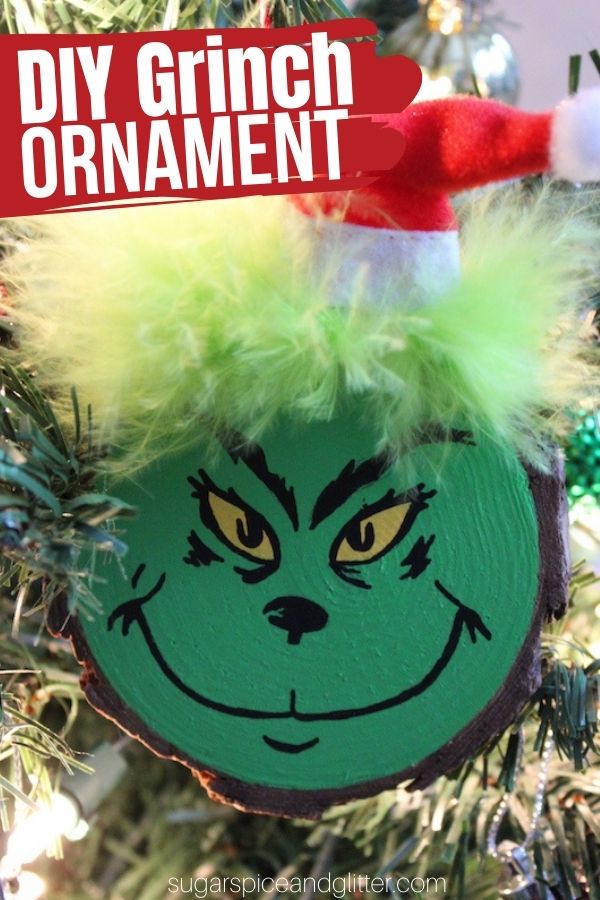
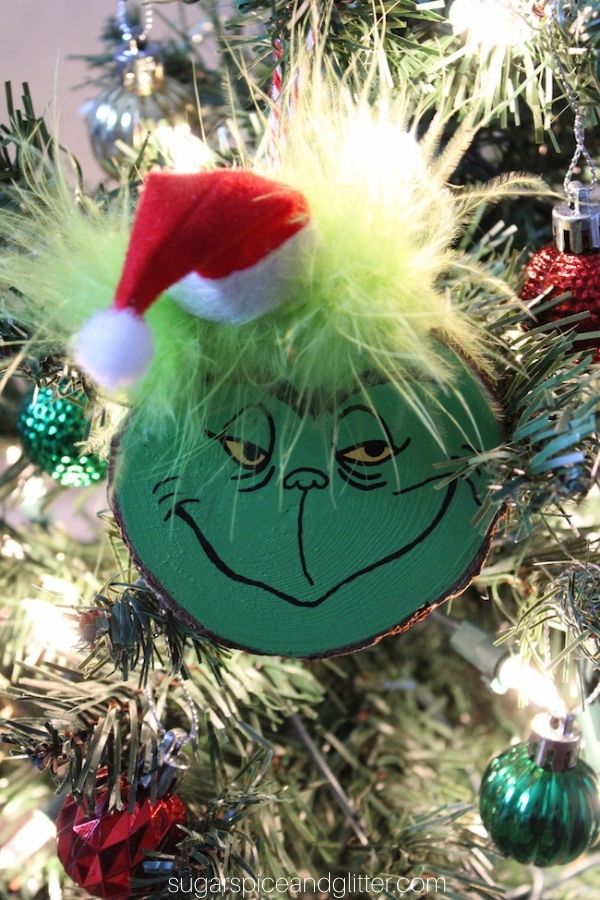
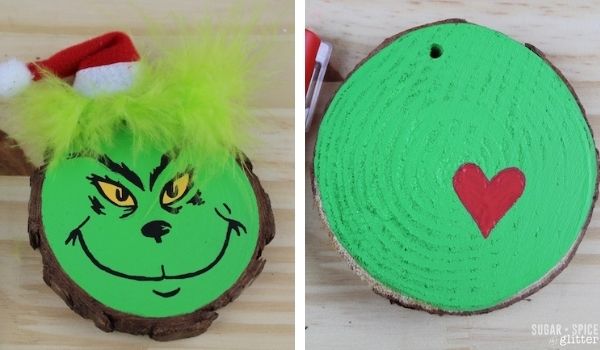
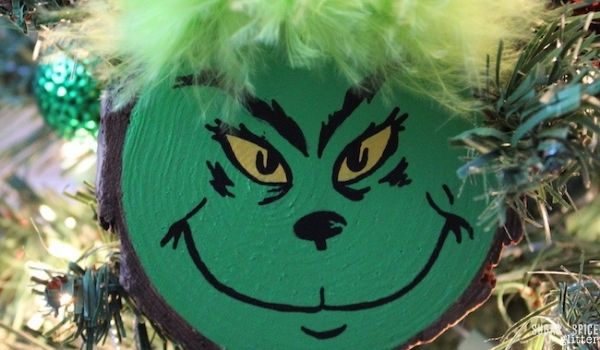
This trio of Grinch ornaments was a super fun and easy option. I just free-handed the Grinch’s face, but you can alternatively use transfer paper to trace over a picture of the Grinch and then trace it onto the wood slice. (We even have a Printable Grinch Template for our bookmark craft that you can enlarge to use for tracing.)
I think it would be so much fun to do a tree dedicated to favorite Christmas characters – especially book-inspired characters.
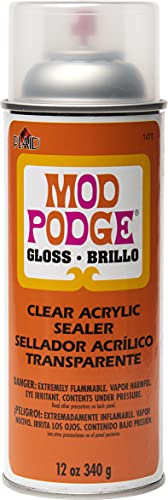
If you plan to use these ornaments year after year, I highly recommend using a craft sealant to prevent the ornaments from fading or being damaged in storage.
More Wood Slice Ornaments for Kids
- Wood Slice String Art Ornament from Happy Brown House
- Hand Lettered Wood Slice Ornament from the Soccer Mom Blog
- Wood Slice Stacked Snowman Ornament
- Snowman Wood Slice Ornament with Winter Scene
- Wood Slice Chalkboard Ornament from Fireflies and Mudpies
- Rudolph Wood Slice Ornament
- Wooden Slice Penguin Ornament
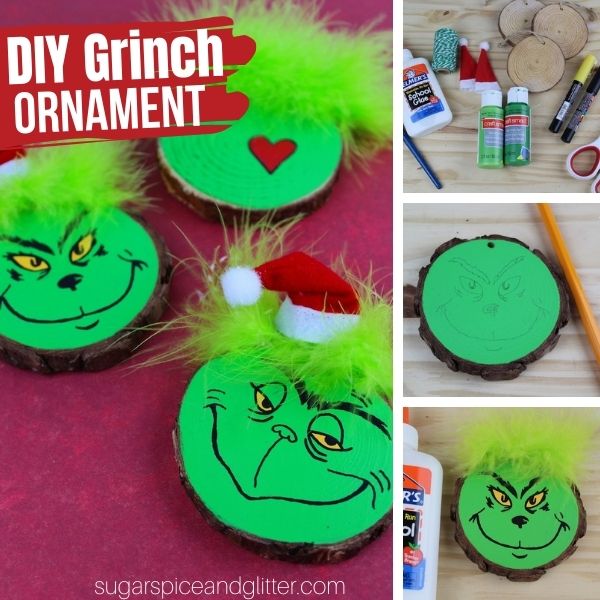
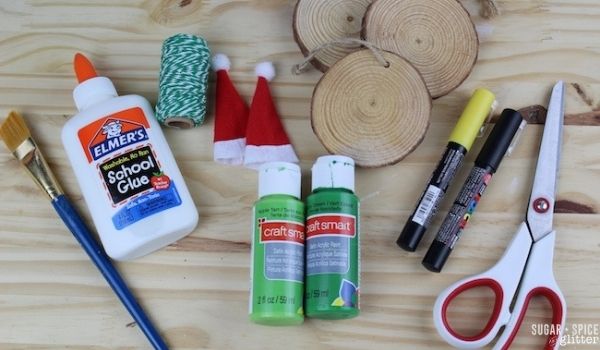
Grinch Ornament Materials
- Wood Slices Ornaments
- Green Paint
- Paintbrushes
- Baker’s Twine, optional
- Scissors <– these are the ones we have in our daycare, super easy to use and actually cut through things (unlike a lot of safety scissors). They’ve lasted for over 5 years
- Glue
- Paint Pens
- Mini Santa Hats
- Green Marabou Feather Boa
- Craft Sealant
Tip: if you’re not comfortable free-hand drawing the Grinch’s face, you can use transfer paper to trace over a picture of him and then trace onto your wood slice.
How to Make a Grinch Wood Slice Ornament
Remove the twine that comes on the wood slice.
Paint the wood slice green. (2-3 coats) Allow paint to dry completely.
Use a pencil to trace the Grinch’s face onto the ornament.
Use a yellow paint pen to fill in the eyes. Allow to dry completely.
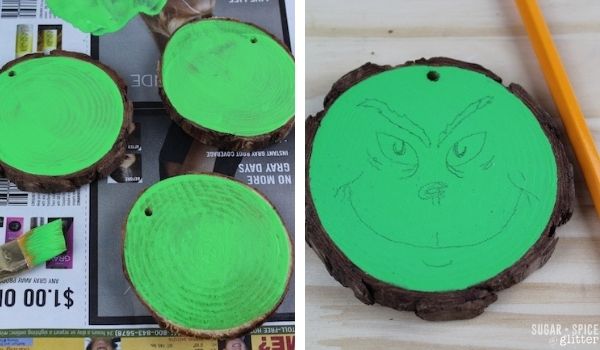
Use a black paint pen to paint the facial features. (mouth, eyes etc) Allow to dry completely.
Use a red paint pen to draw a heart onto one ornament and outline with a black paint pen. Allow to dry completely.
Allow the paint to dry fully before sealing the craft with craft sealant, if using.
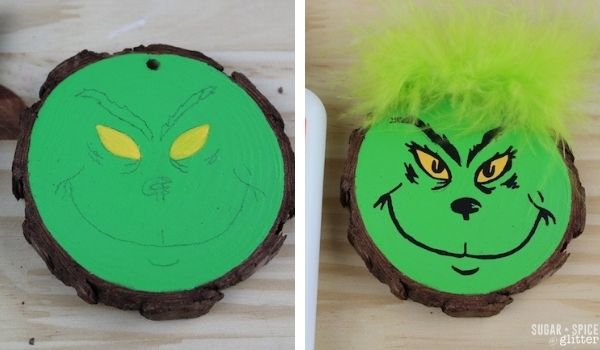
Cut a piece of the marabou feather boa and glue onto the top of the wood slice.
Glue a miniature Santa hat on top of the marabou feather boa. (skip this step for the heart ornament)
Restring the ornament using the twine that it came with, or festive baking twine like we did.
Your ornament is done and ready to hang on the tree.
Pin this Easy Grinch Wood Slice Ornament:
Grab your free printable for our Grinch Christmas Ornament craft:
Want to Save This Recipe?
Enter your email & I'll send it to your inbox. Plus, get great new recipes from me every week!
By submitting this form, you consent to receive emails from Sugar, Spice and Glitter.
Wood Slice Grinch Ornament
A simple step-by-step tutorial for how to make your own trio of DIY Grinch Ornaments. These simply wood slice ornaments would be a cute addition to your Christmas decor or a homemade gift for a teacher or Grinch fan!
Materials
- Wood Slices Ornaments
- Green Paint
- Twine or Ribbon
- Mini Santa Hats
- Green Marabou Feather Boa
- Craft Sealant
Tools
- Paintbrushes
- Scissors
- Glue
- Paint Pens
Instructions
- Remove the twine that comes on the wood slice.
- Paint the wood slice green. (2-3 coats) Allow paint to dry completely.
- Use a pencil to trace the Grinch’s face onto the ornament.
- Use a yellow paint pen to fill in the eyes. Allow to dry completely.
- Use a black paint pen to paint the facial features. (mouth, eyes etc) Allow to dry completely.
- Use a red paint pen to draw a heart onto one ornament and outline with a black paint pen. Allow to dry completely.
- Allow the paint to dry fully before sealing the craft with craft sealant, if using.
- Cut a piece of the marabou feather boa and glue onto the top of the wood slice.
- Glue a miniature Santa hat on top of the marabou feather boa. (skip this step for the heart ornament)
- Restring the ornament using the twine that it came with, or festive baking twine like we did.
- Your ornament is done and ready to hang on the tree.
Recommended Products
As an Amazon Associate and member of other affiliate programs, I earn from qualifying purchases.
-
 Zucker Feather Products Medium Weight Marabou Boa, Lime
 -
HANSGO Mini Santa Hat Cup Bottles Cover, 24PCS Christmas Santa Hats Silverware Holders Xmas Silverware Holder
-
Vivifying Red and White Bakers Twine, 656 Feet Cotton String for DIY Crafts, Christmas Gift Wrapping
-
Paintigo Acrylic Paint Pens,12 Colors, Water-Based, Permanent & Waterproof Ink, 0.7mm Extra Fine Tip, Ideal for Rock Painting, Fabric, Wood, Glass, Metal, Ceramic, Porcelain, Canvas, Mug, DIY Crafts.
-
Apple Barrel PROMOABI Matte Finish Acrylic Craft Paint Set Designed for Beginners and Artists, Non-Toxic Formula that works on All Surfaces, Assorted Colors 1, 18 Count
-
5ARTH Natural Wood Slices - 30 Pcs 2.4-2.8 inches Craft Unfinished Wood kit Predrilled with Hole Wooden Circles for Arts Wood Slices Christmas Ornaments DIY Crafts
-
Mod Podge Spray Acrylic Sealer that is Specifically Formulated to Seal Craft Projects, Dries Crystal Clear is Non-Yellowing No-Run and Quick Drying, 12 ounce, Gloss


I hope your kids had as much fun making these DIY Grinch Ornaments as we did! They would make a thoughtful gift for a teacher or Grinch fan!
For more fun Dr Seuss ideas for kids, check out our DIY Grinch Bookmark or our Dr Seuss Sensory Activities for Kids.