
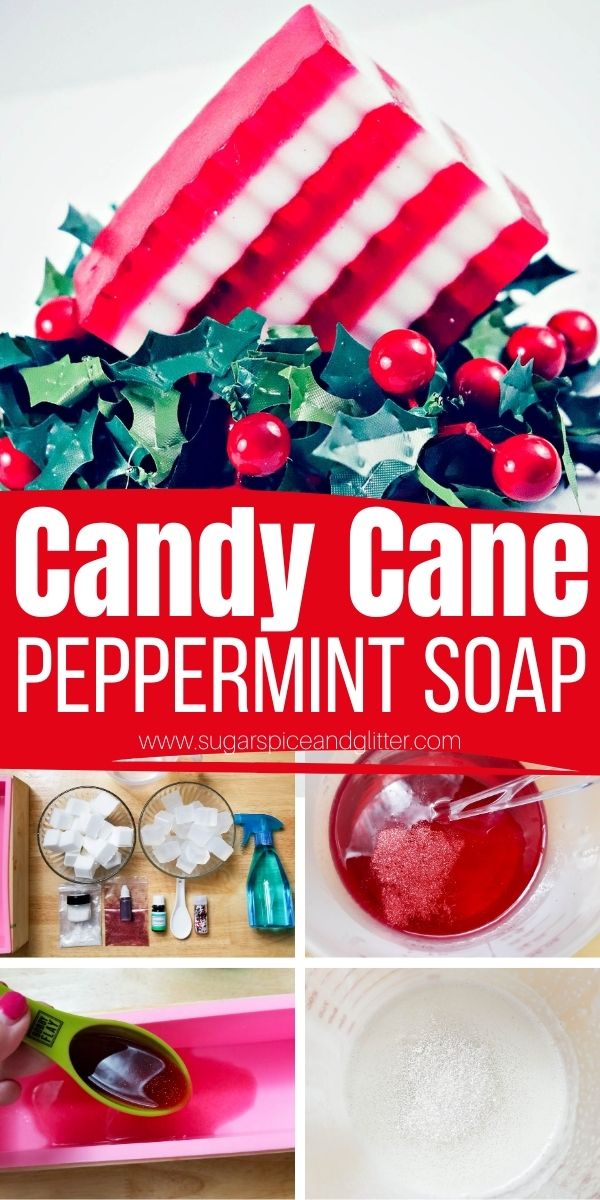
Layered Peppermint Soap Bar (with Video)
Welcome to Sugar, Spice & Glitter! Please note, this post may contain affiliate links. For more details, see our Full Disclosure.
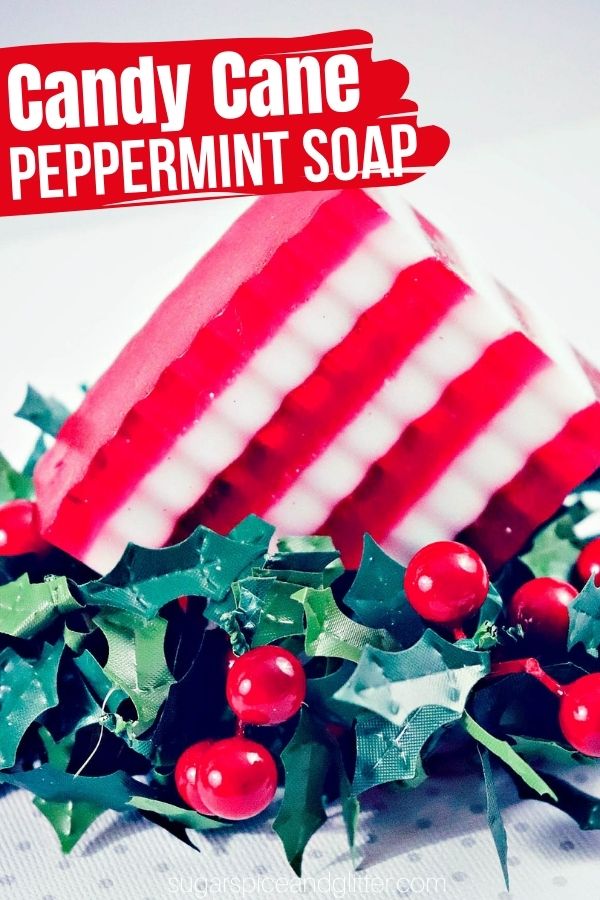
A delicious smelling Peppermint Beauty DIY, these super simple DIY Layered Peppermint Bar Soaps are a festive addition your bathroom or a great homemade gift.
DIY Peppermint Soap Bar Craft
Three years ago, I shared an amazing Peppermint Massage Oil for holiday gift giving, and last year, Ella and I made a pretty Peppermint Swirl Sugar Scrub for her to give as a homemade teacher gift. It seemed only right to keep up the Peppermint DIY tradition with this year’s addition: a candy cane striped peppermint bar soap.
I actually always have a peppermint-scented shower item year-round. The scent is so clean and invigorating, it wakes up my senses on mornings when I wish I was still in bed. Peppermint is also a headache cure and I’ve found that when I have minor headaches, the fresh scent really does help – at least temporarily.
If you prefer a pure peppermint scent, you can just stick to the peppermint essential oil and leave out the candy cane scent. Or, if you can’t find the candy cane scent, you can balance out the peppermint oil by adding some vanilla essential oil or vanilla extract.
We also added some cosmetic glitter to make these peppermint bar soaps extra special, but you can leave that out, if you prefer.
More Christmas Beauty DIYs
- Peppermint Swirl Sugar Scrub
- DIY Peppermint Massage Oil
- Lump of Coal Soap
- Squishy Jelly Soap
- Lavender Honey Sugar Scrub
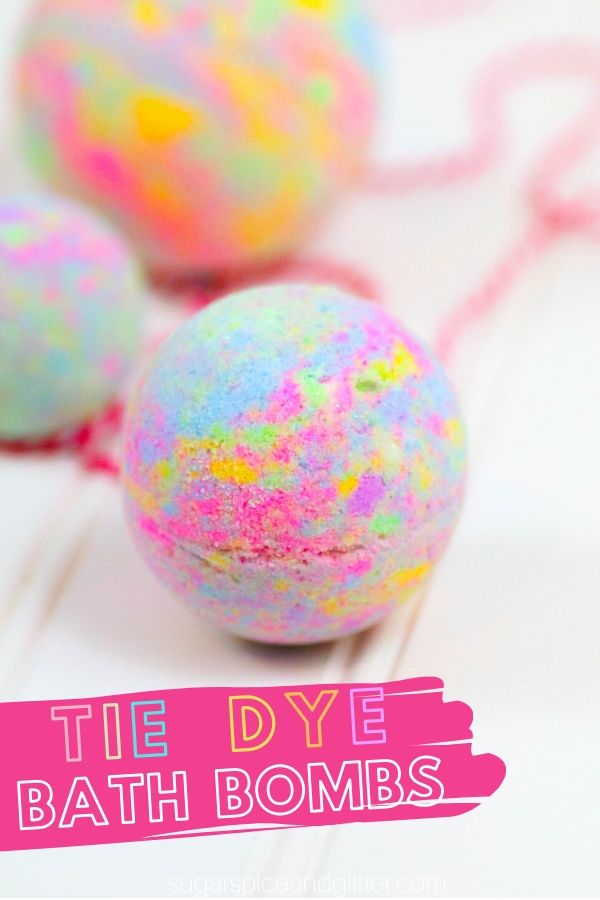
- Energizing Citrus Bliss Bath Bomb
Check out our quick video to see how to make your own layered candy cane soaps – and then don’t forget to scroll down to grab your free printable recipe card:
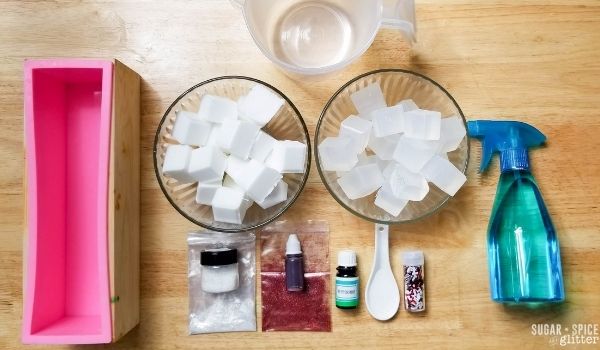
Peppermint Bar Soap Ingredients
- Melt and Pour Goats Milk Soap Base, cut into cubes
- Melt and Pour Clear Soap Base, cut into cubes
- Red Soap Coloring
- White Pearlescent Mica Coloring, optional
- Red Cosmetic Glitter
- White Cosmetic Glitter
- Peppermint Essential Oil
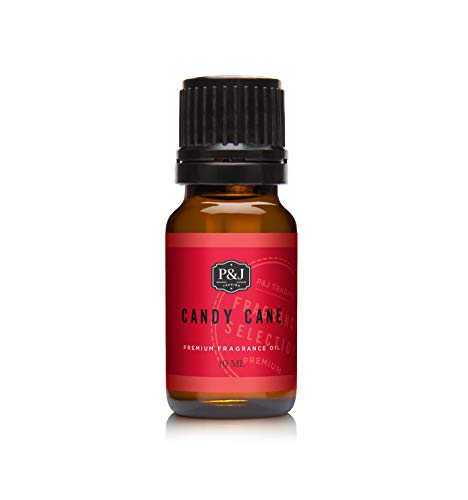
- Candy Cane Soap Scent
- Spray Bottle of Rubbing Alcohol
- Loaf Soap Mold
- Microwave safe bowls or Measuring Cups
- Mixing Spoon
Scroll down to the printable recipe card for full measurements.
Tip: If you do not have the loaf mold I used, that is fine! You can use any mold you like and get the same layered effect. If so, you may need to adjust the amount of soap you use. The important thing is that you have fun!
How to Make Peppermint Bar Soap
To make the red soap layers:
Add 8-12 cubes of the clear soap base (this depends on how thick you want each layer to be) to a microwave safe bowl or measuring cup and melt soap cubes in 30 second intervals, stirring after each until completely melted.
Add 1 teaspoon of candy cane soap scent.
Add 10 drops of Peppermint essential oil to container.
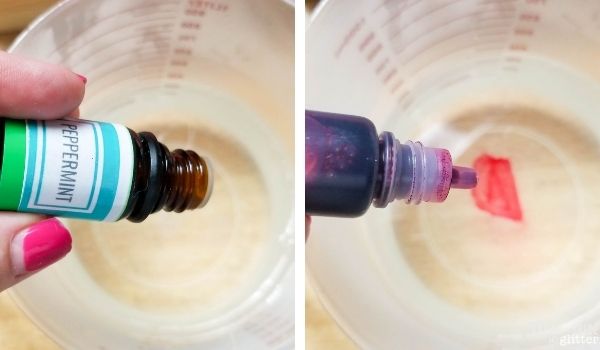
Add 1-2 drops of red soap coloring and stir. If color is not what you want, add 1 drop and stir until desired color is achieved. (Keep track of how many drops you use so each layer is the same color!)
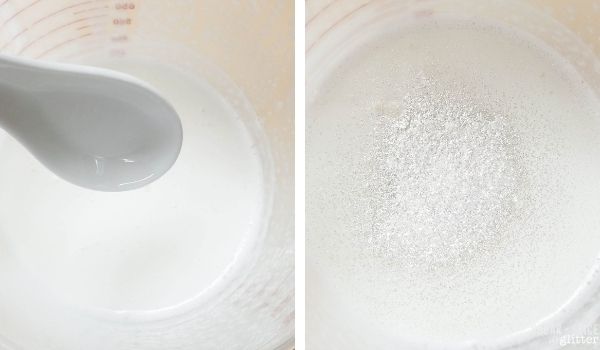
Add 1 teaspoon of the red cosmetic glitter to container and stir. Add more glitter as desired.

Spray bottom of mold with rubbing alcohol to prevent bubbles from forming on the bottom. Pour red soap mixture into mold. Spray with rubbing alcohol to prevent bubbles from forming on the top. Allow to harden completely before pouring the next layer. Each layer will need more time to dry as they get thicker as you move to the top of the mold. You can tell if the layer is not hardened if you blow on it and you see ripples.
To make the white soap layers:
Add 8-12 cubes of the clear soap base (this depends on how thick you want each layer to be) to a microwave safe bowl or measuring cup and melt soap cubes in 30 second intervals, stirring after each until completely melted.
Add 1 teaspoon of candy cane soap scent.
Add 10 drops of Peppermint essential oil to container.
Add 1 teaspoon of white mica coloring and stir. If color is not what you want, add ½ tsp. more and stir until desired amount of sheen is achieved. (Keep track of how much mica you use so each layer is the same pearlescent effect.) You can leave this step out if you like as the soap base is already white. I love this mica as it adds a sheen to it the soap on its own does not lend.
Add 1 teaspoon of the white cosmetic glitter to container and stir. Add more glitter as desired.
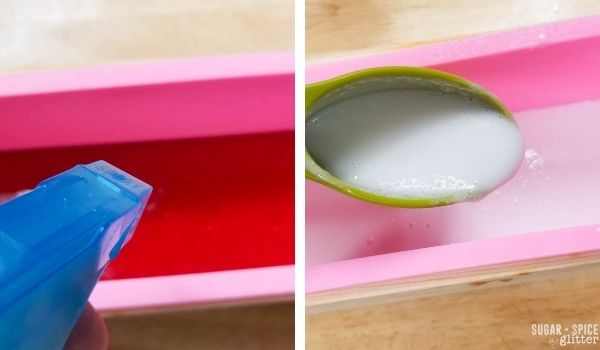
Spray red layer of mold with rubbing alcohol. This helps each layer adhere to one another. Pour white soap mix into mold. Spray top with rubbing alcohol to prevent bubbles from forming. Allow to harden completely before pouring the next layer. Each layer will need more time to dry as the size of the soaps get thicker as you move to the top of the mold. You can tell if the layer is not hardened if you blow on it and you see ripples.
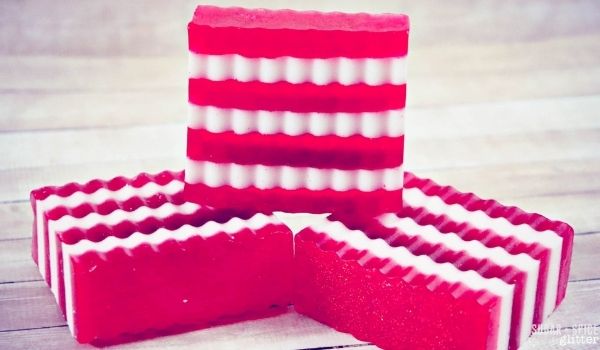
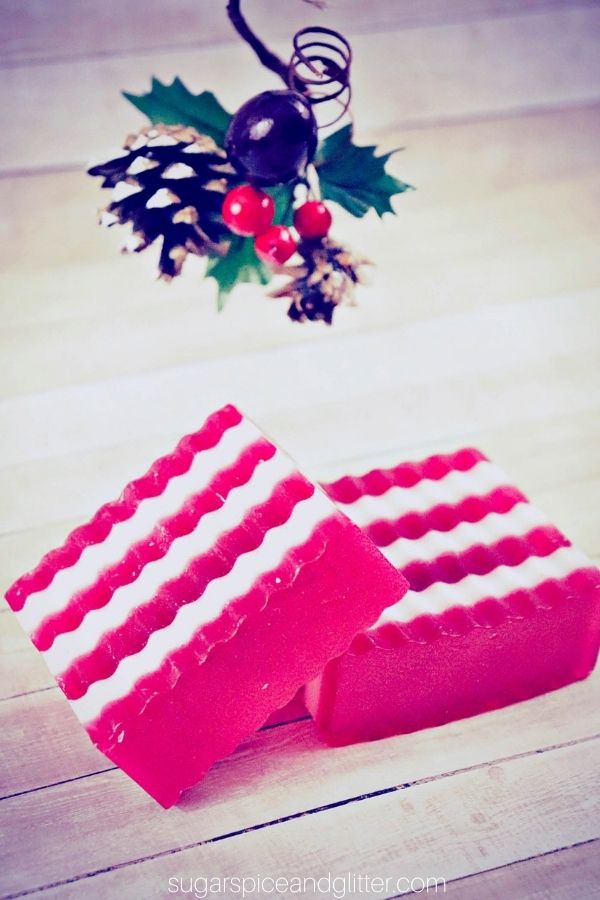
Repeat steps outlined above for each alternating layer until mold is filled or you have the height you want for your soaps. Allow to harden to least 24 hours. Gently remove loaf from mold and remove soap. Cut soap into bars. Store in an airtight container until ready for use.
Pin this Easy Candy Cane Soap Recipe for your holiday gift making:
Grab your free printable instructions for our peppermint bar soap recipe:
Want to Save This Recipe?
Enter your email & I'll send it to your inbox. Plus, get great new recipes from me every week!
By submitting this form, you consent to receive emails from Sugar, Spice and Glitter.
Layered Peppermint Bar Soap
A fun and easy Christmas Beauty DIY, these peppermint bar soaps make a gorgeous addition to your bathroom or a thoughtful homemade gift with an invigorating candy cane scent.
Materials
- 1/2 pound melt and pour goats milk soap base cut into cubes (each cube is approx. 1 ounce)
- 1/2 pound melt and pour clear soap base cut into cubes (each cube is approx. 1 ounce)
- Red soap coloring
- White pearlescent mica coloring, optional
- Red cosmetic glitter
- White cosmetic glitter
- Peppermint essential oil
- Candy Cane soap scent
Tools
- Spray bottle of rubbing alcohol
- Loaf Soap Mold
- 2 microwave safe bowls or measuring cups
- Mixing spoon
Instructions
For the Red Soap Layers:
- Add 1-2 drops of red soap coloring and stir. If color is not what you want, add 1 drop and stir until desired color is achieved. (Keep track of how many drops you use so each layer is the same color!)
- Add 1 teaspoon of the red cosmetic glitter to container and stir. Add more glitter as desired.
- Spray bottom of mold with rubbing alcohol to prevent bubbles from forming on the bottom.
- Pour red soap mixture into mold.
- Spray with rubbing alcohol to prevent bubbles from forming on the top. Allow to harden completely before pouring the next layer. Each layer will need more time to dry as they get thicker as you move to the top of the mold. You can tell if the layer is not hardened if you blow on it and you see ripples.
To make the white soap layers:
- Add 8-12 cubes of the clear soap base (this depends on how thick you want each layer to be) to a microwave safe bowl or measuring cup and melt soap cubes in 30 second intervals, stirring after each until completely melted.
- Add 1 teaspoon of candy cane soap scent.
- Add 10 drops of Peppermint essential oil to container.
- Add 1 teaspoon of white mica coloring and stir. If color is not what you want, add ½ tsp. more and stir until desired amount of sheen is achieved. (Keep track of how much mica you use so each layer is the same pearlescent effect.) You can leave this step out if you like as the soap base is already white. I love this mica as it adds a sheen to it the soap on its own does not lend.
- Add 1 teaspoon of the white cosmetic glitter to container and stir. Add more glitter as desired.
- Spray red layer of mold with rubbing alcohol. This helps each layer adhere to one another. Pour white soap mix into mold. Spray top with rubbing alcohol to prevent bubbles from forming. Allow to harden completely before pouring the next layer. Each layer will need more time to dry as the size of the soaps get thicker as you move to the top of the mold. You can tell if the layer is not hardened if you blow on it and you see ripples.
- Repeat steps outlined above for each alternating layer until mold is filled or you have the height you want for your soaps. Allow to harden to least 24 hours. Gently remove loaf from mold and remove soap. Cut soap into bars. Store in an airtight container until ready for use.
Recommended Products
As an Amazon Associate and member of other affiliate programs, I earn from qualifying purchases.
-
 ZYTJ Silicone soap molds kit kit-42 oz Flexible Rectangular Loaf Comes with Wood Box,Stainless Steel Wavy & Straight Scraper for CP and MP Making Supplies
 -
Candy Cane Fragrance Oil - Premium Grade Scented Oil - 10ml
-
Essential Oil Set 14-5 ml Therapeutic Grade 100% Pure Frankincense, Lavender, Peppermint, Rosemary, Orange, Tea Tree, Eucalyptus, Grapefruit, Lemon, Lime, Clove, Spearmint, Lemongrass, Cinnamon
-
16 Colors Bath Bomb Soap Dye-Food Grade Skin Safe Bath Bomb Colorant,Vegan, Gluten-Free - Liquid Bath Bombs Colorant Set with Bonus Best Soap Making Supplies
-
Epoxy Resin Color Pigment - 23 Color(Total 230g) Mica Powder Pigment Dye with Spoon - Cosmetic Grade Epoxy Resin Coloring for Soap Making Supplies - Slime Colorant for Paint, Bath Bomb - 0.36oz Each
-
Clear Glycerin Soap Base- 2lb
-
Soap Expressions Goats Milk Glycerine Soap Base- 2lb


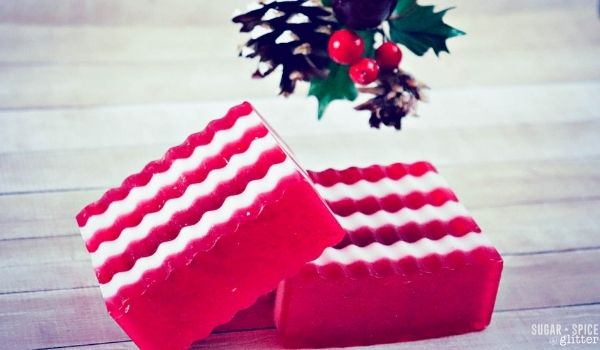
This candy cane striped soap makes a gorgeous addition to your bathroom for the holidays, or would make a thoughtful homemade gift.
For more of our DIY Beauty recipes, check out the full collection here.
One Comment