Easy Gnome Craft for Kids (with Video)
Welcome to Sugar, Spice & Glitter! Please note, this post may contain affiliate links. For more details, see our Full Disclosure.
While we have so many magical crafts on Sugar, Spice and Glitter (including fairies, mermaids, dragons, and wizards), I realized we had no Easy Gnome Crafts for Kids – so naturally, we had to rectify that with today’s Felt Gnome Craft for Kids.
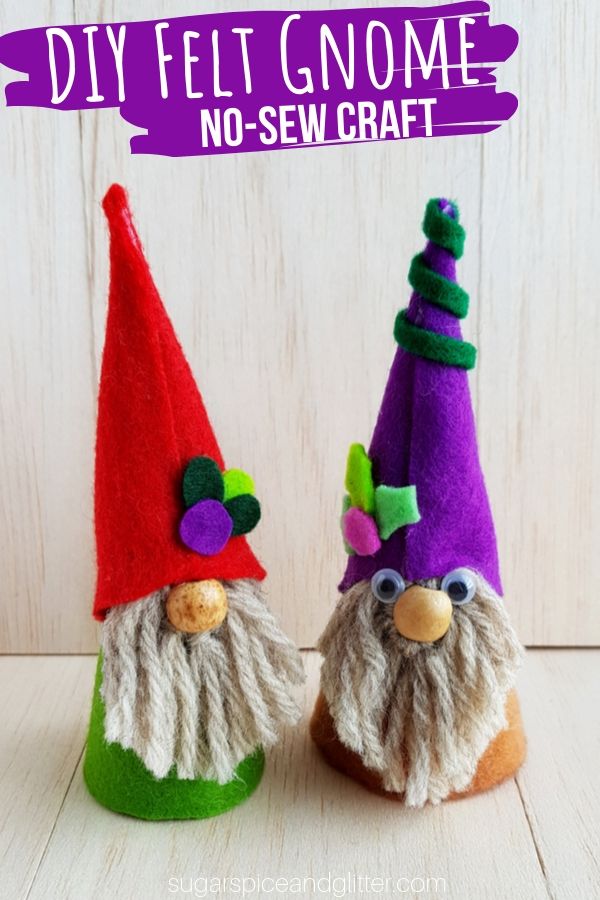
No Sew Felt Gnome Craft
Gnomes are tiny humans that live underground and are said to possess cunning and magical qualities. They originated during the Renaissance and were strongly associated with magic and alchemy.
They appear in works by L Frank Baum, JRR Tolkien, CS Lewis, and JK Rowling’s Harry Potter series, and also in many folk and fairy tales, especially in Nordic countries.
Today’s gnome craft would be perfect for kids who are ready to read any of these books… or watch the movie adaptations (including the super cute Gnomeo and Juliet).

These easy gnomes make cute stand-alone crafts, or can be used in a shoebox theatre to tell a story. You could also string a loop of thread through the top and turn them into ornaments!
I’ve provided a couple of different styling ideas, but feel free to get creative and have fun with this craft! You can adorn the gnomes’ hats and coats however you’d like, and choose whether or not to add googley eyes. (I personally like them a bit better without.) You can also style them for the different holidays.
I highly recommend printing off my paper template (below) to assist you in cutting the felt for this project.

And if this craft isn’t enough, I found a few more gnome crafts for you to check out:
- Pom Pom Gnome Craft from Efzin Creations
- Peek-a-Boo Paper Plate Gnome from Ruffles and Rainboots
- Hand-sewn Felt Gnome from Skip and Scatter
- Gnome Peg Dolls from Ruffles and Rainboots
- Pine Cone Gnome Craft from the Magic Onions
Check out our step-by-step video on how to make this easy Gnome Craft for Kids – filmed by my assistant, Maggie – and then don’t forget to scroll down to grab your free printable template and instructions:

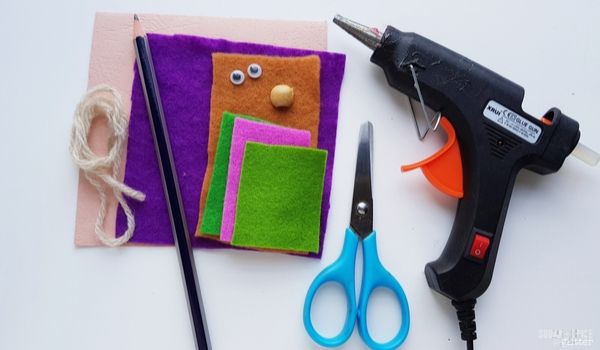
Materials for a Gnome Craft
- Gnome Paper Template
- Cardstock paper
- Felt fabric
- Pencil
- Scissors
- Hot glue gun <– I highly recommend using a cool touch hot glue gun if kids are making this craft
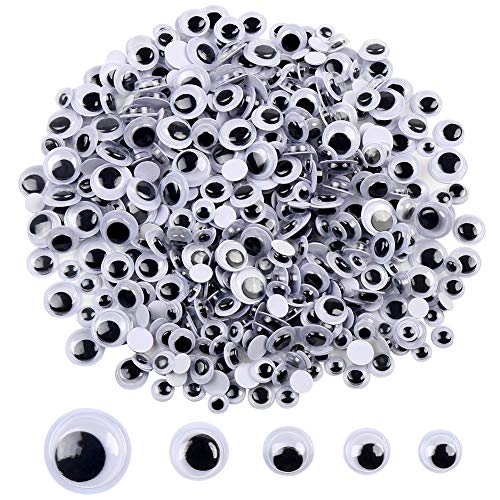
- Googley eyes
- Yarn
- Half wooden bead (for the nose) <– you can either split a wooden bead in half, or buy these wooden half-spheres
Tip: the cardstock won’t show drastically, but try to stick with a neutral color or skin tone. Also, stick with a yarn color that seems natural for a beard. The felt colors can be as wild as you like!
How to Make a Felt Gnome
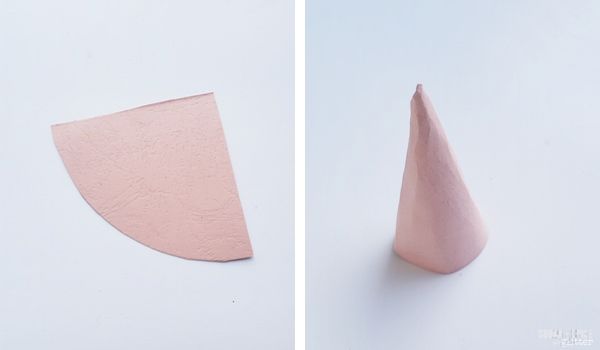
Trace the template for the cone on a cardstock paper and cut it out neatly. Or, you can simply trace a quarter circle on a cardstock paper.
Roll the quarter circle to form a cone shape. Once you are satisfied with the cone pattern apply glue to secure the cone shape by gluing the overlapped parts.
Select a yarn to make the beard of the gnome. Cut out a bunch of yarn strands from the selected yarn bundle. I’ve cut mine into 3 inches long strands; better to keep the strands long as you can trim them later to get a nice shape for the beard.
Grab a strand and place it on a flat surface. Grab 2 groups of strands and fold them into half. Place the looped part of the double yarns over the single strands.
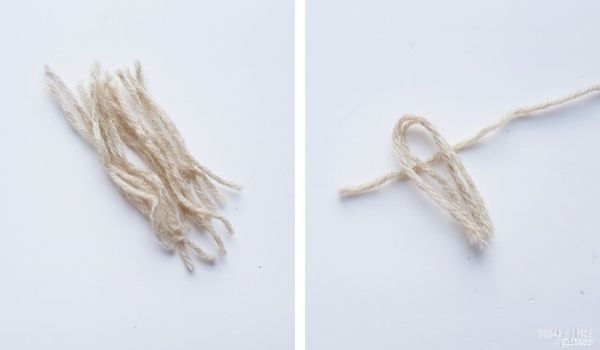
Hold the open ends of the double strands and draw them through its loop from under the single strand of yarn. Pull the open ends all the way through and tighten the double strands with the single strand.
Similarly attach more yarn strands.
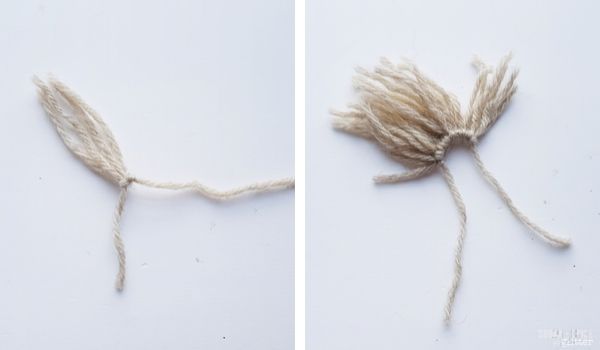
Once you are satisfied with the volume of the yarn strands tie a tight knot with the 2 open ends of the single strand. This will create a small hole in the middle of the attached yarn strands.
Cut out a small piece of felt fabric and also set the yarn strands towards any one direction.
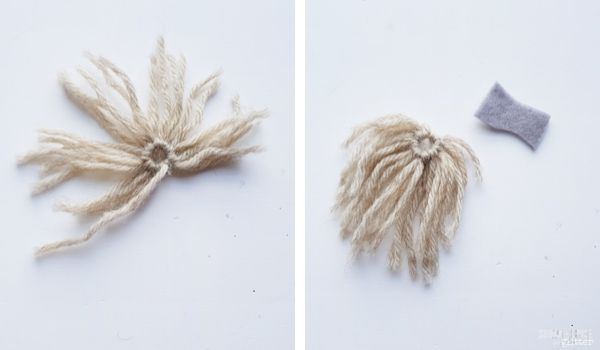
Use hot glue gun to attach the yarn beard on the small felt fabric.
Select felt fabric for the gnome clothes. Trace the clothe patterns on the selected felt fabrics and cut them out nicely.
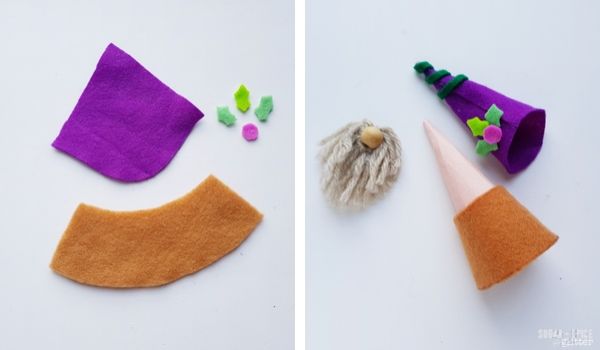
Attach a half wooden bead on the hole of the yarn beard. Roll the hat felt cutout to form a cone shaped hat and attach the leaves and cherry on the hat to decorate it. Take the cardstock cone and wrap the other felt cutout around the bottom side of the cone; use hot glue gun to attach them.
Attach the beard on the cardstock cone, relatively in the middle part of the cone.
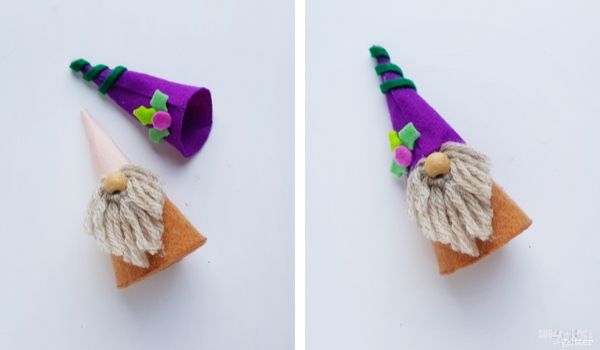
Attach the hat on the top side of the cardstock cone.
Attach googley eyes if you want to.
Pin this Super Simple No-Sew Gnome Craft:

Grab your free printable instructions for our simple gnome craft (and don’t forget to grab the Gnome Template:
Want to Save This Recipe?
Enter your email & I'll send it to your inbox. Plus, get great new recipes from me every week!
By submitting this form, you consent to receive emails from Sugar, Spice and Glitter.
DIY Gnome Craft
A super simple winter craft for kids, these DIY Felt Gnomes require no sewing and are such a cute addition to your winter decor
Materials
- Cardstock paper
- Felt fabric
- Pencil
- Googley eyes
- Yarn
- Half wooden bead (for the nose)
Tools
- Hot glue gun
- Scissors
Instructions
- Trace the template for the cone on a cardstock paper and cut it out neatly. Or, you can simply trace a quarter circle on a cardstock paper.
- Roll the quarter circle to form a cone shape. Once you are satisfied with the cone pattern apply glue to secure the cone shape by gluing the overlapped parts.
- Select a yarn to make the beard of the gnome. Cut out a bunch of yarn strands from the selected yarn bundle. I’ve cut mine into 3 inches long strands; better to keep the strands long as you can trim them later to get a nice shape for the beard.
- Grab a strand and place it on a flat surface. Grab 2 groups of strands and fold them into half. Place the looped part of the double yarns over the single strands.
- Hold the open ends of the double strands and draw them through its loop from under the single strand of yarn. Pull the open ends all the way through and tighten the double strands with the single strand.
- Similarly attach more yarn strands.
- Once you are satisfied with the volume of the yarn strands tie a tight knot with the 2 open ends of the single strand. This will create a small hole in the middle of the attached yarn strands.
- Cut out a small piece of felt fabric and also set the yarn strands towards any one direction.
- Use hot glue gun to attach the yarn beard on the small felt fabric.
- Select felt fabric for the gnome clothes. Trace the clothe patterns on the selected felt fabrics and cut them out nicely.
- Attach a half wooden bead on the hole of the yarn beard. Roll the hat felt cutout to form a cone shaped hat and attach the leaves and cherry on the hat to decorate it. Take the cardstock cone and wrap the other felt cutout around the bottom side of the cone; use hot glue gun to attach them.
- Attach the beard on the cardstock cone, relatively in the middle part of the cone.
- Attach the hat on the top side of the cardstock cone.
- Attach googley eyes if you want to.
Recommended Products
As an Amazon Associate and member of other affiliate programs, I earn from qualifying purchases.
-
 50 Pieces 25mm Natural Half Wooden Balls Decration Split Beads for DIY Projects Crafts Kids Toy
 -
Well Krafty Premium Acrylic Yarn, Snag Free, 4 Ply for Knitting, Crochet and DIY Projects (2 Pack) (Light Gray)
-
E.Durable Mini Glue Gun Tool Kit Kids Friendly with Glue Sticks for School Projects, DIY Crafts, Delicate Items Like Foam, Thermocal, Floral, etc (30W)
-
DECORA 500 Pieces 6mm -12mm Black Wiggle Googly Eyes with Self-Adhesive
-
flic-flac 44PCS 4 x 4 inches (10 x10cm) Assorted Color Felt Fabric Sheets Patchwork Sewing DIY Craft 1mm Thick
-
Astrobrights Colored Cardstock, 8.5” x 11”, 65 lb / 176 gsm, "Spectrum" 25-Color Assortment, 75 Sheets (80944-01)


This super simple gnome craft for kids turns out so cute and is so versatile! I could easily have a little seasonal collection of these cuties!
For more magical craft ideas, check out our Magical Crystal Ball Craft or our Watercolor Winter Wand.