
DIY Fairy Treehouse Pendant Light
Welcome to Sugar, Spice & Glitter! Please note, this post may contain affiliate links. For more details, see our Full Disclosure.
This shop has been compensated by Collective Bias, Inc. and its advertiser. All opinions are mine alone. #PoweringAdventure #CollectiveBias
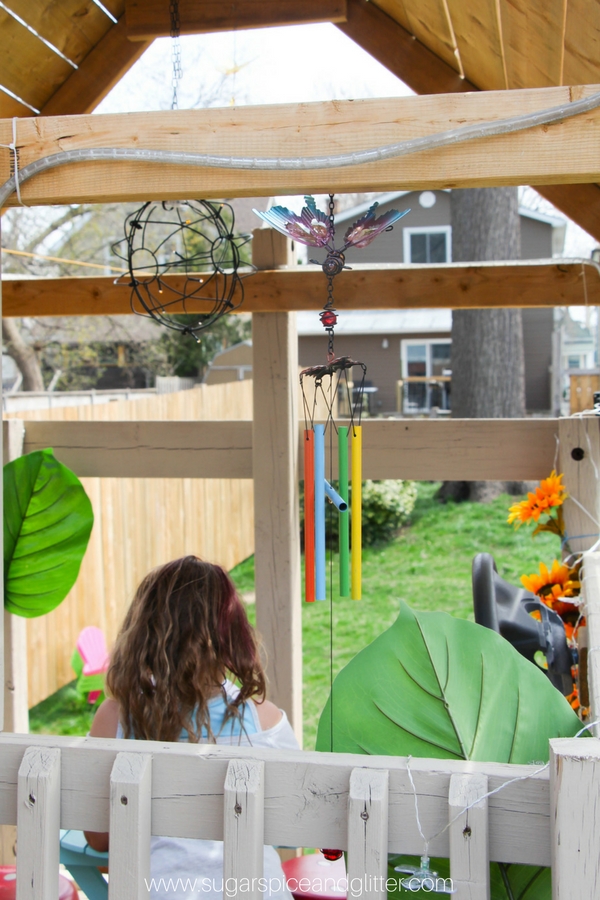
I’m so excited to share Ella’s Fairy Treehouse reveal with you today.
It’s been a project that I’ve been looking forward to since we finished construction on her fairy house late last summer, but I waited because I knew that the excitement of having a treehouse was good enough initially.
I wanted to create a magical space that was all her own – just steps away from our main deck.
I tried to leave some space available so that she could help create a few magical additions to her treehouse after the reveal, and it’s also not warm enough yet for me to set out any flowers so I’m going to have her help pick those out in a couple weeks.
(I’ll do a full post with the full details on the Fairy Treehouse once she’s been able to add her own creative touch and we’ve added some flowers.)
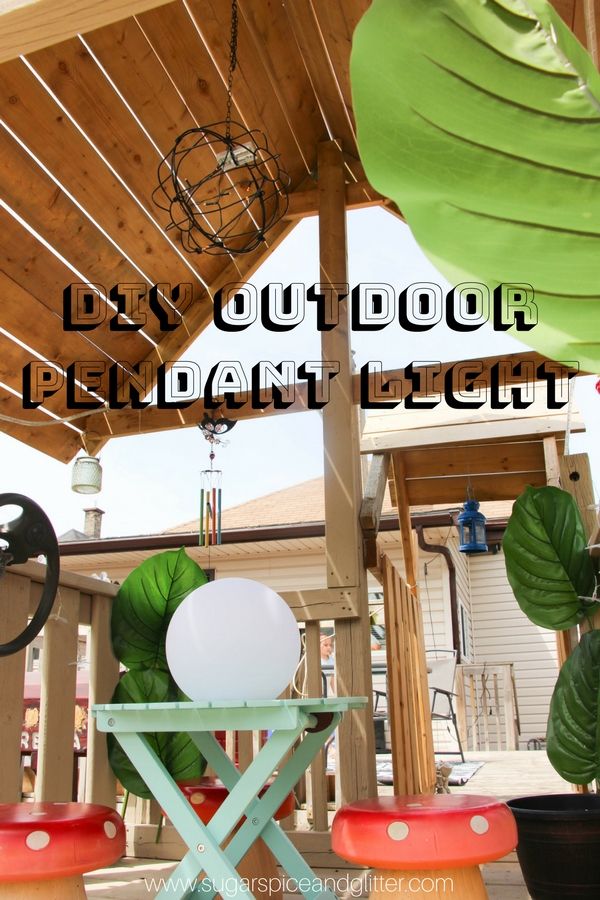
DIY Pendant Light Tutorial
But before we get to the reveal – I’m going to share with you how I made a dramatic and professional looking pendant light for Ella’s treehouse using a couple of unexpected materials and Energizer® Ultimate Lithium™ batteries.
This DIY Pendant Light adds a major wow factor to the fairy treehouse and I think it looks almost store-bought! No one is going to believe that this pendant light only cost you $4 to make!
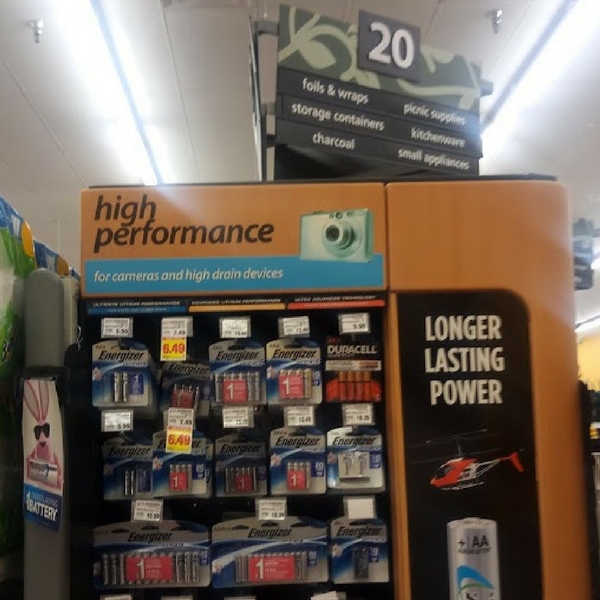
We partnered with Energizer® on this post and used Energizer® Ultimate Lithium™ batteries because they are lightweight, leak resistant and perform in extreme temperatures, making them a great choice for outdoor use. The AA batteries are the #1 longest lasting AA batteries, so I won’t have to be getting out the ladder and swapping out the batteries all of the time.
We also bought an extra pack of the batteries to use in Ella’s walkie talkies, because I’m pretty sure she’s now going to be spending most of her time in her magical Fairy Treehouse.

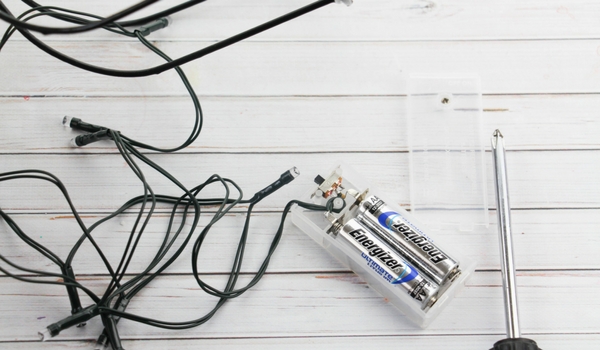
Materials Needed for DIY Outdoor Pendant Light
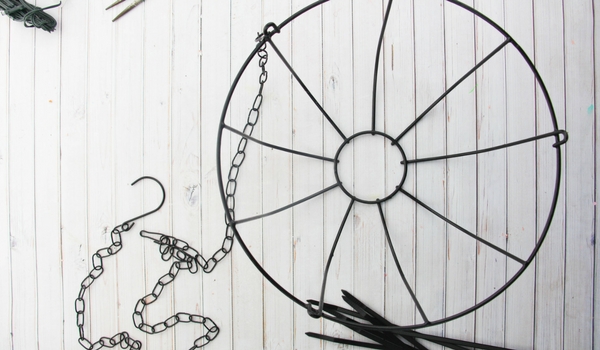
- 2 wire hanging garden baskets
- Fairy twinkle lights
- Black zip ties
- Energizer® Ultimate Lithium™ batteries (AA/AAA as indicated on the twinkle lights)
- Twine, optional for hanging
- Pliers
Tip: the only change I would make to this DIY is that I would have purchased a much longer string of fairy lights to make it brighter and having more interest.

How to Make a DIY Pendant Light
Remove any chains or tags from the hanging garden baskets, using scissors or pliers as needed.

Determine if you will use the provided chain to hang up the basket or twine. I used the provided chain and used my pliers to connect the chains to form one long chain, by opening and connecting the ending chains.
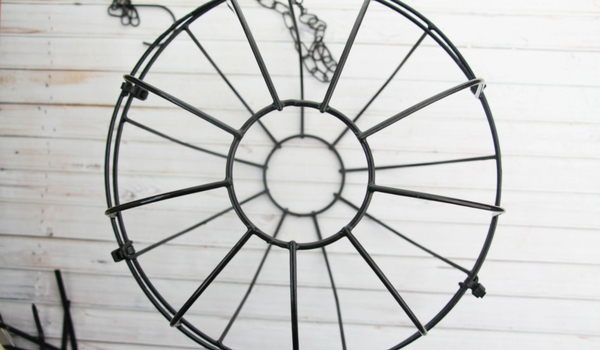
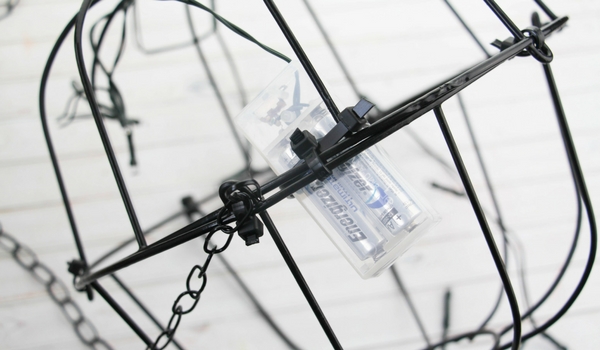
Place the openings of the baskets together and secure using the zip ties to form an orb.
Trim the excess off the zip ties.
Place the proper batteries in the battery pack.
Secure the battery pack for the fairy lights on the top of your orb – again, using zip ties.
Thread the fairy lights throughout the orb, as desired.
Hang your pendant light.
Pin this DIY Pendant Light Tutorial:

Grab your free printable directions for our DIY Orb Pendant Light here:
Want to Save This Recipe?
Enter your email & I'll send it to your inbox. Plus, get great new recipes from me every week!
By submitting this form, you consent to receive emails from Sugar, Spice and Glitter.
DIY Fairy Treehouse Pendant Light
Ingredients
- 2 wire hanging garden baskets
- Fairy twinkle lights
- Black zip ties
- Energizer® Ultimate Lithium™ batteries (AA/AAA as indicated on the twinkle lights)
- Twine, optional for hanging
- Pliers
Instructions
- Remove any chains or tags from the hanging garden baskets, using scissors or pliers as needed.
- Place the openings of the baskets together and secure using the zip ties to form an orb.
- Trim the excess off the zip ties.
- Secure the battery pack for the fairy lights on the top of your orb - again, using zip ties.
- Thread the fairy lights throughout the orb, as desired.
- Determine if you will use the provided chain to hang up the basket or twine. I used the provided chain and used my pliers to connect the chains to form one long chain, by opening and connecting the ending chains.
- Place the proper batteries in the battery pack.
- Hang your pendant light.
We purchased our Energizer® Ultimate Lithium™ batteries at Kroger:
Alright – and now onto the fairy treehouse reveal:
<>
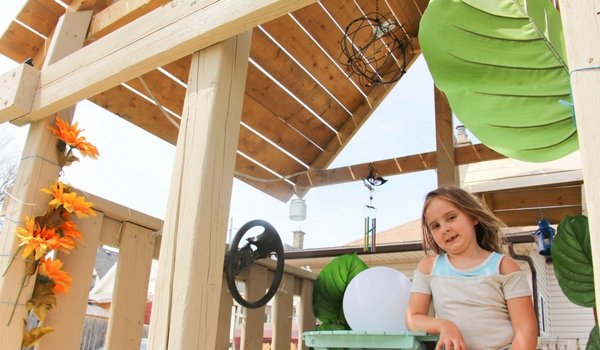
I hope our DIY Fairy Treehouse and DIY Pendant Light inspires you to add a bit of magic to your outdoor spaces this summer!
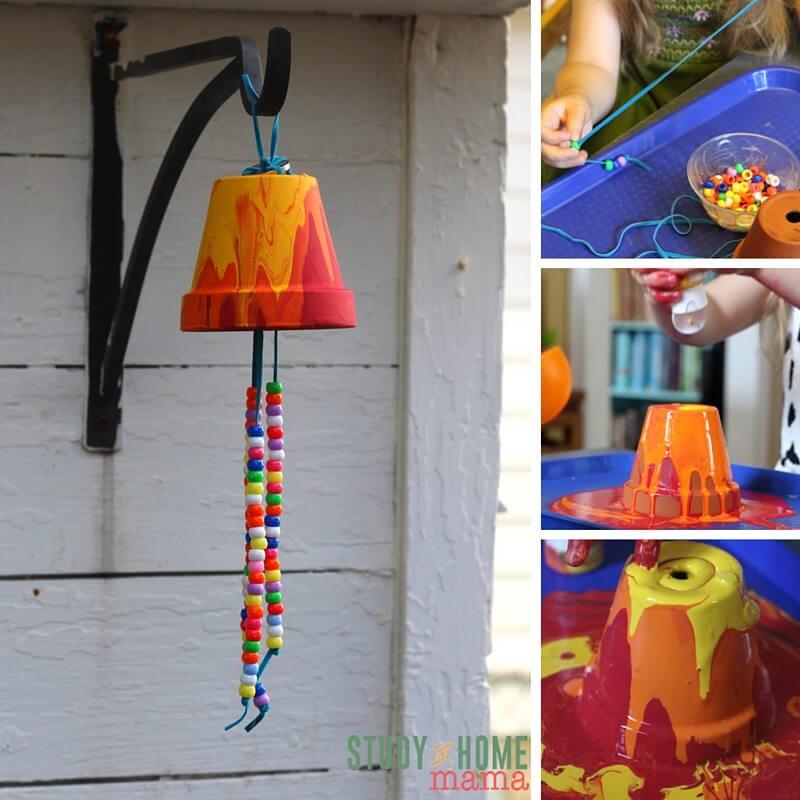
For more fun garden DIYs, check out our Kid-Made Garden Windchimes or our Superfun Sandbox Play Ideas for Kids.


Ball88 mình thấy dạo này được nhắc nhiều nên cũng tò mò bấm vào xem thử giao diện thế nào. Không phải kiểu vào để chơi hay soi khuyến mãi gì đâu, mình chỉ xem cách họ sắp xếp nội dung cho dễ hiểu. Ấn tượng đầu là trang nhìn khá “gọn”, các mục được chia theo nhóm rõ ràng nên lướt một vòng là biết mình đang ở đâu, không bị rối. Mình thích kiểu họ gom nhiều lựa chọn trong cùng một hệ thống, chuyển qua lại giữa các khu cũng nhanh, không cần bấm quá nhiều bước. Có mấy đoạn giới thiệu tổng quan đặt ngay trên trang nên người mới đọc cũng nắm được ý chính khá lẹ. Nói chung cảm giác dùng như một site làm cho người Việt quen tay, và phần menu điều hướng hiển thị rõ ràng theo từng cụm mục trên cùng một giao diện.
https://rr88ca.com/ mình thấy được nhắc mấy lần nên tò mò bấm vào xem thử giao diện thế nào. Ấn tượng đầu là trang chủ nhìn khá gọn, chữ nghĩa rõ ràng, không bị nhồi quá nhiều thứ một lúc nên lướt nhẹ cũng nắm được ý chính. Mình chỉ đọc phần giới thiệu với mấy đoạn nói về lịch sử hoạt động, thấy họ có nhắc mốc tham gia thị trường từ 2018 và đặt trụ sở ở Philippines, kiểu thông tin này để ngay trên trang nên đỡ phải mò. Mấy khối nội dung trên trang được chia theo từng cụm, cuộn xuống là thấy các tiêu đề nổi bật hiện ra theo dạng block khá dễ nhìn, nhất là phần heading “Trang Chủ Chính Thức 2026” đặt ngay đầu trang nên nhận diện nhanh.
rr88 mình mới ghé thử vì thấy bạn bè nhắc hoài, chủ yếu tò mò giao diện thôi chứ chưa chơi gì sâu. Ấn tượng đầu là trang nhìn khá “sạch”, chữ dễ đọc, mấy khối nội dung xếp gọn nên lướt một vòng là nắm được mình đang ở đâu. Mình để ý phần giới thiệu thông tin nguồn gốc pháp lý họ để khá rõ ràng trên web, kiểu ai muốn tìm hiểu trước thì có chỗ xem luôn, không phải mò. Thao tác chuyển mục cũng mượt, không bị giật hay rối như vài trang mình từng vào thử. Nói chung cảm giác họ chăm chút trải nghiệm người dùng hơn mình tưởng, nhất là cách họ chia nội dung theo từng khối và đặt menu điều hướng khá dễ thấy ngay trên giao diện.
rr88k1.com mình thấy dạo này nhiều người nhắc nên cũng tò mò bấm vào xem thử giao diện thế nào. Mình không có ngồi soi từng mục hay chơi gì cả, chỉ lướt qua để xem họ sắp xếp trang ra sao thôi. Ấn tượng đầu là bố cục khá thoáng, các phần nội dung được chia theo khối nhìn phát hiểu ngay chỗ nào là chỗ nào, không bị nhồi chữ quá nhiều. Mình cũng thích kiểu bảng thông tin trình bày theo cột gọn gàng, kéo xuống vẫn dễ theo dõi chứ không rối mắt. Menu để chỗ dễ thấy nên chuyển qua lại vài mục cũng nhanh, không phải bấm vòng vòng. Nói chung lướt vài phút là nắm được cách họ bố trí vì các khối nội dung và thanh menu nhìn khá rõ ràng.
ball88.space mình mới ghé thử vì thấy vài người bàn tán, chủ yếu tò mò giao diện họ làm kiểu gì thôi. Vào trang thấy họ ưu tiên phần “sảnh” nhìn khá thoáng, ít chi tiết thừa nên bấm qua lại không bị ngợp. Mình cũng để ý là bài viết trên đó nói khá rõ chuyện link vào mới và có nhắc tới cách dùng VPN 1.1.1.1 để truy cập ổn định, đọc lướt cũng hiểu ngay chứ không vòng vo. Nói chung cảm giác như họ tập trung vào phần hiển thị nội dung chính hơn là trang trí màu mè, nên nhìn nhanh vẫn nắm được mình đang ở mục nào. Menu đặt dễ thấy và các khối nội dung xếp gọn, kéo xuống là thấy tiêu đề và thông tin chia theo block rõ ràng.
https://hd88.app/ mình mới ghé thử vì thấy vài người nhắc, chủ yếu tò mò giao diện thôi chứ không có xem kỹ nội dung. Vừa vào là thấy bố cục khá dễ chịu, kiểu chia thành từng khối rõ ràng nên lướt một vòng là nắm được trang đang sắp xếp gì ở đâu. Mình thích nhất là phần menu đặt khá dễ nhìn, bấm qua lại giữa các mục không bị vòng vèo, cảm giác điều hướng nhanh. Mấy khu thông tin hiển thị dạng danh sách/cột nhìn gọn, không bị nhồi chữ nên đỡ mỏi mắt khi xem trên điện thoại. Nói chung trải nghiệm lướt sơ ổn, vì các khối nội dung và thanh menu được nhóm lại khá rõ ràng ngay trên giao diện.
new88 mình mới ghé thử vì thấy vài người nhắc, chủ yếu tò mò giao diện họ làm thế nào thôi. Vào trang cái là thấy bố cục khá “dễ thở”, kiểu chia nội dung thành từng khối rõ ràng nên lướt nhanh vẫn nắm được mình đang ở đâu. Mình thích nhất là phần menu đặt chỗ dễ nhìn, bấm qua lại giữa các mục không bị vòng vèo hay phải tìm hoài. Thông tin hiển thị theo dạng cột gọn gàng, nhìn một lượt là hiểu, không bị nhồi chữ hay rối mắt như nhiều chỗ khác. Nói chung cảm giác dùng thử vài phút khá ổn, nhất là cách họ sắp xếp các khung nội dung và thanh điều hướng ngay trên giao diện.
https://luck821.com/ dạo này mình thấy bạn bè nhắc nhẹ nên tò mò bấm vào xem thử giao diện thế nào. Mình không có soi kỹ nội dung hay chơi gì cả, chỉ lướt qua cho biết cách họ sắp xếp trang thôi. Ấn tượng đầu là bố cục nhìn khá thoáng, các mục được gom theo từng khối nên kéo xuống không bị “ngợp” chữ. Mình thích kiểu thông tin hiển thị dạng bảng/cột gọn gàng, nhìn cái là nắm được ngay chứ không phải đọc lan man. Thanh menu cũng đặt chỗ dễ thấy nên chuyển qua lại giữa các phần khá nhanh, không phải bấm nhiều bước. Nói chung lướt vài phút là hiểu họ tổ chức trang kiểu gì, nhất là cách họ chia khối nội dung và trình bày bảng cột khá rõ ràng.
xoilac dạo này mình thấy bạn bè nhắc nên cũng tò mò bấm vào xem thử thôi. Mình không có ngồi soi nội dung hay gì kỹ, chủ yếu nhìn cách họ làm giao diện cho dễ dùng hay không. Ấn tượng đầu là bố cục khá thoáng, các mục được gom theo nhóm nhìn phát hiểu ngay, không bị nhồi chữ nên lướt nhanh vẫn nắm được mình đang ở đâu. Cái mình thích nữa là menu để chỗ dễ thấy, chuyển qua lại giữa các phần khá mượt, kiểu không phải bấm đi bấm lại nhiều lần. Mấy khung thông tin hiển thị dạng cột gọn gàng nên nhìn không rối mắt, nhất là khi kéo xuống vẫn thấy các block nội dung tách bạch rõ ràng.
cakhiaTV mình thấy nhiều người nhắc nên cũng tò mò bấm vào xem thử giao diện thế nào. Mình không có thời gian ngồi mò sâu nội dung, chủ yếu lướt qua cách họ sắp xếp trang cho dễ nhìn thôi. Ấn tượng đầu là bố cục khá thoáng, các mục được chia theo từng khối rõ ràng nên kéo xuống không bị “ngợp” chữ. Mình thích kiểu thông tin hiển thị dạng cột gọn gàng, nhìn một cái là nắm được chỗ nào đang ở đâu, không phải đoán. Menu cũng đặt chỗ dễ thấy nên chuyển qua lại giữa các phần khá nhanh, nhất là khi dùng trên điện thoại. Nói chung ai chỉ cần vào xem nhanh thì cũng không mất công làm quen, vì các khối nội dung và thanh menu được bố trí khá rõ ràng trên trang.
xem bóng đá trực tiếp mình thấy dạo này nhiều người rỉ tai nên cũng tò mò bấm vào thử cho biết. Mình không kiểu ngồi soi từng trận hay gì đâu, chủ yếu xem trang họ làm có dễ dùng không thôi. Ấn tượng đầu là giao diện khá gọn, nhìn phát biết chỗ nào là lịch khung phát, chỗ nào là thông tin trận đấu, không bị nhồi chữ quá mức. Mình cũng để ý chất lượng hiển thị ổn, kiểu hướng tới xem Full HD nên nhìn đỡ mỏi mắt hơn mấy trang lộn xộn. Cái mình thích là phần thông tin thể thao cập nhật liên tục, lướt xuống là thấy các khối nội dung xếp rõ ràng và menu điều hướng đặt khá dễ thấy trên trang.
90phut dạo này mình thấy vài người nhắc nên tò mò bấm vào thử xem giao diện thế nào thôi. Ấn tượng đầu là trang load khá nhanh, nhìn tổng thể gọn gàng chứ không bị rối. Mình chỉ lướt sơ phần bóng đá, thấy họ để lịch Thông tin trận khá dễ nhìn, kiểu cập nhật liên tục nên khỏi phải mò nhiều. Chất lượng xem cũng ổn, có cảm giác ưu tiên hiển thị rõ ràng hơn là nhồi nhét chữ. Mình không ngồi xem lâu hay soi kỹ từng mục, nhưng cách họ chia khối nội dung và đặt menu điều hướng khá “thân thiện”, bấm qua lại không bị lạc. Nói chung ai chỉ cần vào coi nhanh thì hợp, vì phần thông tin thể thao được trình bày dạng khối rõ ràng và giao diện tối ưu nhìn khá nhẹ mắt.
socolive mình thấy vài người nhắc nên tò mò bấm vào xem thử giao diện thế nào thôi. Mình không có soi kỹ nội dung hay mấy trò bên trong, chủ yếu nhìn cách họ sắp xếp trang cho dễ dùng không. Ấn tượng đầu là bố cục chia khu khá rõ, nhìn kiểu khối với danh sách nên lướt một vòng là biết mình đang ở mục nào. Mấy bảng thông tin họ để dạng cột gọn gàng, không bị dồn chữ quá nhiều nên đọc nhanh cũng ổn. Menu thì đặt chỗ dễ thấy, bấm chuyển qua lại không phải tìm vòng vèo, cảm giác dùng kiểu “vào là hiểu” luôn. Nói chung mình thích nhất là cách họ trình bày các khối nội dung và menu điều hướng nhìn khá sạch, dễ theo dõi.
lương sơn tv dạo này mình thấy vài người nhắc nên tò mò bấm vào xem thử thôi. Mình không kiểu ngồi soi từng trận hay gì, chủ yếu xem trang họ sắp xếp thế nào cho dễ dùng. Ấn tượng đầu là giao diện nhìn khá thoáng, mấy mục chính để rõ ràng nên kéo xuống không bị rối mắt. Có cái mình thích là phần thông tin thể thao cập nhật liên tục, nhìn lướt qua là biết đang có gì mới mà không phải bấm quá nhiều. Mình dùng trên điện thoại cũng ổn, chuyển qua lại giữa các khu không bị lạc. Nói chung cảm giác họ làm bố cục gọn gàng, chữ nghĩa dễ đọc, và các khối nội dung thể thao được đặt ngay ngắn trên trang.