
Copycat Disneyland Turkey Legs (No Smoker Needed) – with Video
Welcome to Sugar, Spice & Glitter! Please note, this post may contain affiliate links. For more details, see our Full Disclosure.

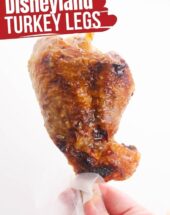


If you’re missing wandering around the park with a colossal turkey leg, we can help you out with at least half of that problem: today, we’re sharing our copycat recipe for Disney Turkey Legs! This oven roasted method doesn’t require a smoker like most other copycat recipes out there, for an easier, quicker and more accessible park-inspired treat.

Disney Turkey Legs Recipe
Whether you’re planning a Disney Day at home, complete with ride simulations, dole whips and Mickey Ears, or just craving a giant turkey leg, this Disneyland turkey leg recipe has got you covered!
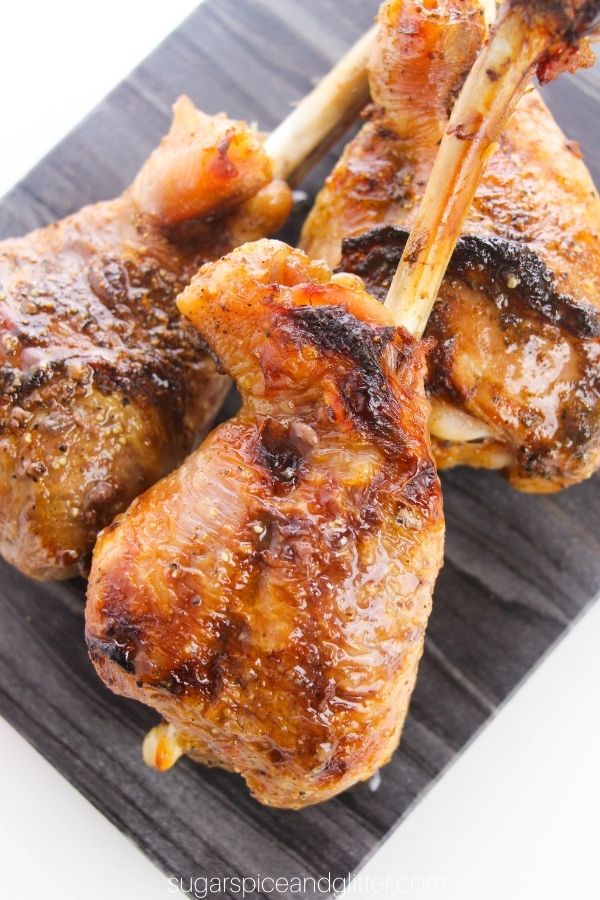
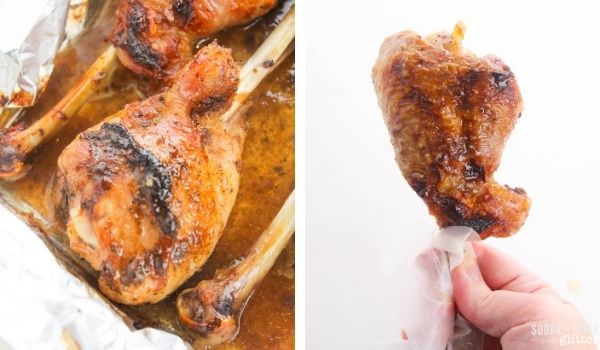
Smoky, juicy, flavorful turkey legs with golden, crispy skin and dark meat. Not to mention that convenient little “handle” created by the turkey leg bone.
While we have a smoker and it would have been more authentic to use it to recreate this classic recipe, I’m personally not a fan of babysitting it to ensure it stays at the right temperature and we tend to have our “Disney Days” on rainy or snowy days, so I wanted an oven baked method that still gave amazing flavor while allowing me to focus on having fun with my daughter. However, you can definitely still use our base recipe and then smoke or BBQ the turkey legs afterwards.
Now, I’ll be honest that I’ve only splurged for a Disney Turkey Leg once and while the flavor was good, it was too salty for me. This recipe takes the other flavors of a Disney Turkey Leg and takes them up a notch, while dialing down the salt. If you would prefer a saltier recipe, increase the salt called for in the recipe to your personal preferences.
A note about liquid smoke: liquid smoke can be a delicious, hickory-infused flavor enhancer to this recipe and I personally think a few drops in this recipe is a great idea, however, if you don’t already have a good-quality liquid smoke at home and don’t want to splurge on one, this recipe will still turn out delicious. I’ve made it an optional ingredient for this reason.
How long should I brine Disney turkey legs for? These turkey legs should brine for at least 2 hours, but they can also be left in the brine for up to three days. Aim to brine the turkey overnight or as close to 24 hours as you can, if possible. This will give the brine enough time to impart flavor and also dissolves some of the muscle proteins, which yields a juicier turkey.
What if my turkey legs are already brined? Many brands of turkey legs will come already brined, so you have options. You can rinse off the brine and continue with this recipe, as written, or you can prepare the brine as a seasoning blend (omit the water and reduce all spices by at least 1/2) and just season the turkey legs and get right to roasting.
Can I dry brine this recipe? Absolutely. Dry brining is when the seasoning is applied as a dry rub, instead of being dissolved in water. This will result in a more seasoned skin. You can read more about dry brining turkey here.
Check out our quick recipe video to see how to make these Copycat Disneyland Turkey Legs for yourself – and then don’t forget to scroll down to grab your free printable recipe card:

Disney Turkey Legs Ingredients
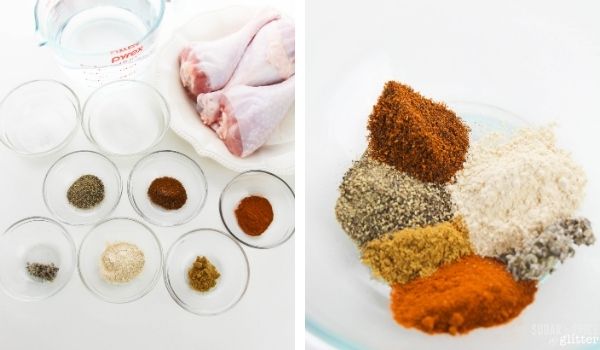
For the Turkey Leg Brine:
- Water
- Kosher Salt <– kosher salt penetrates the meat proteins better than table salt
- White Sugar
- Garlic Powder
- Chili Powder
- Paprika
- Black Pepper
- Sage
- Cumin
For Baking the Turkey:
- Turkey Legs
- Olive oil, optional
Scroll down to the printable recipe card for full measurements.
Tip: if you have a good brand of liquid smoke that you like, add a few drops to the turkey brine.
Kitchen Tools You May Find Helpful
- Large bowl or container for brining
- Measuring cups and spoons
- Casserole or roasting dish
- Tinfoil
- This is the meat thermometer I have been using for the past 6 years – I’ve never had to change a battery and it’s super sturdy and reliable. It was a bit pricey, but unlike the $15 models that you can buy, this one isn’t going to need replacement. It is waterproof and comes with a two-year warranty. (Thermoworks also has a $15 pocket-sized model if you want to try that out first before investing in the MK4.)
How to Make Disney Turkey Legs
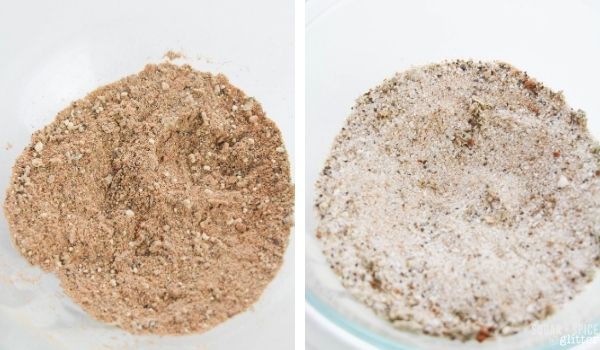
Combine the seasoning ingredients for the turkey leg brine. Adjust to your own personal preferences, if desired.
If dry brining your turkey legs, you can rub this mixture directly on the legs now.
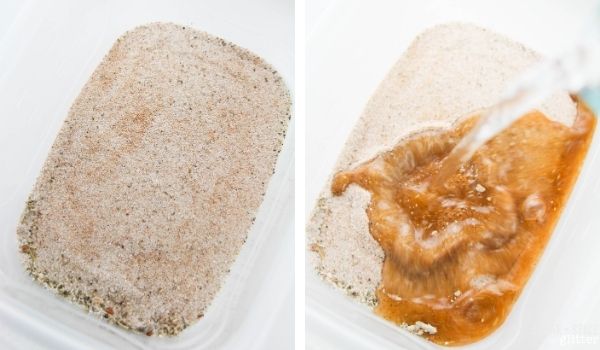
If wet brining your turkey legs, place the mixture in a large bowl or a container with a lid and add the 4 cups of water.
Stir to dissolve the seasoning in the water before adding the turkey legs to the turkey leg brine.
Cover and refrigerate overnight, or for at least 2 hours.
30 minutes before you are ready to cook your turkey legs, you can remove them from the brine. You can rinse off the brine or leave it on, then place the turkey legs on a clean plate and place, uncovered, back in the fridge. This allows the skin to dry.

Preheat your oven to 325ºF
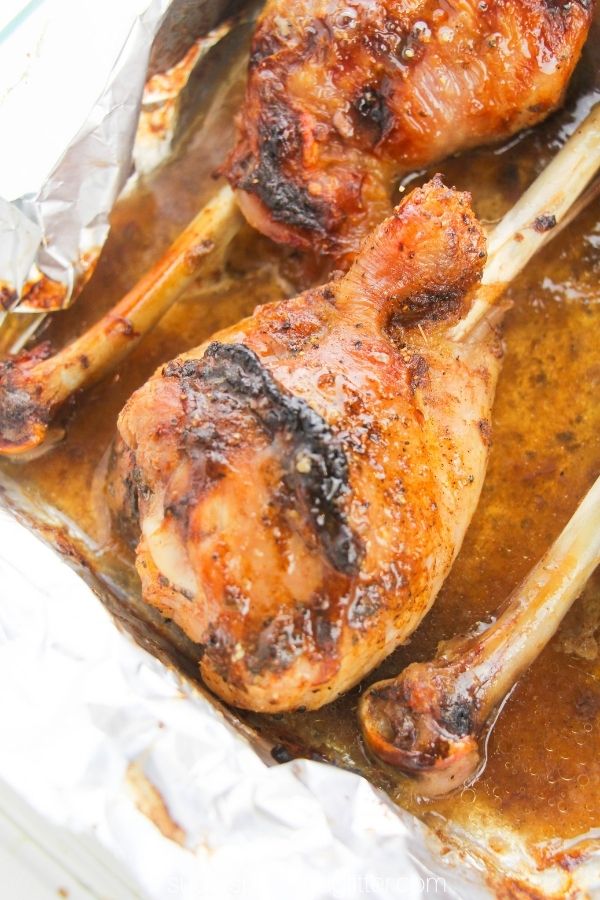
Line a roasting pan or casserole dish with tinfoil and place the turkey legs in the dish. If desired, you can rub the turkey legs with some olive oil at this time, to assist with getting a crispy, golden skin.
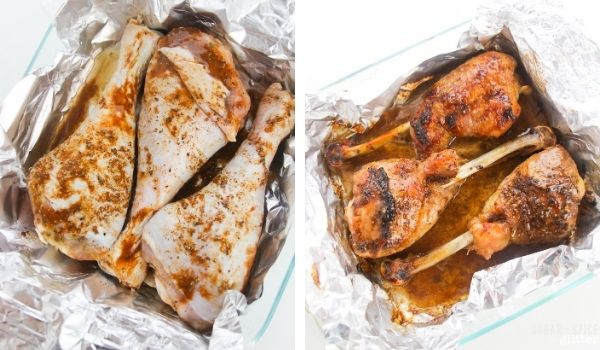
Cook the turkey legs for 20 to 25 minutes per pound, approximately 45 minutes for 4 turkey legs. When an inserted meat thermometer reads at least 155ºF, increase the oven temperature to 400ºF (or set to broil) for the last few minutes of baking, until the turkey legs read 165ºF. This will help crisp up the skin.
Allow the turkey legs to rest for about 5 minutes after removing from the oven.
Pin this Disney Turkey Legs Recipe to Satisfy your Park Cravings:

Grab your free printable for our Disneyland Turkey Legs recipe:
Want to Save This Recipe?
Enter your email & I'll send it to your inbox. Plus, get great new recipes from me every week!
By submitting this form, you consent to receive emails from Sugar, Spice and Glitter.
Disney Turkey Legs (Oven Roasted Version)
A delicious, juicy, smoky roasted turkey legs recipe inspired by the famous Disneyland Turkey Legs. These easy oven roasted turkey legs are the perfect addition to your Disney Day at home.
Ingredients
For the Turkey Leg Brine:
- 4 cups water
- 2 Tablespoons kosher salt
- 1/4 cup white sugar
- 2 teaspoons garlic powder
- 1 teaspoon chili powder
- 1 teaspoon paprika
- 1 teaspoon black pepper
- 1/2 teaspoon sage
- 1/2 teaspoon cumin
For Baking the Turkey:
- 3-4 Turkey Legs
- Olive oil, optional
Instructions
- Combine the seasoning ingredients for the turkey leg brine. Adjust to your own personal preferences, if desired.
- If dry brining your turkey legs, you can rub this mixture directly on the legs now.
- If wet brining your turkey legs, place the mixture in a large bowl or a container with a lid and add the 4 cups of water.
- Stir to dissolve the seasoning in the water before adding the turkey legs to the turkey leg brine.
- Cover and refrigerate overnight, or for at least 2 hours.
- 30 minutes before you are ready to cook your turkey legs, you can remove them from the brine. You can rinse off the brine or leave it on, then place the turkey legs on a clean plate and place, uncovered, back in the fridge. This allows the skin to dry.
- Preheat your oven to 325ºF
- Line a roasting pan or casserole dish with tinfoil and place the turkey legs in the dish. If desired, you can rub the turkey legs with some olive oil at this time, to assist with getting a crispy, golden skin.
- Cook the turkey legs for 20 to 25 minutes per pound, approximately 45 minutes for 4 turkey legs. When an inserted meat thermometer reads at least 155ºF, increase the oven temperature to 400ºF (or set to broil) for the last few minutes of baking, until the turkey legs read 165ºF. This will help crisp up the skin.
- Allow the turkey legs to rest for about 5 minutes after removing from the oven.
Notes
If you have a good quality liquid smoke, add a few drops to the brine.
Recommended Products
As an Amazon Associate and member of other affiliate programs, I earn from qualifying purchases.


Nutrition Information:
Yield:
4Serving Size:
1Amount Per Serving: Calories: 631Total Fat: 29gSaturated Fat: 7gTrans Fat: 0gUnsaturated Fat: 20gCholesterol: 330mgSodium: 3511mgCarbohydrates: 15gFiber: 1gSugar: 13gProtein: 78g
Sugar, Spice and Glitter uses an auto-generate nutrition calculator. Nutrition information isn’t always accurate unless analyzed in a scientific lab, so these should be considered more of a guideline than medical information.

I hope you love this Disneyland Turkey Legs recipe as much as my family did! It was the perfect addition to our Disney Day at home – and we didn’t have to worry about turkey grease on our park outfits!
For more Disney-inspired treats, check out our full Disney recipe collection here:

For more ways to enjoy turkey, check out our full turkey recipe collection here:


Howdy! I’ve never had a Disney Land turkey leg, but the ingredients caught my interest. I’ve used this overnight brine twice on turkey legs, once on turkey thighs, and once on chicken thighs. All were excellent. The best turkey I’ve ever had! The chicken was just as good. I highly recommend brining overnight. I’m not big on smoked turkey. I added liquid smoke. This is now my go to poultry brine.
Aw, Thank you so much for giving this recipe a try and coming back to let me know how much you enjoyed it! I’m so glad to hear it!
Did you do a dry rub or a wet brine? Want to gove it a try too
Delicious, Moist, Tender and Finger Licking Good!
Only had 3 turkey drumsticks, followed recipe but used smoked paprika instead of liquid smoke.
Brined overnight, rinsed then dry rub with brine seasoning, refrigerated till ready for cooking in air fryer and couldn’t believe they were done in 45 minutes!
Re-used brine same day for chicken wings with greater success!
Wasn’t much of a turkey fan however I will make this again for Thanksgiving!
Hi Travis,
Thank so much for your comments and tips – I’m going to have to try it in the airfryer and also using chicken wings!
I’m so glad you enjoyed the recipe. I used to also think I wasn’t a fan of turkey, but I think I just always had overcooked, dry and flavorless turkey in the past LOL
I want to do this recipe with a wet brine but I’m doing it with 22 legs for a group of people. How do I adjust my brine
Hi Darren,
If you have room in your fridge/container, you can just multiply all ingredients by 5; however, if that is going to be too much water, you can probably get away with just multiplying the dry ingredients by 4 and then ensuring that the turkey legs are completely submerged by water, even if it’s less than 16 cups water.