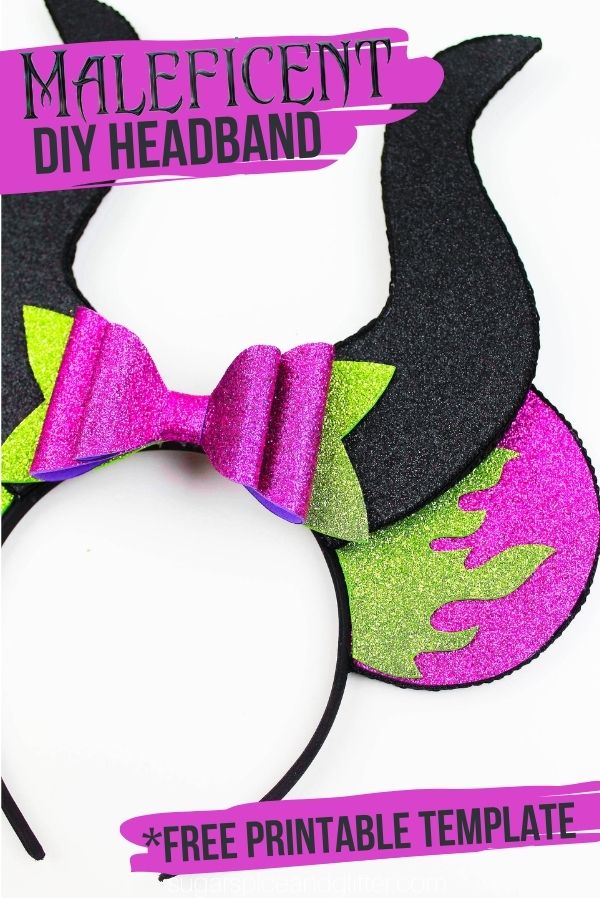
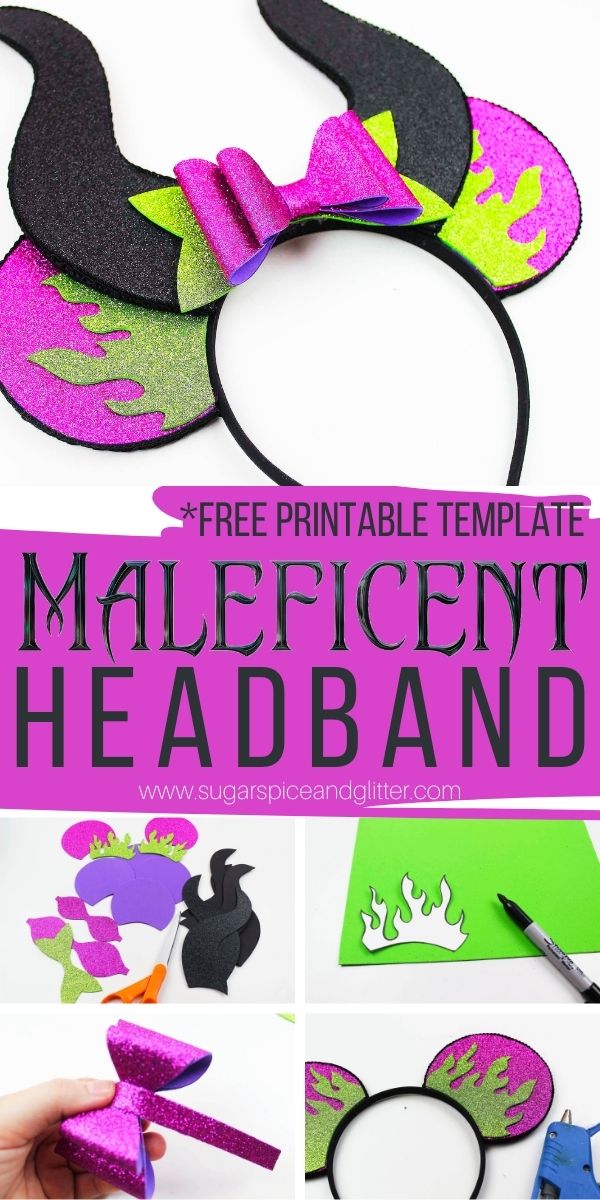
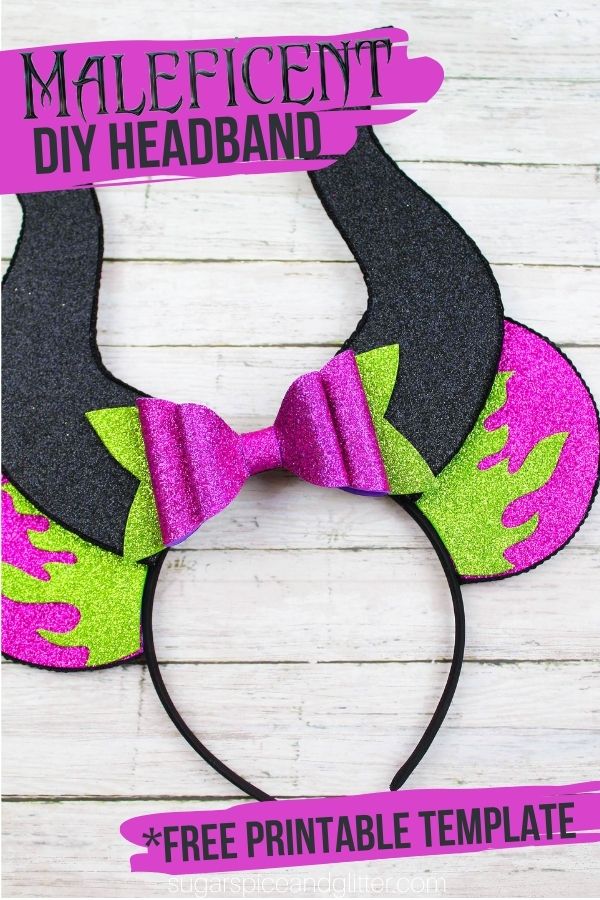
DIY Maleficent Mickey Ears Headband
Welcome to Sugar, Spice & Glitter! Please note, this post may contain affiliate links. For more details, see our Full Disclosure.
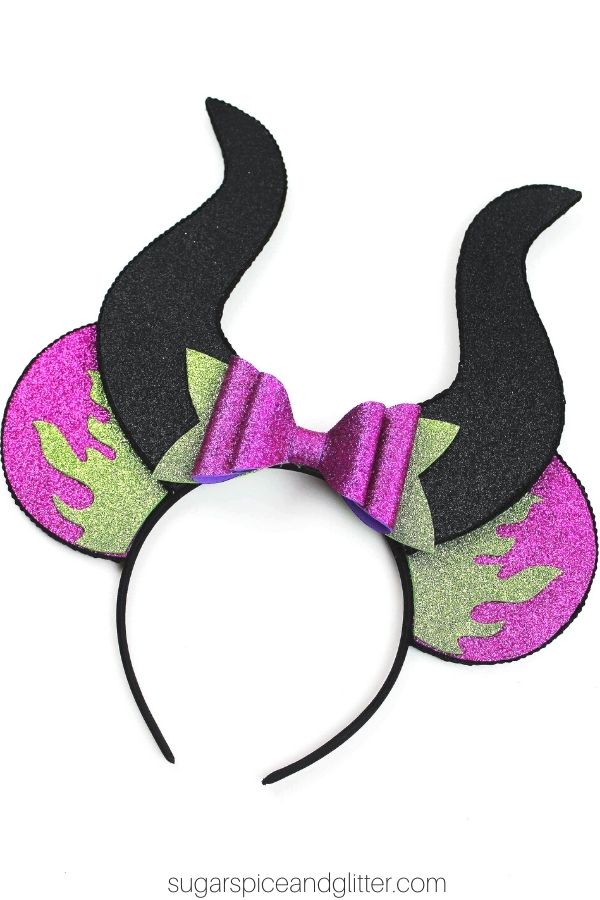
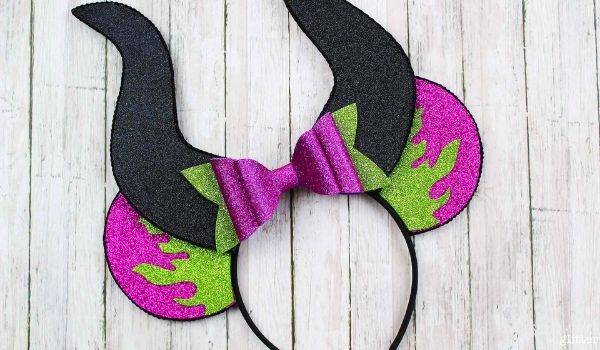
A fun DIY Mickey Ears Headband inspired by the Mistress of Evil herself, this DIY Maleficent Headband is the perfect Disney accessory for Halloween!
Mickey Ears Maleficent Headband Craft
Whether you are celebrating Halloween at home or heading to the parks for Mickey’s Not So Scary Halloween Party, these DIY Maleficent Mickey Ears are a fun way to take a plain black outfit and transform it into a Maleficent costume.
I always have to make or buy a new set of Mickey Ears every time we head to the parks. It’s one of our favorite Disney World traditions and then the new set of ears gets added to our Mickey Ears wall when we get home. Each one represents a different Disney World trip and is a fun reminder of all of the adventures we got up to.
Maleficent was always my favorite Disney Villain. She had way more personality than that Princess Aurora and definitely knew how to make an entrance!
For this Halloween, I bought a cute Maleficent-inspired dress from Hot Topic and am planning on pairing it with this sparkly Maleficent Horns Headband.
Of course, you can make this headband with plain craft foam instead of the glittery craft foam that I used if you don’t want to end your night with glitter in your hair…
You can also skip the Mickey Ears and bow if you’d like this to be a straight-up Maleficent Horns Headband.
If you’re not heading to the parks anytime soon, this would also make a cute craft for a Maleficent Movie Night or just a cute piece of wall decor.
More Mickey Ears Headbands:
- Moana Tefiti Mickey Ears Headband
- UP Mickey Ears Headband
- Aristocats Marie Mickey Ears Headband
- Poison Apple Mickey Ears Headband

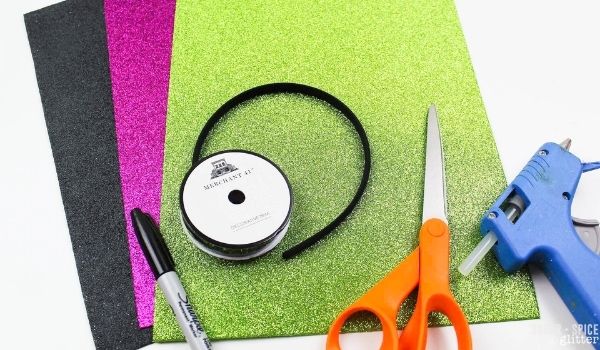
Materials for a Maleficent Headband Craft
- Printable Maleficent Mickey Ears Template
- Black, Purple and Green glitter foam sheets
- Scissors
- Hot Glue
- Marker or Pen
- Black Sewing Trim or Ribbon
- Black Headband
Tip: if you plan to wear your Maleficent Headband, make sure to try on your headband first to ensure that it fits and is comfortable before spending the time personalizing it. Headband headaches are the worst!
How to Make a Maleficent Mickey Ears Headband
First, gather all of your materials and print off the free printable Maleficent Mickey Ears template.
Cut out each piece of the printable template.
Trace half circle shapes and bow parts onto the back of the purple glitter foam sheet. You will need 6 of the half circles – 3 for each ear.
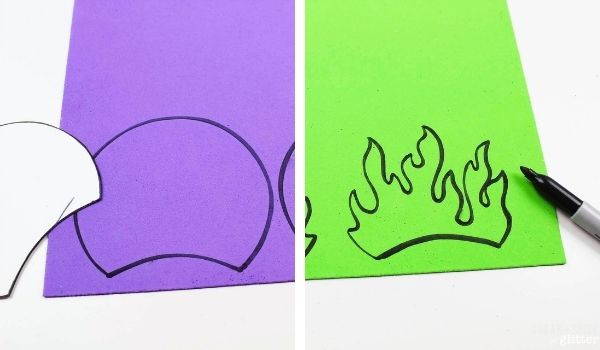
Trace the flame shape and the base of the bow onto the back of the green glitter foam. You will need two of the flame shapes.
Trace the horn shape onto the back of the black glitter foam. You will need 6 of them – 3 for each horn. Make sure that you do 3 each that are right-oriented and 3 that are left-oriented.
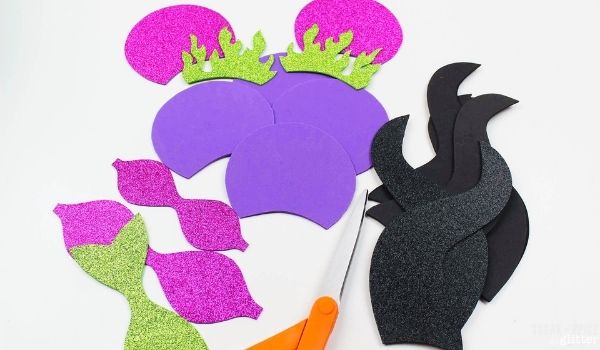
Cut out all of the shapes.
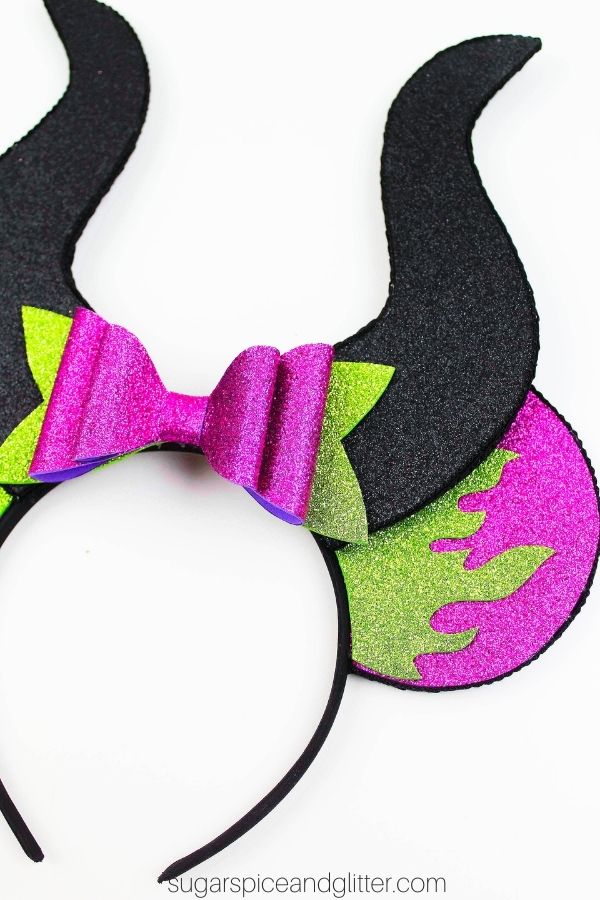
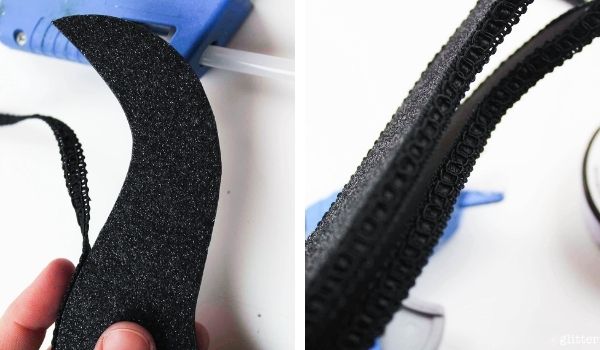
Glue three of the horn shapes together in a stack, with the glitter sides facing out. Repeat to make the second horn.
Use the black sewing trim or ribbon to cover the edges of the horns, as shown.
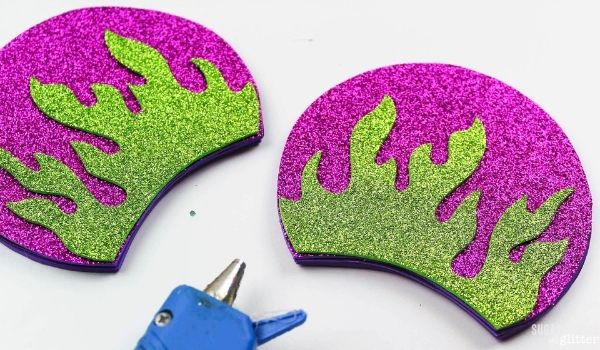
Do this same step with the purple half circles – glue three of the half circles in a stack, with glitter sides facing out. Repeat to form the second ear.
Glue the green flames onto the fronts of the purple ears, with the bottom edges of each shape matching up, as shown.
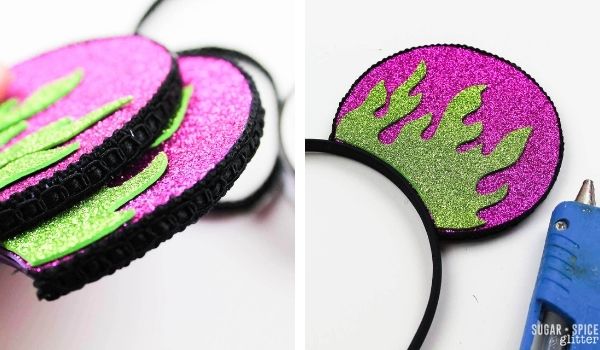
Use the black sewing trim or ribbon to cover the outer edges of the ears, leaving the bottom part that will be attached to the headbands bare.
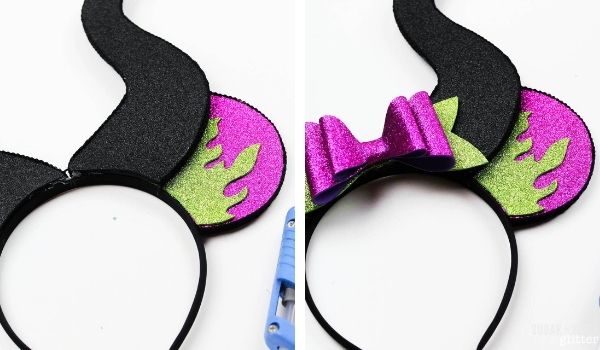
Try on your headband and use a mirror to help determine where you want to glue the ears onto the headband. Glue the ears on and set aside.
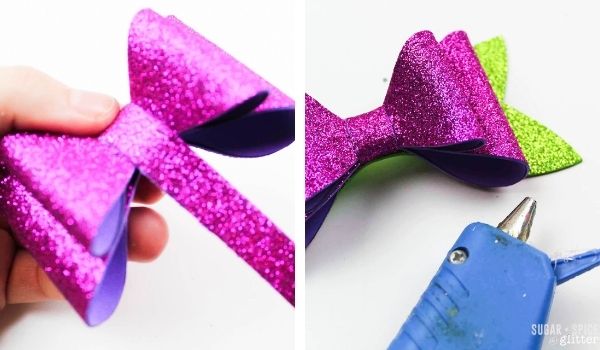
Start assembling the glitter bow.
For the purple glitter pieces, fold the edges of the bow towards the center of the shapeand glue in place to form a bone-like shape. Repeat with both pieces.

Glue both purple glitter bows together in a stack, then glue onto the green base shape.
Wrap a small piece of the purple glitter foam around the center of the bows and glue in place.
Glue the horns onto the headband. I liked this positioning best – with the horns touching in the center and covering up just a bit of the Mickey ears.
Once the horns are securely attached, glue the bow in the middle.
Let the glue harden and set completely before wearing.
Pin this Easy Maleficent Mickey Ears Headband craft:
Grab your free printable instructions below and don’t forget your Printable Maleficent Mickey Ears Template:
Want to Save This Recipe?
Enter your email & I'll send it to your inbox. Plus, get great new recipes from me every week!
By submitting this form, you consent to receive emails from Sugar, Spice and Glitter.
DIY Maleficent Mickey Ears Headband
A quick and easy Maleficent Headband with horns and Mickey Ears - perfect for wearing at DisneyWorld or for a Maleficent movie night.
Materials
- Printable Maleficent Mickey Ears Template
- Black, Purple and Green glitter foam sheets
- Marker or Pen
- Black Sewing Trim or Ribbon
- Black Headband
Tools
- Scissors
- Hot Glue
Instructions
- First, gather all of your materials and print off the free printable Maleficent Mickey Ears template.
- Cut out each piece of the printable template.
- Trace half circle shapes and bow parts onto the back of the purple glitter foam sheet. You will need 6 of the half circles - 3 for each ear.
- Trace the flame shape and the base of the bow onto the back of the green glitter foam. You will need two of the flame shapes.
- Trace the horn shape onto the back of the black glitter foam. You will need 6 of them - 3 for each horn. Make sure that you do 3 each that are right-oriented and 3 that are left-oriented.
- Cut out all of the shapes.
- Glue three of the horn shapes together in a stack, with the glitter sides facing out. Repeat to make the second horn.
- Use the black sewing trim or ribbon to cover the edges of the horns, as shown.
- Do this same step with the purple half circles - glue three of the half circles in a stack, with glitter sides facing out. Repeat to form the second ear.
- Glue the green flames onto the fronts of the purple ears, with the bottom edges of each shape matching up, as shown.
- Use the black sewing trim or ribbon to cover the outer edges of the ears, leaving the bottom part that will be attached to the headbands bare.
- Try on your headband and use a mirror to help determine where you want to glue the ears onto the headband. Glue the ears on and set aside.
- Start assembling the glitter bow.
- For the purple glitter pieces, fold the edges of the bow towards the center of the shapeand glue in place to form a bone-like shape. Repeat with both pieces.
- Glue both purple glitter bows together in a stack, then glue onto the green base shape.
- Wrap a small piece of the purple glitter foam around the center of the bows and glue in place.
- Glue the horns onto the headband. I liked this positioning best - with the horns touching in the center and covering up just a bit of the Mickey ears.
- Once the horns are securely attached, glue the bow in the middle.
- Let the glue harden and set completely before wearing.
Recommended Products
As an Amazon Associate and member of other affiliate programs, I earn from qualifying purchases.
-
 E.Durable Mini Glue Gun Tool Kit Kids Friendly with Glue Sticks for School Projects, DIY Crafts, Delicate Items Like Foam, Thermocal, Floral, etc (30W)
 -
6 Pieces Plastic Plain Headbands Teeth Comb Headbands Skinny DIY Hair Bands Headbands for Women Girls (Rubber Black)
-
85 Sheets Bright Craft Foam Sheets Glitter Craft Foam Sheets 17 Assorted Rainbow Colors 9x6" 2mm Thick with Scissor Stencils Ruler Pencils for Kids Classroom Party Scrapbooks Artwork Projects 9" x 6"


Let me know if you end up making this Maleficent Headband craft – and what you end up using it for!
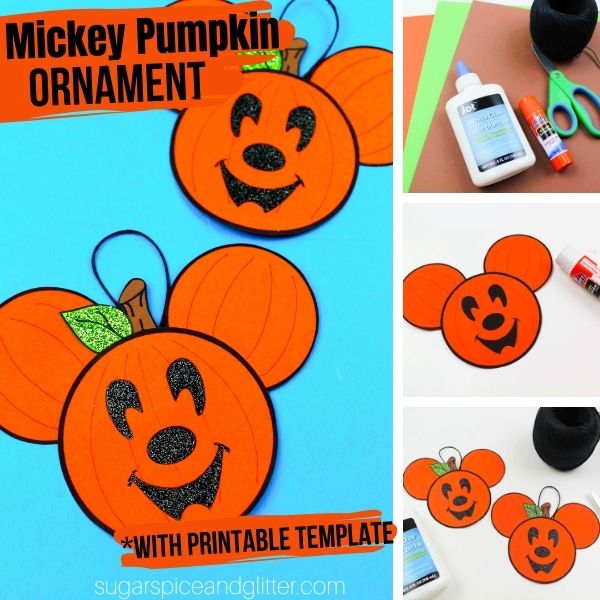
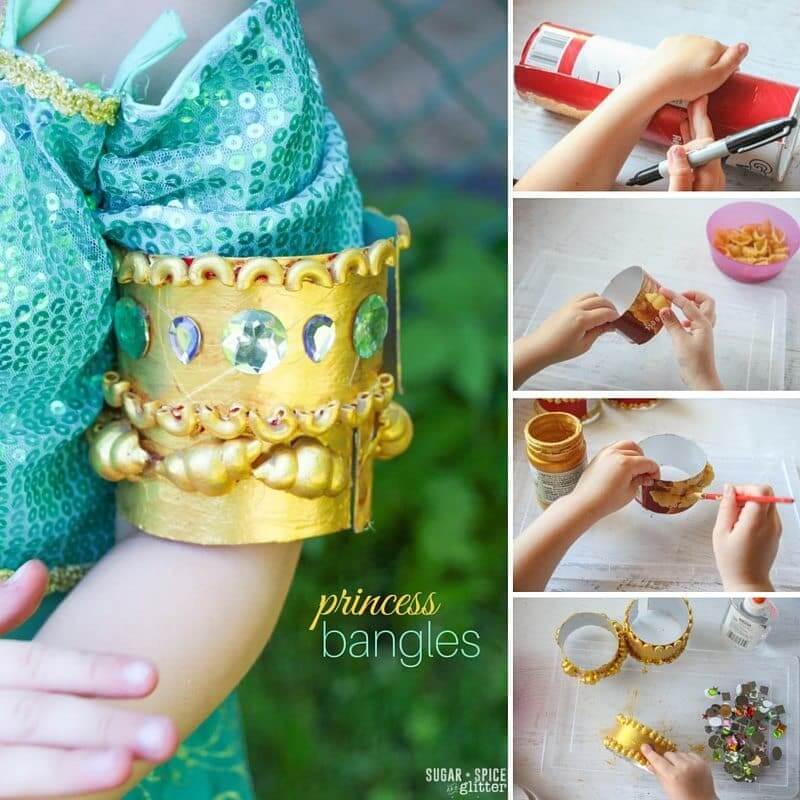
For more fun Disney-inspired crafts, check out our Mickey Pumpkin Ornaments or our Princess Jasmine Bangles Craft.