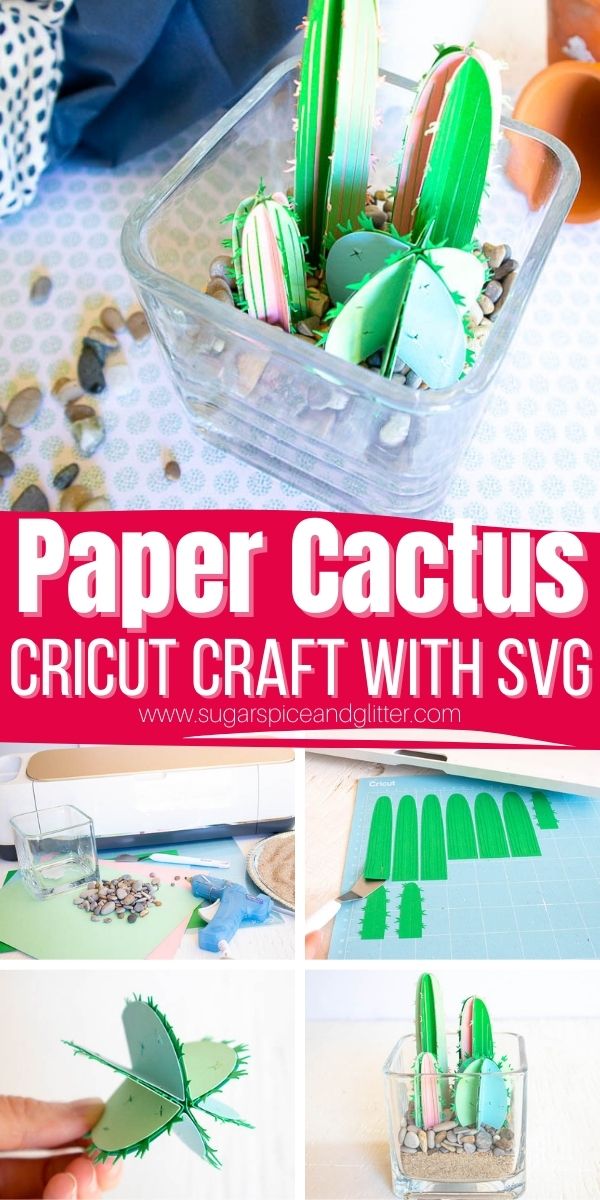
Cactus Cricut Terrarium with SVG
Welcome to Sugar, Spice & Glitter! Please note, this post may contain affiliate links. For more details, see our Full Disclosure.
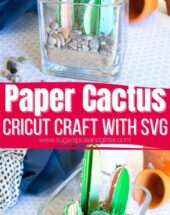

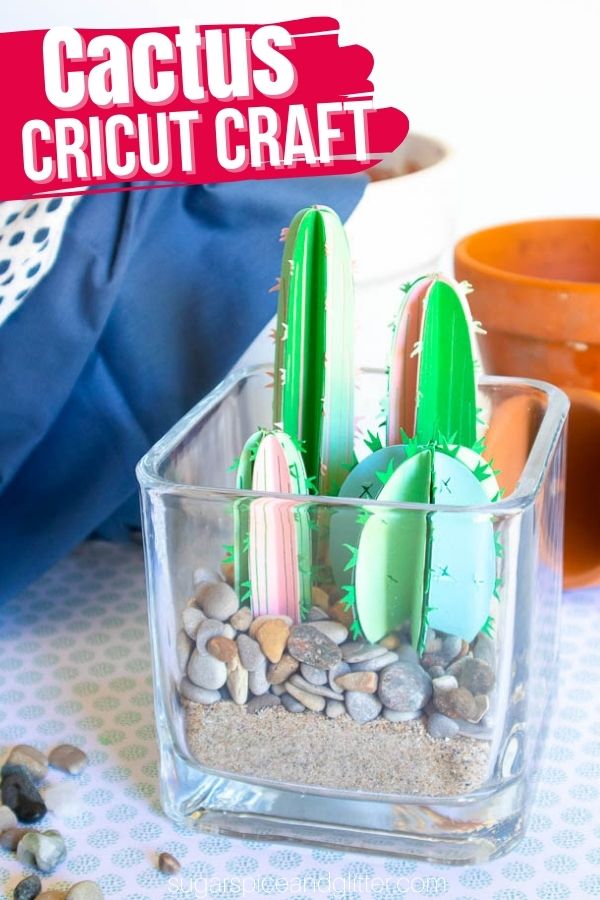
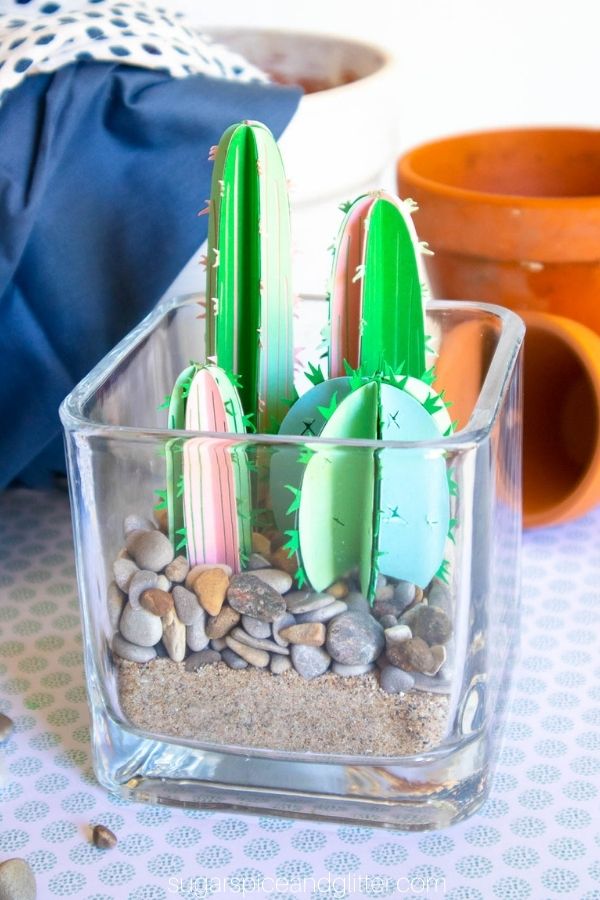
A fun DIY Cricut decor craft, this Cactus Cricut Craft creates a terrarium that even the worst plant moms can keep looking great and makes a fun addition to your office decor.
Cactus Cricut Craft from Cricut Cactus Template
I am trying to turn over a new leaf and become a responsible plant owner – one that doesn’t kill everything green that enters my home within a week. But y’all, this does not come easily to me!
I always find it so sweet when a friend gifts me a plant, but I usually end up feeling super guilty when I inevitably kill it. The most recent fatality was a beautiful orchid a friend surprised me with on my birthday… I bought it specially formulated orchid food, researched everything I could and put it in an optimal spot in the house.
It didn’t last a month.
So, this craft is the gift to give people like me. The people who love plants but are decidedly plant killers.
It’s a cute and whimsical piece of office or bedroom decor that nods to their love of plants… without the potential of plant murder. Plus it’s super easy and cheap to make. It could also be a cute table centerpiece for a themed party, and then guests can take it home afterwards as a fun goody gift. (It would also be cute for a friend who you have a special Southwestern travel memory with!)
You could also make these cricut cacti to attach to a card or add to a picture frame, especially one of these shadow box-style picture frames. I think it would also be super cute to add little cactus flowers to your design.
I didn’t glue or secure the sand or rocks in the vase so that when I get bored of this craft, I can re-use all of the materials. If desired, you can layer an epoxy over the sand and then over the rocks to secure them in place.
More Cricut Paper Decor Ideas:
- Easy Paper Flower Wreath with Cricut from Hootshack
- DIY Paper Luminaries from Domestic Heights
- Paper Feather Wall Decor from Sustain my Craft Habit
- Star Wars Paper Lantern from Designs by Miss Mandee
- Paper Star Lanterns from Jennifer Maker
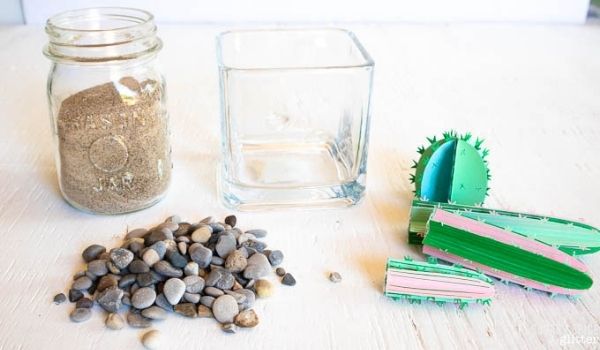
Materials to Make Paper Cacti
- Torch Cactus Template <– search in Design Space, codes #M103661F and #M102CADB
- Cricut Maker <– or other Cricut cutting machine with Fine Point Blade and Scoring tool
- Cricut Light Grip Mat
- Cardstock Paper <- in light green, dark green, coral pink and cream colors
- Square Glass Vase <– we used a 5” size vase
- Cricut Spatula
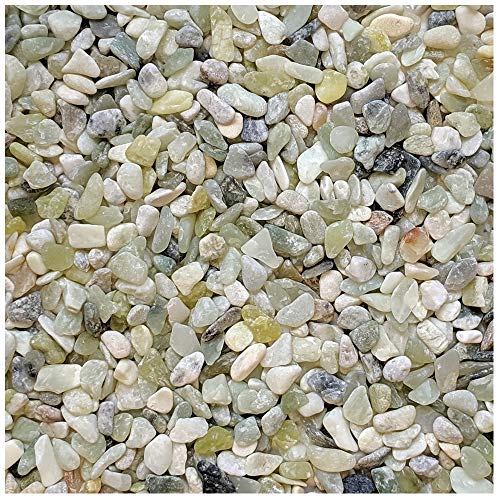
- Small Pebbles <– we used 1 1/2 cups
- Sand <– we used 1 1/2 cups
- Hot Glue Gun with Clear Hot Glue Sticks
Tip: if you don’t want to re-use your materials and want to ensure your sand and pebbles stay securely in place, you can use an epoxy to seal them.
How to Make a Cricut Cactus Terrarium Craft
Uploading the Cactus Pattern
- Open Cricut Design Space.
- Click on the “+” sign to start a new project, opening up a blank canvas.
- Click on the Images button from the toolbar.
- Search “torch cactus” image (#M103661F) and then click on the image to insert the pattern on the canvas.
- Resize grouping to double its original height (4.5” high).
- Search “barrel cactus” image (#M102CADB) and then click on the image to insert the pattern on the canvas.
- Resize the cactus to 2.25” wide. Duplicate the pattern and resize the second cactus to 1.5” high.
- Change the color of the prickly torch cactus pieces to pink and change the color of the prickly barrel cactus to dark green.
- Change the color of the other torch cactus pattern pieces to a mix of light green and dark green. Change the other barrel cactus pattern pieces to a mix of light green and dark green.
- Move to the color sync tab to see all the pieces sorted by color.

Cutting
- With the machine set to Cricut Maker, select “Make It” in Design Space.
- Set material type to Medium Cardstock, choosing the appropriate weight based on your paper.
- Place the first paper color onto the light grip mat.
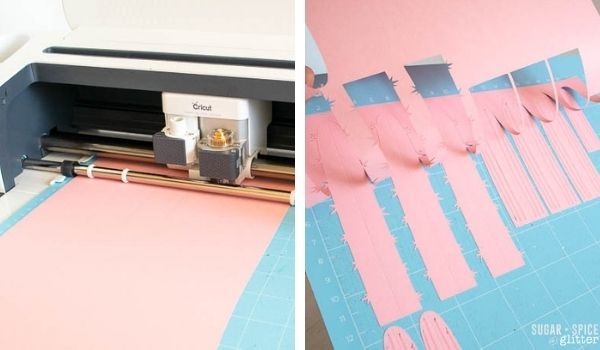
4. Follow prompts for loading cardstock paper into Cricut Maker and cutting. When the cut is complete, unload the mat from the machine.
5. Remove the cut pieces from the cutting mat using a spatula tool.
6. Repeat for the remaining cacti pieces and papers.
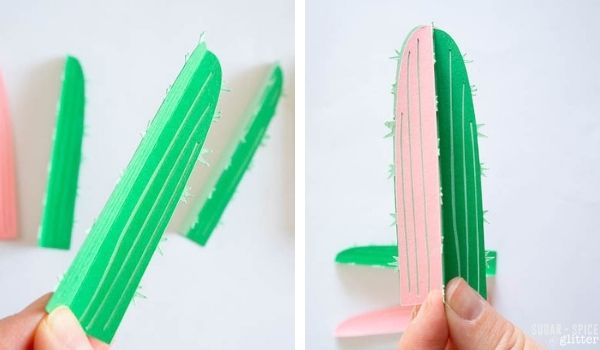
Assembling the Paper Cactus
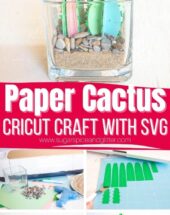
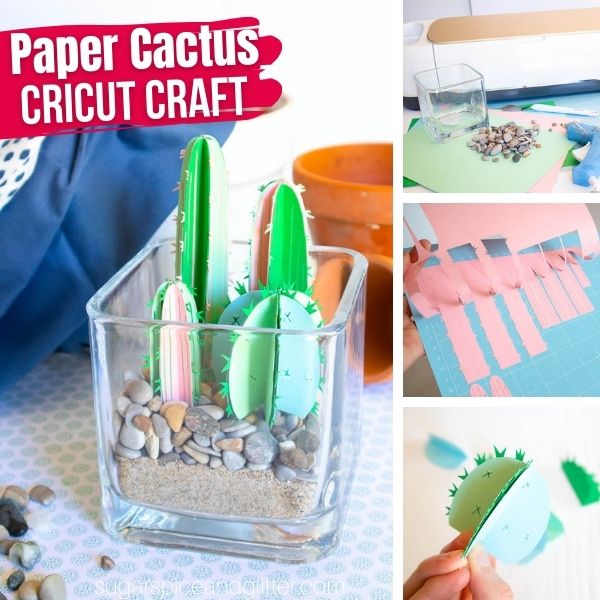
- Fold the cactus pieces along the score lines.
- Group the similar sized pieces together. They will create three separate cacti.
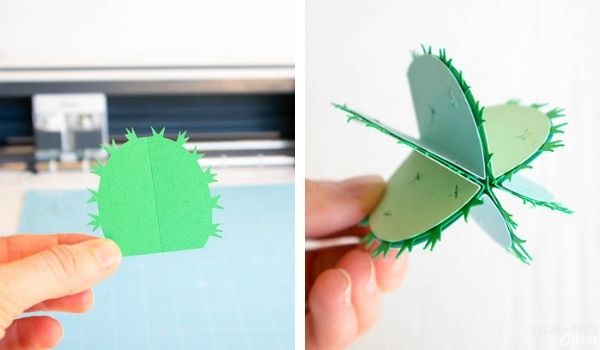
3. Start with the smallest sized cactus. Using a glue stick or hot glue gun, glue the pieces together, sandwiching the prickly pieces between the other colors, alternating them as you go along.
4. Repeat with the other two sizes of the torch cactus and for the other barrel cactus.
Assembling the Terrarium
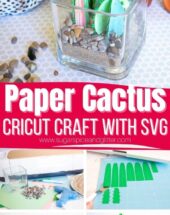
- Pour the sand into the bottom of the glass vase.
- Pour the pebbles over the sand.
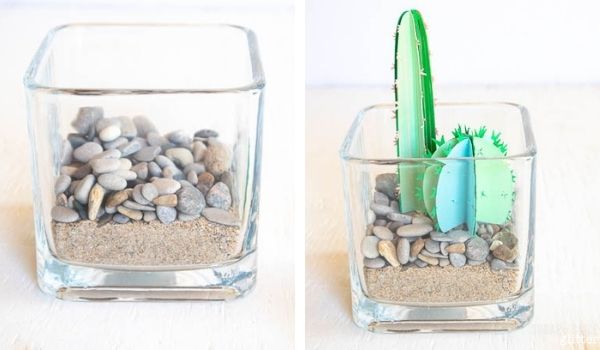
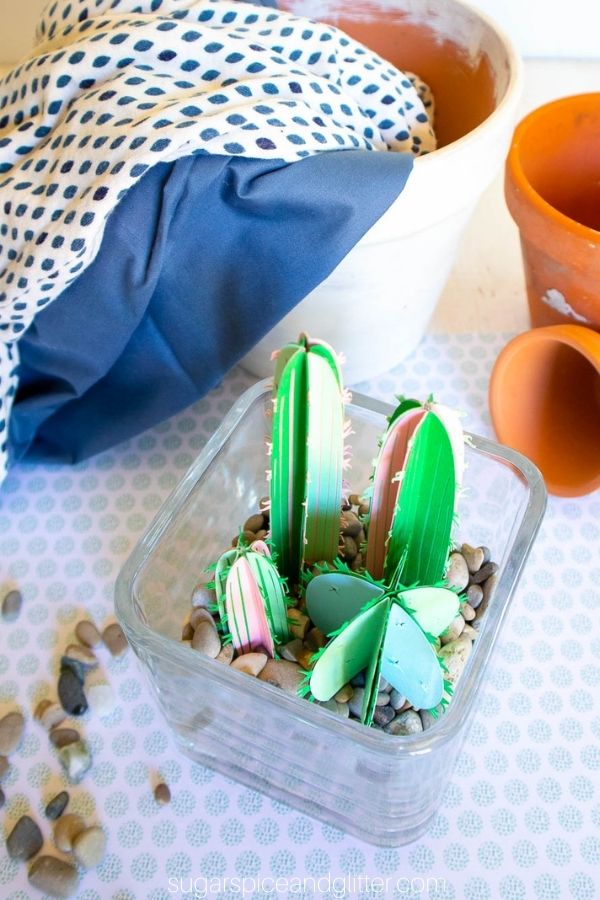
3. Place the paper cacti into the vase, burying them into the pebbles to secure in place or add a bit of glue to the bottom to help hold it upright.
Pin this Easy Cricut Cactus Craft for a fun gift for a plant-loving friend:
Grab your free printable instructions for our Cricut Cactus Terrarium craft:
Want to Save This Recipe?
Enter your email & I'll send it to your inbox. Plus, get great new recipes from me every week!
By submitting this form, you consent to receive emails from Sugar, Spice and Glitter.
Cactus Cricut Terrarium with SVG
A fun addition to your office or centerpiece for a Western-themed party, this DIY Cactus Terrarium uses a Cricut Cactus template to make a cute plant decor piece that even the worst gardeners can't kill!
Materials
- Torch Cactus Template (Design Space codes #M103661F and #M102CADB)
- Cardstock Paper in light green, dark green, coral pink and cream colors
- 5" Square Glass Vase
- 1 1/2 cups Small Pebbles
- 1 1/2 cups Sand
Tools
- Cricut Machine with Fine Point Blade and Scoring tool
- Cricut Light Grip Mat
- Cricut Spatula
- Hot Glue Gun with Clear Hot Glue Sticks
Instructions
Uploading the Cactus Pattern
- Open Cricut Design Space.
- Click on the “+” sign to start a new project, opening up a blank canvas.
- Click on the Images button from the toolbar.
- Search “torch cactus” image (#M103661F) and then click on the image to insert the pattern on the canvas.
- Resize grouping to double its original height (4.5” high).
- Search “barrel cactus” image (#M102CADB) and then click on the image to insert the pattern on the canvas.
- Resize the cactus to 2.25” wide. Duplicate the pattern and resize the second cactus to 1.5” high.
- Change the color of the prickly torch cactus pieces to pink and change the color of the prickly barrel cactus to dark green.
- Change the color of the other torch cactus pattern pieces to a mix of light green and dark green. Change the other barrel cactus pattern pieces to a mix of light green and dark green.
- Move to the color sync tab to see all the pieces sorted by color.
Cutting
- With the machine set to Cricut Maker, select “Make It” in Design Space.
- Set material type to Medium Cardstock, choosing the appropriate weight based on your paper.
- Place the first paper color onto the light grip mat.
- Follow prompts for loading cardstock paper into Cricut Maker and cutting. When the cut is complete, unload the mat from the machine.
- Remove the cut pieces from the cutting mat using a spatula tool.
- Repeat for the remaining cacti pieces and papers.
Assembling the Paper Cactus
- Fold the cactus pieces along the score lines.
- Group the similar sized pieces together. They will create three separate cacti.
- Start with the smallest sized cactus. Using a glue stick or hot glue gun, glue the pieces together, sandwiching the prickly pieces between the other colors, alternating them as you go along.
- Repeat with the other two sizes of the torch cactus and for the other barrel cactus.
Assembling the Terrarium
- Pour the sand into the bottom of the glass vase.
- Pour the pebbles over the sand.
- Place the paper cacti into the vase, burying them into the pebbles to secure in place or add a bit of glue to the bottom to help hold it upright.
Recommended Products
As an Amazon Associate and member of other affiliate programs, I earn from qualifying purchases.


I’d love to see any twists that you make to this fun DIY Paper Terrarium craft!
For more easy ideas for things to make with your Cricut, check out our full Cricut Craft collection here:
For more fun decor ideas, check out our full DIY Home Decor collection here:

For more crafts just for grown-ups, check out our full Adult Crafts collection here:
For more easy gift ideas, check out our full Homemade Gifts collection here:

For more fun summer crafts, check out our full Summer Crafts collection here: