
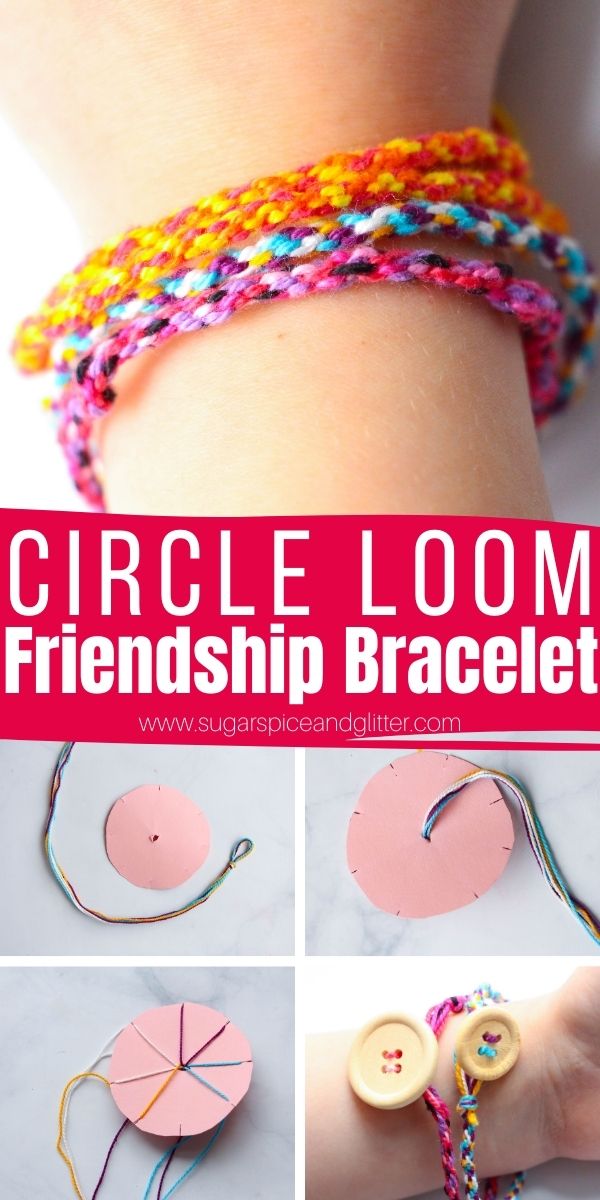
Circle Loom Friendship Bracelet (with Video)
Welcome to Sugar, Spice & Glitter! Please note, this post may contain affiliate links. For more details, see our Full Disclosure.
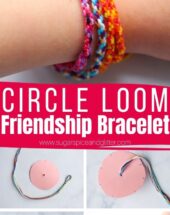
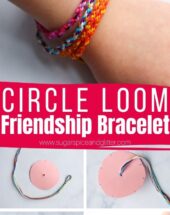
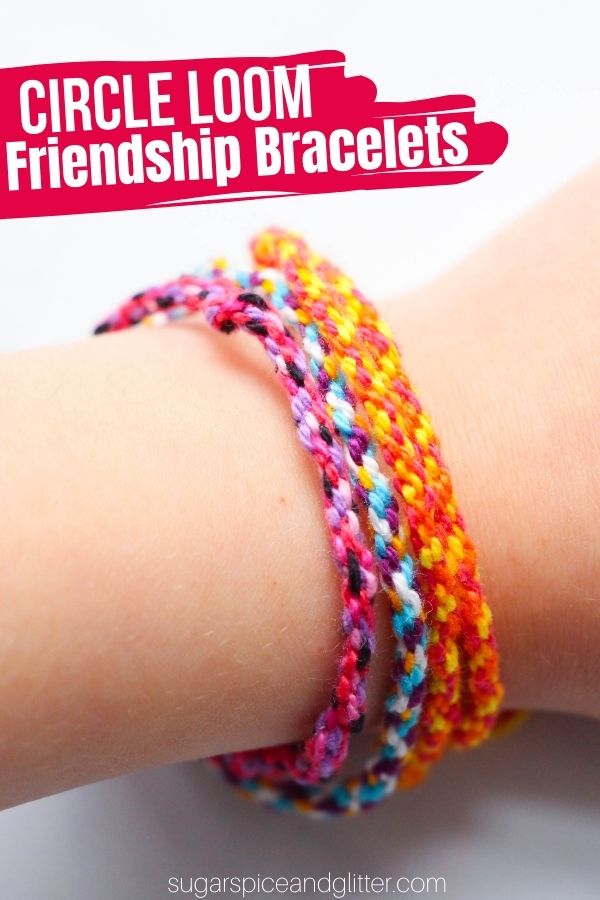
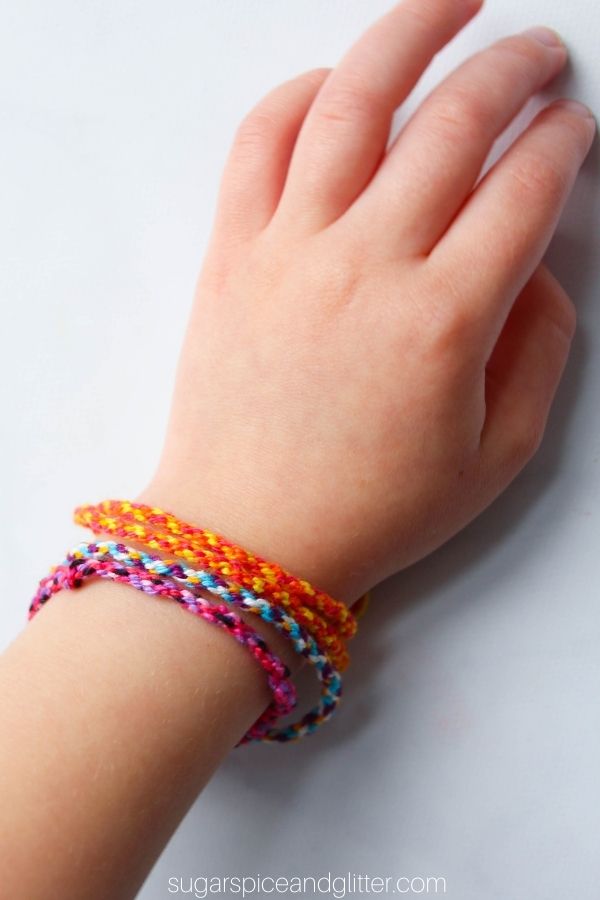
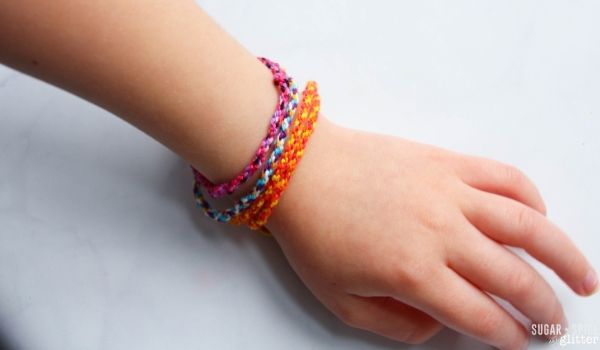
A fun and easy way to make friendship bracelets without braiding, these Circle Loom Friendship Bracelets are a great craft for kids to make – for themselves or as a homemade gift for a friend.
Circle Loom Bracelet Craft
Ella has long been obsessed with friendship jewelry and friendship bracelets, but at 6 years old it’s still hard for her to braid properly or keep the strings on a friendship bracelet tight enough to create a uniform-looking bracelet.
(Not to mention, she gets bored and needs crafts that are easy to come back to – and with a traditional friendship bracelet, you need to keep track of where you left off.)
Her babysitter taught us this fun hack for making easy friendship bracelets using a cardboard circle loom, and ever since, Ella has been turning out bracelet after bracelet. She feels so proud of her creations, and this method of making friendship bracelets is so easy that she doesn’t need any help from me until it’s time to tie up the ends.
It doesn’t matter if your kid can’t braid or tie knots yet – all they need to be able to do to make these friendship bracelets is count to three!
All you need to make these friendship bracelets are embroidery thread, a piece of cardboard or cardstock, and scissors.
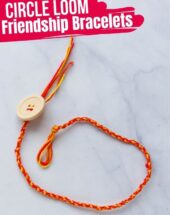
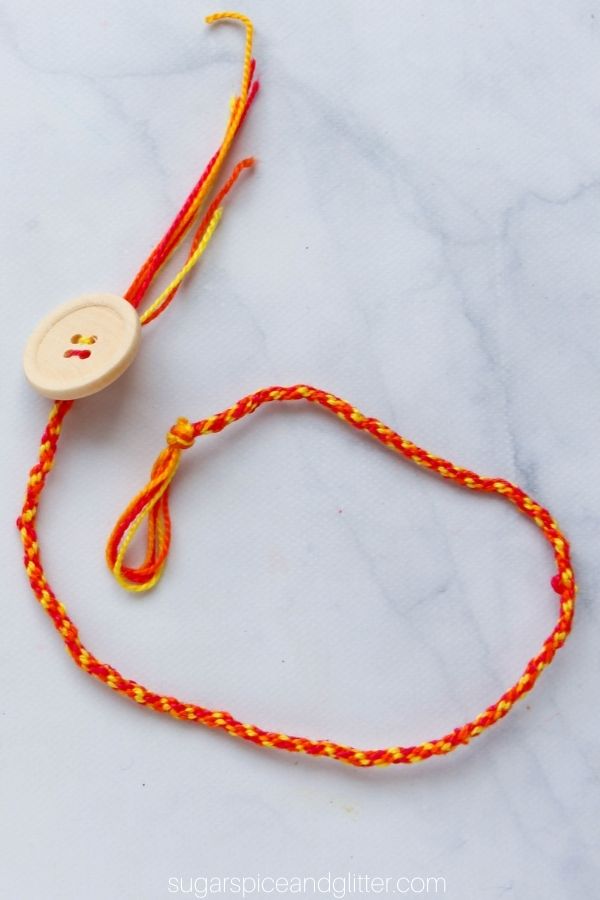
We also used some large wooden buttons we already had on hand to make an easy closure for little hands, but you could just tie your friendship bracelet together or use large beads or traditional bracelet clasps instead.
Once your kids get the hang of making these loom friendship bracelets, they can start adding in beads or other embellishments, if desired. You can also increase the number of strings used to make thicker bracelets.
More Kid-Made Jewelry Ideas:
- Secret Message Lockets (with Video)
- Pixie Dust Jar Necklace
- Fantastic Beasts Niffler Necklace
- DIY Quilled Paper Peacock Necklace
- Kid-Made Felt Bracelets
- Princess Jasmine Bangles
- African-Inspired Paper Beads
Check out our quick video to see how the circle loom works – and then don’t forget to scroll down to grab your free printable instructions for how to make a circle loom friendship bracelet:
Friendship Bracelet Materials
- Cardstock or Cardboard
- Pencil
- Scissors <– these are the ones we have and they have lasted for years in our daycare, and unlike some other safety scissors – they actually cut things!
- Embroidery Thread
- Wooden Button, optional for creating the closure
Tip: you can also use yarn or ribbon to make these friendship bracelets, and large beads can be used for the closure, if desired.
How to Make Circle Loom Friendship Bracelets
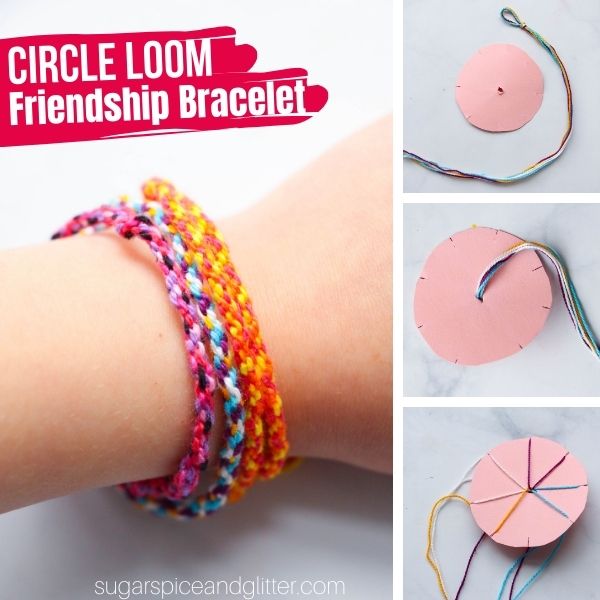
Use a circular object to trace a circle onto the cardstock.
Cut the circle out, then poke a small hole in the middle of the circle.
Make 8 small notches along the edge of the cardstock, evenly spaced apart.
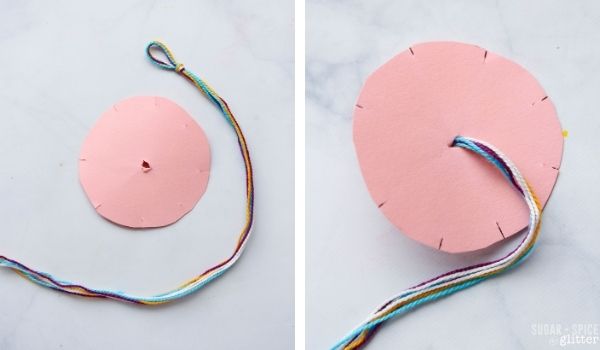
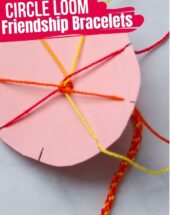
Cut 4 lengths of embroidery thread to equal lengths, and then gather them together.
Fold the bundle of threads in half and form a loop in the middle. Tie a secure double knot just below the loop.
Trim one length of the embroidery thread right underneath the loop so you have 7 long strands of thread.
Push the loop through the center of the cardstock.
Take each length of thread and secure each into an individual notch, so that 7 of the 8 notches on the edge of the cardstock have thread secured in them. There will be one empty notch.
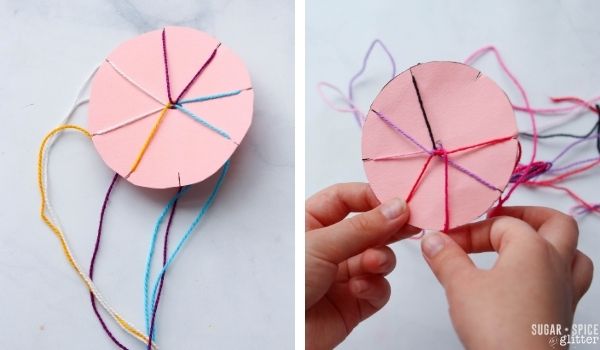
Starting at the empty notch, count counter-clockwise to reach the third piece of thread from the empty notch. Remove the thread from the notch it is in and bring it down to the empty notch and secure. Rotate the cardstock so that the newly empty notch faces you. Repeat this motion of counting back three and moving the thread to the newly empty notch until the bracelet is completely woven.
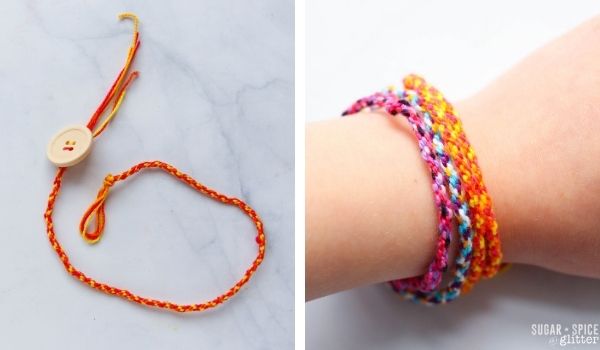
When you have braided the length of bracelet you want, remove the yarn from the cardstock circle.
Tie a double knot to secure the bottom of the braid. We added a wooden button just underneath and secured with another double knot to serve as a closure for the bracelet, but you an use a clasp or whatever form of bracelet closure you’d like.
Trim off the excess embroidery thread.
Pin this Easy Friendship Bracelet Tutorial:
Grab your free printable instructions for our circle loom friendship bracelets craft:
Want to Save This Recipe?
Enter your email & I'll send it to your inbox. Plus, get great new recipes from me every week!
By submitting this form, you consent to receive emails from Sugar, Spice and Glitter.
Circle Loom Friendship Bracelet
A step-by-step tutorial (plus how-to video) for how to make the easiest friendship bracelets using a homemade circle loom. You just need three materials to make these easy circle loom friendship bracelets: cardboard, embroidery thread, and scissors.
Materials
- Cardstock or Cardboard
- Embroidery Thread
- Wooden Button, optional for creating the closure
Tools
- Pencil
- Scissors
Instructions
- Use a circular object to trace a circle onto the cardstock.
- Cut the circle out, then poke a small hole in the middle of the circle.
- Make 8 small notches along the edge of the cardstock, evenly spaced apart.
- Cut 4 lengths of embroidery thread to equal lengths, and then gather them together.
- Fold the bundle of threads in half and form a loop in the middle. Tie a secure double knot just below the loop.
- Trim one length of the embroidery thread right underneath the loop so you have 7 long strands of thread.
- Push the loop through the center of the cardstock.
- Take each length of thread and secure each into an individual notch, so that 7 of the 8 notches on the edge of the cardstock have thread secured in them. There will be one empty notch.
- Starting at the empty notch, count counter-clockwise to reach the third piece of thread from the empty notch. Remove the thread from the notch it is in and bring it down to the empty notch and secure. Rotate the cardstock so that the newly empty notch faces you. Repeat this motion of counting back three and moving the thread to the newly empty notch until the bracelet is completely woven.
- When you have braided the length of bracelet you want, remove the yarn from the cardstock circle.
- Tie a double knot to secure the bottom of the braid. We added a wooden button just underneath and secured with another double knot to serve as a closure for the bracelet, but you an use a clasp or whatever form of bracelet closure you'd like.
- Trim off the excess embroidery thread.
Recommended Products
As an Amazon Associate and member of other affiliate programs, I earn from qualifying purchases.


I hope your kids love getting to make their own friendship bracelets using this easy circle loom method as much as my daughter did!
For more wearable crafts (homemade jewelry, Disney headbands, cricut shirts, etc), check out our full collection here:


I appreciate your Hard work. Looking forward for more blogs from you.
You mentioned that beads could be added to the circle loom bracelets. Do you have a video showing how that’s done?
Thanks in advance,
Chris
Hi Chris,
To add beads, just thread them onto the individual strings/threads as you go. But that’s a good idea to add a video, I’ll add it to our to-do list!
This is great! They sell theses sets at Michael’s of craft stores. Old Japanese tradition called kimihumo (sp)… I’d you Pinterest or YouTube they show you how to add the beads!
What do you do different to add more strings? I tried 16 slots with 15 threads and it doesn’t work. Should I skip more strings?
Hi Cindy, sorry for the delay – I want to try this with the number of strings you indicated but I haven’t had a chance yet. I think maybe skipping more strings will help (try keeping it the same pattern as we had) but I will report back once we are able to troubleshoot this for you.
Your ads for these friendship bracelets for kids are NOT kid friendly.
Can you let me know what ads you saw? I can report to my ad company if it was something inappropriate.
I absolutely loved this tutorial! The video made it so easy to follow along, and the circle loom technique is such a fun twist on traditional friendship bracelets. I can’t wait to try making my own and gifting them to my friends! Thank you for sharing your creativity! 🌈❤️