Cherry Garcia Ice Cream Sandwiches (with VIDEO)
Welcome to Sugar, Spice & Glitter! Please note, this post may contain affiliate links. For more details, see our Full Disclosure.
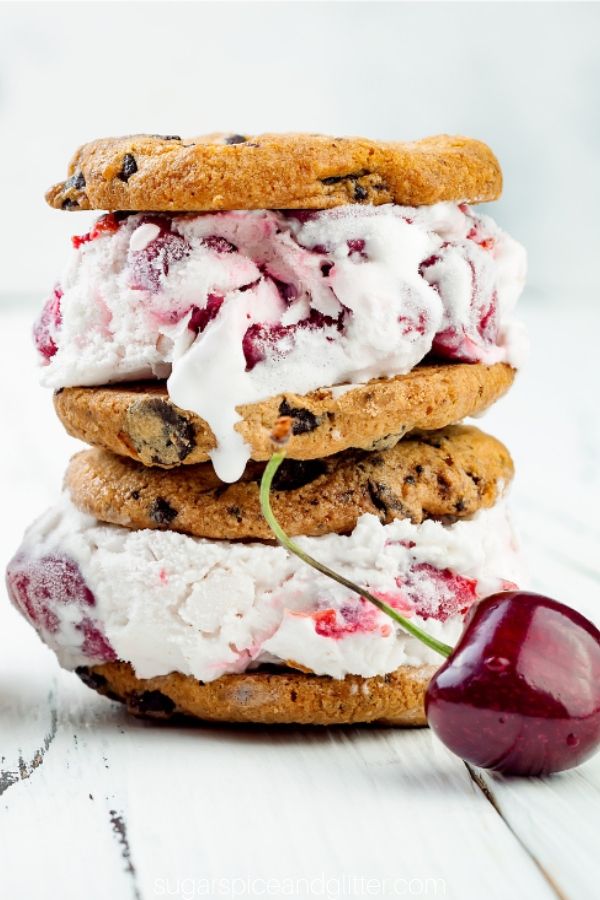
A fun way to enjoy our No-Churn Cherry Garcia Ice Cream is with these Homemade Cherry Garcia Ice Cream Sandwiches! These homemade ice cream sandwiches are super easy to make and customzie to your personal preferences.

Cherry Garcia Ice Cream Sandwiches Recipe
For years now, my daughter and I have loved experimenting with no-churn ice cream recipes.
You can either make crazy flavor combinations that you wouldn’t be able to find at the store – or recreate your favorite ice cream flavors to be even better. I love adding double or triple the amount of mix-in’s that I usually find in store-bought ice cream.
I first made our cherry garcia ice cream two years ago and it’s a firm favorite among our daycare children, so I thought we’d do a fun update with these homemade cherry garcia ice cream sandwiches! I added about half of the ice cream that you see here to the kids’ sandwiches so they didn’t turn into a giant mess, but this is a great serving option for older kids or adults.
My daughter loves getting to use her cherry pitter to help make this recipe. (Here is a little tutorial on how kids can use an olive or cherry pitter.)

Now, of course you can use store-bought ice cream to make these ice cream sandwiches – which doesn’t really require a recipe at all.
This no-churn ice cream recipe lasts for a month in the fridge, but it’s so quick and easy to make (less than ten minutes active prep) that it’s not a big deal to whip up a batch when you want it.

Ingredients for Chocolate Cherry Ice Cream
- Heavy whipping cream (35%)
- Sweetened condensed milk, to taste
- Vanilla extract
- Cherries
- Dark Chocolate <– can use milk chocolate
- Chocolate Chip Cookies
Scroll down to the printable recipe card for full measurements.
*Tip: The amount of sweetened condensed milk affects both the sweetness and texture. I often substitute for 1/3 cup of honey, or just use a smaller portion of the can. (I personally am not a huge fan of the flavor of sweetened condensed milk.)
Kitchen Tools You May Find Helpful
- Electric mixer <– this is a great hand mixer if you don’t want to make the investment into a stand mixer
- Large mixing bowl
- Loaf pan
- Ice Cream Scoop
- Measuring cups and spoons
- Sharp kitchen knife
- Wooden spoon or spatula <– I like these spatulas because they are one solid piece and don’t have removable heads for bacteria to get trapped underneath. Plus they are heat-resistant and have a lifetime warranty.
How to Make Homemade Cherry Garcia Ice Cream
First, chop and pit your cherries. Then chop your chocolate and set aside.
Place the cold whipping cream in a large bowl and whip with a mixer for 4-7 minutes until the cream appears fluffy and cloud-like. It takes a full four minutes (and sometimes a bit longer depending on the humidity) to achieve the perfect texture.
Be careful not to over mix the cream, as that can reverse all of the hard whipping work!

Next, add in the vanilla and sweetened condensed milk or honey to your personal preference. For this batch, I only used 1/2 cup and it was sweet enough for my family and the texture of the ice cream was very light.
Stir it in, being careful not to over mix.

Next, gently stir in the chopped cherries and dark chocolate chunks.
Add more as called for so you have the perfect amount of mix-ins for you!

Fold the ice cream mixture out into a loaf pan or reusable ice cream container. Smooth with the back of a spoon or an offset spatula and sprinkle more toppings over the top.
Freeze for 4 hours or overnight. (Sometimes it’s ready in two hours, but plan for 4 just in case!)

Scoop about 1/2 cup of the homemade cherry garcia ice cream onto a cookie and then sandwich with a second cookie.
Repeat with all cookies. The cookies will get soft if placed back in the refrigerator so try to make these as you need them and just store the ice cream in the freezer until needed.
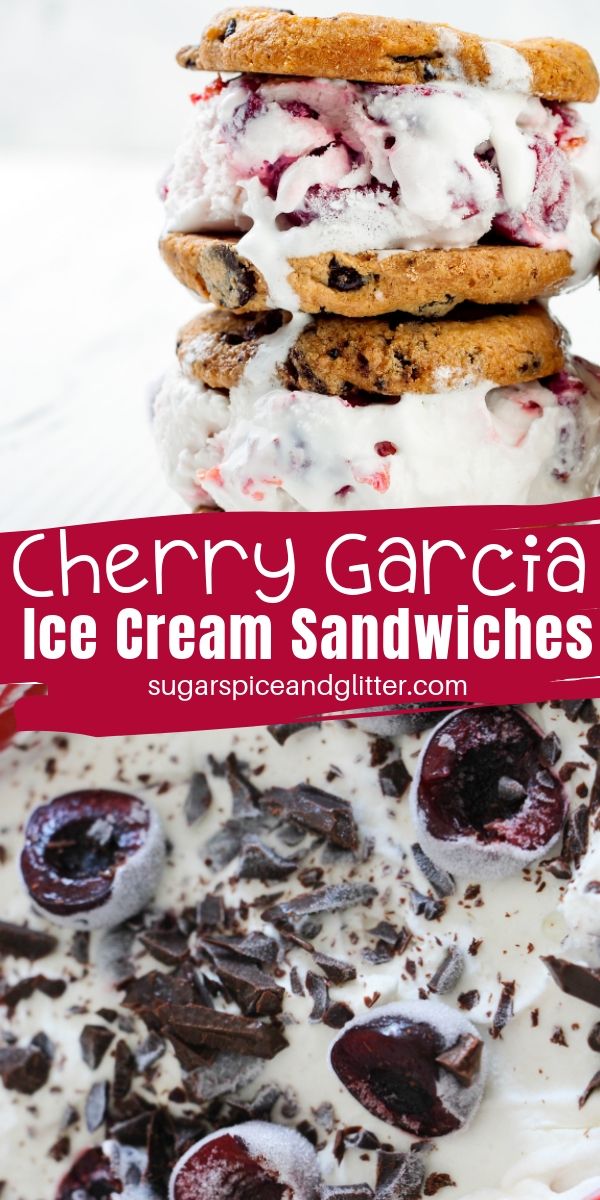
Pin this Cherry Garcia Ice Cream Sandwich recipe:
Grab your free printable recipe card for Cherry Garcia Ice Cream Sandwiches recipe:
Want to Save This Recipe?
Enter your email & I'll send it to your inbox. Plus, get great new recipes from me every week!
By submitting this form, you consent to receive emails from Sugar, Spice and Glitter.
Cherry Garcia Ice Cream Sandwiches
A delicious ice cream sandwich recipe for the summer, these Cherry Garcia ice cream sandwiches are made from scratch in less than 10 minutes
Ingredients
- 2 cups whipping cream (35% heavy cream)
- 1-10oz can sweetened, condensed milk, or to taste*
- 1 teaspoon vanilla
- 1 cup cherries
- 1/2 cup dark chocolate (can use milk chocolate)
- 12 cookies
Instructions
- First, chop and pit your cherries. Then chop your chocolate and set aside.
- Place the cold whipping cream in a large bowl and whip with a mixer for 4-7 minutes until the cream appears fluffy and cloud-like. It takes a full four minutes (and sometimes a bit longer depending on the humidity) to achieve the perfect texture.
- Be careful not to over mix the cream, as that can reverse all of the hard whipping work!
- Next, add in the vanilla and sweetened condensed milk or honey to your personal preference. For this batch, I only used 1/2 cup and it was sweet enough for my family and the texture of the ice cream was very light.
- Stir it in, being careful not to over mix.
- Next, gently stir in the chopped cherries and dark chocolate chunks.
- Add more as called for so you have the perfect amount of mix-ins for you!
- Fold the ice cream mixture out into a loaf pan or reusable ice cream container. Smooth with the back of a spoon or an offset spatula and sprinkle more toppings over the top.
- Freeze for 4 hours or overnight. (Sometimes it's ready in two hours, but plan for 4 just in case!)
- Scoop about 1/2 cup of the homemade cherry garcia ice cream onto a cookie and then sandwich with a second cookie.
- Repeat with all cookies. The cookies will get soft if placed back in the refrigerator so try to make these as you need them and just store the ice cream in the freezer until needed.
Notes
The amount of sweetened condensed milk affects both the sweetness and texture. I often substitute for 1/3 cup of honey, or just use a smaller portion of the can. (I personally am not a huge fan of the flavor of sweetened condensed milk.)
Recommended Products
As an Amazon Associate and member of other affiliate programs, I earn from qualifying purchases.
-
 Norpro, black 683 Nonstick Anti-Freeze Ice Cream Scoop, 7in/18cm
 -
24-Piece Superior Glass Food Storage Containers Set - Newly Innovated Hinged BPA-free Locking lids - 100% Leak Proof Glass Meal Prep Containers, Great on-the-go & Freezer to Oven Safe Food Containers
-
Organic Heavy Whipping Cream
-
Dark Red Cherries, 1lb
-
PME Belgian Milk Chocolate Curls for Decorating Cake Muffin Cupcake Desserts 85g
-
Eagle Brand Sweetened Condensed Milk, 14 oz


Nutrition Information:
Yield:
6Serving Size:
1Amount Per Serving: Calories: 911Total Fat: 56gSaturated Fat: 31gTrans Fat: 1gUnsaturated Fat: 21gCholesterol: 116mgSodium: 315mgCarbohydrates: 94gFiber: 3gSugar: 69gProtein: 13g

These Homemade Cherry Garcia Ice Cream Sandwiches are a fun way to enjoy fresh cherries in the summer and a great recipe to make with the kids!
For more cherry dessert recipes, check out our Cherry Chocolate Chip Cookie recipe or our Cherry Bakewell Tarts recipe.