
Wave in a Bottle Science Experiment (with Video)
Welcome to Sugar, Spice & Glitter! Please note, this post may contain affiliate links. For more details, see our Full Disclosure.
Recently, we studied waves for a day while learning the “W” letter sound. One of the coolest things we did that day was this simple oil and water science experiment to make our own wave in a bottle.

This is a great science experiment if you have a little chef like I do, or if you were supposed to take a trip to the beach and it was cancelled for whatever reason.
Children get a chance to practice the practical life skill of pouring liquids, while learning about measurements and molecular properties, or more simply, how different substances have different characteristics.
Ella and I recently revisited this experiment and decided to make a video of her assembling her wave in a bottle – check it out before scrolling down and reading the full instructions, including how to use this simple kitchen science experiment to learn about the scientific method:
Materials to Make Your Own Wave in a Bottle:
- Clear bottle (we used a repurposed plastic bottle but you could alternatively use a heavy duty glass bottle)
- Water
- Cheap oil (we used the same oil we buy for homemade play dough)
- Blue food dye
- “W” letter beads
- Kitchen tray for easy clean-up
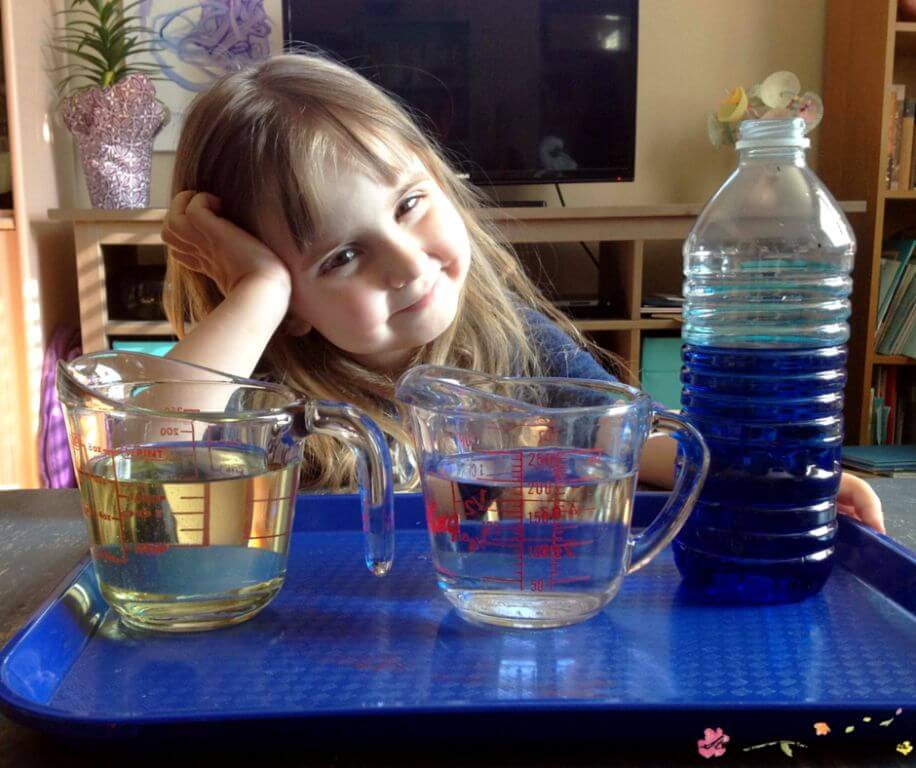
- 2 measuring cups
- Funnel, optional
The “W” letter beads are not essential for the wave science experiment, we added them because we were emphasizing the similarities between the shapes of the waves and the shape of a letter “w.”
While you could use the same measuring cup for pouring the liquids, I liked offering two measuring cups so the liquid measurements could be compared, both visually and by looking at the numbers labeling the cups.
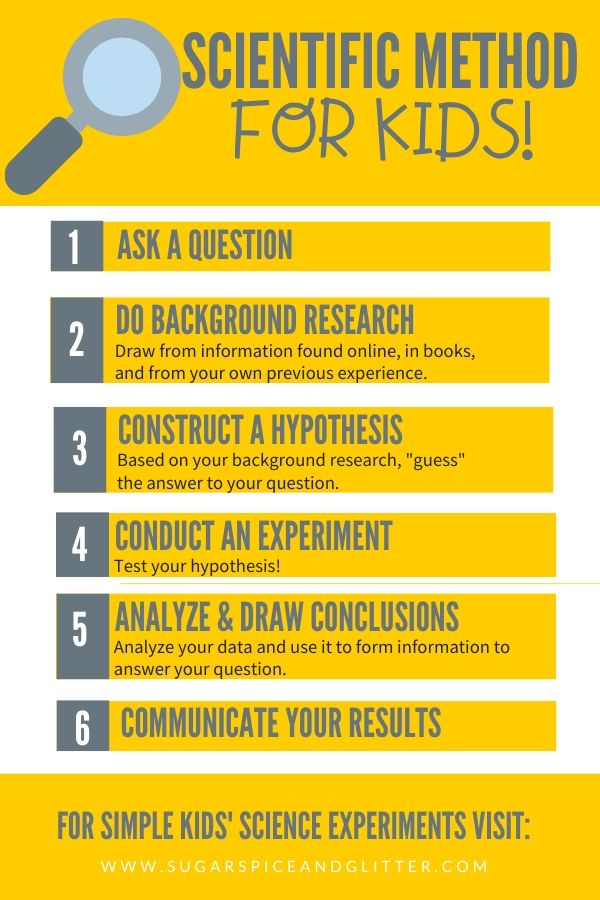
I try to walk Ella through the steps of the Scientific Method each time we do one of our science experiments for kids. It’s a great way to validate their pre-existing knowledge and make children comfortable with the Scientific Process.
Download your copy of our Scientific Method Printable by clicking here.
Our question was:
What happens when you mix oil and water together?
To create a hypothesis, we drew on our previous experiences with using water and oil in different situations.
Children may have had the chance to watch oil and water react in many different situations:
- cooking pasta (either adding the oil to the water or adding oil to pasta that has been cooked in water)
- making homemade play dough (which often uses oil and water)
- oil and water puddles in parking lots
- natural body care products in the bath
To make things more interesting, you can also ask what they think will happen when you add a water-based food dye into the mix.

We started off by measuring out our water and oil. We compared the measurements to ensure that we were adding the same amount of oil as water.
Ella poured the water into the bottle and added a few drops of a blue water-based dye.

She then added the oil, and observed that instead of mixing into the water, it was sitting on top. (This is a great time to discuss density – water is heavier than oil, and therefore is more dense. So it remains at the bottom while oil floats on top. A more dramatic representation of this would occur if you added the oil first and then the blue water, and watched it sink.)

We added a few small “W” letter beads and noticed that they moved slower through the oil than they floated through the water. (This is a great time to discuss viscosity, or thickness of a liquid. The oil is thicker than water, so small objects will move through it slower.)

Once everything was added to the bottle, Ella attempted to make waves by moving the bottle back and forth, and rolling it along the table.
While some small droplets of the blue-coloured water could be seen sneaking into the oil layer, they quickly returned back to the water layer. No matter how big the waves were, or how much they were “mixed together,” the oil and water remained separate.

What do you think? Would your kids enjoy making their own Wave in a Bottle Science Experiments? Be sure to pin it for later, and consider subscribing to our daily or weekly e-mails with more learning ideas for kids, family friendly recipes, and parenting inspiration!


The water and oil experiments are always so pretty! I love the idea of using it to explore waves!
Hi my name is Maida and my doughter is doing a project for water works, and she chose the waves in a bottle and im trying to help her shes done the bottles with ingridients she did 4 diff ones each one had diff food coloring. She did the research and shes finising her 3D board on the 3D noard she has to have a title ✅ a question ✅ materials✅ how to make the waves in a bottle✅results✅ and shes got left Hypothesis and Conclusion i dont understand or know what eater one means can you please help letting me know what it means and what it is
Hypothesis – what does she think will happen with the experiment?
Conclusion – what did the experiment show/prove?
I see you don’t monetize your site, don’t waste your
traffic, you can earn additional bucks every
month because you’ve got hi quality content. If you
Darn, content like this makes waking upward worth your time and effort!
Reading in in bed today I got thus motivated I even decided to function out.
I want to thank virtually making my life far better.