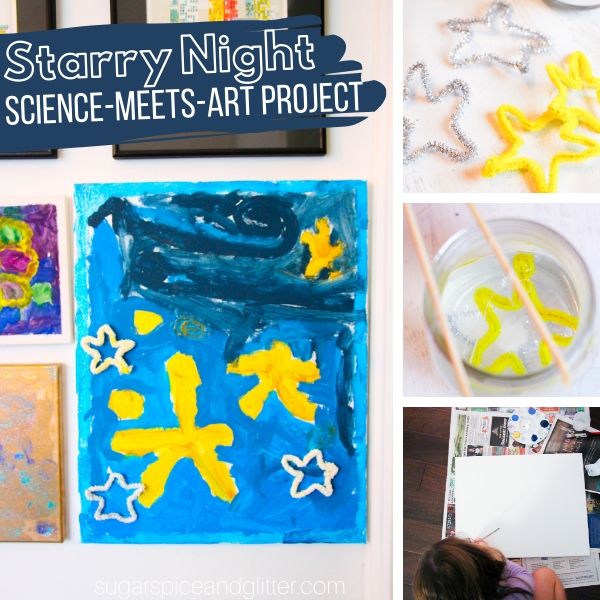
Starry Night STEAM Art Project for Kids
Welcome to Sugar, Spice & Glitter! Please note, this post may contain affiliate links. For more details, see our Full Disclosure.
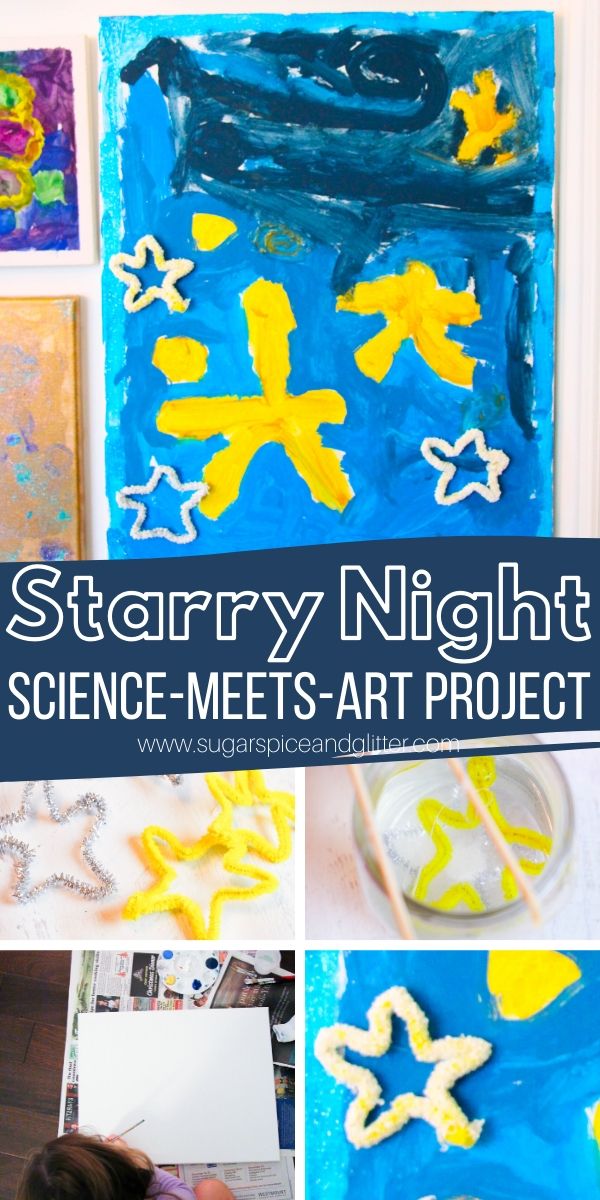
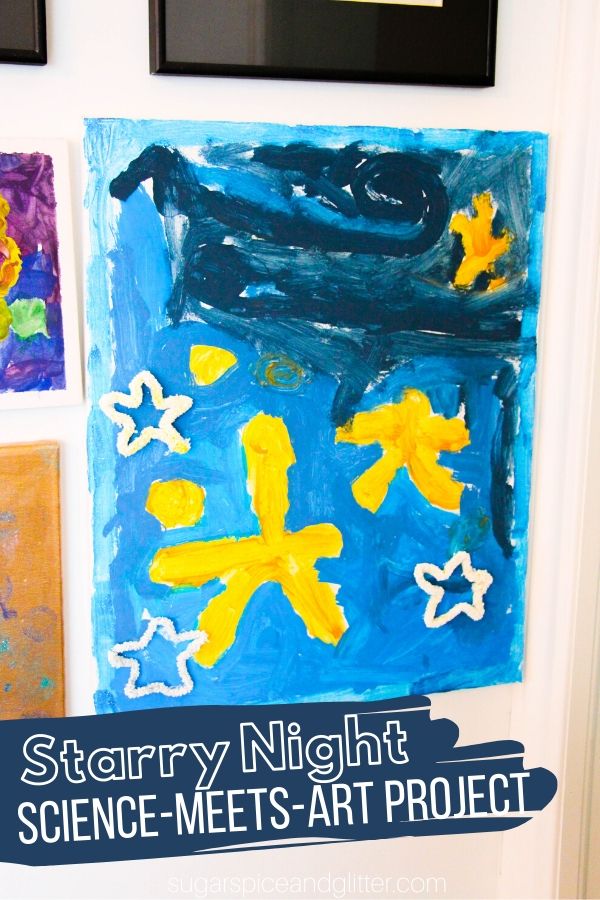
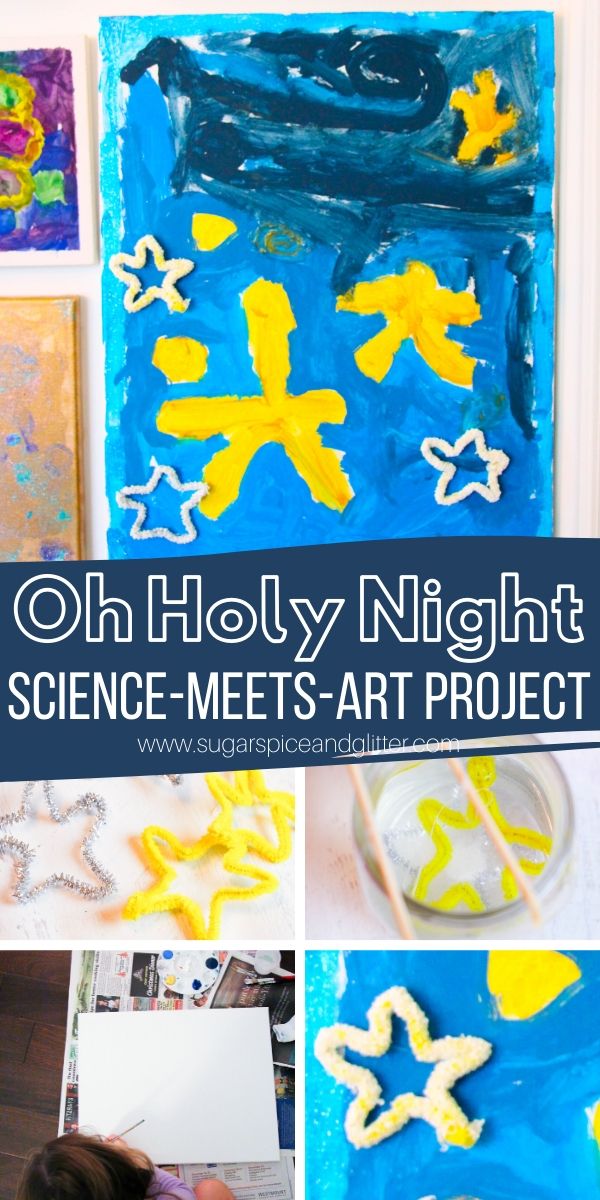
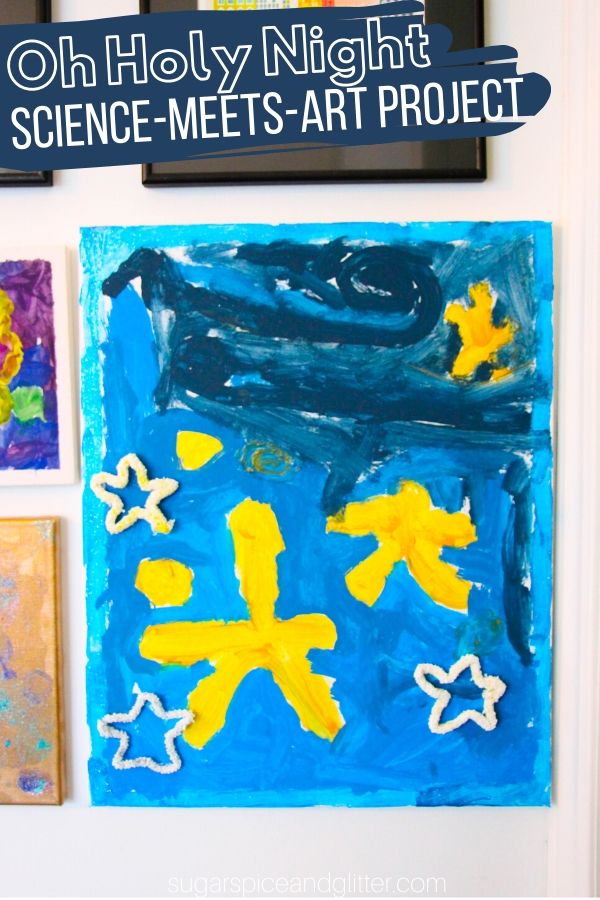
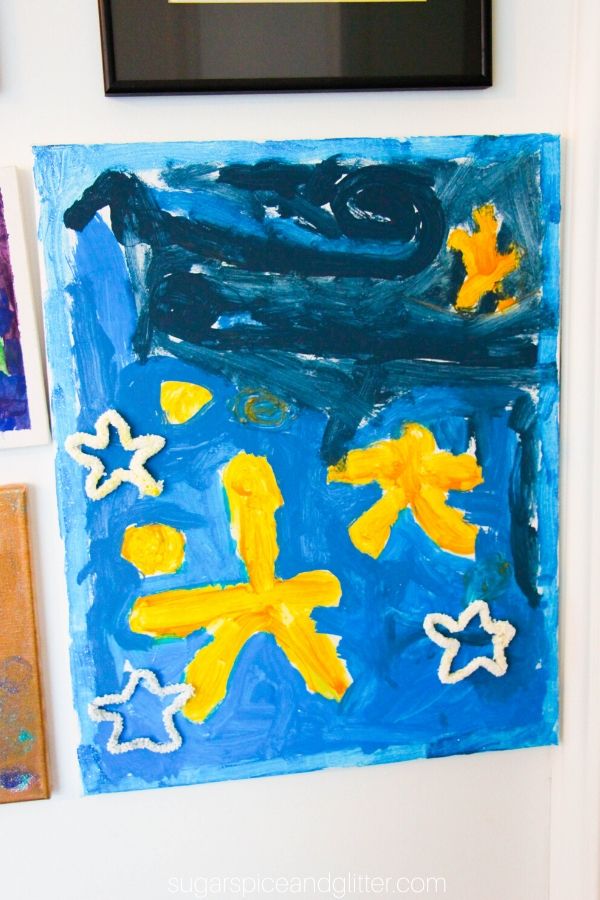
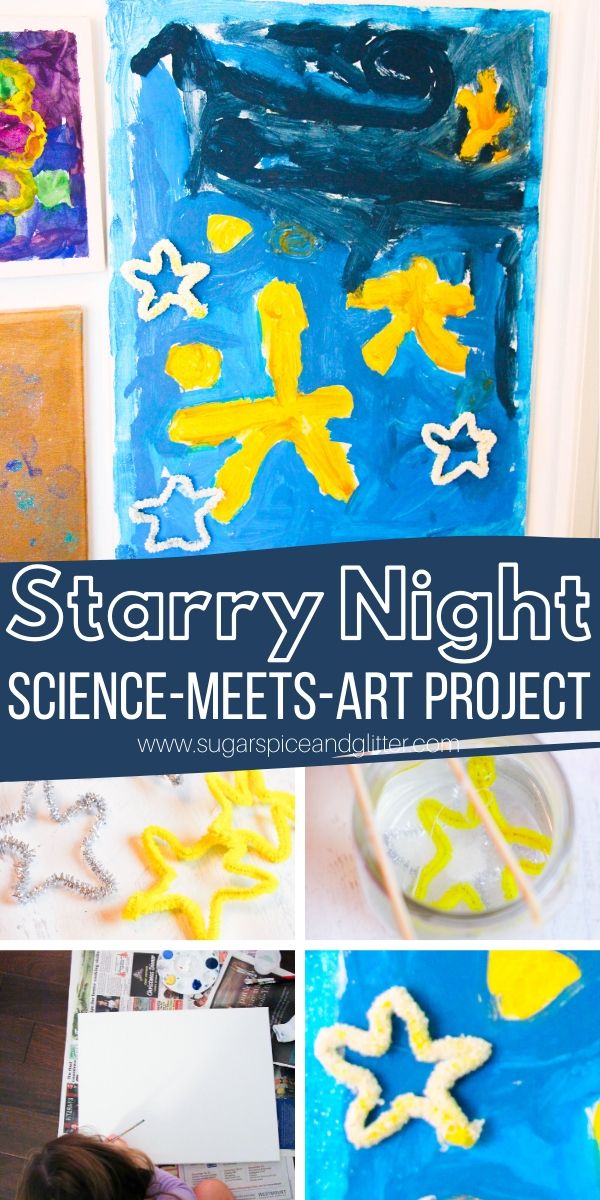
A gorgeous science project meets art project for kids to learn about Vincent van Gogh, this Starry Night Craft for Kids incorporates homemade borax crystal stars into a mixed media art project.

Starry Night Craft for Kids
Vincent van Gogh once said, “I often think that the night is more alive and more richly colored than the day.”
About the inspiration for his famous “The Starry Night” oil pastel painting, Vincent wrote to his brother, “this morning I saw the countryside from my window a long time before sunrise, with nothing but the morning star, which looked very big.” (The morning star being the planet Venus.)
This Starry Night craft is a great way to introduce children to the gorgeous artwork of van Gogh, learn about the solar system, engage in a fun science project and make a beautiful piece of art!
- Learning About van Gogh and his Artwork
While there are many great resources for kids to learn about van Gogh and his work, I highly recommend this free resource from Tate Kids (hosted by the Tate Modern Museum of Art).
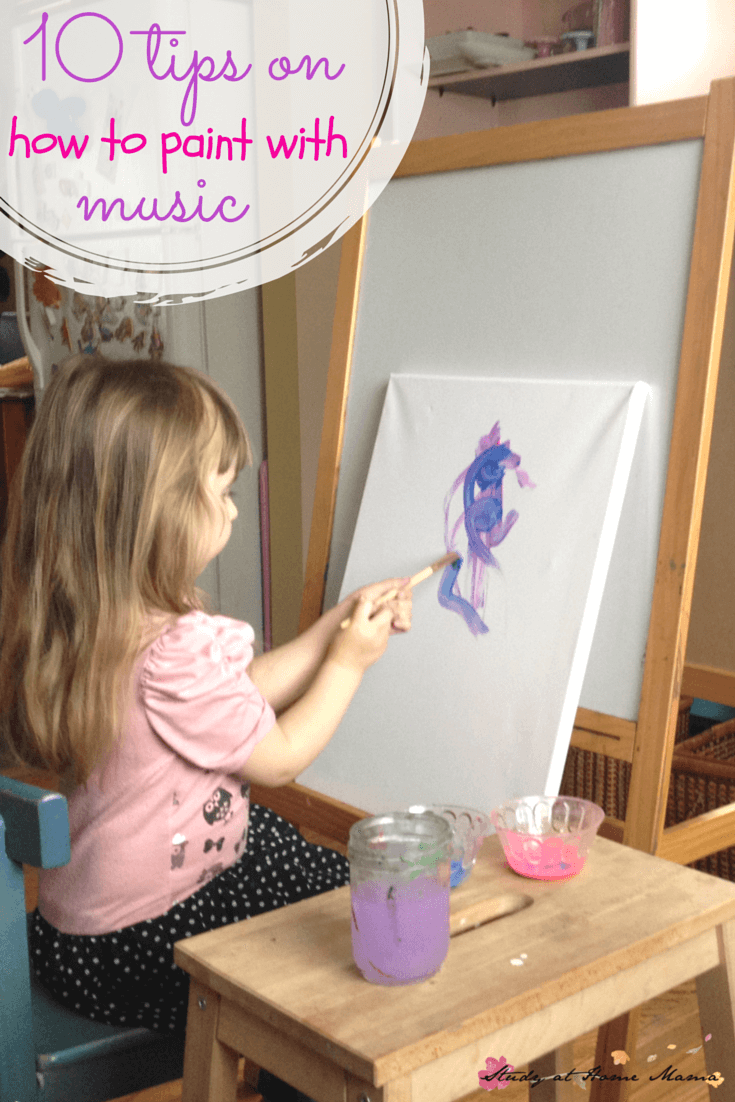
If you wanted to add a musical element to this art project, you could listen to Don Mclean’s Vincent (I like the Lianne La Havas cover version), but it does speak about van Gogh’s struggles so another star-inspired song may be a better choice for your children.
We actually gave this to my mom as a Christmas gift and Ella called it “Oh Holy Night.” I think it goes perfectly with the first lyric in the song, “Oh holy night the stars are brightly shining,” and it also gives a great opportunity to talk about the Christmas Story.
You can also read one of these books about Vincent van Gogh:
- Camille and the Sunflowers by Laurence Anholt (you can listen to it here)
- Katie and the Starry Night by James Mayhew (you can listen to it here) <– this one is my favorite
2. Learn About the Solar System
You can go as deep as you want about this, or just stick to learning about the aspects of the solar system that are shown in the painting.
I think it would be really fun for kids to go out and look at the night sky or visit a planetarium before making their art.
3. Star Borax Science Project
I love the mixed media and 3D effect that our borax stars add to our Starry Night painting, but the best part about them is that they are a science project all on their own!
Growing your own Crystal Stars is an easy chemistry experiment that also allows kids to learn about crystal formation. Basically, you make a very saturated water-and-borax solution that (as it cools) starts to form crystal particles on whatever is added to the water. We’ve done this experiment with egg shells and pipe cleaners, and I really enjoy that we can make the pipe cleaners into a variety of shapes to grow crystals on.
You can delve deeper into the concepts of solubility, states of matter (liquid vs solid), recrystallization, and suspension. You can read more about borax crystal experiments on Steve Spangler Science.

4. Make your art!
I describe below all of the steps for making the crystal stars and painting your canvas.
The biggest thing to keep in mind is to have fun and allow children to make their artwork their own! While they can look at other star paintings or pictures of the solar system for inspiration, just like van Gogh did his own thing and painted the world “as he felt it,” I think it’s important to allow children to experiment and make their painting unique and special to them.
We experimented with color mixing, using different sizes of brushes, different brush stroke techniques, layering paint, etc.
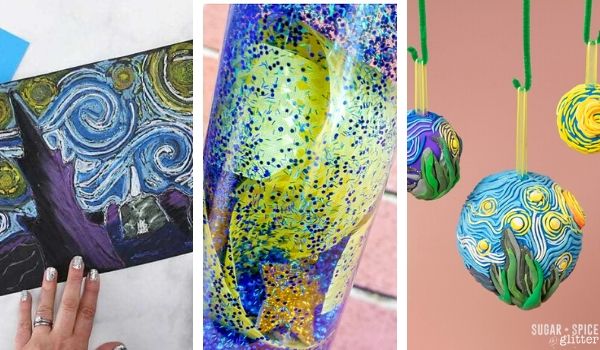
Check out these other gorgeous Starry Night Crafts for kids:
- Van Gogh Inspired Fork Scrape Painting from the Pinterested Parent
- Glue Resist Van Gogh Painting from The Crafty Classroom
- Melted Crayon Starry Night from Happy Hooligans
- Starry Night Sensory Bottle from the Chaos and the Clutter
- Starry Night Sensory Tray from Rubber Boots and Elf Shoes
- Starry Nights Clay Ornaments from Crayola
- Van Gogh Coloring Pages from Kids n Fun
Materials Needed for our Starry Night Craft with Borax Stars
- Pipe cleaners (silver, yellow, white or gold)
- 3 Tablespoons Borax powder <– you can also use this to make slime or homemade laundry detergent
- 1 cup boiling water
- Mason jars
- Chopsticks or skewer sticks
- Dental floss or string
- Large canvas
- Blue paints (variety)
- Yellow paints
- White paint
- Metallic paint, optional
- Paint brushes
- Paint tray
- Rag
- Container of clean water for washing brushes
- Hot Glue <– if making with kids, a Cool Temp Hot Glue Gun can make the process less daunting
Tip: you can make as much of the borax solution as you need, keeping the 3Tbsp borax powder to 1 cup of boiling water ratio.
We usually use these sturdy plastic lunch trays for almost all of our craft or kitchen activities, as well as in our Montessori practical life activities. Ours have lasted for over 6 years and are still going strong, plus they are so great for containing messes and allowing the kids to set a project to the side while it dries (or if you have to clear off the table for supper). For this craft, the canvas was too big for our trays, so we had to use newspaper to protect our surface.
How to Make Crystal Stars with Borax and Pipe Cleaners
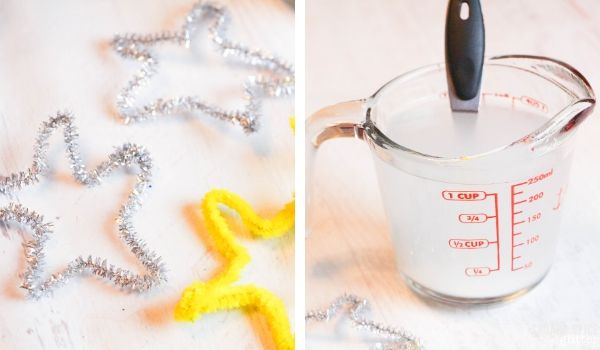
Shape your pipe cleaners into star shapes.
Use a piece of dental floss or string to tie the pipe cleaner star to a chopstick or wooden skewer stick. (You will want about 4″ of string between the two.) Set aside.
Boil your water and pour into a heat-safe mason jar.
Stir 3 Tablespoons of borax powder into the water and stir well. Keep adding borax powder into the solution until no more borax powder will dissolve (you may have some settled at the bottom of your jar and that’s okay.)
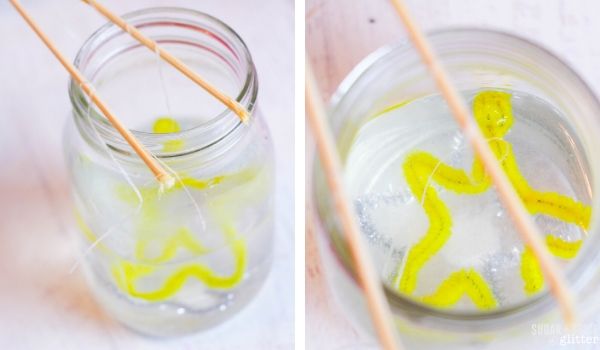
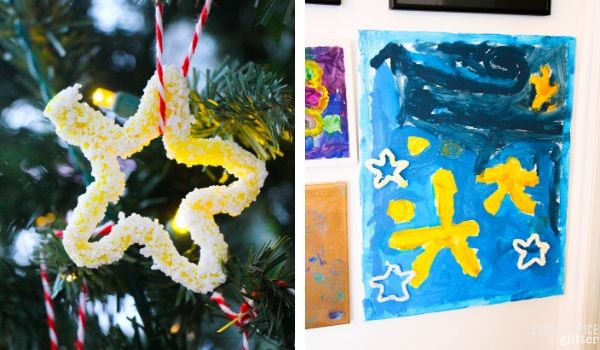
Slowly lower the pipe cleaner stars into the solution and set in a safe place overnight or for up to three days.
Try to ensure that none of the pipe cleaners are touching, or you will have to break some of the crystals off when separating them later. (Using multiple jars can help with this.)
Remove the crystals carefully and dispose of the borax water. (It can be great if you have an ant problem outside, or add to laundry for a freshness boost.)
Let the crystals dry on a clean surface until ready to attach to your painting.
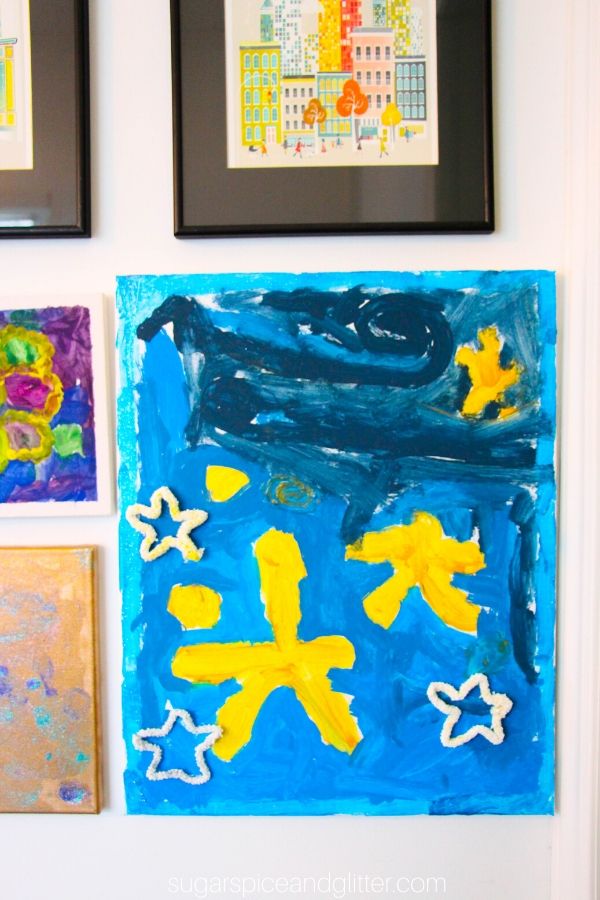
How to Make a Starry Night Painting
Place the canvas on a clean, protected surface (we covered our living room floor with newspaper).
Set out the paints, a variety of paintbrushes, a container with clean water and a rag.
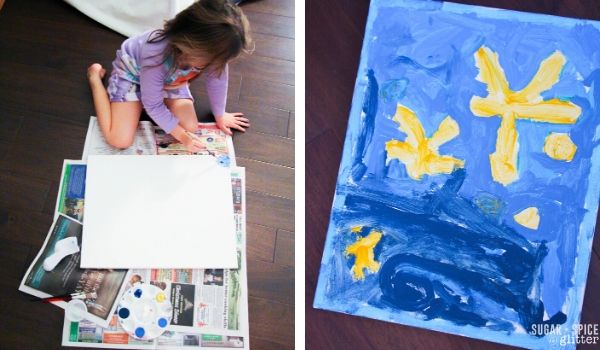
Let your child fill their canvas with their starry night painting. If you are using a large canvas, this may take a couple of sessions.
We just used acrylic paints, but you can experiment with oil paints or oil pastels, if desired.
Let the painting dry completely overnight before attaching the crystal stars with white glue or hot glue.
Pin this Easy Starry Night Painting for Kids:
Grab your free printable instructions for our Easy Starry Night Craft with Crystal Stars:
Want to Save This Recipe?
Enter your email & I'll send it to your inbox. Plus, get great new recipes from me every week!
By submitting this form, you consent to receive emails from Sugar, Spice and Glitter.
Starry Night Craft Project for Kids with Borax Crystal Stars
A simple art project for kids to learn about van Gogh's starry night which also includes a science experiment of making crystal stars.
Materials
- Pipe cleaners (silver, yellow, white or gold)
- 3 Tablespoons Borax powder
- 1 cup boiling water
- Large canvas
- Blue paints (variety)
- Yellow paints
- White paint
- Metallic paint, optional
Tools
- Mason jars
- Chopsticks or skewer sticks
- Dental floss or string
- Paint brushes
- Paint tray
- Rag
- Container of clean water for washing brushes
Instructions
How to Make Borax Crystal Stars
- Shape your pipe cleaners into star shapes.
- Use a piece of dental floss or string to tie the pipe cleaner star to a chopstick or wooden skewer stick. (You will want about 4" of string between the two.) Set aside.
- Boil your water and pour into a heat-safe mason jar.
- Stir 3 Tablespoons of borax powder into the water and stir well. Keep adding borax powder into the solution until no more borax powder will dissolve (you may have some settled at the bottom of your jar and that's okay.)
- Slowly lower the pipe cleaner stars into the solution and set in a safe place overnight or for up to three days.
- Try to ensure that none of the pipe cleaners are touching, or you will have to break some of the crystals off when separating them later. (Using multiple jars can help with this.)
- Remove the crystals carefully and dispose of the borax water. (It can be great if you have an ant problem outside, or add to laundry for a freshness boost.)
- Let the crystals dry on a clean surface until ready to attach to your painting.
How to Make a Starry Night Painting
- Place the canvas on a clean, protected surface (we covered our living room floor with newspaper).
- Set out the paints, a variety of paintbrushes, a container with clean water and a rag.
- Let your child fill their canvas with their starry night painting. If you are using a large canvas, this may take a couple of sessions.
- We just used acrylic paints, but you can experiment with oil paints or oil pastels, if desired.
- Let the painting dry completely overnight before attaching the crystal stars with white glue or hot glue.
Recommended Products
As an Amazon Associate and member of other affiliate programs, I earn from qualifying purchases.
-
![Carl & Kay 348 Pipe Cleaners [Bonus: 48 Googly Eyes] in a Zipper Storage Bag, Chenille Stems in 29 Colors for DIY Art, Creative Kid’s Gift, Assorted Fuzzy Craft Sticks, Children’s Craft Supplies](data:image/svg+xml,%3Csvg%20xmlns='http://www.w3.org/2000/svg'%20width='240'%20height='240'%20viewBox='0%200%20240%20240'%3E%3C/svg%3E) Carl & Kay 348 Pipe Cleaners [Bonus: 48 Googly Eyes] in a Zipper Storage Bag, Chenille Stems in 29 Colors for DIY Art, Creative Kid’s Gift, Assorted Fuzzy Craft Sticks, Children’s Craft Supplies
Carl & Kay 348 Pipe Cleaners [Bonus: 48 Googly Eyes] in a Zipper Storage Bag, Chenille Stems in 29 Colors for DIY Art, Creative Kid’s Gift, Assorted Fuzzy Craft Sticks, Children’s Craft Supplies -
PHOENIX Pre Stretched Canvas for Painting - 18x24 Inch / 5 Pack - 5/8 Inch Profile of Super Value Pack for Oil & Acrylic Paint
-
Borax 20 Mule Team Detergent Booster, 65 Oz
![Carl & Kay 348 Pipe Cleaners [Bonus: 48 Googly Eyes] in a Zipper Storage Bag, Chenille Stems in 29 Colors for DIY Art, Creative Kid’s Gift, Assorted Fuzzy Craft Sticks, Children’s Craft Supplies](https://m.media-amazon.com/images/I/61i-2oblnhL._SL500_.jpg)


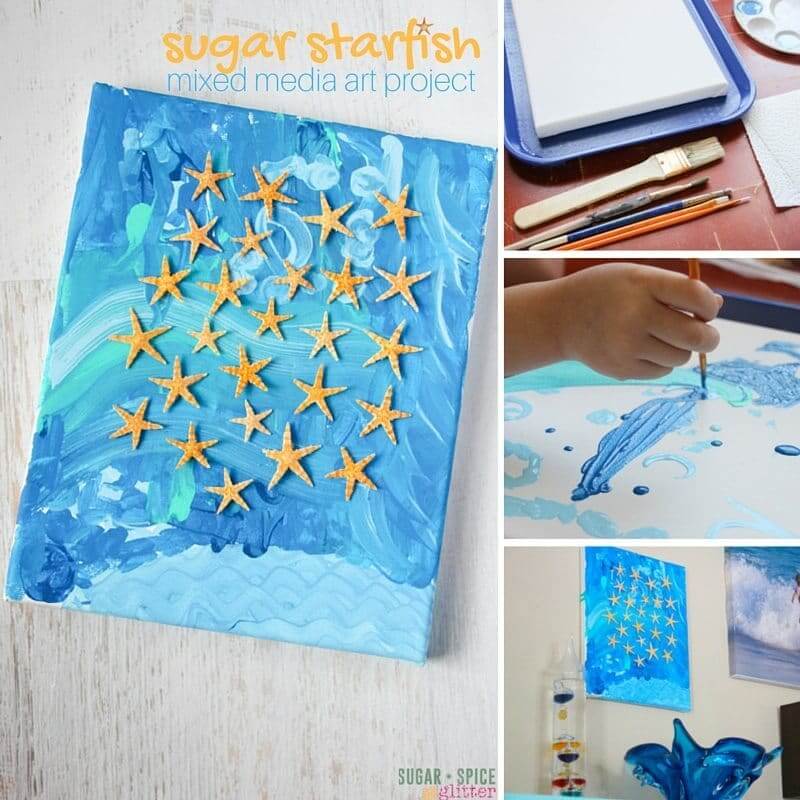
For more mixed media art projects for kids, check out our Starfish Art Project or our Crayon Drip Rain Cloud craft.