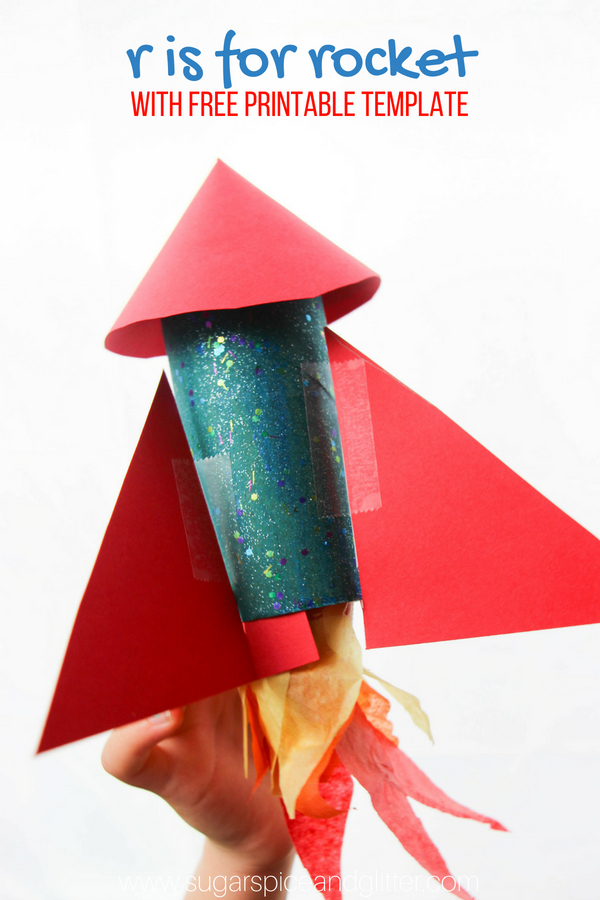
R is for Rocket Craft
Welcome to Sugar, Spice & Glitter! Please note, this post may contain affiliate links. For more details, see our Full Disclosure.
One of our earliest kid science experiments on the blog was this Straw Rocket experiment, which is still a classic! I wanted to add to our growing collection of Space Activities with a Paper Rocket Craft just in time for the 31 Days of ABCs Challenge.
Rocket Craft for Kids
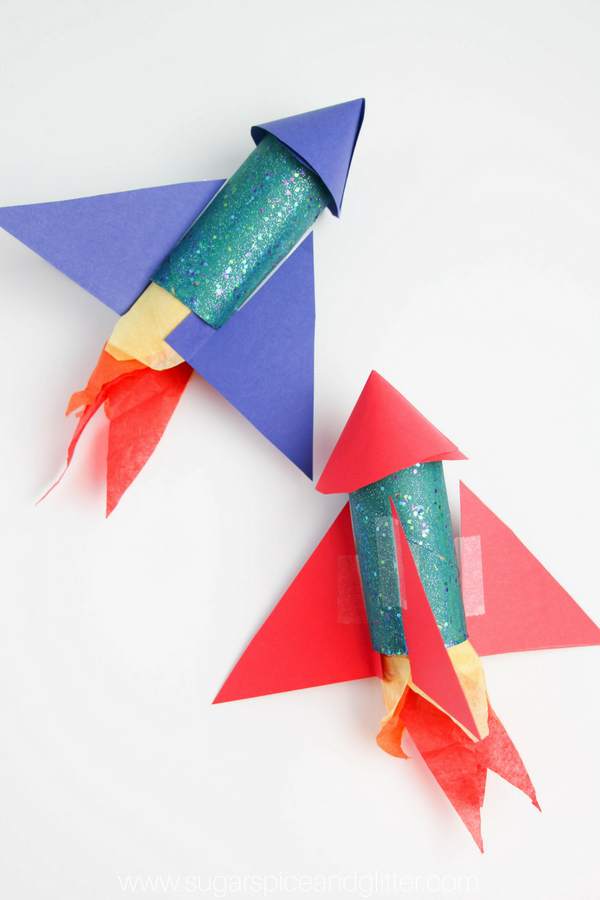
This rocket craft was super easy to do with my crew of 2 and 3 year olds but older kids will enjoy it, too, and be able to add even more personalization to their rockets.
I helped the younger kids with taping their rocket fins in the right spots and showed them how to assemble the tissue paper rocket flames, but other than that – this craft is super simple for them to make independently.
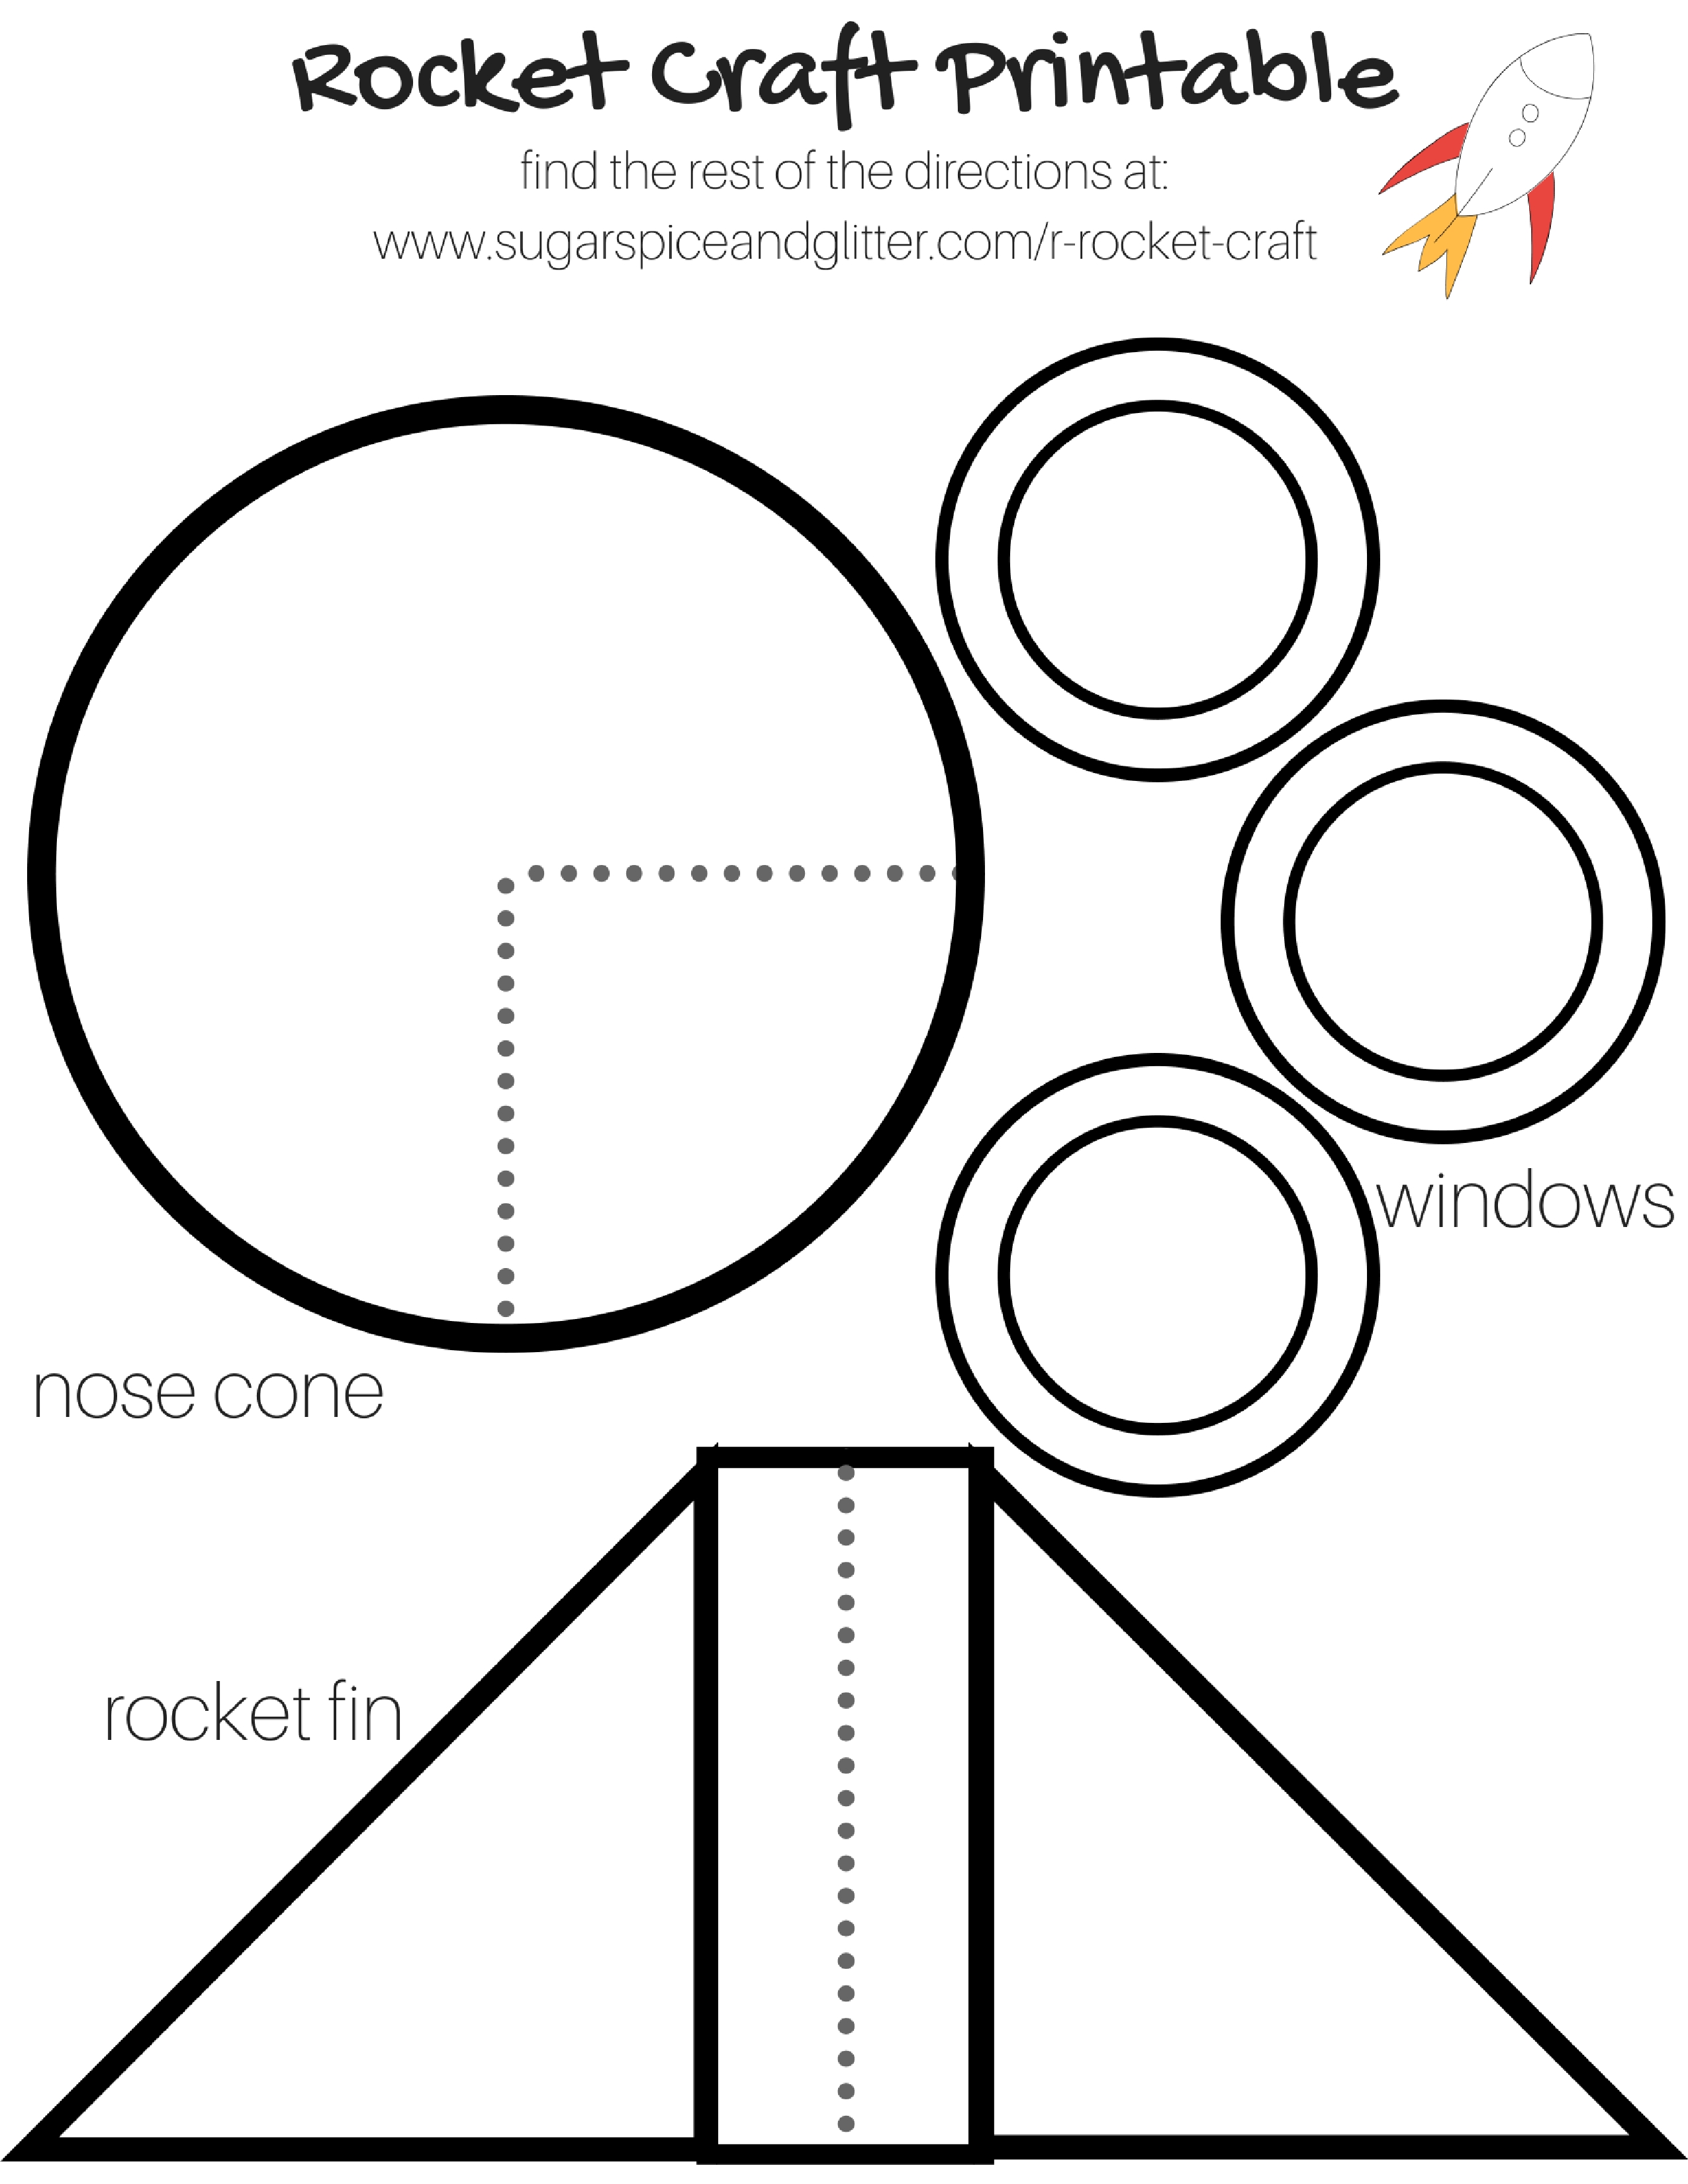
I made a printable that kids can trace and cut out the shapes to help this craft go smoooothly and also helps kids work on their fine motor skills – tracing and cutting, specifically. (Plus, it was awesome when the parents came for pick up and knew immediately what the crafts were – they usually have to ask or look for me to whisper what we made.)
These would look really cool hanging from the ceiling with some string, but my kids just enjoyed zooming around the room with their rockets. It would be a great addition to a space unit study (along with our space sensory bin or our space yoga for kids.)
I know there are some people who are really anti-TP rolls in crafts, but this craft can use leftover paper towel roll, wrapping paper roll, or even some rolled cardstock. (They’ve even started selling “craft rolls” which are basically TP rolls that have never had TP on them for those who are super icked out at using real TP rolls.)

Materials for a Paper Rocket Craft
- Toilet paper tube
- Rocket craft printable (below)
- Cardstock or construction paper
- Sparkly paint
- Paintbrushes
- Scissors
- Tape
- Tissue paper streamers (red, orange, yellow)
Tip: instead of tape you can alternatively use glue and a paperclip, or hot glue.
How to Make A Paper Tube Rocket
Have the children paint the paper tubes first as the base of their rockets. Our rockets needed two coats of paint since we used brown paper tubes.
While the paint is drying, cut out the shapes from the rocket craft printable (below) and trace them onto your chosen color of cardstock or construction paper. Cut out the shapes – you will want 3 fins, not two.

Cut one line of the circle (nose cone of the rocket) and glue all over the triangle section. Fold the glued section underneath the rest of the circle to form a cone and let dry.
Cut the streamers to form the “flames” to come out of the bottom of the rocket.
When the nose cone and paper tube are dry, attach the fins (either by cutting halfway down the rectangular lines and and inserting the paper tube in the cuts, or folding the rectangular tabs down and taping or gluing them to the rocket.

Attach the nose cone and optional “rocket windows.”
Tape or glue the flames securely to the inside of the rocket.
And you’re done – 3, 2, 1 BLAST OFF!
Pin this easy Rocket Craft for Kids:

Grab your free rocket printable for this craft here.
Grab your free printable directions for our rocket craft for kids:
Want to Save This Recipe?
Enter your email & I'll send it to your inbox. Plus, get great new recipes from me every week!
By submitting this form, you consent to receive emails from Sugar, Spice and Glitter.
R is for Rocket Craft
Ingredients
- Toilet paper tube
- Rocket craft printable
- Cardstock or construction paper
- Sparkly paint
- Paintbrushes
- Scissors
- Tape
- Tissue paper streamers (red, orange, yellow)
Instructions
- Have the children paint the paper tubes first as the base of their rockets. Our rockets needed two coats of paint since we used brown paper tubes.
- While the paint is drying, cut out the shapes from the rocket craft printable and trace them onto your chosen color of cardstock or construction paper. Cut out the shapes - you will want 3 fins, not two.
- Cut one line of the circle (nose cone of the rocket) and glue all over the triangle section. Fold the glued section underneath the rest of the circle to form a cone and let dry.
- Cut the streamers to form the "flames" to come out of the bottom of the rocket.
- When the nose cone and paper tube are dry, attach the fins (either by cutting halfway down the rectangular lines and and inserting the paper tube in the cuts, or folding the rectangular tabs down and taping or gluing them to the rocket.
- Attach the nose cone and optional "rocket windows."
- Tape or glue the flames securely to the inside of the rocket.
- And you're done - 3, 2, 1 BLAST OFF!


Don’t forget to follow All Done Monkey’s 31 Days of ABCs Pinterest board for even more great ABC ideas!