
No-Sew Felt Flowers
Welcome to Sugar, Spice & Glitter! Please note, this post may contain affiliate links. For more details, see our Full Disclosure.

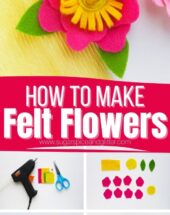
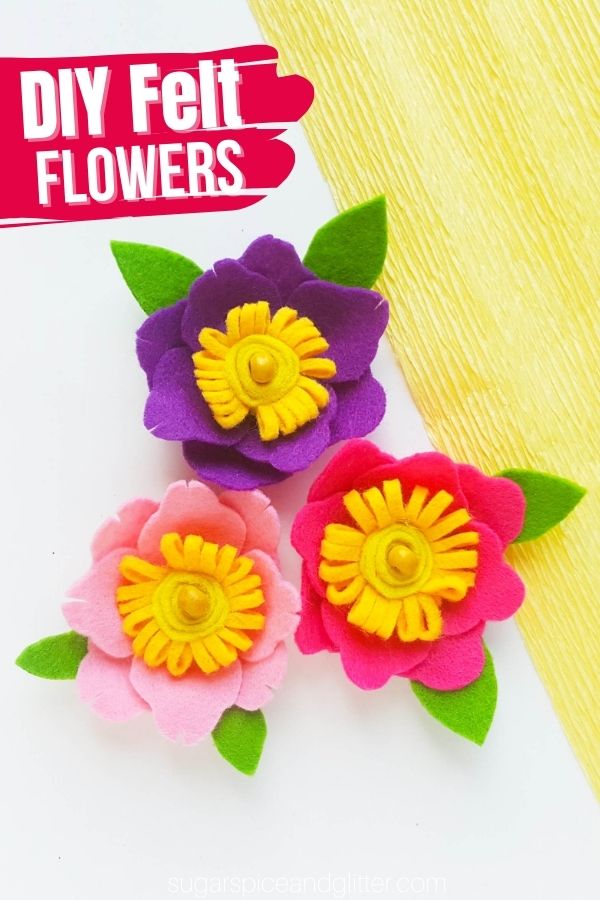
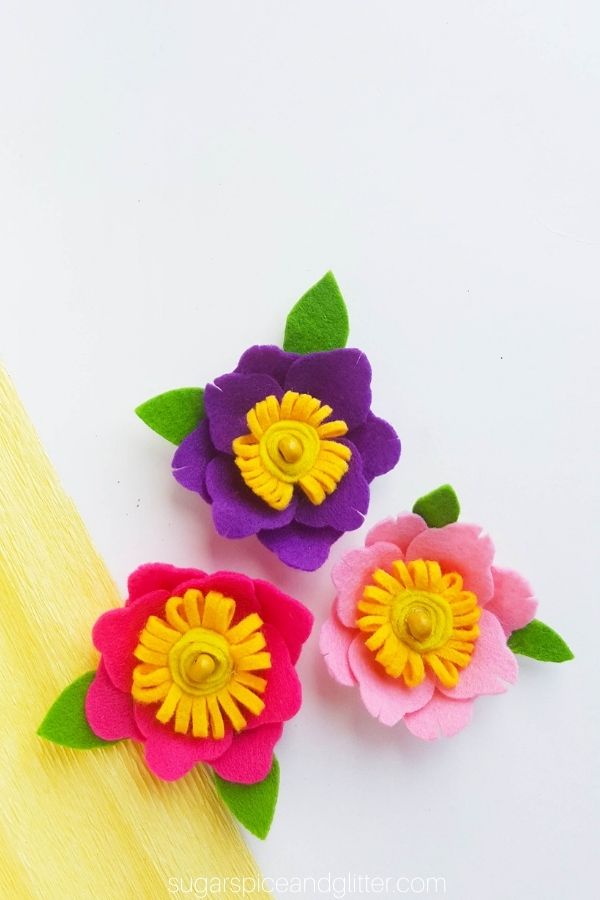
A fun and easy tutorial for how to make felt flowers, perfect for adding to a variety of craft projects: felt flower headbands, wreaths, magnets, picture frames, etc.
DIY Felt Flower Craft
Today I’m sharing a simple felt flower tutorial for how to make simple felt flowers to add to your crafting projects. This tutorial also includes a free felt flower template that you can download and print off as many times as you’d like. Make the template bigger or smaller to change the size of your flowers.
While I used hot glue to make our felt flowers, you can use white school glue or felt glue if you’re nervous about hot glue burns. Have some binder clips on hand to hold the flower petals in shape as they dry, since other types of glue don’t dry as quickly as hot glue.
You can also use our template to make paper flowers using pretty origami paper or cardstock paper. I also think it would be cute to replace the yellow part (the pistil and stamen) of the flower with pretty beads, jewels, glass rocks, etc.
Whenever we need to cut out intricate shapes from felt, I always grab some freezer paper and use the freezer paper trick to cut out our felt shapes, but good-quality felt and a sharp pair of scissors also makes all the difference.
Crafts You Can Add these Felt Flowers To:
- Attach a magnet to the back
- Glue onto a headband or hair clips for a pretty hair accessory
- Use to make your own felt flower bracelets
- Attach to a picture frame for a sweet gift idea
- Add to a painting for a 3D touch
- Glue to a cup or empty container for a pretty, customized pencil holder
- Glue in a pattern to a cardboard shape for a pretty piece of decor
- Sew or glue onto a throw pillow for a custom touch

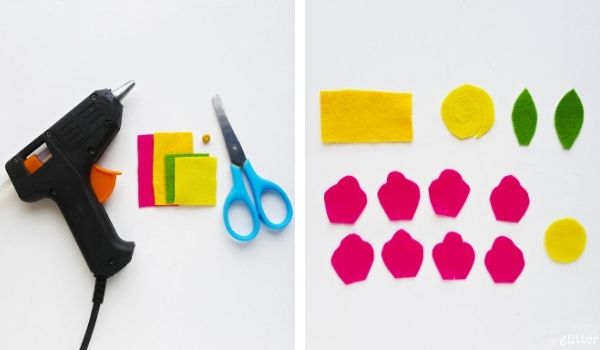
No-Sew Felt Flower Materials
- Felt
- Pencil or fabric marker
- Scissors
- Freezer paper and iron (if using the freezer paper trick)
- Small Beads
- Hot glue gun
- Felt Flower Template
Tip: change the size of your template when printing them out to make bigger or smaller flowers.
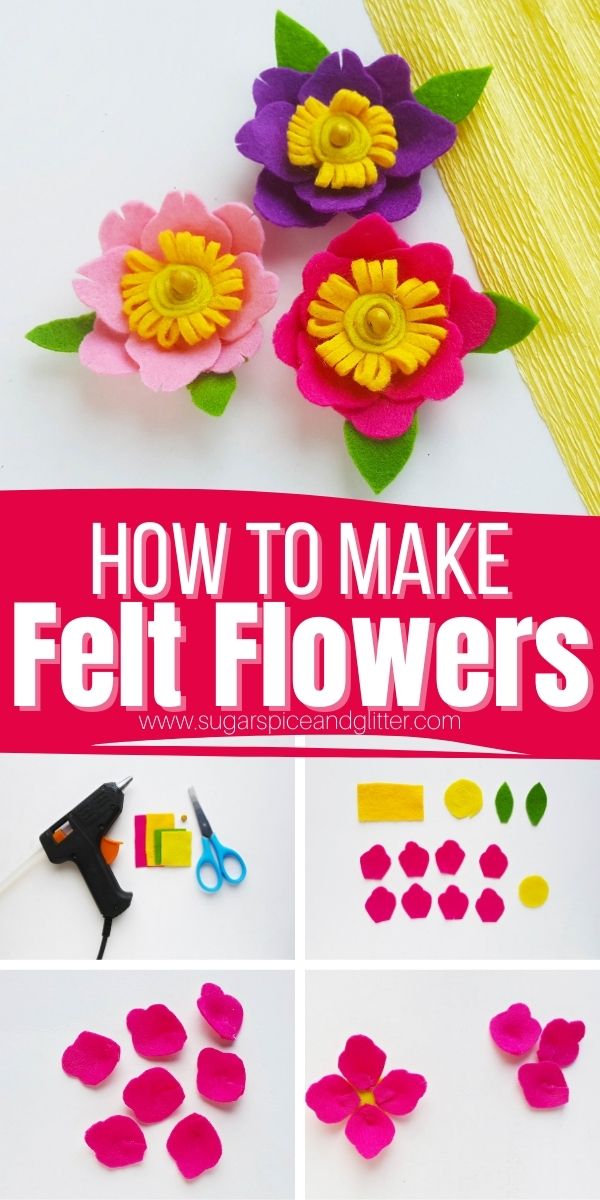
How to Make Felt Flowers
Print out the felt flower template and cut out the flower shapes.
Use the freezer paper trick or use a felt pen to trace the flower shapes onto your chosen felts.
Take the felt petals and cut a small (1 cm) slit in the bottom of each petal.
If using hot glue, prepare the glue gun and when ready, apply a small dab of glue to one side of the slit and then fold the other side of the slit over the glue to form a rounded, cup-shape at the bottom of the petal.
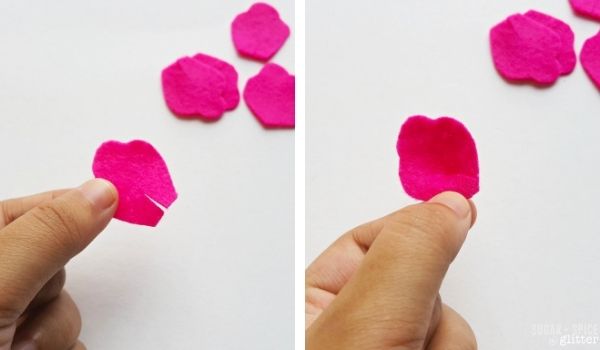
If using school glue or felt glue, use a binder clip or strong paper clip to hold the petal in place as it dries.
Repeat with all petals.
Take the rectangular and spiral felt pieces.
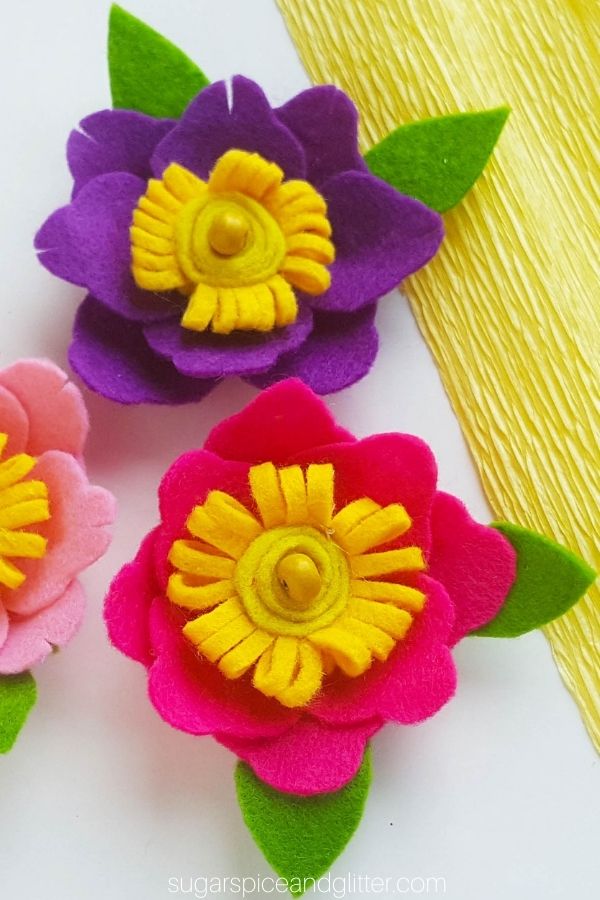
Fold the rectangular pattern into half and cut thin, even fringe along the closed end of the fold. Take the spiral pattern and start rolling it from its outer end. Continue to roll towards the center and after reaching the center glue the roll with the center of the spiral pattern to secure it.
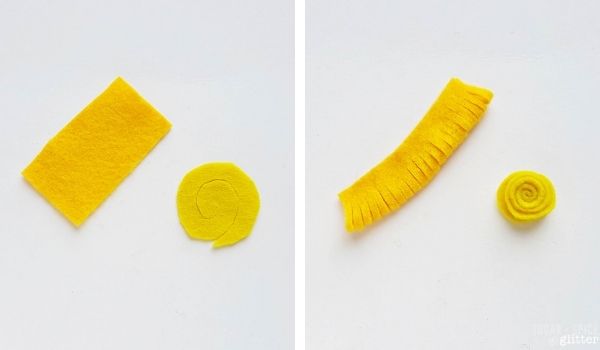
Wrap and glue the fringed pattern around the rolled spiral pattern.
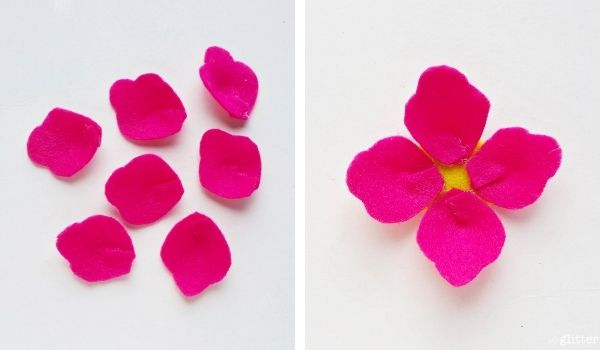
Take the round pattern and place it on a flat surface. Glue a petal on the round pattern near its outer edge.
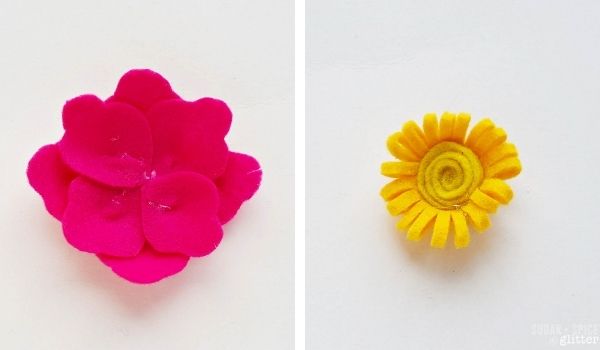
Glue 3 more petals one by one, near the outer edge of the round base.
Glue the rest of the petals (4 more petals) near the center of the round base to fill out the flower.
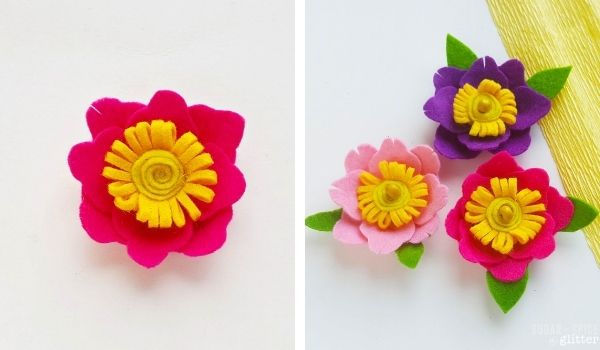
Now glue the center part of the flower (with the roll and fringe) in the center of the petals.
If desired, you can glue a small bead to the center of the flower.
Glue the felt leaves to the bottom of the flower. Allow to dry completely.
Pin this Easy No-Sew Felt Flower Tutorial:
Grab your free printable for our felt flower tutorial:
Want to Save This Recipe?
Enter your email & I'll send it to your inbox. Plus, get great new recipes from me every week!
By submitting this form, you consent to receive emails from Sugar, Spice and Glitter.
No-Sew Felt Flowers
An easy step-by-step tutorial for felt flowers. You can add these flowers to a variety of crafts for a customized embellishment - headbands, magnets, picture frames, etc.
Materials
- Felt
- Small Beads
- Hot glue gun
- Felt Flower Template
Tools
- Pencil or fabric marker
- Scissors
- Freezer paper and iron (if using the freezer paper trick)
Instructions
- Print out the felt flower template and cut out the flower shapes.
- Use the freezer paper trick or use a felt pen to trace the flower shapes onto your chosen felts.
- Take the felt petals and cut a small (1 cm) slit in the bottom of each petal.
- If using hot glue, prepare the glue gun and when ready, apply a small dab of glue to one side of the slit and then fold the other side of the slit over the glue to form a rounded, cup-shape at the bottom of the petal.
- If using school glue or felt glue, use a binder clip or strong paper clip to hold the petal in place as it dries.
- Repeat with all petals.
- Take the rectangular and spiral felt pieces.
- Fold the rectangular pattern into half and cut thin, even fringe along the closed end of the fold. Take the spiral pattern and start rolling it from its outer end. Continue to roll towards the center and after reaching the center glue the roll with the center of the spiral pattern to secure it.
- Wrap and glue the fringed pattern around the rolled spiral pattern.
- Take the round pattern and place it on a flat surface. Glue a petal on the round pattern near its outer edge.
- Glue 3 more petals one by one, near the outer edge of the round base.
- Glue the rest of the petals (4 more petals) near the center of the round base to fill out the flower.
- Now glue the center part of the flower (with the roll and fringe) in the center of the petals.
- If desired, you can glue a small bead to the center of the flower.
- Glue the felt leaves to the bottom of the flower. Allow to dry completely.
Recommended Products
As an Amazon Associate and member of other affiliate programs, I earn from qualifying purchases.
-
 Reynolds Freezer Paper Plastic Coated 50 Sq Ft (3 Rolls)
 -
E.Durable Mini Glue Gun Tool Kit Kids Friendly with Glue Sticks for School Projects, DIY Crafts, Delicate Items Like Foam, Thermocal, Floral, etc (30W)
-
flic-flac 44PCS 4 x 4 inches (10 x10cm) Assorted Color Felt Fabric Sheets Patchwork Sewing DIY Craft 1mm Thick


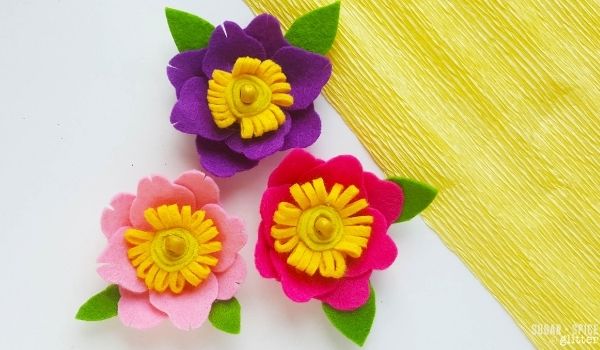
These no-sew felt flowers are super easy to make and add a pretty touch to just about anything you add them to! Your kids will be looking to add these to everything once they master making their first couple of felt flowers.
For more kids’ craft ideas, check out our full collection here:
For some sewing projects for kids, check out our kids’ sewing project ideas here:
For more Spring Crafts for Kids, check out our Spring Craft collection here:
Fold the rectangular pattern into half and cut thin, even fringe along the closed end of the fold. Take the spiral pattern and start rolling it from its outer end
Thanks for the tip!
Custom Skincare Is the Future of Beauty
Your skin is unique, so your treatment should be too. Experience individualized spa care at https://www.spajolieny.com.