
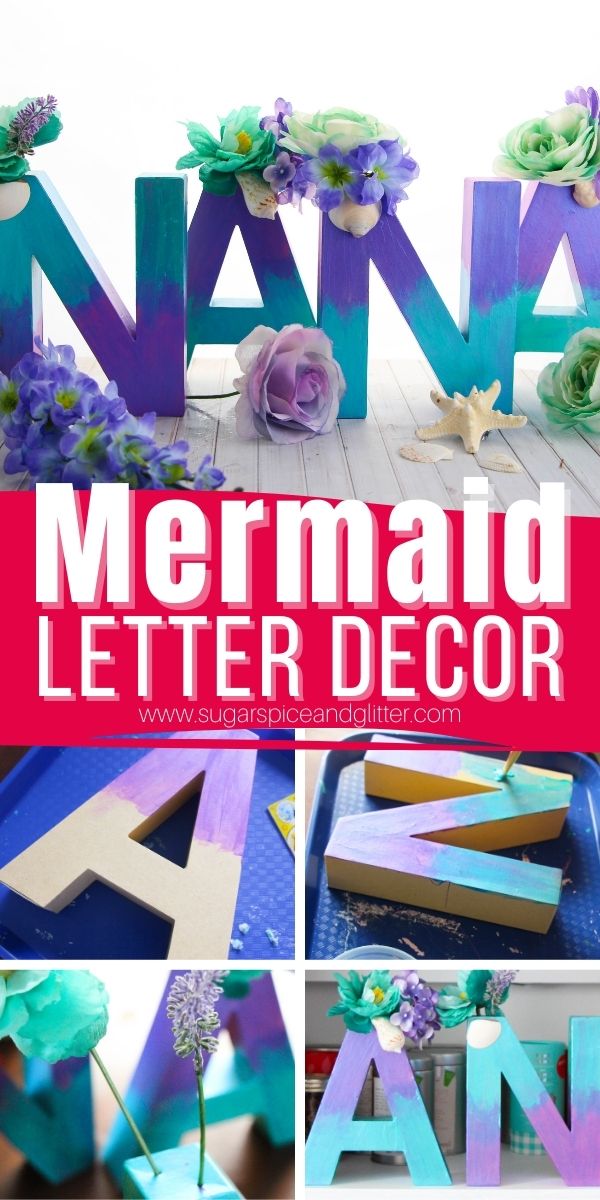
Mermaid Letter Name Decor
Welcome to Sugar, Spice & Glitter! Please note, this post may contain affiliate links. For more details, see our Full Disclosure.
A fun DIY Mermaid Decor Idea to add some personality to your child’s room, these DIY Mermaid Letters are a fun way to display your child’s name or make a fun gift idea for someone you want to celebrate!
Mermaid Name Craft
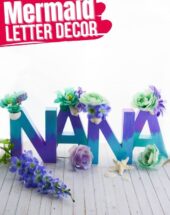
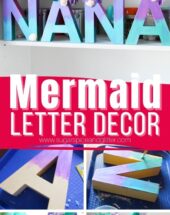
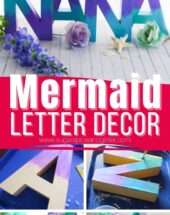
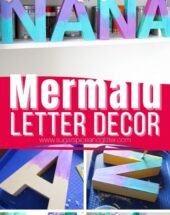
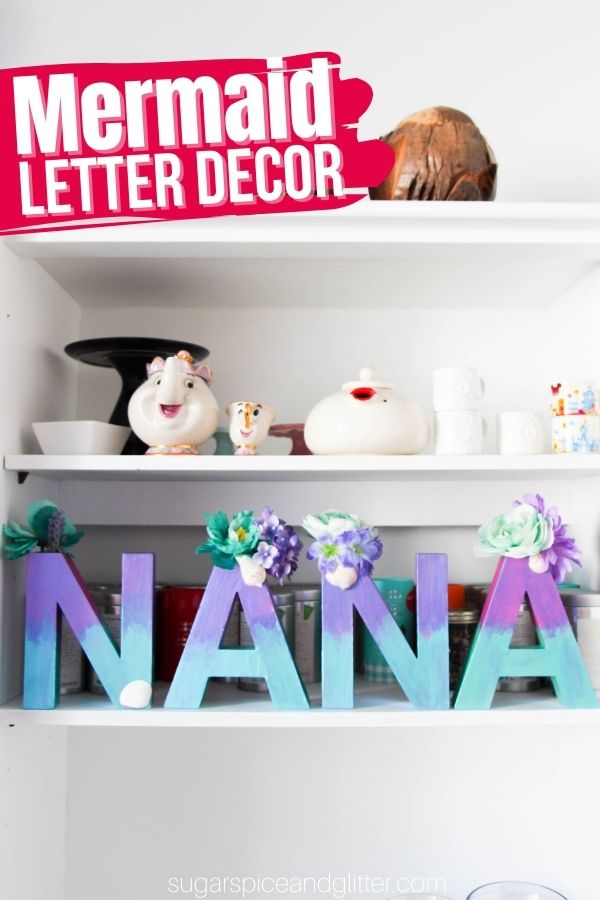
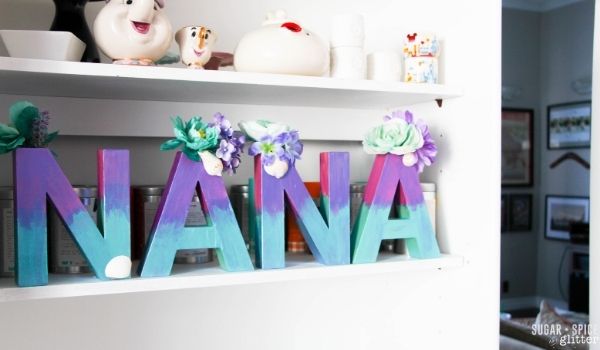
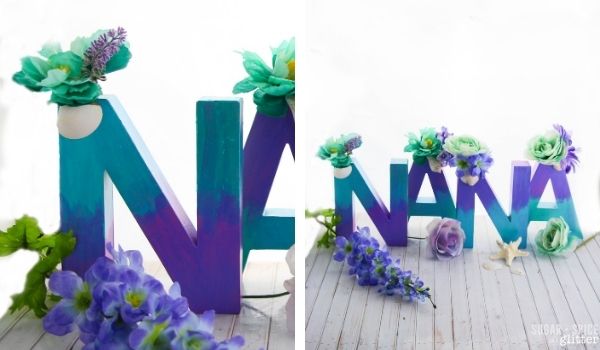
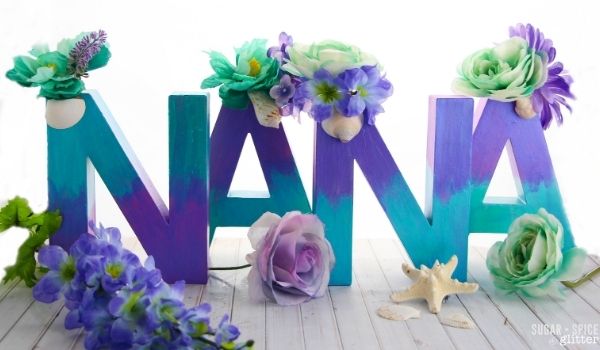
This cute Mermaid Letter Name Craft was a homemade gift that my 7 year old Ella made for her Nana’s birthday.
It was super easy for her to make mostly independently and I think it turned out looking really gorgeous with that shimmery color blending and the cute addition of the flowers and seashells. You could even add in fake pearls or pearl beading, glitter designs, small pictures, or even add some broken/mismatched pieces of jewelry, just like a mermaid would collect.
There are similar 3D mermaid letters for sale on Etsy for $20-44 PER LETTER! So, even though we splurged on the holographic paint and pricey Michael’s flower bouquets, I think this craft ended up being a bargain. You could make your version less expensive by making your own cardboard letters and/or using dollar store flowers for the embellishments.
These mermaid letters would be a cute addition to a Mermaid Birthday Party decor scheme, or just a whimsical addition to your child’s room. My mom put hers in her sunroom overlooking her pool, which fit the mermaid theme perfectly.
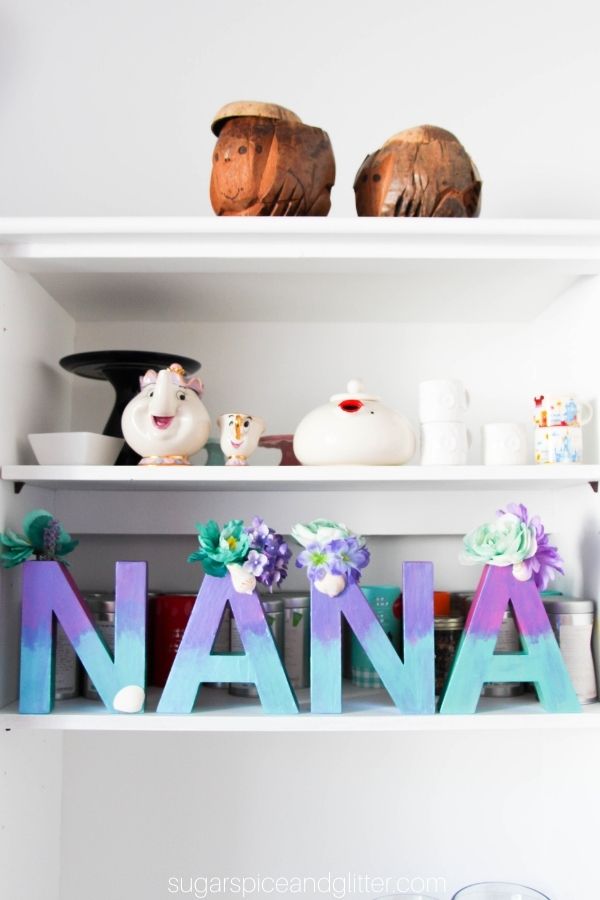
To display the letters, you can place them on a decorative shelf, use picture hangers to place them on a wall or even mount them onto a canvas or piece of driftwood. (I think the driftwood idea would look super cool with the mermaid theme.)
More Mermaid Decor Ideas
- Mermaid Flower Pot
- DIY Mermaid Bulletin Board
- Mermaid Suncatcher
- 30 Mermaid Gifts for Adults (includes several cute Etsy Mermaid home decor pieces)
- DIY Mermaid Lantern Jar from Red Ted Art
- Mermaid Fish Scale Wall Art from Darice Blog
Materials Needed for Mermaid Vases
- Cardboard Letters
- Metallic or Holographic Paint <– I suggest using two contrasting colors on the same half of the color wheel that share similar pigment hues
- 2 Paintbrushes
- Water
- Rag or Paper Towels
- Artificial Flowers <– we opted for ones that matched our paint colors
- Seashells, optional
- Hot glue
- Hot glue gun
Tip: I highly recommend grabbing a couple of these sturdy plastic lunch trays (we have one in the pictures in this post). I use these for almost all of our craft or kitchen activities, as well as in our Montessori practical life activities. Ours have lasted for over 6 years and are still going strong, plus they are so great for containing messes and allowing the kids to set a project to the side while it dries (or if you have to clear off the table for supper).
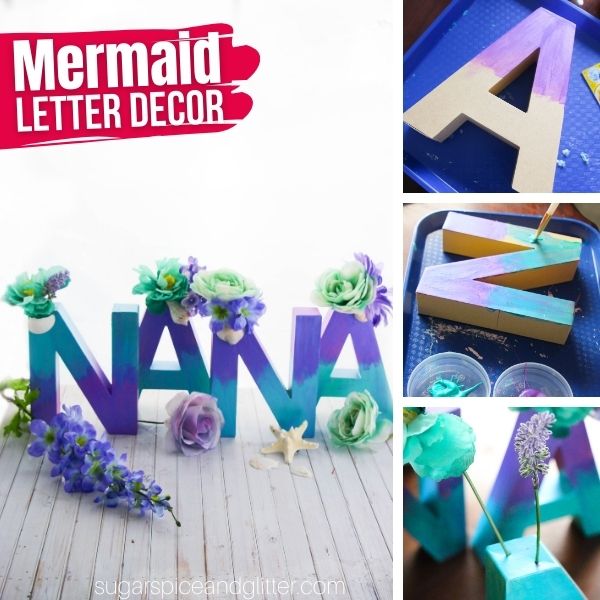
How to Make Mermaid Letters
Place one letter on your clean, protected surface and use a paintbrush to apply one color of paint to the top half of the letter. Use consistent strokes moving in the same direction.
(Alternatively, you can use a sponge to apply the paint.)
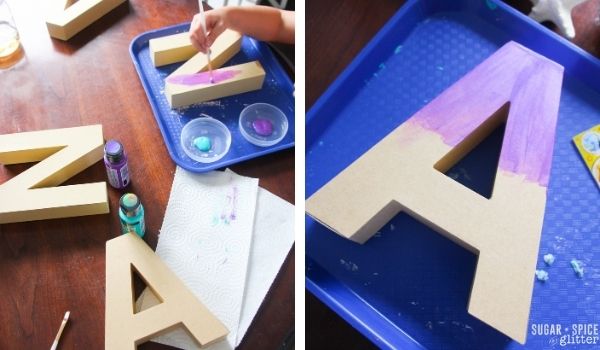
Clean your brush and then apply the other color of paint to the bottom half of the letter. Where the two colors meet, try to blend the colors using your paintbrush, adding more paint of either color as needed to get a look that you like.
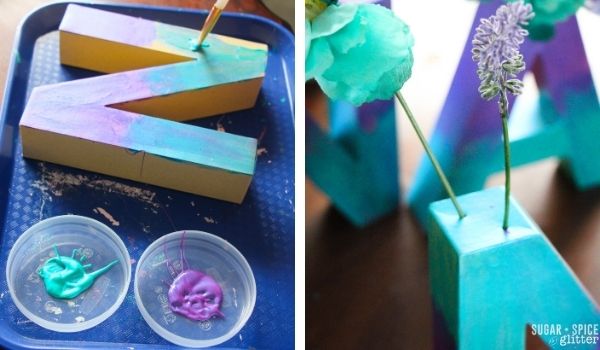
Allow the painted side of the letter to dry as you repeat this process with the other letters. Pay attention to ensure that you paint the top half of each letter in the same color, so that your final display has consistency. We experimented with painting the first color in the opposite scheme, but eventually changed it because we liked the consistency better (you can see pictures in the post that show both options).
Repeat the painting process on all sides of the letters, swapping them out as you wait for sides to dry.
When the paint is fully applied and dry, you can seal your paint using a paint sealant, but it’s not necessary. (Follow the instructions on the bottle, if using.)
Add decorative elements to your letters, as desired. We poked holes in the tops of our letters and then poked our fake flower stems through them, and then hot glued seashells just under the flowers for an added mermaid touch.
Pin this DIY Mermaid Decor Idea to add some magic to your child’s room:
Grab your free printable instructions for our DIY mermaid decor letters:
Want to Save This Recipe?
Enter your email & I'll send it to your inbox. Plus, get great new recipes from me every week!
By submitting this form, you consent to receive emails from Sugar, Spice and Glitter.
Mermaid Letter Name Decor
A super simple method for making professional-looking Mermaid Decor Letters for a fun, mermaid-inspired gift or a whimsical room decor piece.
Materials
- Cardboard Letters
- Metallic or Holographic Paint
- Artificial Flowers
- Seashells, optional
Tools
- 2 Paintbrushes
- Water
- Rag or Paper Towels
- Hot glue
- Hot glue gun
Instructions
- Place one letter on your clean, protected surface and use a paintbrush to apply one color of paint to the top half of the letter. Use consistent strokes moving in the same direction.
- (Alternatively, you can use a sponge to apply the paint.)
- Clean your brush and then apply the other color of paint to the bottom half of the letter. Where the two colors meet, try to blend the colors using your paintbrush, adding more paint of either color as needed to get a look that you like.
- Allow the painted side of the letter to dry as you repeat this process with the other letters. Pay attention to ensure that you paint the top half of each letter in the same color, so that your final display has consistency. We experimented with painting the first color in the opposite scheme, but eventually changed it because we liked the consistency better (you can see pictures in the post that show both options).
- Repeat the painting process on all sides of the letters, swapping them out as you wait for sides to dry.
- When the paint is fully applied and dry, you can seal your paint using a paint sealant, but it's not necessary. (Follow the instructions on the bottle, if using.)
- Add decorative elements to your letters, as desired. We poked holes in the tops of our letters and then poked our fake flower stems through them, and then hot glued seashells just under the flowers for an added mermaid touch.
Notes
I suggest using two contrasting paint colors on the same half of the color wheel that share similar pigment hues.
We opted for flowers that matched the paint colors we used, but a third color or neutral colors would be pretty, too.
You could even add in fake pearls or pearl beading, glitter designs, small pictures, or even add some broken/mismatched pieces of jewelry, just like a mermaid would collect.
Recommended Products
As an Amazon Associate and member of other affiliate programs, I earn from qualifying purchases.


I hope whoever you make these DIY mermaid letters for loves them!
For more kids’ craft ideas, check out our full collection here:
For more easy gift ideas, check out our full collection of homemade gifts here:
For more easy decor ideas, check out our full collection of DIY home decor here:
Or for some Disney-inspired crafts, check out our full Disney craft collection here:


Such a cute and creative mermaid decor idea handmade pieces always feel extra special! Similarly, for projects in Dubai free zones, getting Trakhees Approval is essential, and Atech Interiors LLC helps secure it quickly and smoothly so clients can focus on their design vision.