
Kids Kitchen Water Xylophone Science Experiment (with Video)
Welcome to Sugar, Spice & Glitter! Please note, this post may contain affiliate links. For more details, see our Full Disclosure.
We’re interrupting our usual schedule of kids’ activities, parenting inspiration, and family-friendly food to bring you 31 days of Kids Kitchen Recipes and Activities.
Today, Christy from Thriving Stem is sharing her Chicken Bone Science exploration with her kids, so I thought I’d share a recent Water Xylophone activity that Ella and I enjoyed, which blended music education and science experimentation in a fun and colourful way!

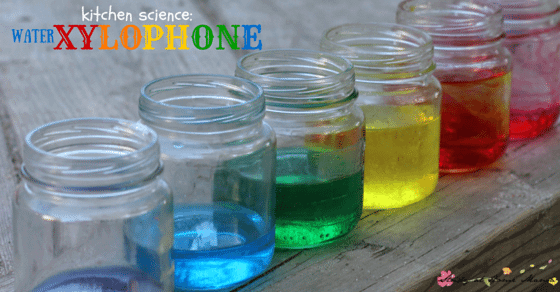
Rainbow Water Xylophone Experiment
While we have a full music corner in our daycare (complete with a drum set, keyboard, toddler piano, Montessori-inspired bells, boom whackers and more), I also think it can be a lot of fun to make our own music with everyday materials!
We’ve made popsicle stick harmonicas, drums out of recyclable containers, and DIY tambourines – but this water xylophone has to be the easiest homemade instrument yet!
This simple activity combines science, math, art and music! It’s great for toddlers, preschoolers and elementary-aged kids, and you can make it with materials you already have in the house.
We did this activity outside so any spills wouldn’t derail our fun. You can alternatively use a large but shallow plastic tote box to contain any spills.
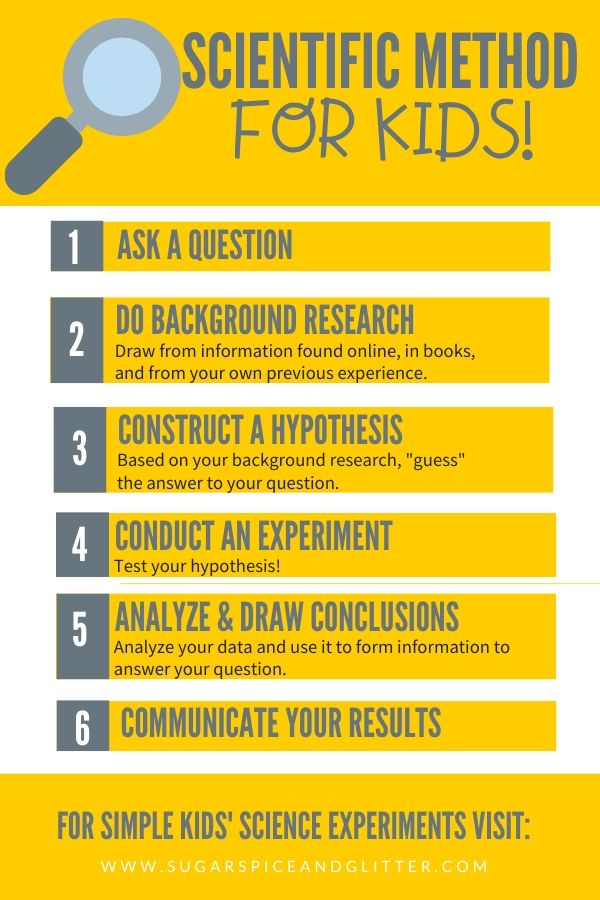
Here is a free Scientific Method Printable for you to use when designing and leading science experiments with kids (including this water xylophone experiment). The process is simpler than it may seem – simply observing what they are seeing and using those observations to “guess” why something might be occurring is half of the process!
Check out our quick video on how to make your own water xylophone – plus see it in action as Ella shows how simple it is to play! (It’s so fun for me to see 9 year old purple-haired Ella playing it just as enthusiastically as she did when she was 3 and we first did this activity!)
Materials Needed for a Water Xylophone
To start off with, we assembled our materials:
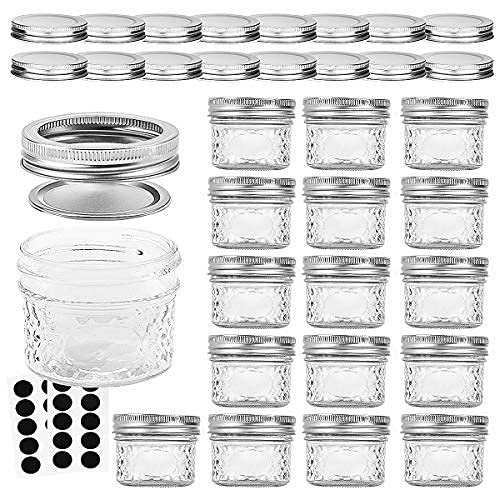
- 6 repurposed baby food jars <– Can use mason jars. make sure that your jars are all the same size. A different experiment can be seeing how different jar sizes affect sound
- Blue, red, and yellow food colouring
- Water
- Measuring cup
- Xylophone striker <– we used our striker from our Glockenspiel which has survived over 6 years of regular daycare use

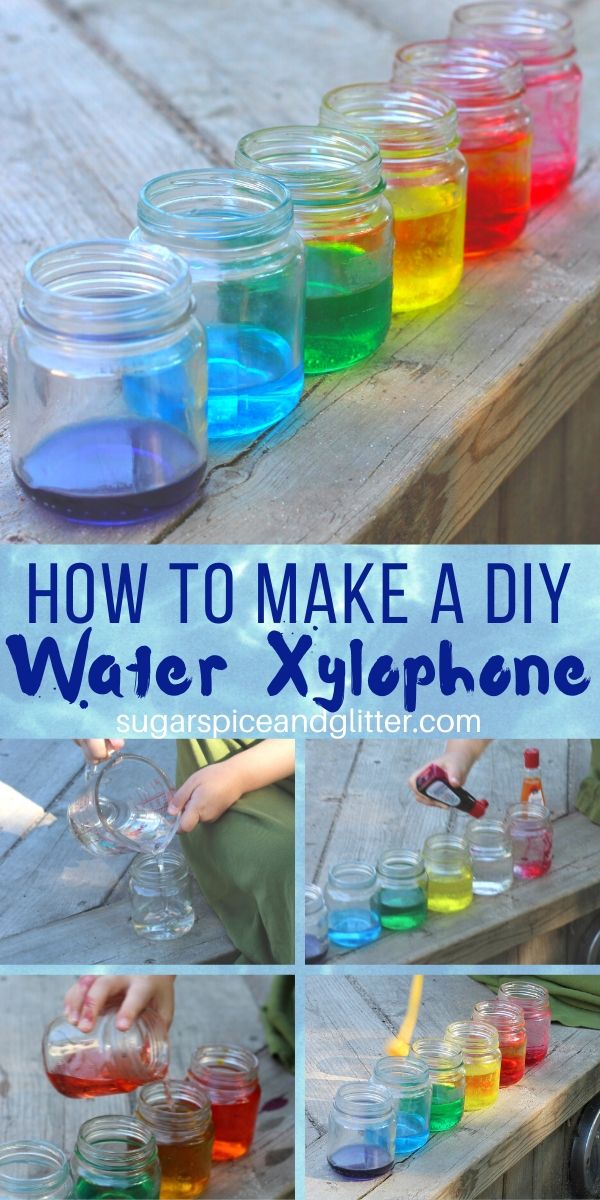
How to Make a Water Xylophone
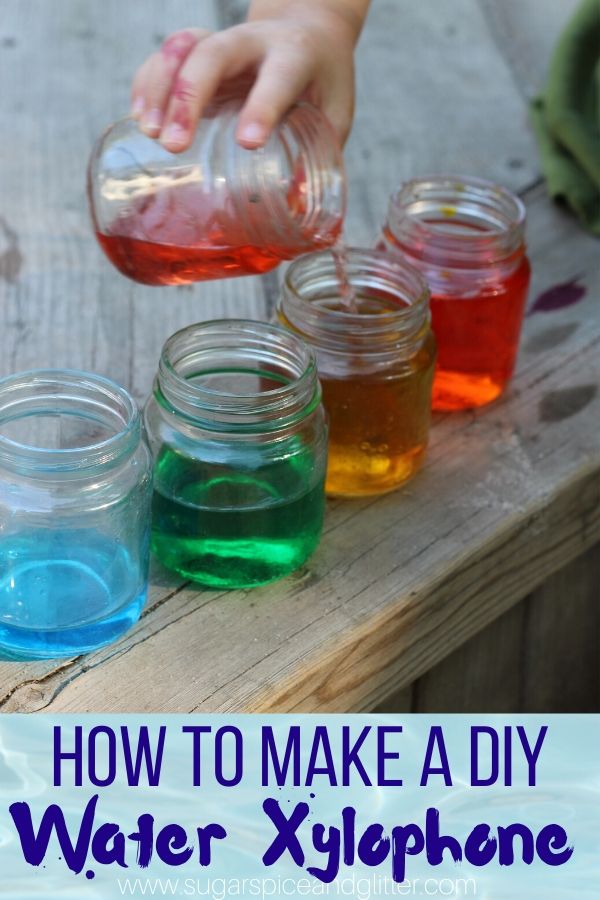
Ella used the measuring cup to portion out varying amounts of water into each jar. We tried our best to ensure that each jar had slightly less water than the jar previous to it. This took a lot of evaluating and adjusting to get things exactly right.
(The average baby food jar holds 4oz, so your increments should be close to: 1oz, 1.5 oz, 2oz, 2.5oz, 3oz, 3.5oz and 4oz – adjust based on the number of jars you are using.)
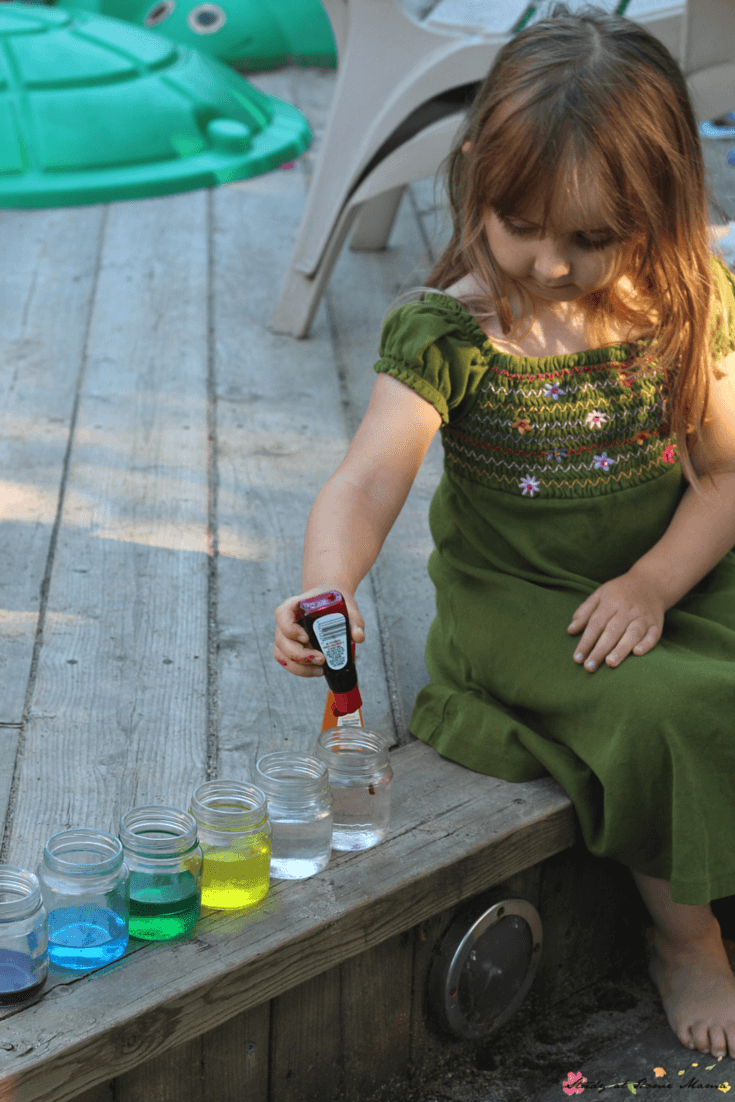
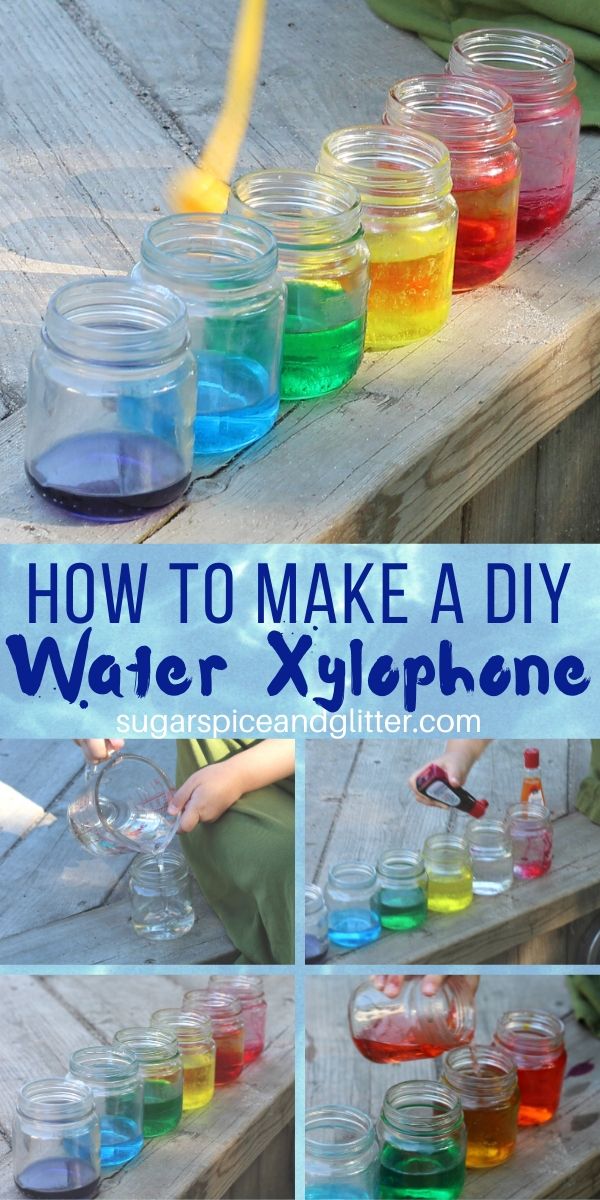
Next, we remembered the order of the rainbow and our colouring mixing experiments to add drops of dye to the water to create a rainbow set of jars.
We could have stirred the dye to help it set faster, but we sat and enjoyed watching the dye slowly spread throughout each jar and change the entire water contents of each. This is a great opportunity to talk about pollution or how contamination occurs.

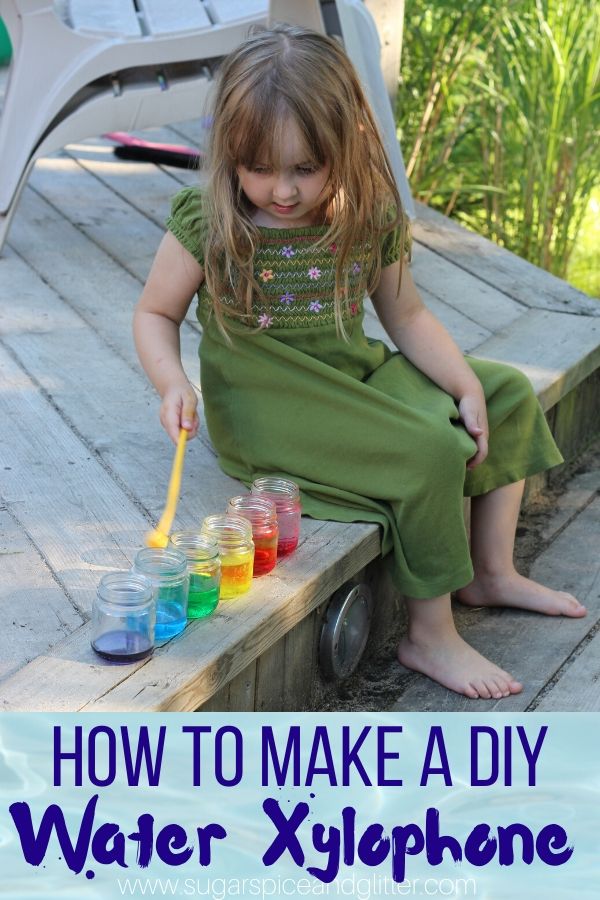
Next, I encouraged Ella to use her striker and play her “water xylophone” and she was pleasantly surprised to hear how each colour had it’s own distinct sound. She experimented quite a bit to see if the tones would stay consistent before putting forth some great hypotheses.

Of course, once we were done playing the water xylophone, Ella decided to mix the coloured water together and see how that effected both the colour and the tone of each jar.
I know some people might have a hard time with a child “ruining” the xylophone, but I try to keep the perspective that the whole point is experimenting and being engaged. If she had started mixing the colours before we got around to the xylophone experiment, I would have reminded her why we were setting up the xylophone and said “when you’re done with mixing, you can help me set up a new xylophone.” As long as she wasn’t being destructive (breaking the glass jars, etc) I would be completely fine with steering off course for a bit.
Pin this Water Xylophone Activity:
Grab our free printable for how to make your own water xylophone (and don’t forget to grab our free Scientific Method Printable):
Want to Save This Recipe?
Enter your email & I'll send it to your inbox. Plus, get great new recipes from me every week!
By submitting this form, you consent to receive emails from Sugar, Spice and Glitter.
Water Xylophone Science Experiment

A fun water play activity that combines art, music, science and math. A great way to introduce the scientific method to kids!
Materials
- 6 repurposed baby food jars or mason jars
- Blue, red, and yellow food colouring
- Water, as needed
- Measuring cup
- Xylophone striker
Instructions
- Use the measuring cup to portion out varying amounts of water into each jar.
(The average baby food jar holds 4oz, so your increments should be close to: 1oz, 1.5 oz, 2oz, 2.5oz, 3oz, 3.5oz and 4oz - adjust based on the number of jars you are using.) - Add drops of dye to the water to create a rainbow set of jars. Try to do it according to the order of the rainbow: Red, Orange, Yellow, Green, Blue, Purple.
- You can stir the dye to help it set faster, or watch the dye slowly spread throughout each jar and change the entire water contents of each. This is a great opportunity to talk about pollution or how contamination occurs.
- Use your striker to play your "water xylophone" and hypothesize about why each jar is making a different sound.
Notes
You can work through the printable Scientific Method throughout this activity.
Recommended Products
As an Amazon Associate and member of other affiliate programs, I earn from qualifying purchases.


In addition to linking up with Christy’s Kids Kitchen Chicken Science post, there are some wonderful Montessori bloggers sharing their Montessori Music posts today — be sure to check them out too, as part of our 12 Months of Montessori Learning:
The Natural Homeschool ~ Living Montessori Now
The Kavanaugh Report ~ Mama’s Happy Hive ~ Child Led Life
Every Star Is Different ~ Grace and Green Pastures ~ The Pinay Homeschooler
Check out the rest of our 31 Days of Kids Kitchen Series here.


I’ve gotta say you did a fantastic job of incorporating Montessori, music, and the kitchen all in one post. It’s quite impressive! I love that you also included the scientific method! Way to go!
I love your scientific slant to this music activity. I’m guilty of often forgetting to ask “thinking-type” questions and your printable is an awesome way to remember what to ask! Thanks!
I love the way you incorporated the scientific method into your activity. I also appreciate how you addressed a child potentially “ruining” the xylophone. It’s a great reminder that how we approach the activity can be just as important as the activity itself.
What a wonderful idea! She can learn a lot about colours and music in just one activity. I’m sure she loved building and playing with this xylophone 🙂
What a fun experiment! Love this idea! 🙂
I just did something very similar to this yesterday! We read the book “Froggy Plays in the Band” and did a quick lesson on making a joyful noise. We made homemade instruments and the xylophone was one of his favorites. I really like how you incorporated the scientific process. What a great moment of purposeful play! I will definitely try to be more intentional about incorporating that vocabulary into our Mommy School activities. Thanks for the encouragement!
Follow Mommy & Her Men on BlogLovin’
My kids love doing stuff like this! Just pinned! 🙂
Elizabeth
allkindsofthingsblog.com
This looks like so much fun! I can’t wait to try this with Little Bee and to hear what this cool xylophone sounds like. 🙂
We’re featuring you this week on Good Tips Tuesday!!! Thanks for linking up!
My kids will love making this water xylophone! I love how you added a science dimension to this activity. Thanks for sharing at #ToddlerFunFriday!
This is really great idea. My little girl probably already loves music and has her favorite songs. I always think music as a powerful tool that helps children learn new thinking skills..
Hi,I check your new stuff regularly. This is a great idea.
Great work and idea. Thank you for sharing.
What a fun learning idea for Montessori kids.
also i find i it very usefull
This was such a fun activity, my kids loved it. Next time, I’m skipping the dye though…
Hiring success often begins with a clear job advertisement that explains the role, expectations, and benefits. A detailed listing attracts qualified applicants and saves time during recruitment. Many employers choose to Post a job listing online because it expands visibility across different industries and locations. Candidates can apply quickly, while businesses receive applications faster through digital platforms. Regularly updating listings and providing accurate information encourages better matches, helping companies connect with talented professionals who are ready to contribute and grow within the organization.