
DIY Tie Dye Welcome Wreath
Welcome to Sugar, Spice & Glitter! Please note, this post may contain affiliate links. For more details, see our Full Disclosure.


A fun DIY Summer Wreath, today’s Tie Dye Welcome Wreath is a super fun and easy way to add some boho/new country style to your entryway.

DIY Summer Wreath Idea
I love a great welcome wreath, but I refuse to spend $80 on a pre-made one – especially since I love changing them out every season and don’t really want to hang up the same wreath year after year. (Which I would feel obligated to do if I spent that much money on a wreath!)
It’s become a fun tradition to make a new wreath to welcome in each season. (It’s my reward for doing all of the grown-up things required with each season change, like swapping out Ella’s clothing or doing all that dreaded yard work.)
We’ve been going through a bit of a tie dye obsession in our home, so what more perfect way to welcome summer than with a tie dye welcome wreath! We used a simple kitchen towel, tie dyed it ourselves, and then used it to make a fabulous fringe and some really unique tie dye roses to embellish our wreath. It’s unique, fun and perfectly suits my family!
For the “welcome” sign, we used our Cricut machine to cut this custom font out of chipboard. I know some craft stores have little wooden signs like this already made, so if you don’t have a Cricut, or don’t want to mess with chipboard, you can alternatively use a pre-made sign or leave that element off of your wreath.

Instead of the tie dye kitchen towel, you could alternatively use some clothing that has seen better days but isn’t really fit to be donated. Small holes or stains won’t be noticeable or strips of fabric that have them can be discarded.
More Summer Cricut Ideas
- Cricut Cactus Terrarium
- DIY Coir Cricut Doormat from the Soccer Mom Blog
- Cricut Mermaid Drink Coasters from Slay at Home Mother
- Red Wine and Blue Drink Decal from That’s What Che Said
- DIY Garden Markers from the Soccer Mom Blog

Materials to Make a Tie Dye Welcome Wreath
- 12-Inch Grapevine Wreath
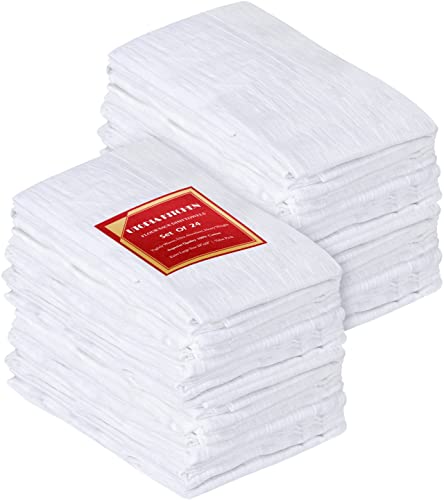
- 1 Large Kitchen Towel
- 1 Chipboard Sheet
- Purple and Pink Tie-Dye
- Black Acrylic Paint
- Mod Podge Craft Sealant
- Welcome SVG File
Tools You May Find Helpful
- Cricut Maker <– or other Cricut cutting machine with Fine Point Blade and Scoring tool
- Knife Blade Tool
- Strong Grip Mat
- Tape
- Hot Glue Gun with Clear Hot Glue Sticks
- Scissors
- Clothing Iron
Tip: you can swap out the tie dyed kitchen towel for strips of fabric cut from clothing that has seen better days.

How to Make a Tie Dye Welcome Wreath
To Tie Dye Your Towel:
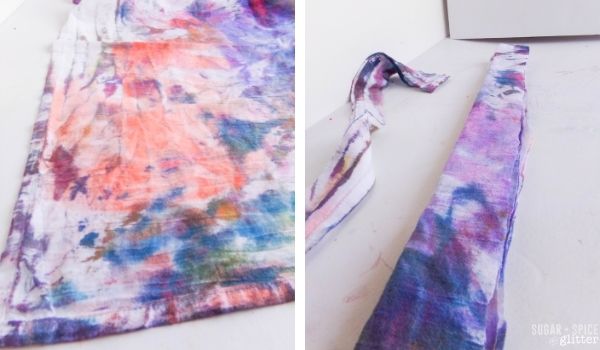
Start by tie-dyeing your kitchen towel. Twist it up and wrap the rubber bands around the center of your bundle in 4-5 places then place it in a large bowl.
Either spray or pour (my preferred method) the dye onto your towel, saturating the towel in multiple places with purple or pink dye, respectively. Allow the tie-dyed towel to dry completely.
Cricut Welcome SVG:
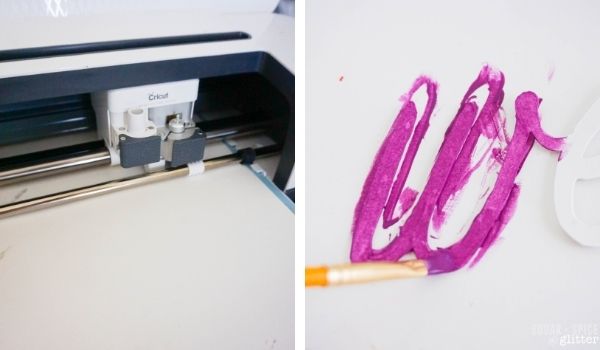
While the towel is drying, go ahead and make your welcome element by downloading the Welcome SVG File. Load the SVG file into Design Space, then insert the image for a new project.
Click “Make It” in Design Space, and set the material type on the machine to “Chipboard”.
Load the knife blade into your Cricut Maker, then follow prompts to load and cut.
Be sure to use a strong grip mat for the chipboard and tape it down in each corner. Unload when finished cutting.
Cut a second welcome shape before closing out of Design Space.
Layer the two pieces of chipboard on top of each other and paint, if desired.
Make the Tie Dye Fringe and Roses:
Once your tie dyed towel is dry, iron it to set in the colors (follow package directions).
Cut the towel into 2-inch (approximately) wide strips.
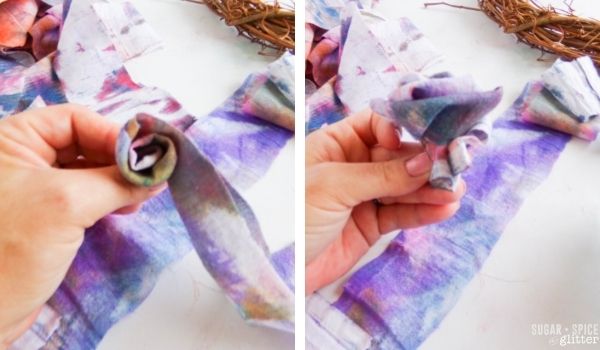
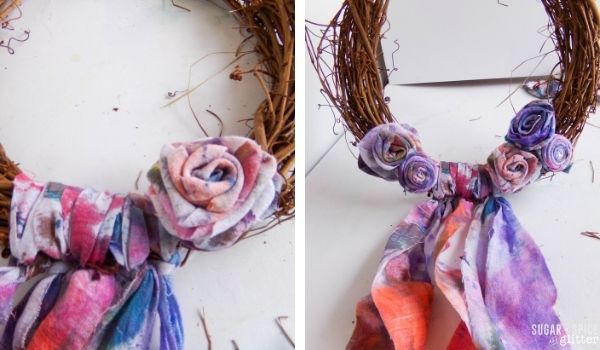
Take a single strip and fold it in half, then lay it flat on the table. Working from one end, roll the strip to make a rose. Make sure to make one end of the roll a little tighter than the other to make the rose full or make it looser in the center to make a bud. Repeat to make 5-10 roses of varying sizes.
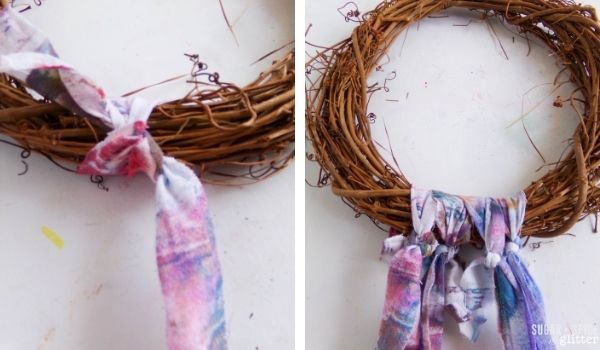
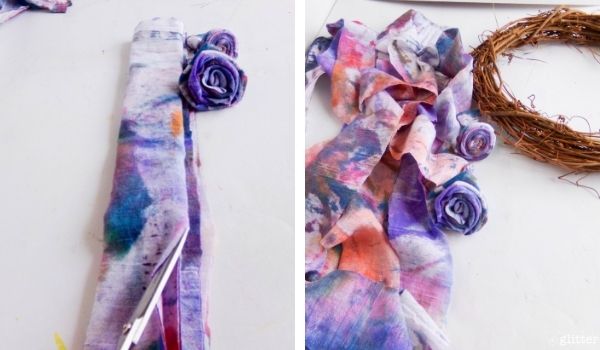
With the remaining strips of towel, tie them onto the bottom of the wreath, then cut them into ½-inch wide strips to make the fringe finer.
Hot glue each of the roses to the bottom of the wreath, around and overtop of the tie dye strips, in whichever arrangement looks best to you.
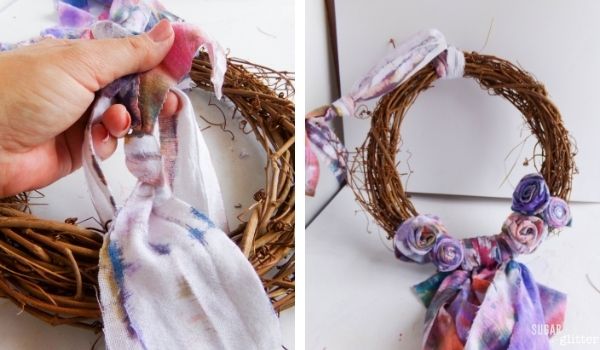
If desired, use one of the remaining strips of the towel to make a hanger loop on the top of the wreath. (We show how to do this in the picture below, but I personally didn’t use it for my wreath hanger as I already have nail in my door for wreaths.)
Figure out how you want to position the “welcome” element – I liked having the roses and fringe off to one side with the welcome sign going straight across, as shown.
Hot glue the welcome element to the front of the wreath, securing on each side of the wreath.
Hang on your door and enjoy!

Pin this DIY Summer Wreath Idea:

Grab your free printable instructions for our DIY Tie Dye Summer Wreath craft:
Want to Save This Recipe?
Enter your email & I'll send it to your inbox. Plus, get great new recipes from me every week!
By submitting this form, you consent to receive emails from Sugar, Spice and Glitter.
DIY Tie Dye Welcome Wreath
How to make a Tie Dye Welcome Wreath, with homemade tie dye fabric roses, a tie dye fabric fringe and Cricut Welcome Sign for a fun, boho touch to your front door. You can alternatively use old clothing to make the roses and fringe.
Materials
- 12-Inch Grapevine Wreath
- 1 Large Kitchen Towel
- 1 Chipboard Sheet
- Purple and Pink Tie-Dye
- Black Acrylic Paint
- Mod Podge Craft Sealant
- Welcome SVG File
Tools
- Cricut Maker
- Knife Blade Tool
- Strong Grip Mat
- Tape
- Hot Glue Gun with Clear Hot Glue Sticks
- Scissors
- Clothing Iron
Instructions
To Tie Dye Your Towel:
- Start by tie-dyeing your kitchen towel. Twist it up and wrap the rubber bands around the center of your bundle in 4-5 places then place it in a large bowl.
- Either spray or pour (my preferred method) the dye onto your towel, saturating the towel in multiple places with purple or pink dye, respectively. Allow the tie-dyed towel to dry completely.
Cricut Welcome SVG:
- While the towel is drying, go ahead and make your welcome element by downloading the SVG file. Load the SVG file into Design Space, then insert the image for a new project.
- Click “Make It” in Design Space, and set the material type on the machine to “Chipboard”.
- Load the knife blade into your Cricut Maker, then follow prompts to load and cut.
- Be sure to use a strong grip mat for the chipboard and tape it down in each corner. Unload when finished cutting.
- Cut a second welcome shape before closing out of Design Space.
- Layer the two pieces of chipboard on top of each other and paint, if desired.
Make the Tie Dye Fringe and Roses:
- Once your tie dyed towel is dry, iron it to set in the colors (follow package directions).
- Cut the towel into 2-inch (approximately) wide strips.
- Take a single strip and fold it in half, then lay it flat on the table. Working from one end, roll the strip to make a rose. Make sure to make one end of the roll a little tighter than the other to make the rose full or make it looser in the center to make a bud. Repeat to make 5-10 roses of varying sizes.
- With the remaining strips of towel, tie them onto the bottom of the wreath, then cut them into ½-inch wide strips to make the fringe finer.
- Hot glue each of the roses to the bottom of the wreath, around and overtop of the tie dye strips, in whichever arrangement looks best to you.
- If desired, use one of the remaining strips of the towel to make a hanger loop on the top of the wreath. (We show how to do this in the picture below, but I personally didn't use it for my wreath hanger as I already have nail in my door for wreaths.)
- Figure out how you want to position the "welcome" element - I liked having the roses and fringe off to one side with the welcome sign going straight across, as shown.
- Hot glue the welcome element to the front of the wreath, securing on each side of the wreath.
- Hang on your door and enjoy!
Recommended Products
As an Amazon Associate and member of other affiliate programs, I earn from qualifying purchases.


I’d love to see your finished wreaths and any unique twists you might make to customize it your personal tastes!
Fore more easy home decor ideas, check out our full DIY Home Decor collection here:

For more creative uses for your Cricut, check out our full Cricut Craft collection here:

For more creative ideas for summer, check out our full Summer Crafts collection here:


This DIY Tie Dye Welcome Wreath is such a fun idea! I love how creative and colorful it is — definitely a great way to add some personality to your door. If you’re looking to add a little extra touch to the space, window films are a fantastic way to add privacy while still letting in natural light. It’s a subtle yet stylish change that complements any décor, and you don’t even need to sacrifice your view! Check it out here: https://windowfilminstallers.com. This could be the perfect pairing for your DIY projects!