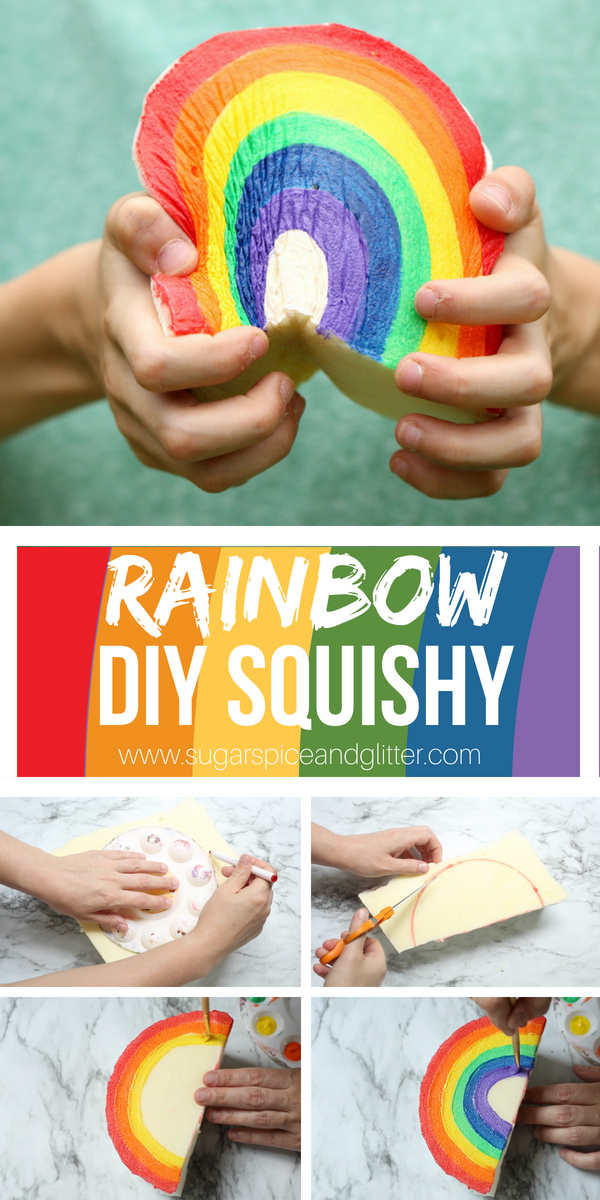
DIY Rainbow Squishy (with Video)
Welcome to Sugar, Spice & Glitter! Please note, this post may contain affiliate links. For more details, see our Full Disclosure.
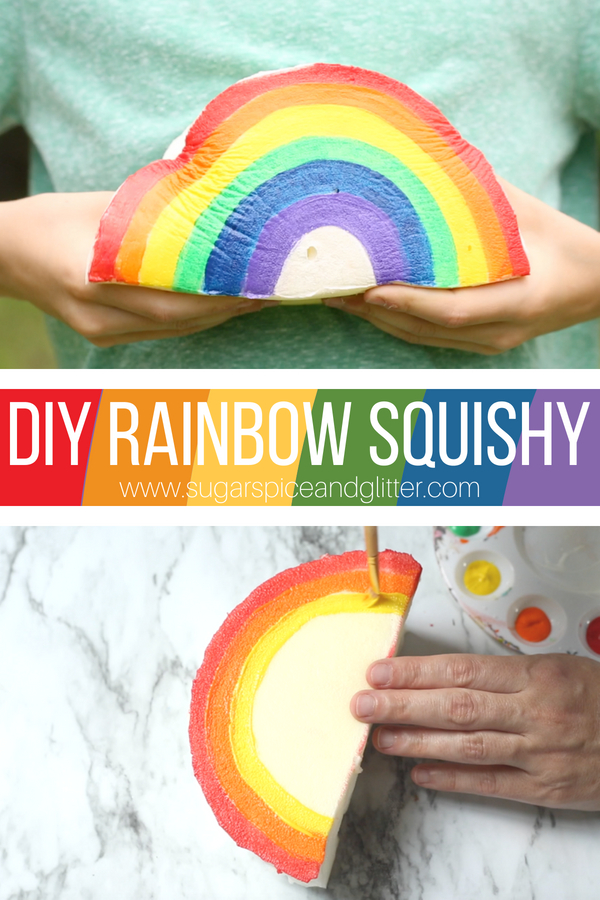
Have your kids fallen for the recent squishy toy trend? I find the prices on them a bit outrageous, so we decided to make our own DIY Squishy Toy using memory foam! Using this method, kids can make any squishy toy that they can imagine – like our DIY Rainbow Squishy!
DIY Squishy Foam Craft
So, in case you’ve been spared by the squishy toy trend, basically they are foam toys that can be squished and then bounce back to their original shape, similar to a stress ball but with less resistance.
The toys come in just about every theme and shape that you can imagine, but my issue is the price. Even small ones average about $5-7 each and if you try to go for the cheaper ones, the paint flakes off quite quickly and they just become a gross, sticky mess.
So we decided to DIY our own squishy toys – and first up was this GIANT RAINBOW SQUISHY! A squishy this size would normally go for $13 or more… insanity, right? We spent less than that for 15″ of memory foam which could make several squishies.
We experimented with using both acrylic and puffy fabric paint on our DIY squishy toys and I found that puffy paint was the better choice – so ignore what you see in the video! (Oops.) While acrylic paint covered the surface of the squishy quickly and in a single coat, it can flake off a bit easier which I disliked. You can also use fabric markers, I just find using paint a bit easier and quicker, despite needing a couple coats.
Also, while I have only used memory foam for this craft so far, if that’s a bit too pricey for you, a solid sponge would also work well. (We used a sponge as the base in our Sponge Cake Craft and it worked awesome.) Some chair pads/cushions are made with memory foam, so if you have any extra lying around, they would be perfect for this craft.
These DIY Squishy Toys would be a great party craft – they just might not dry by the time the party is over (unless you’re crazy enough to have a sleepover party like we are) – and they would make a great addition to a “Calm Down Center” or Peace Corner. If your child could use a bit of sensory relief during a long car ride or school day, a small pocket-sized squishy might be perfect for helping them work out some of that anxiety.
Watch our quick video on how to make your own DIY Rainbow Squishy Toy out of memory foam, and then don’t forget to scroll down to grab our free printable directions!
Materials for Rainbow DIY Squishy
- Memory Foam
- Puffy Paint in all rainbow colors
- Paintbrushes
- Scissors
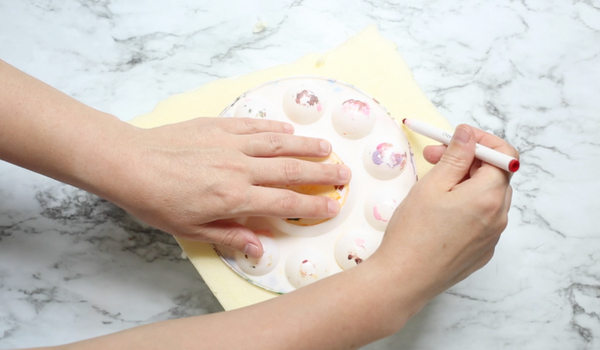
- Circular object to trace – we used a paint palette
- Exacto knife, optional
Tip: you may find it cheaper to use an extra memory foam pillow, but you can make several squishies from the 15″ sheet of memory foam that we opted for. Painter’s sponges or seat cushions apparently also work, but we haven’t tried those yet.
How to Make a DIY Squishy Toy
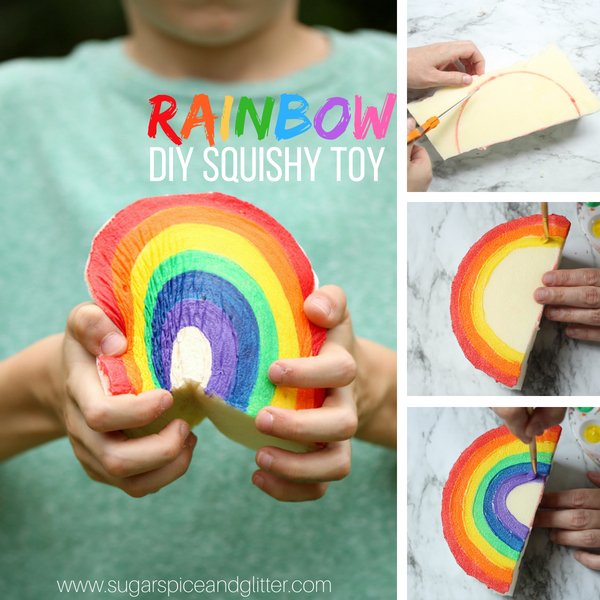
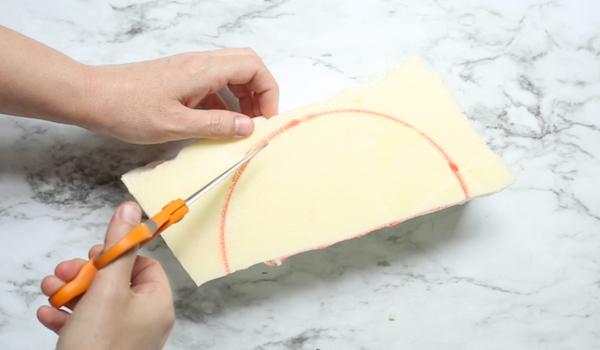
Trace your design onto your memory foam. We were doing a rainbow so we needed a circle, and then cut it in half to form the arc of the rainbow.
Cut out the shape and trim any rough bits from the foam. I found it easiest to use an exacto knife but scissors will work if you’re diligent.
Paint your squishy as desired. You will most likely need to do a couple coats of paint. Allow the paint to dry fully between coats – the bottles for ours recommended a full 24 hours between coats.
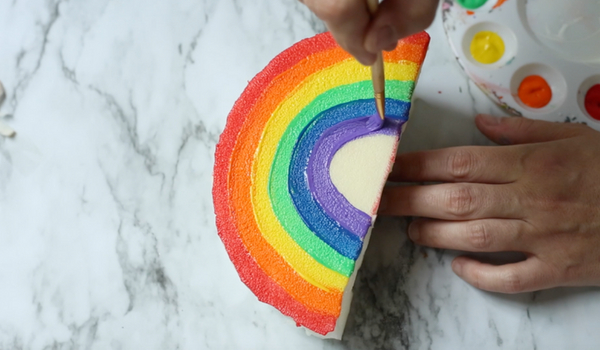
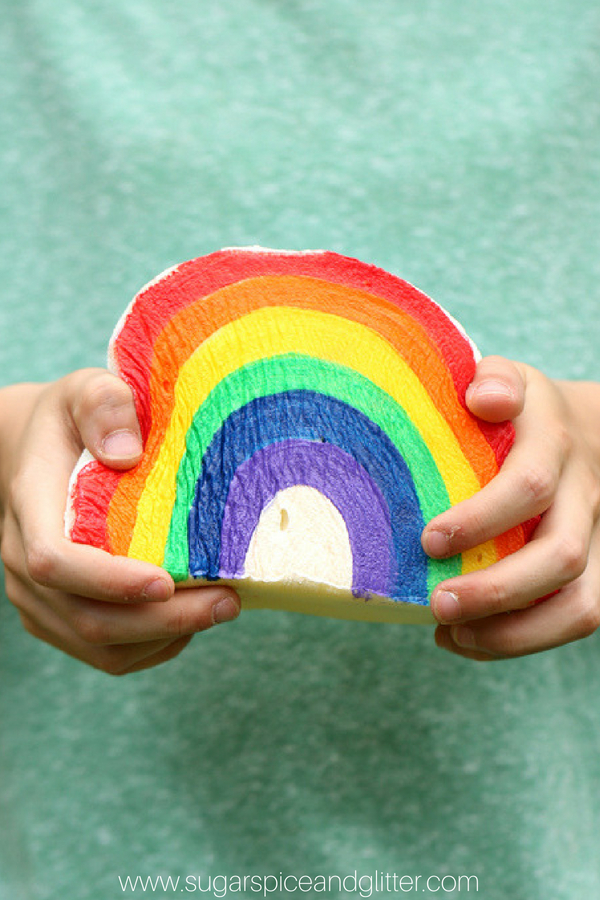
Once the paint has fully dried, squish away!
Pin this DIY Squishy Rainbow Toy:
Grab your free printable instructions for our DIY Rainbow Squishy craft:
Want to Save This Recipe?
Enter your email & I'll send it to your inbox. Plus, get great new recipes from me every week!
By submitting this form, you consent to receive emails from Sugar, Spice and Glitter.
Rainbow Squishy
Materials
- Memory Foam Pillow
- Puffy Paint in all rainbow colors
Tools
- Paintbrushes
- Scissors
- Circular object to trace
- Exacto knife, optional
Instructions
- Trace your design onto your memory foam. We were doing a rainbow so we needed a circle, and then cut it in half to form the arc of the rainbow.
- Cut out the shape and trim any rough bits from the foam. I found it easiest to use an exacto knife but scissors will work if you're diligent.
- Paint your squishy as desired. You will most likely need to do a couple coats of paint. Allow the paint to dry fully between coats - the bottles for ours recommended a full 24 hours between coats.

This DIY Rainbow Squishy Toy is a fun and easy craft for kids, and makes a great homemade gift or craft for a party.
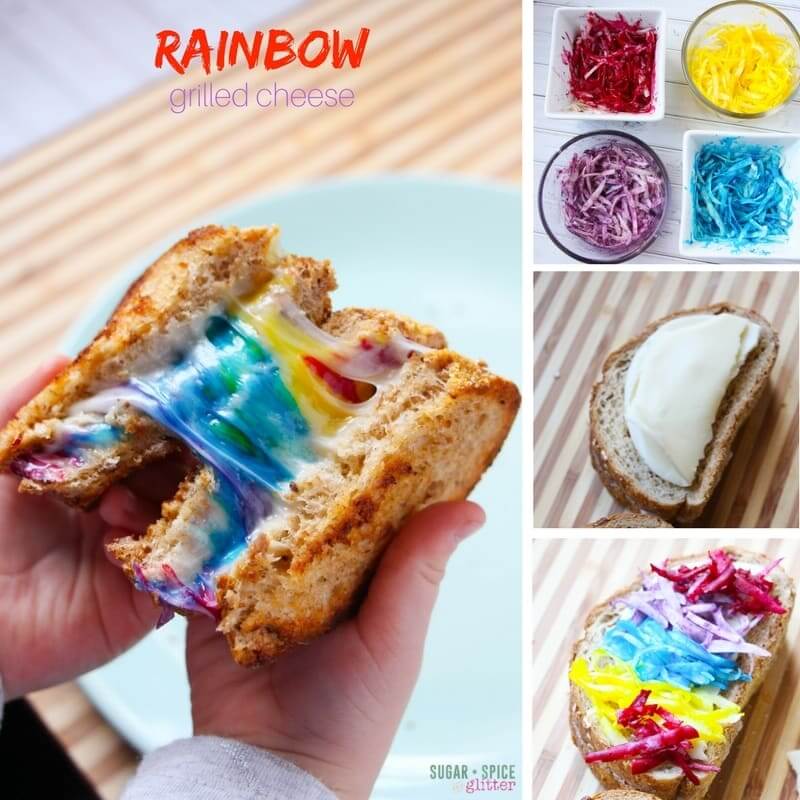
For more awesome rainbow-inspired activities, check out our Kid-Made Rainbow Grilled Cheese Sandwich recipe or our Edible Rainbow Waterbeads for Sensory Play.