
DIY Paper Plate Loom: Rainbow Yarn Art
I love decorating my walls with Ella’s artwork, and I wanted to add a fabric piece to compliment the metal and canvas elements currently featured in our living room. This DIY Paper Plate Loom makes sweet circular tapestries – perfect for a small rainbow wall hanging or fabric coasters!
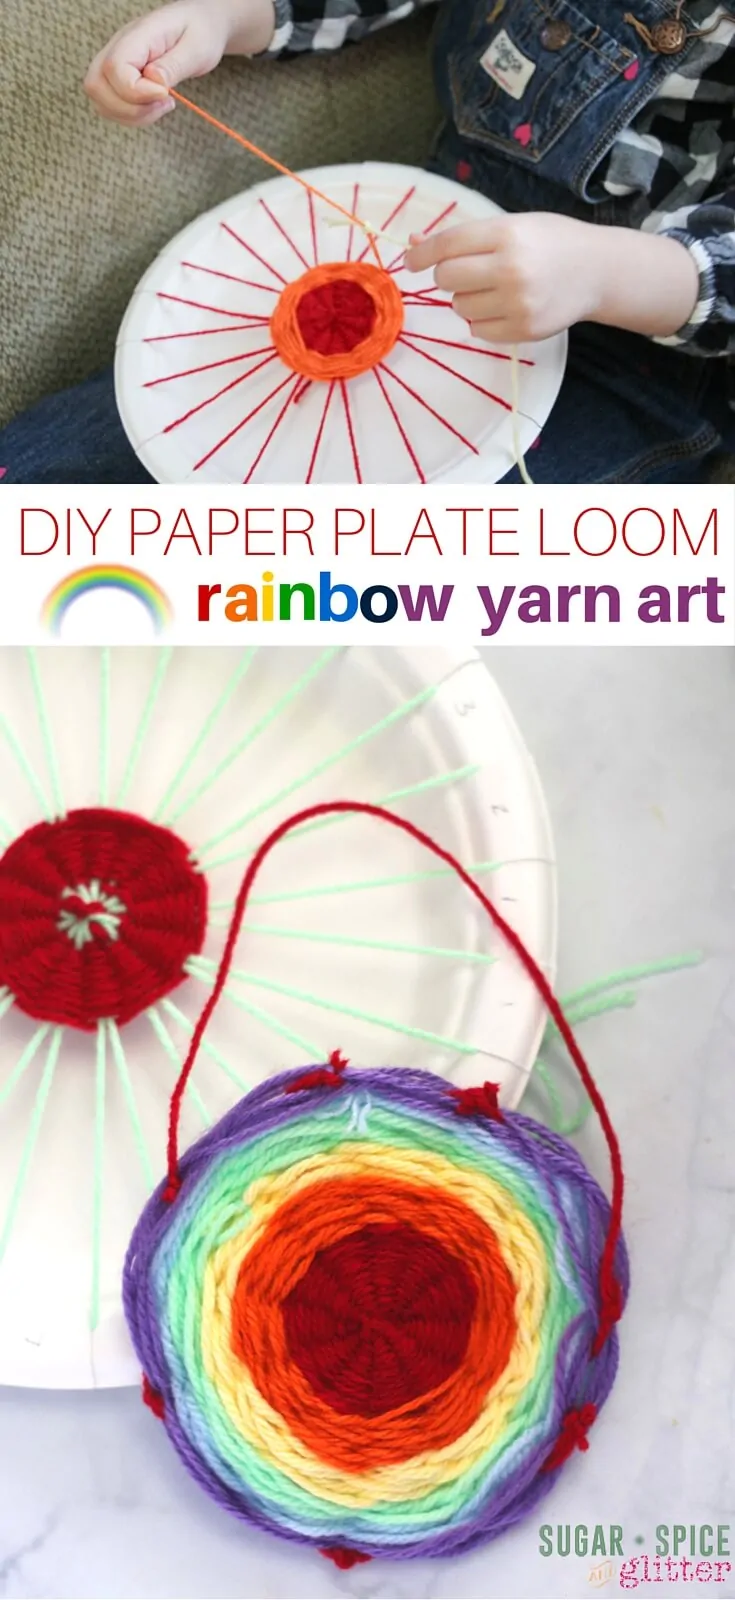
This DIY rainbow loom tapestry can be finished in just a couple hours and involves preliminary sewing techniques, like weaving and tying off. This’ kids craft idea is perfect for a child who is comfortable counting in two’s and has enough fine motor coordination to tie a knot.
This yarn art works perfectly with a rainbow scheme, since you’re going to want to use a few separate strands of yarn throughout. Working with any strands larger than 5-6ft was really frustrating for Ella’s little hands – keep in mind that children need to weave that length of yarn for each and every “shot” (weaving) of the yarn. By trading out the colours with each additional length of yarn, a rainbow pattern is really easy to achieve and creates a gorgeous final product!
How to Make a DIY Paper Plate Loom
To make your loom you will need:
- heavy duty paper plate
- scissors
- 4 ft length of yarn
- pencil
- tape measurer, optional
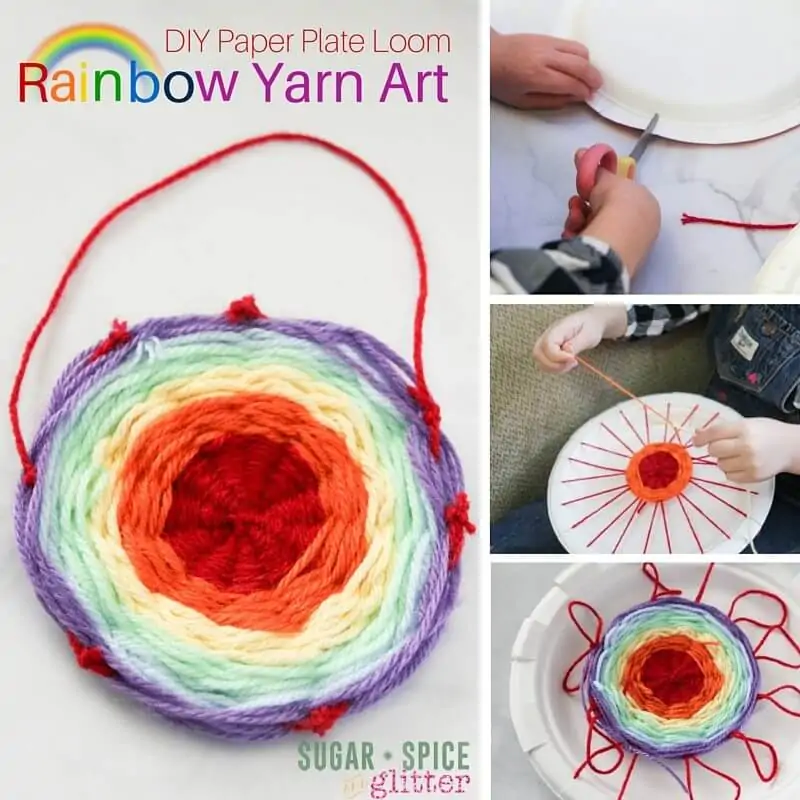
Cut the paper plate in (approximately) equal measures. If you want to be really precise, you can use the pencil and tape measurer to indicate where to make the cuts. Try to ensure an even number of cuts.
Next, you’re going to create the “heddles” or basis of your loom. Take the yarn and secure it into one “cut” of the paper plate. Leave about 6″ of yarn out the back of the cut, draping down the back of the plate.
Bring the yarn across the plate and loop the yarn through one cut, behind the tab of the plate, and back through the next cut. Bring the yarn back across the plate to the cut on the opposite side, beside the original cut that you threaded through. Repeat this web-like pattern until the yarn has been looped through each tab.
Tie the end after the last tab has been threaded to the end from the first cut. You will use this string to hang your tapestry later, if you choose.
How to Make a Rainbow Tapestry
Now that you have your paper plate loom, you’re ready to make your tapestry!
Cut 4-6ft lengths of yarn in each of the rainbow colours: red, orange, yellow, green, blue, (indigo if you have it,) and purple.
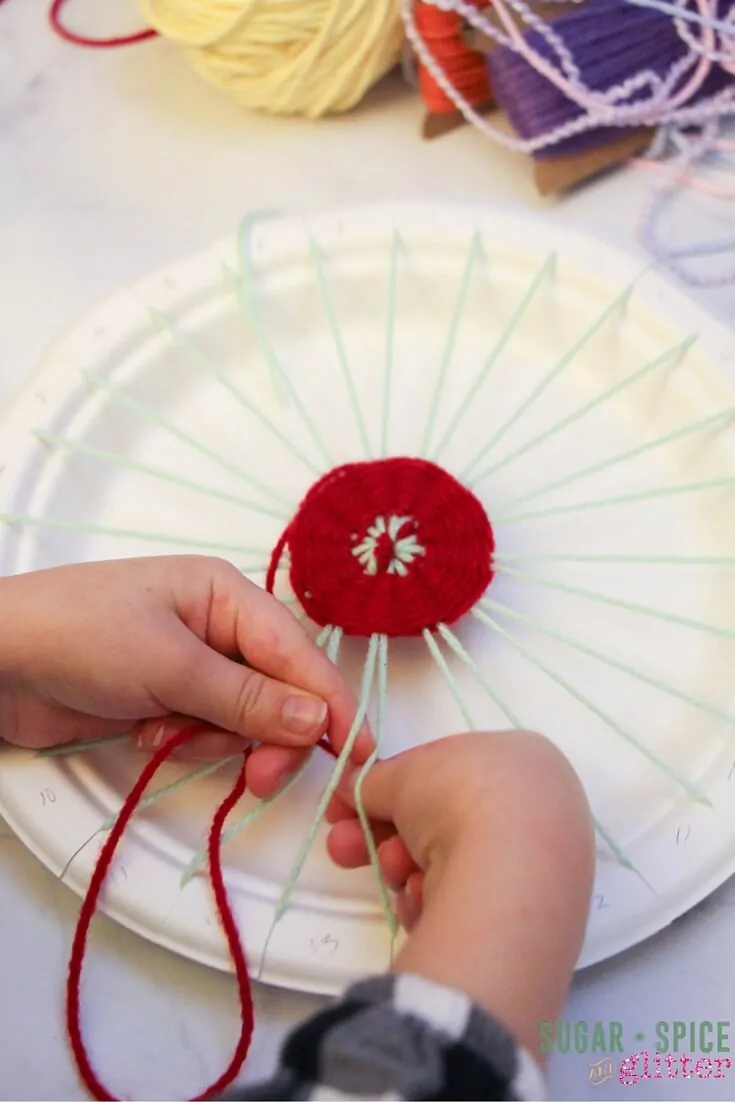
Use the red yarn first and tie a knot around the center of the loom to secure the red yarn to the loom strings (“heddles.”)
As an optional step, you can use a yarn needle, but I wanted to ensure this craft would just work with a paper plate and some yarn – no special equipment required. The yarn needle would be great for building fine motor strength and working on the pincer grip. You can also wrap a piece of tape around the “weaving end” of your yarn.
Next, weave the red yarn through the loom strings. We went “over two, under two” – counting by twos for a great wavy pattern in our final product. This results in a wider “stitch” and a faster craft time.
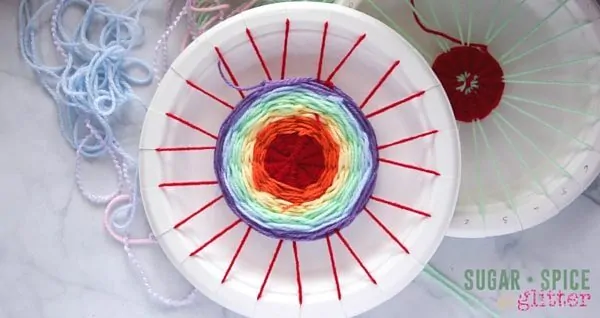
When you are nearing the end of your yarn, tie a knot to connect the yarn to the next colour in your rainbow sequence.
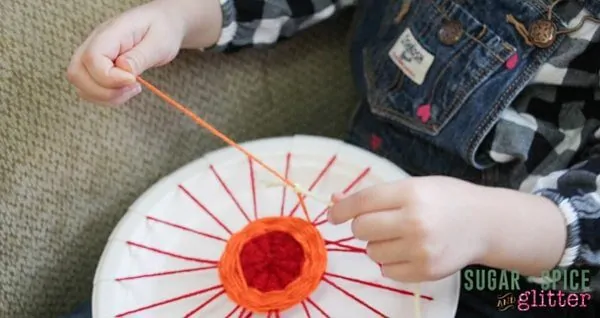
Repeat this weaving and tying in new colours until all six or seven lengths of yarn are woven into the tapestry.
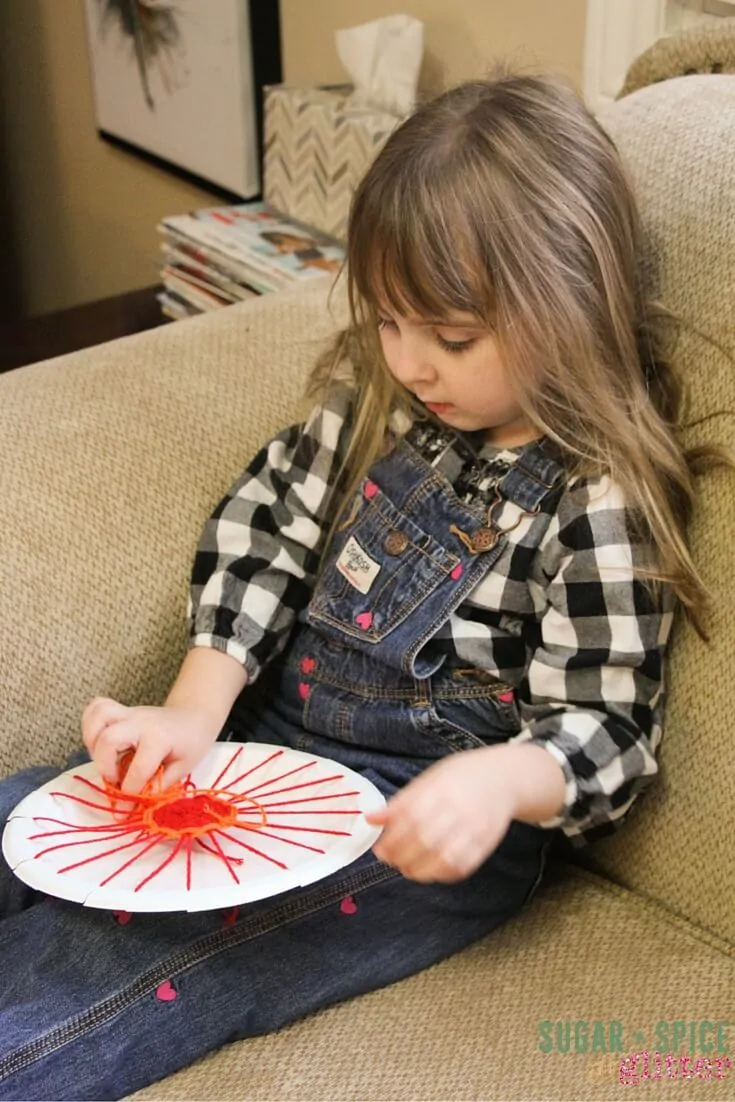
What’s nice about this craft is that you can bring it with you – Ella got bored of weaving her tapestry at the kitchen table and moved over to the couch. She experimented with pulling the full length of the yarn through each weave, and bunching the yarn up in her hand to make the weaving process a bit faster.
This is a nice rhythmic craft that children can really focus on while keeping their fingers busy. It’s easy to pick up this craft later if they need to take a break from it.
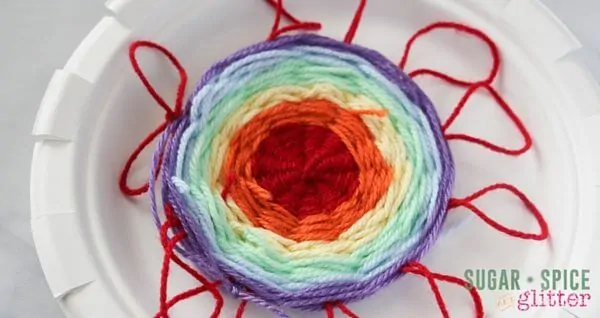
When you are done weaving your rainbow tapestry, tie the last length to itself. Pull the loom loops off of the paper plate and tie them together in a figure eight shape.
Trim the loop ends of the figure eight (once they are double knotted and secure) and go back and trim any ends that resulted from tying a new yarn into the tapestry.
Hang the tapestry using the long length across the back of the plate, or spray the tapestry with waterproof spray and use as a homemade coaster!
Would you try this rainbow loom craft with your children?
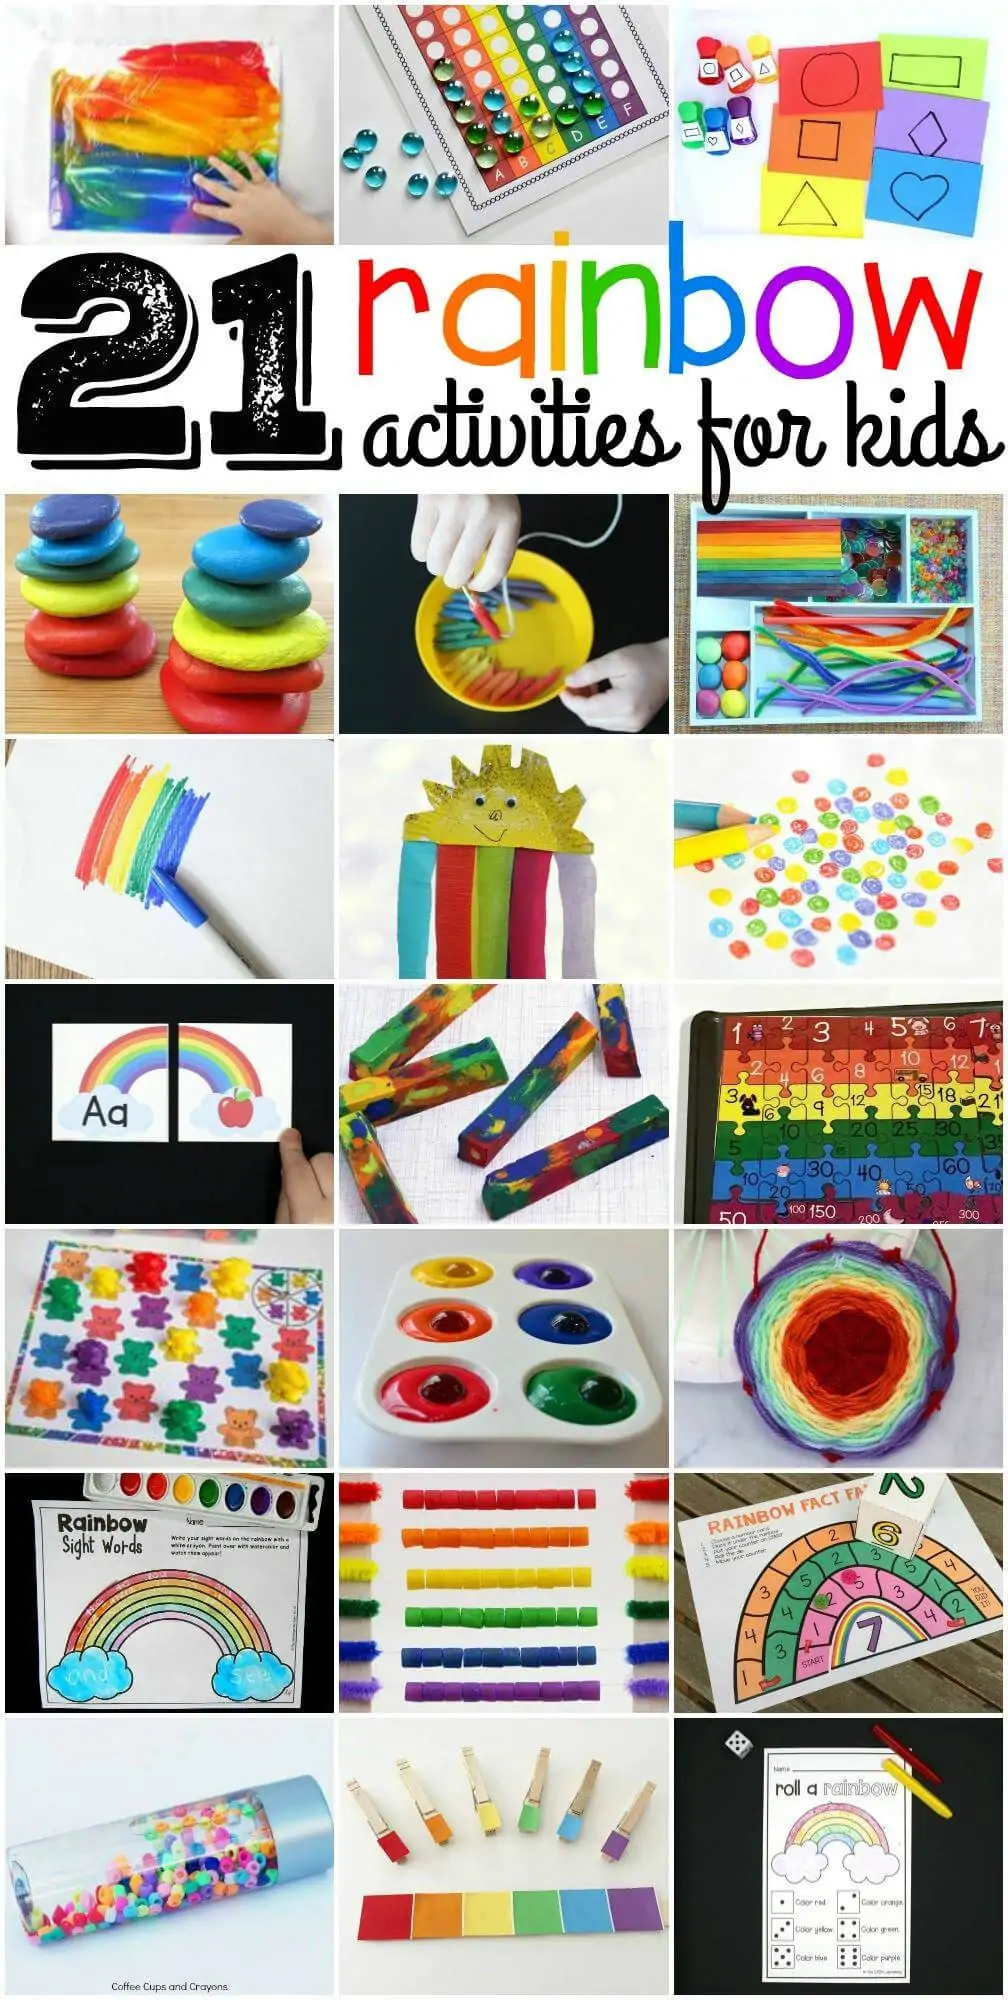
Check out these other fun rainbow activities for kids from my fellow kids’ activity bloggers:
FROM LEFT TO RIGHT:
Rainbow in a Bag – No Mess Art // Powerful Mothering
Rainbow Letters Race to the Top // Stay at Home Educator
Color and Shape Match Up // Frogs and Snails and Puppy Dog Tails
Stack a Stone Rainbow // Adventures of Adam
Rainbow Pasta Threading // Play and Learn Everyday
Rainbow Tinker Tray // Still Playing School
How to Flip a Rainbow | Simple Science for Kids // Lemon Lime Adventures
Rainbow Sun Craft // Fairy Poppins
Rainbow Pencil Control Exercises // Sugar Aunts
Beginning Sound Rainbows // Playdough to Plato
DIY Rainbow Crayon Names // Pre-K Pages
Rainbow Puzzle Skip Counting // Creative Inclusion
Rainbow Bear Color Matching Game // Life Over Cs
Rainbow Marble Painting Process Art // Preschool Inspirations
DIY Paper Plate Loom: Rainbow Yarn Art // Sugar Spice and Glitter
Rainbow Sight Words // The Kindergarten Connection
Rainbow Math with a DIY Abacus // Fun-a-Day
Rainbow Fact Family Board Game // Liz’s Early Learning Spot
Simple Rainbow Sensory Bottle for Kids // Coffee Cups and Crayons
Rainbow Paint Chip Color Match // Modern Preschool
(Not Shown) Rainbow Perler Bead Key Ring // Teach Me Mommy
I really really REALLY love this idea! Hope to try it soon!
I love this! I think this will keep Mavi busy during the Lenten season. And that collection of rainbow activities, love it!
This is such a great idea and a fabulous way to keep little hands busy! I just may have to introduce this activity to the kiddos!
This is such a pretty craft with wonderful fine motor work!