
DIY Mickey Lotion Bars (with Video)
Welcome to Sugar, Spice & Glitter! Please note, this post may contain affiliate links. For more details, see our Full Disclosure.
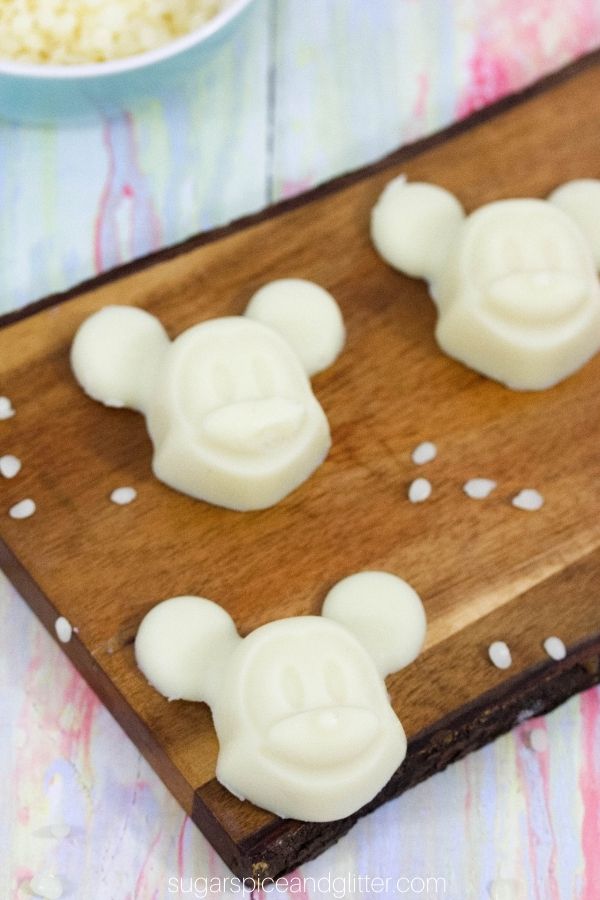
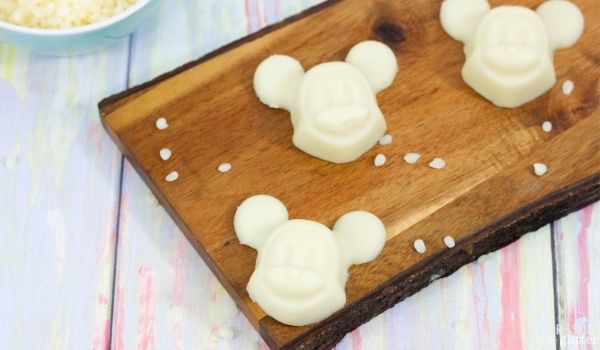
A fun DIY lotion bar for the Disney fan in your life, these Mickey Mouse Lotion Bars make a gorgeous gift or a fun way to pamper yourself – especially if you travel often and like to travel with carry-on only like I do.

DIY Lotion Bar Recipe
I’ll be honest: I was a lotion bar skeptic for years.
I had awful experiences with solid shampoos so I expected to have similar disappointments with solid lotions, but after purchasing some solid lotion perfumes from Disney Spring’s Basin store, I thought I’d give this DIY beauty idea another try.
My friend Shelby helped me trouble-shoot this recipe to create a luxurious lotion bar with amazing moisturizing benefits and a fun Disney-inspired shape. I love how cute and cheerful it is for gifting and it’s super convenient for travelling with. I always travel carry-on only so using solid lotion doesn’t just avoid mess, it helps me stay within the liquid limits (and yes, I’ve travelled with these and they don’t come up on the scans as liquids).
Because this recipe contains no water, I actually find it is more moisturizing than many commercial lotions – especially the ones you tend to find in hotel bathrooms.
Plus, you can have a bit of fun and customize the scent (and scent intensity). I like to really amp up the scent so that my lotion bars double as solid perfumes.
How to use DIY lotion bars: After your shower, rub the lotion bar all over your body, or if just using after washing your hands, rub all over your hands. Massage to work the lotion into your skin. If needed, warm the lotion bars up in your hands a bit before applying.
How long do homemade lotion bars last? These DIY Mickey Mouse lotion bars will last for up to two months in an airtight container without any change to texture. (They can possibly last longer, but they may start to change texture with time.)
With everyday use, you can plan for each lotion bar to last at least two weeks.
If your lotion bar feels sticky, it’s likely due to putting too much cocoa butter into your recipe. If your lotion bars feel too greasy, it’s likely due to adding too much oil. You can reduce the greasy texture by sprinkling some cornstarch or baby powder on the bars, but make sure to adjust the next batch for the perfect texture.
Check out our quick video on how to make these DIY Lotion Bars for yourself – and then don’t forget to scroll down to grab your free printable instructions:
Mickey Lotion Bar Ingredients
- Shea Butter
- Mango Butter
- Almond Oil
- Beeswax Pellets
- Essential Oils, optional
Scroll down to the printable recipe card for full measurements.
Tip: as all homes have different humidities and temperatures, pay attention to how your first batch reacts in your home and adjust accordingly. Be sure to keep the extra lotion bars in an airtight container – you can even refrigerate if needed.
Kitchen Tools You May Find Helpful
How to Make Lotion Bars
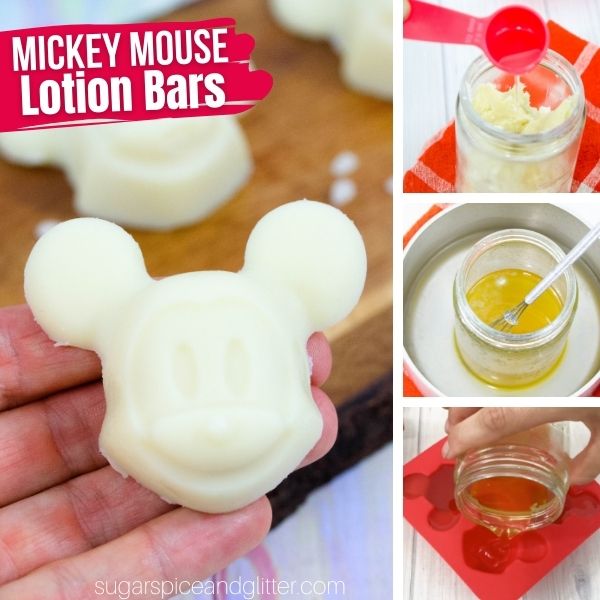
In a double boiler (or heat-proof mason jar), combine all ingredients except for optional essential oils.

Fill the bottom of a double-boiler with water and bring it to a rolling boil. Place the top part of the double boiler overtop until lotion bar ingredient melt together, whisking occasionally. It will take about 20 minutes until the beeswax pellets melt.
(If using a mason jar, ensure the water in the double boiler doesn’t evaporate and ensure the top of the mason jar is well above the top of the boiling water.)
Once lotion bar ingredients are fully melted, remove from heat.
Whisk in any essential oils you want to use.
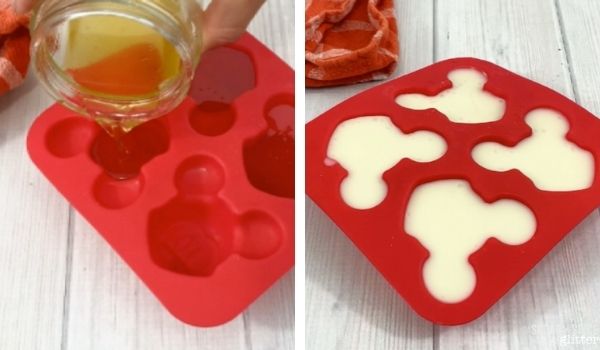
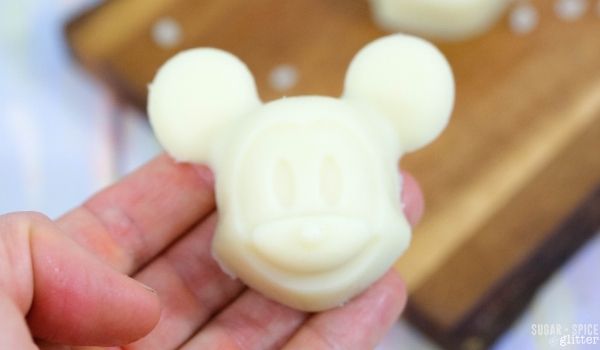
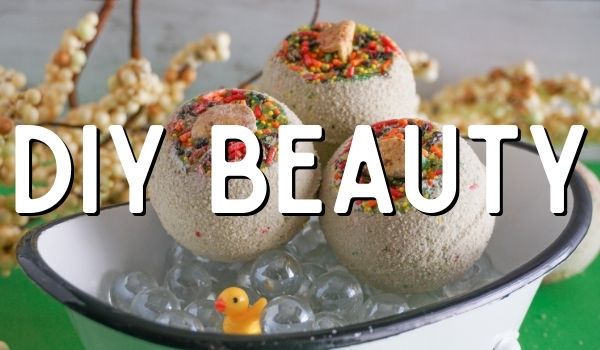
Pour the lotion bar mixture into the silicone Mickey Mouse molds.
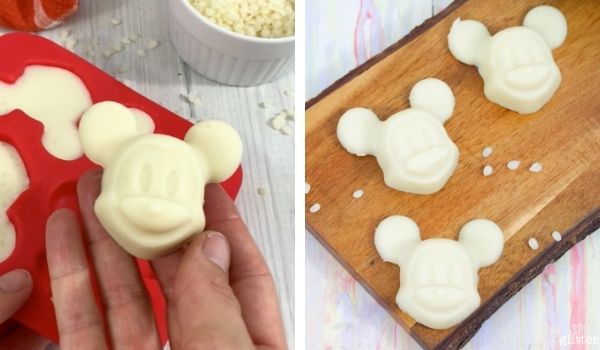
Let sit at room temperature for twenty-four hours to solidify.
Be gentle while removing the lotion bars from the molds as they will still be soft and delicate for the first few days.
Pin this Easy Lotion Bar recipe for a fun gift for the Disney lover in your life:

Grab your free printable recipe card for our Mickey Mouse lotion bars recipe:
Want to Save This Recipe?
Enter your email & I'll send it to your inbox. Plus, get great new recipes from me every week!
By submitting this form, you consent to receive emails from Sugar, Spice and Glitter.
DIY Mickey Lotion Bars
A luxurious DIY lotion bar inspired by Disney's Basin, this DIY Mickey Mouse Lotion Bar is a great way to moisturize on-the-go without the mess of liquid lotions. Customize this DIY lotion bar recipe with your favorite scents.
Materials
- 1/3 cup Shea Butter
- 1/3 cup Shea Butter
- 1/3 cup Mango Butter
- 1/3 cup Mango Butter
- 1 Tablespoon Almond Oil
- 1 Tablespoon Almond Oil
- 1 1/2 Tablespoons Beeswax Pellets
- 1 1/2 Tablespoons Beeswax Pellets
- Essential Oils, optional
- Essential Oils, optional
Tools
- Double Boiler
- Measuring Cups and Spoons
- Whisk
Instructions
- In a double boiler (or heat-proof mason jar), combine all ingredients except for optional essential oils.
- Fill the bottom of a double-boiler with water and bring it to a rolling boil. Place the top part of the double boiler overtop until lotion bar ingredient melt together, whisking occasionally. It will take about 20 minutes until the beeswax pellets melt.
- (If using a mason jar, ensure the water in the double boiler doesn't evaporate and ensure the top of the mason jar is well above the top of the boiling water.)
- Once lotion bar ingredients are fully melted, remove from heat.
- Whisk in any essential oils you want to use.
- Pour the lotion bar mixture into the silicone Mickey Mouse molds.
- Let sit at room temperature for twenty-four hours to solidify.
- Be gentle while removing the lotion bars from the molds as they will still be soft and delicate for the first few days.
Notes
As all homes have different humidities and temperatures, pay attention to how your first batch reacts in your home and adjust accordingly. Be sure to keep the extra lotion bars in an airtight container - you can even refrigerate if needed.
Recommended Products
As an Amazon Associate and member of other affiliate programs, I earn from qualifying purchases.
-
 GreenIVe - 100% Pure Mango Butter- All Natural - Fresh Sourced - Exclusively on Amazon (8 Ounce Jar)
 -
BetterBody Foods Refined Almond Oil, 16.9 Ounce
-
Organic Shea Butter by Sky Organics (16 oz) 100% Pure Unrefined Raw African Shea Butter for Face and Body Moisturizing Natural Body Butter for Dry Skin


I hope you love these easy DIY Mickey Lotion Bars as much as I do – I would love to hear any tweaks or scent that you add to this recipe!
For more easy DIY Beauty ideas, check out our full DIY Beauty Crafts collection here:
Or for more Disney crafts, check out our full Disney Crafts collection here:
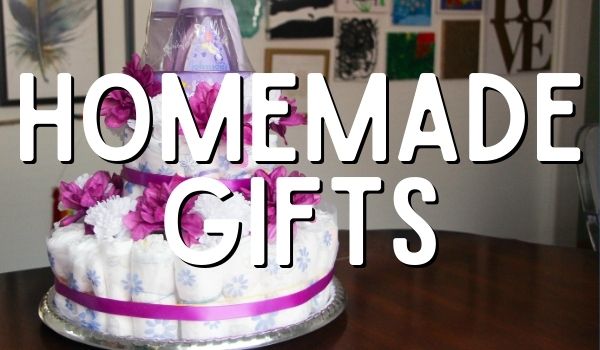
Or for more beautiful Homemade Gifts, check out our full Homemade Crafts collection here:
These DIY loyion bars shaped like Mickey are so cute! They will be great party favors.
I actually made these Mickey Mouse lotion bars a few months ago, and they’ve become one of my favorite travel hacks. They melt beautifully on the skin but don’t turn into a mess in your bag, which, for someone who packs carry-on only, feels like magic. I even compared the texture to a store lotion I once asked about while searching for the best crepe erase phone number on and honestly, the DIY version felt richer. The combo of shea butter, mango butter, and almond oil is super nourishing. Plus, the Mickey shape just makes me smile every time.