
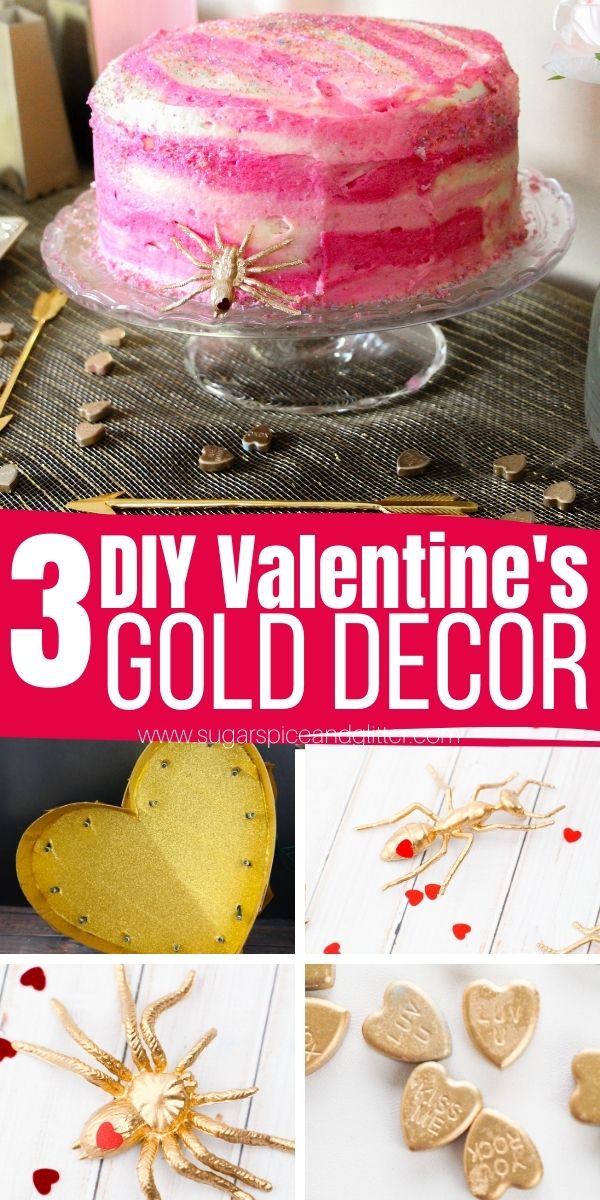
DIY Gold Valentine Decor Ideas
Welcome to Sugar, Spice & Glitter! Please note, this post may contain affiliate links. For more details, see our Full Disclosure.

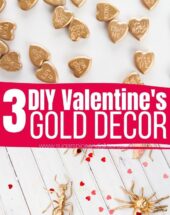
A trio of gold Valentine’s Day decor ideas, these DIY Valentine’s Day crafts all take less than 10 minutes to make and add some glamour and whimsy to your Valentine’s day decor.

Gold Valentine’s Crafts
A couple of years ago, I hosted a Chalkboard and Love Bugs-themed Valentine’s Day party for Ella and a few friends. I loved the black and gold theming (I also used the same color scheme for my Old Hollywood Movie Night) – and evidently, so did many readers who have since asked me how I made some of the decor.
Below I detail how to make:
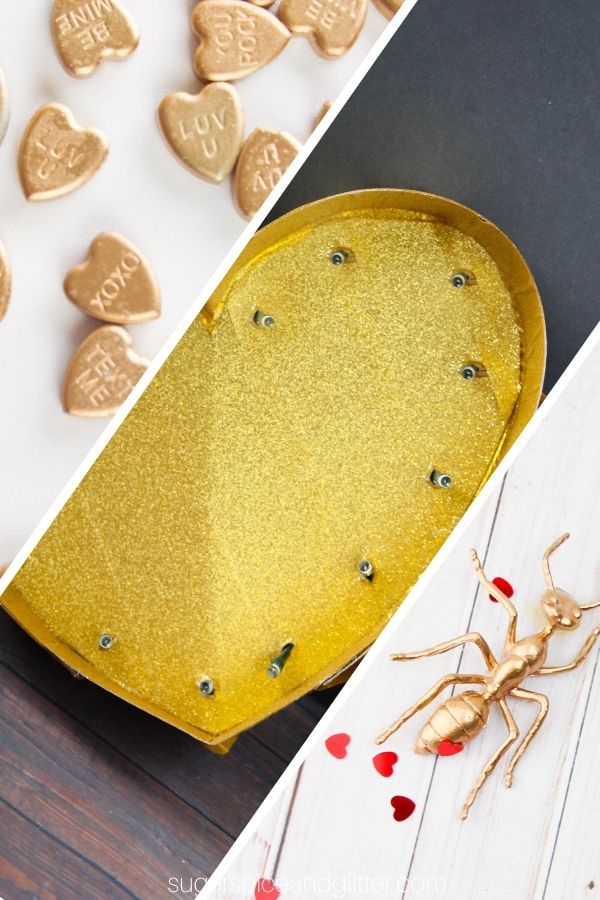
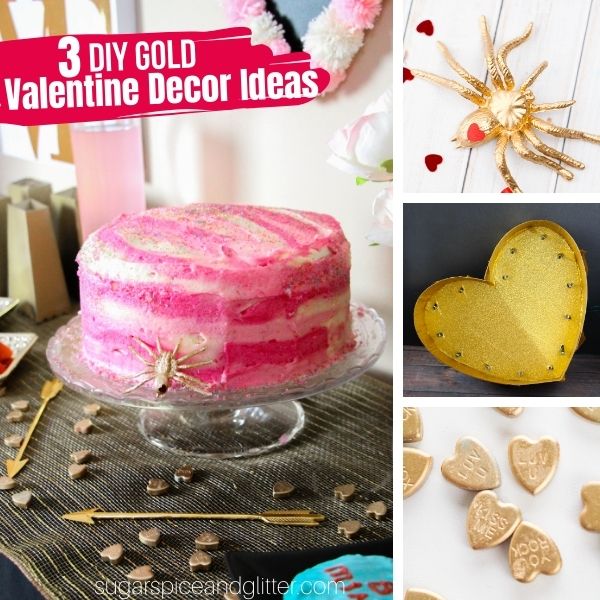
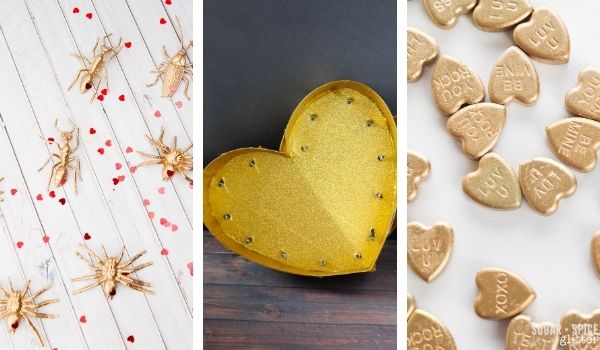
- Gold Conversation Heart Table Scatter
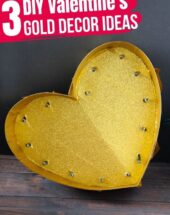
- a Glittery Gold Heart Marquee Sign
- Gold Love Bugs
Each of these DIYs takes 10 minutes or less to make and add a pop of glamour and whimsy to your Valentine’s Day Decor. The biggest expenses are the gold spray paint and glitter gold duct tape, so if you happen to already have those on hand, each of these DIY Valentine’s crafts will only cost you a dollar or two.
More Gold Valentine’s Day Decor Ideas
- Valentine’s Gold Heart Wire Wreath
- 24k Gold Rose
- Rose Gold Marble Wall Art
- Gold Heart Piñata
- Personalized Gold Heart Wreath
- Gold Heart Wall Decals
- Gold Foil Anatomical Heart Drawing
Planning a Valentine’s Day party? Check out some of our favorite Valentine’s Day recipes:
- Baked Brie in Sourdough Bread with Raspberries and Toasted Almonds (with Video)
- No-Bake Strawberry Cheesecakes (with Video)
- Valentine’s Day Cheeseboard
- Strawberry Glazed Donuts
- Cinnamon Heart Red Velvet Cake
- Strawberry Heart-Shaped Macarons (with Video)
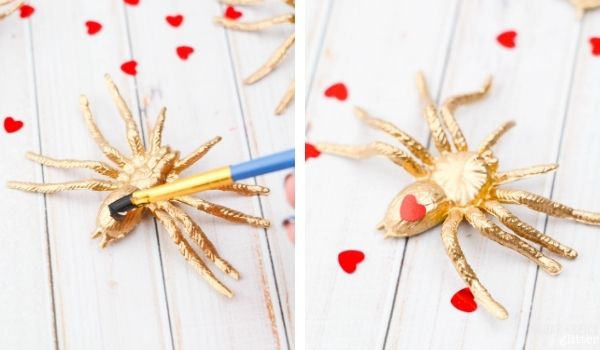
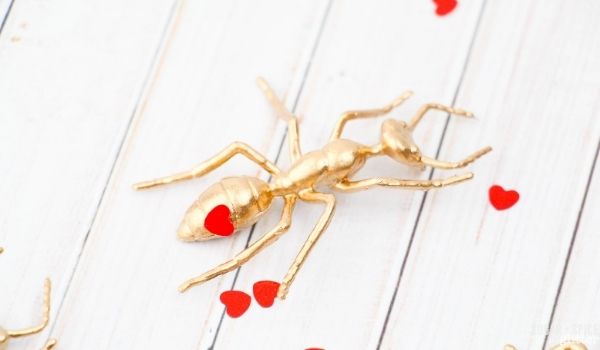
Gold Love Bugs Craft
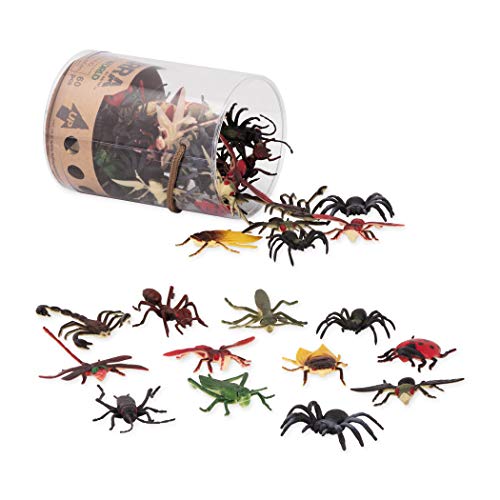
We used these gold love bugs for our Love Bug Valentine’s Party. They added a touch of humor and glamor to our tablescape and would also make a cute addition to a Valentine’s painting or gift. I also think it would be really cute to make love bug hair barrettes using these little critters!
They were super simple to make and the kids thought they were so fun!
How to Make Gold Love Bugs
Materials Need to Make Gold Love Bugs:
Spray paint the bug figurines gold. Follow the spray paint’s instructions for how long to let the bugs dry before proceeding with the rest of the craft. (Usually 24 hours.)
Apply a small dab of glue to the gold bug and attach a piece of heart glitter or a heart sequin. Allow to dry before decorating or using to embellish a craft.
You can also use a craft sealant, if desired.
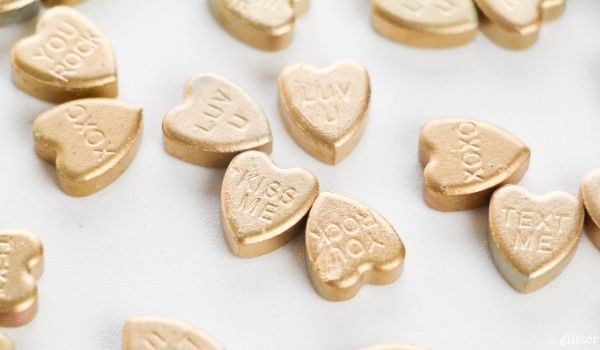
Gold Conversation Heart Scatter
A fun and classy take on a Valentine’s Day classic, these conversation hearts are a fun addition to a grown-up Valentine’s Day soiree, as long as everyone knows not to eat them!
They would also be a cute embellishment on a card, or glued onto earring studs for some whimsical Valentine’s day jewelry.
How to Make Gold Conversation Heart Scatter
Materials Need to Make Gold Conservation Heart Scatter:
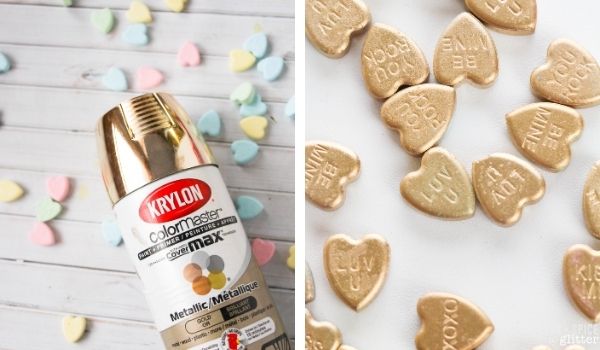
- Gold Spray Paint
- Conservation Hearts
Place the conversation hearts on a piece of cardboard in a well-ventilated area, or outdoors.
Spray one side of the conversation hearts gold, covering thoroughly, and then wait a few hours before flipping the hearts over and spray painting the other side.
Allow to dry according to the spray paint’s directions.
You can also apply a craft sealant, if desired.
Gold Heart Marquee Sign
This easy homemade marquee sign was a fun, cheap alternative to expensive store-bought marquee signs. It reminds me of summer fairs and old fashioned movie theatres. You can customize your sign’s shape and color to suit your other decor or any event.
Materials You Will Need to make a Gold Heart Marquee Sign:
- Cardboard
- Scissors
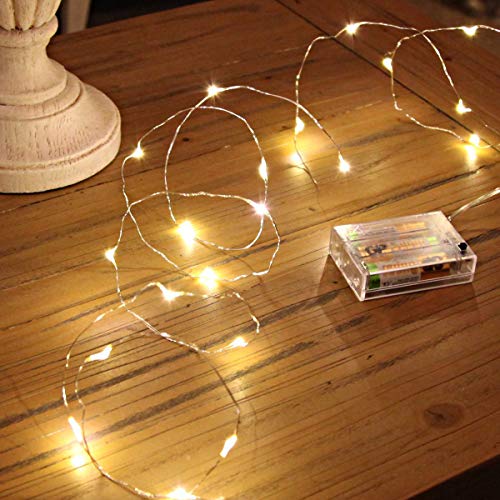
- Fairy lights (plus batteries)
- Gold Glitter Duck Tape
- Pen
- Craft knife
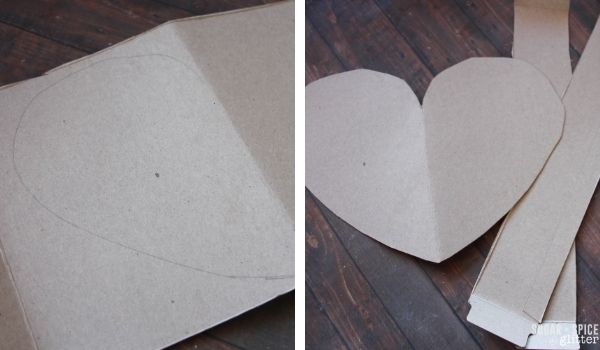
Trace your desired shape onto a wide panel of your cereal box.
Cut the shape out carefully and trim the long sides to 1 1/2″ wide (still keeping their original length).
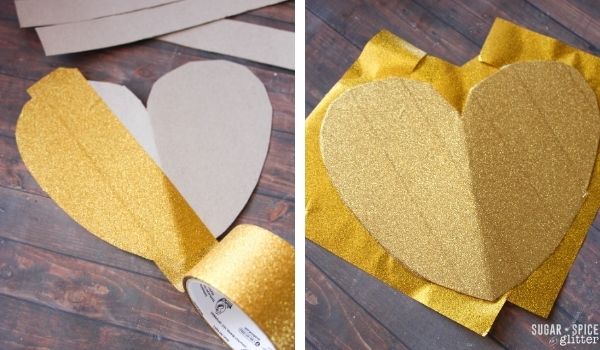
Cover the shape with glitter duck tape, as well as the long lengths of cardboard.
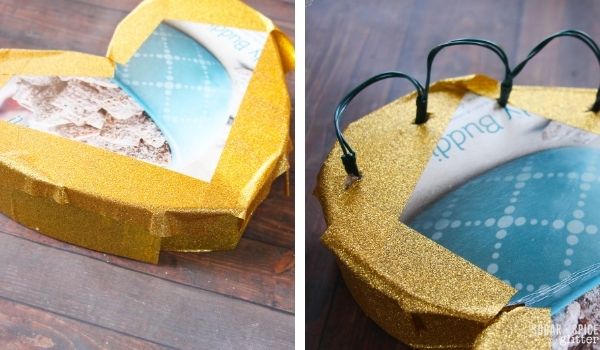
Place some cardboard onto the back of the shape to help “frame” and attach the lengths along the sides of the shape.
Form the long lengths of cardboard along the side of your shape and press the duck tape up to secure the panels in place. Add additional tape anywhere where the cardboard needs more strength.
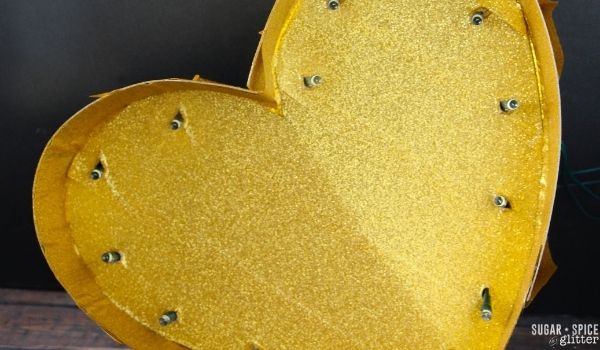
Next, poke holes in the shape where the lights will go using the craft knife. Poke the lights through the holes, and then secure the battery pack onto the marquee sign.
If you plan to hang your sign, add a hook now.
Pin these Gold Valentine’s Day Decor Ideas for your Valentine’s Inspiration:
Grab your free printable instructions for these three gold decor ideas:
Want to Save This Recipe?
Enter your email & I'll send it to your inbox. Plus, get great new recipes from me every week!
By submitting this form, you consent to receive emails from Sugar, Spice and Glitter.
DIY Gold Valentine Decor
A trio of gold Valentine's Day decor ideas: gold love bugs, gold conversation heart scatter, and a glittery gold heart marquee sign. Add some glamour and whimsy to your Valentine's day decor with these simple, affordable DIY ideas - all taking 10 minutes or less to make.
Materials
Materials for Gold Love Bugs:
- Bug Figurines
- Gold Spray Paint
- Clear Glue
- Mini Heart Sequins or Glitter
Materials for Gold Conversation Heart Scatter:
- Gold Spray Paint
- Conservation Hearts
Materials for Gold Marquee Sign
- Cardboard
- Fairy lights (plus batteries)
- Gold Glitter Duck Tape
Tools
- Scissors
- Craft Knife
- Pen
Instructions
Gold Love Bugs
- Spray paint the bug figurines gold. Follow the spray paint's instructions for how long to let the bugs dry before proceeding with the rest of the craft. (Usually 24 hours.)
- Apply a small dab of glue to the gold bug and attach a piece of heart glitter or a heart sequin. Allow to dry before decorating or using to embellish a craft.
- You can also use a craft sealant, if desired.
Gold Conversation Heart Scatter
- Place the conversation hearts on a piece of cardboard in a well-ventilated area, or outdoors.
- Spray one side of the conversation hearts gold, covering thoroughly, and then wait a few hours before flipping the hearts over and spray painting the other side.
- Allow to dry according to the spray paint's directions.
- You can also apply a craft sealant, if desired.
Gold Heart Marquee Sign
- Trace your desired shape onto a wide panel of your cereal box.
- Cut the shape out carefully and trim the long sides to 1 1/2" wide (still keeping their original length).
- Cover the shape with glitter duck tape, as well as the long lengths of cardboard.
- Place some cardboard onto the back of the shape to help "frame" and attach the lengths along the sides of the shape.
- Form the long lengths of cardboard along the side of your shape and press the duck tape up to secure the panels in place. Add additional tape anywhere where the cardboard needs more strength.
- Next, poke holes in the shape where the lights will go using the craft knife. Poke the lights through the holes, and then secure the battery pack onto the marquee sign.
- If you plan to hang your sign, add a hook now.
Recommended Products
As an Amazon Associate and member of other affiliate programs, I earn from qualifying purchases.
-
 Creative Converting Heart Foil Confetti, Any, Red
 -
Ariceleo Led Fairy Lights Battery Operated, 1 Pack Mini Battery Powered Copper Wire Starry Fairy Lights for Bedroom, Christmas, Parties, Wedding, Centerpiece, Decoration (5m/16ft Warm White)
-
Terra by Battat – Insect World – Assorted Miniature Insect Toys For Kids 3+ (60 Pc)
-
Best Creation Glitter Tape, 50mm/5m, Gold
-
Rust-Oleum 1910830 Spray Paint, Each, Gold
-
By The Cup Small Conversation Hearts 1 Pound Bag


I’d love to hear what your Valentine’s plans look like this year! How will you be decorating – and who will you be celebrating it with?
Check out some of our other Valentine’s Day crafts for kids here.
Love these DIY gold Valentine decor ideas – such elegant and creative ways to add sparkle to your home. I especially appreciate how accessible and stylish each project is. Perfect inspiration for a personalized, festive touch this season. And if anyone needs last minute accessories or materials, check out this local pawn shop for unique finds.
I love how simple yet elegant the gold accents look, especially the heart marquee sign. Creative decor really adds personality to any space – kind of like how a fresh style upgrade can transform your confidence too. I recently came across https://premiumbarbershop.com/ and it gave me the same vibe of premium styling and attention to detail.