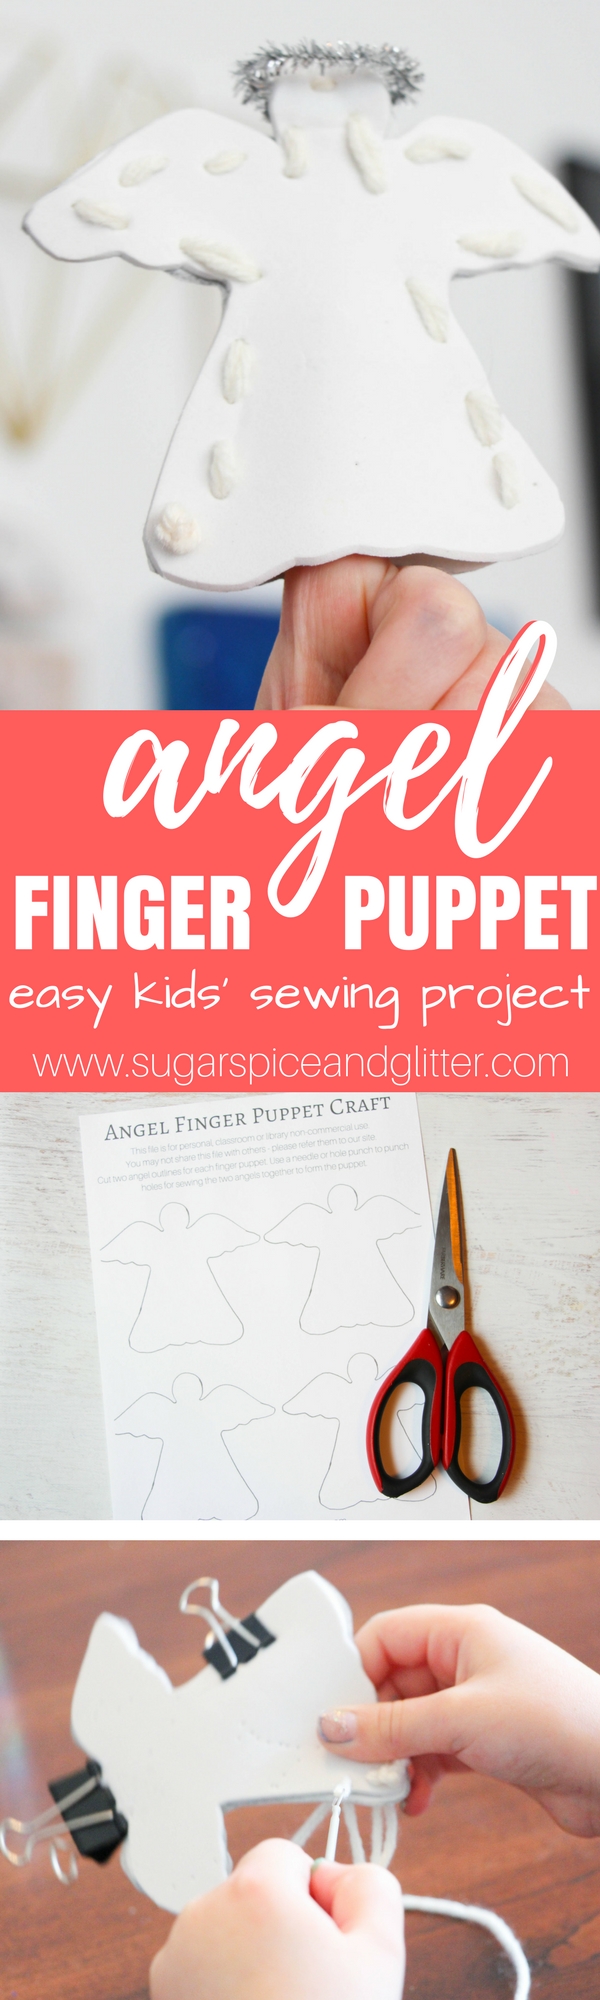
Dip Dyed Angels
Welcome to Sugar, Spice & Glitter! Please note, this post may contain affiliate links. For more details, see our Full Disclosure.
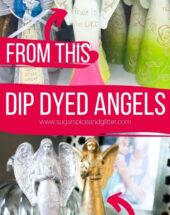
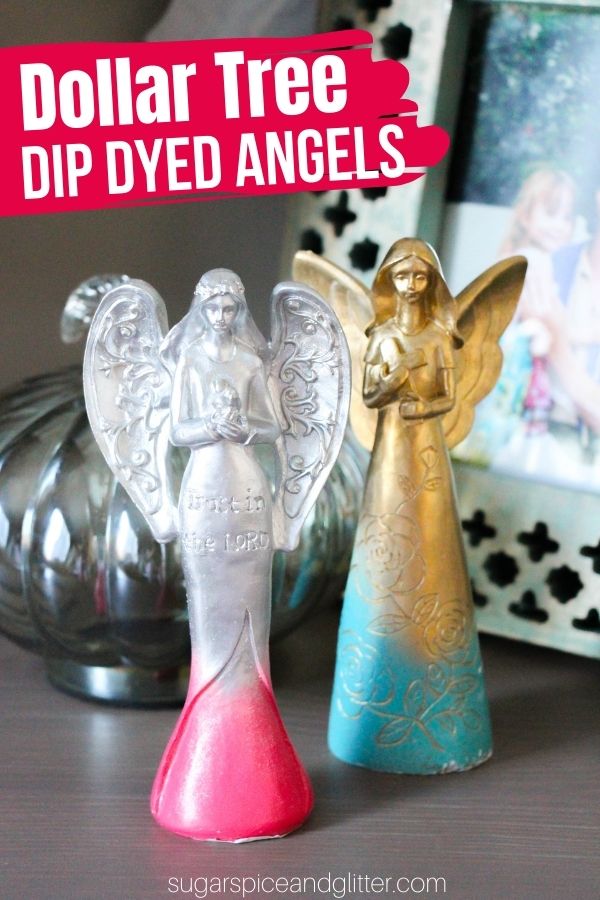
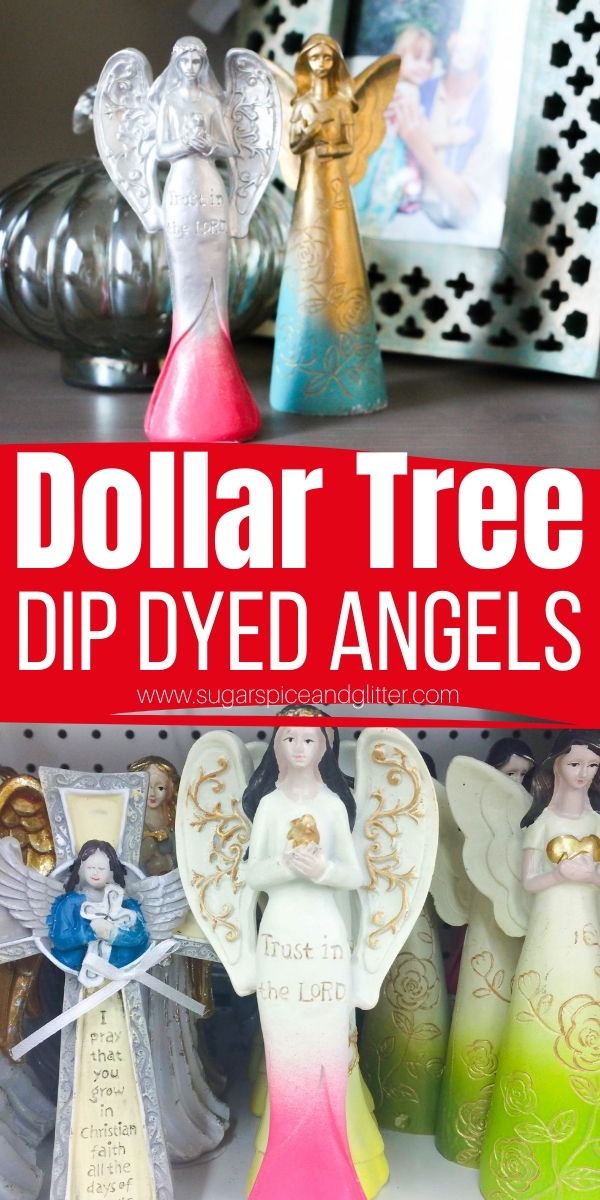
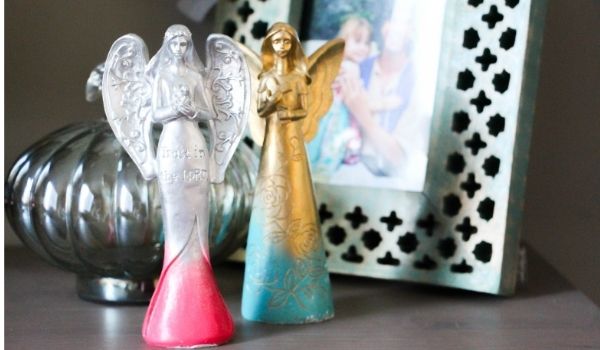
A fun Dollar Tree craft for Christmas, these Dip Dyed Angels go from homey to chic in just a few minutes with a light and strategic coating of paint. A great way to bring new life to home decor pieces, especially gifts that aren’t really your style.
Dip Dyed Angels Craft
My favorite thing about the Dollar Tree is that I get to tell my daughter she can pick out “anything she’d like” and know that it’s just going to cost me $1.25
She’s always so excited at this idea – how often can we let our kids loose in a store to pick out whatever they’d like?! They don’t care that it’s a dollar, they just love getting the freedom.
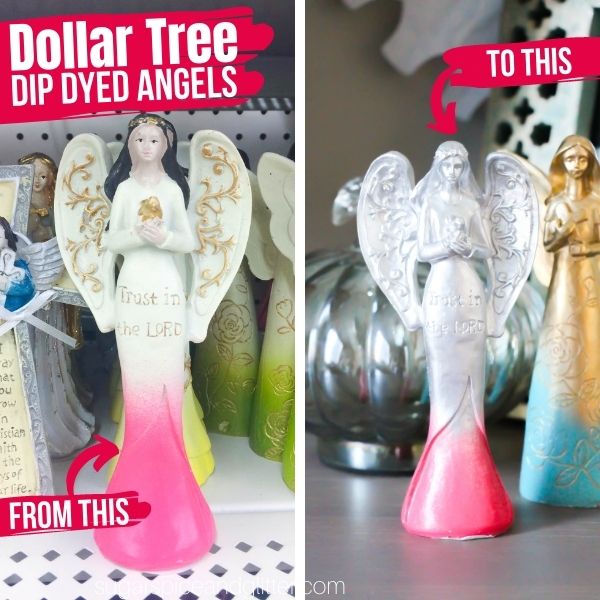
Recently, my daughter picked out a set of angel statues from the Dollar Tree and was insistent that they should go on our mantle when we got home… I’m all for letting her pick out what she wants, but the thought of those angel statues sitting on my mantle was not sitting well with me. At the risk of offending anyone who loves the statues as-is, I’ll just say that they are not at all my style, but my daughter just loved that they were angels.
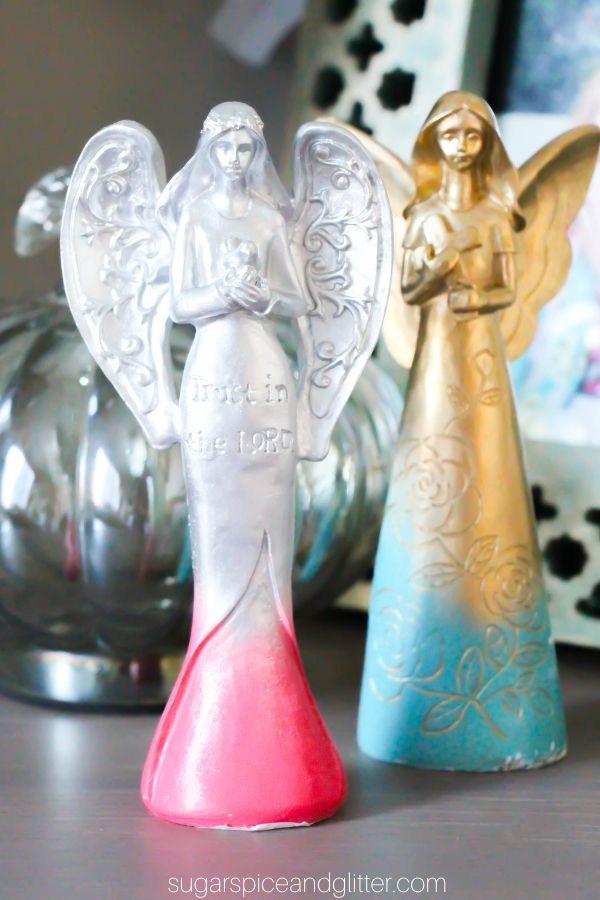
We agreed to a compromise of painting the angels to suit our family’s decor a bit better, and I’m so happy with how they turned out. I think they look like something you would find in a high-end gift store for $15+, and I think they would make a gorgeous homemade gift.
I just used a light coat of strategically placed spray paint to upgrade our angels, but you could also do a traditional dip dye or apply a light coat of paint with a foam brush. I’ve outlined how to do all three methods below.
Spray Paint Angels Instructions
You will need spray paint in a complementing color to your statue. Some of the statues already have a metallic second color in their design, so I would pick that same color. (You can see this with our gold and blue angel, she already had a gold design to her dress so we picked a similar tone for the dip dye effect.)
Working in an outdoor, well-ventilated area, hold the angel upside down and apply a light coat of spray paint, starting at the bottom (her head) and working your way up (to her feet).
Once you reach the place that you want the colors to blend, work your way back down (to the angel’s head).
Hold upside down for a few seconds up a minute to allow any excess paint to drip off. Lay flat to dry.
When the front of the angel is dry, turn the statue over and repeat on the back of the angel.
Dip Dyed Angel Instructions
There are two ways you can dip dye this angel statue:
- dip the angel into a large container of paint
- place some paint at the top of a large container of water and dip the angel into the water, then slowly remove, allowing the paint to attach to the statue as you remove it
The water method uses less paint but can result in a bubbly surface and uneven paint. The large container is great if you already have some pints of paint sitting around, but would be not cost-effective if you’re having to buy all supplies from scratch.
To dip the angels in the large container, slowly insert the statue, starting with the head to apply an even coat. Remove the angel faster when you hit the spot where you want the colors to blend so that it results in a lighter coat.
Hold the statue over the container to allow excess paint to drip off before placing on a protected surface to dry. (You may want to use a hair dryer to help this process along.)
If these angels will be stored, you may want to apply a craft sealant to protect the paint from chipping or scratching.
Painted Angel Instructions:
To apply the paint using foam paintbrushes, select complementing acrylic paints to your angel statues. Some of the statues already have a metallic second color in their design, so I would pick that same color.
Start at the angels head, applying very light brush strokes of paint, and working your way down to where you want the colors to blend. Apply light, almost opaque coats here to allow the original color to peek through. Concentrate your paint application on the upper half of the angels.
You may need to apply several coats, allowing the paint to dry in between, to achieve a uniform appearance.
If these angels will be stored, you may want to apply a craft sealant to protect the paint from chipping or scratching.
Pin this DIY Angel Craft for your holiday crafting and gift giving:
Grab your free printable instructions for our dip dyed angels craft:
Want to Save This Recipe?
Enter your email & I'll send it to your inbox. Plus, get great new recipes from me every week!
By submitting this form, you consent to receive emails from Sugar, Spice and Glitter.
Dip Dyed Angels
A fun way to upcycle decor to suit your tastes, these Dip Dyed Angels started off as Dollar Tree ornaments but with just 5 minutes of effort can be transformed into a classy, gorgeous piece of home decor or a homemade gift. There are 3 different ways to give your angels this dip dye effect
Materials
For the Spray Paint Angels:
- Metallic Spray Paint
For the Dip Dyed Angels:
- Large container of paint
- Craft Sealant
For the Painted Angels:
- Foam Paintbrush
- Acrylic Paint
- Craft Sealant
Instructions
Spray Paint Angels Instructions
- Working in an outdoor, well-ventilated area, hold the angel upside down and apply a light coat of spray paint, starting at the bottom (her head) and working your way up (to her feet).
- Once you reach the place that you want the colors to blend, work your way back down (to the angel's head).
- Hold upside down for a few seconds up a minute to allow any excess paint to drip off. Lay flat to dry.
- When the front of the angel is dry, turn the statue over and repeat on the back of the angel.
Dip Dyed Angel Instructions
- There are two ways you can dip dye this angel statue: dip the angel into a large container of paint OR place some paint at the top of a large container of water and dip the angel into the water, then slowly remove, allowing the paint to attach to the statue as you remove it
- The water method uses less paint but can result in a bubbly surface and uneven paint. The large container is great if you already have some pints of paint sitting around, but would be not cost-effective if you're having to buy all supplies from scratch.
- To dip the angels in the large container, slowly insert the statue, starting with the head to apply an even coat. Remove the angel faster when you hit the spot where you want the colors to blend so that it results in a lighter coat.
- Hold the statue over the container to allow excess paint to drip off before placing on a protected surface to dry. (You may want to use a hair dryer to help this process along.)
- If these angels will be stored, you may want to apply a craft sealant to protect the paint from chipping or scratching.
Painted Angel Instructions:
- Start at the angels head, applying very light brush strokes of paint, and working your way down to where you want the colors to blend. Apply light, almost opaque coats here to allow the original color to peek through. Concentrate your paint application on the upper half of the angels.
- You may need to apply several coats, allowing the paint to dry in between, to achieve a uniform appearance.
- If these angels will be stored, you may want to apply a craft sealant to protect the paint from chipping or scratching.
Recommended Products
As an Amazon Associate and member of other affiliate programs, I earn from qualifying purchases.

These dip dyed angels make a gorgeous addition to your holiday decor and make a great homemade gift. I love that these angels match our decor perfectly and you can’t even tell they came from the Dollar Tree!
For more fun upcycled crafts, check out our Mother’s Day Purse Idea or our Painted Wooden Spoon Craft.