
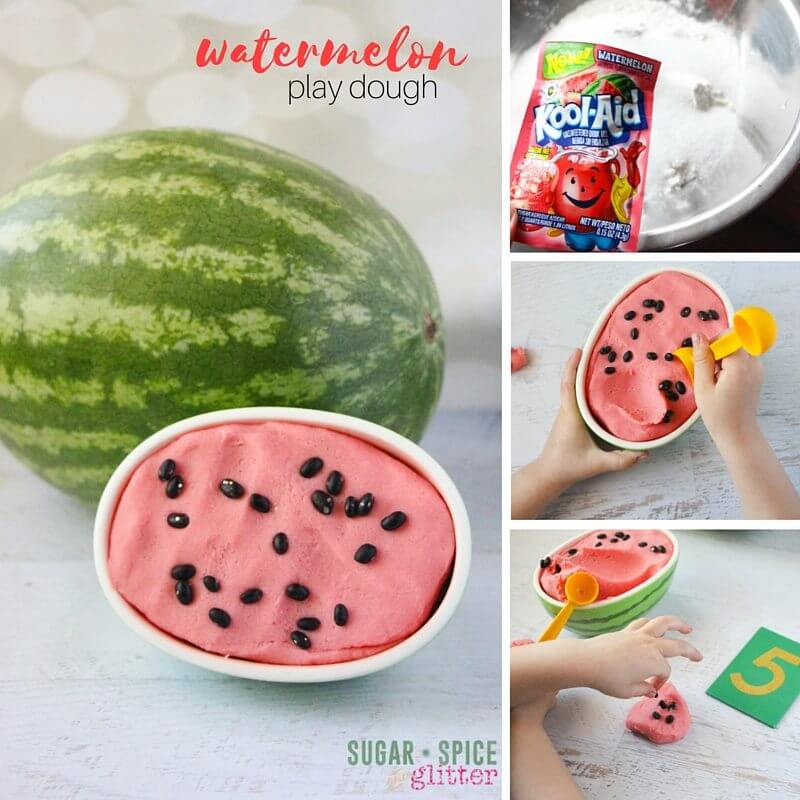
Watermelon Play Dough for Counting
Welcome to Sugar, Spice & Glitter! Please note, this post may contain affiliate links. For more details, see our Full Disclosure.
While we try to spend as much time as we can outdoors in the summer, where we live we tend to get a lot of thunderstorms and the humidity can get a bit out of control, so I love having fun summer-inspired sensory play activities like this Watermelon Play Dough ready for the kids.
(Next week we will be sharing a fun round-up of Watermelon Sensory Play ideas, so keep an eye out for that!)

Watermelon play dough is a fun way to engage the senses and there are so many ways to play! I’ll share how we played, plus a few other ideas at the bottom of this post.
This Kool-aid No-Cook Play Dough recipe is fast becoming one of my favourites because I don’t need to mess around with dye or additional scents – I just add whichever packet we feel like making to our recipe and the colour and scent take care of themselves! You can also mix and match different packs for new combinations of scents.
Kids can actually help make this recipe if you have a big enough bowl to stir it all together and prevent the hot water from splashing. Even if they can’t help, they can watch the magical process of when the water hits the dry mixture and the colour transforms from white to pink (or blue, or green, or whatever colour you are making).

Check out our video for how to make homemade play dough – this video doesn’t show the Kool-Aid step so be sure to grab the free printable recipe below to ensure you follow this Kool-Aid Play Dough recipe correctly:
How to Make Watermelon Play Dough
First, assemble your materials:
- Water
- Vegetable Oil <– you can use melted coconut oil but if it’s cold where you are, it will make the play dough a bit tough at the start of playing (will soften with the heat of hands playing)
- Flour
- Salt
- Cream of Tartar <– I buy the big container or from a bulk store as those little jars are so expensive! A bulk container will last us for months of play dough making – and can also be used for soft sugar cookies, snickerdoodle cookies, etc.
- Watermelon KOOL-AID Unsweetened Drink Mix
You will also need:
- Number Cards (we used our Montessori Sandpaper Numbers)
- Black Beans for counting
- Container <– we used a cute watermelon bowl

Start off by boiling the water while you stir the dry ingredients together.
Measure out the boiling water and then add the oil into the measuring cup. This helps ensure the oil is evenly distributed through the play dough.
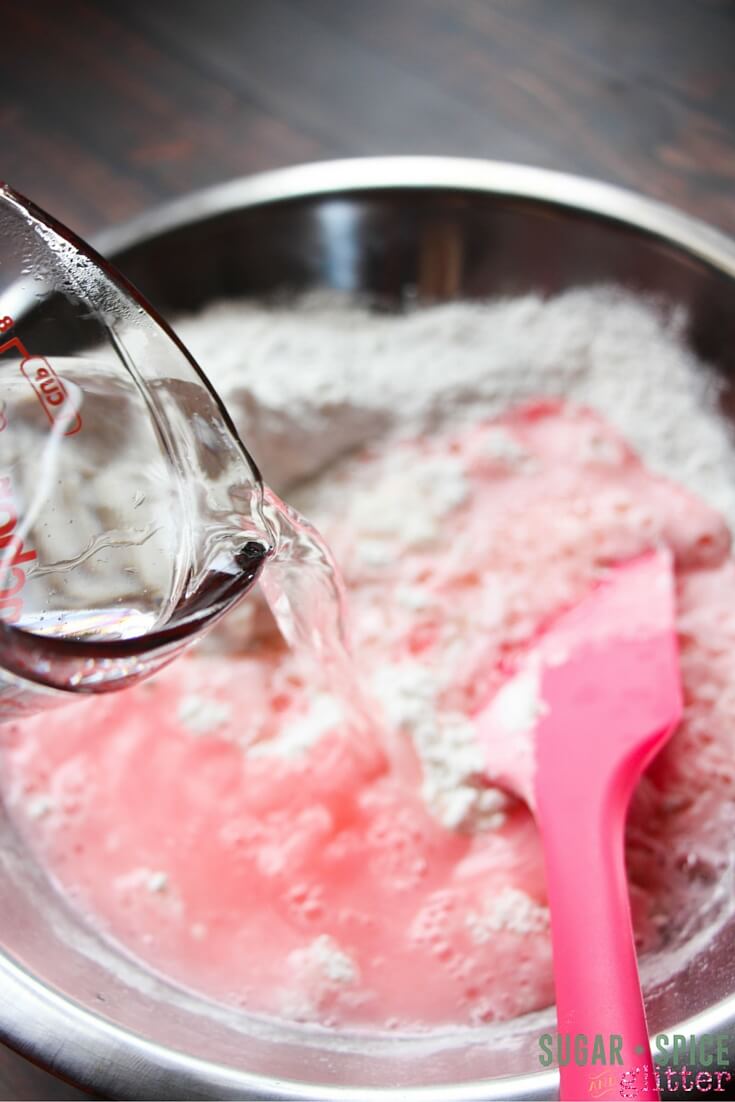
Pour the water-oil mixture into the dry ingredients and stir carefully.
Once the play dough is completely mixed and starts to form a ball, fold out the mixture onto a floured surface and knead for at least a minute.
Avoid the temptation to add extra flour until you’ve kneaded the dough for a while; some of the stickiness will go away after a good kneading, and you don’t want to dry out the dough with too much flour.
How We Played with our Watermelon Play Dough
Once the play dough is made, you’re ready to play!
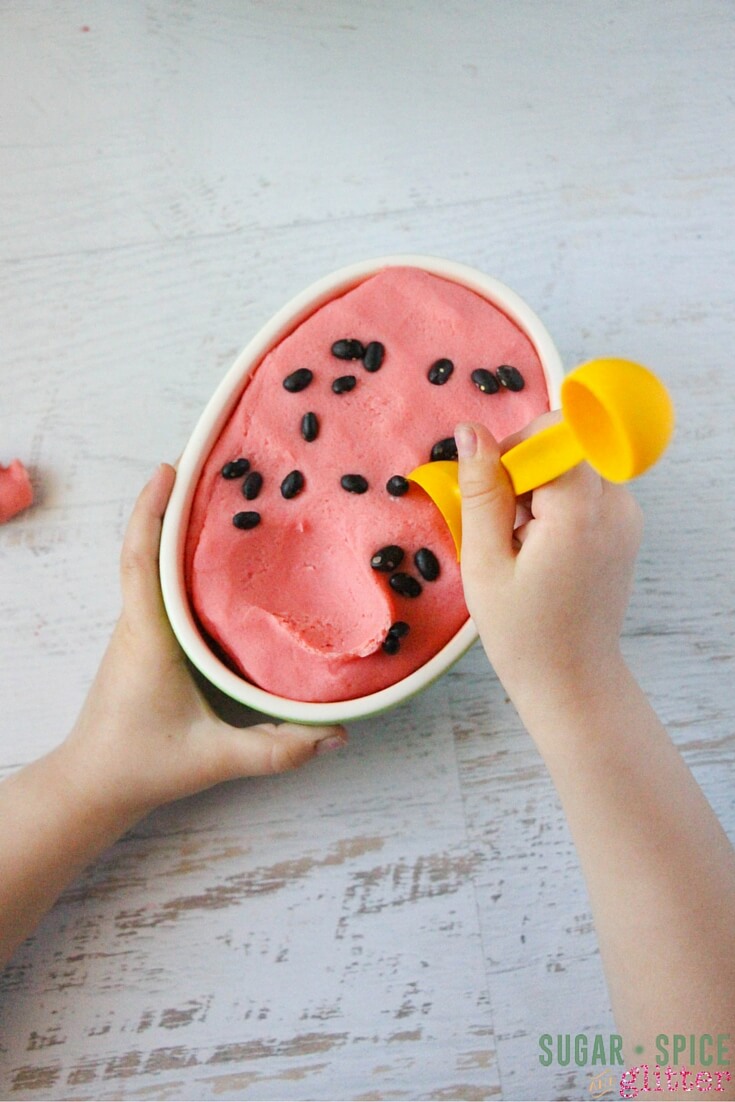
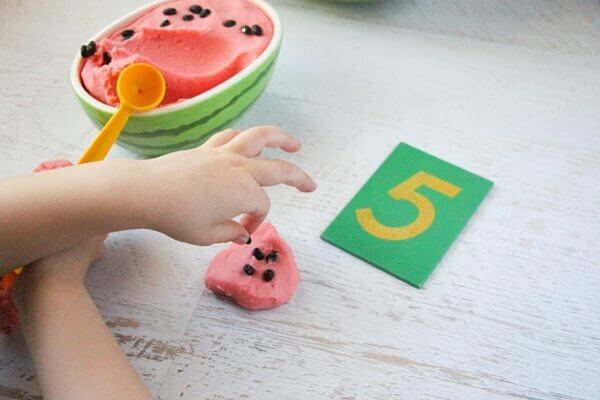
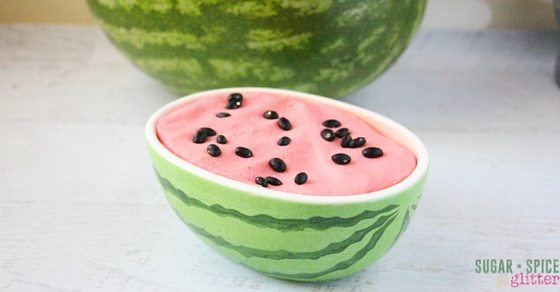
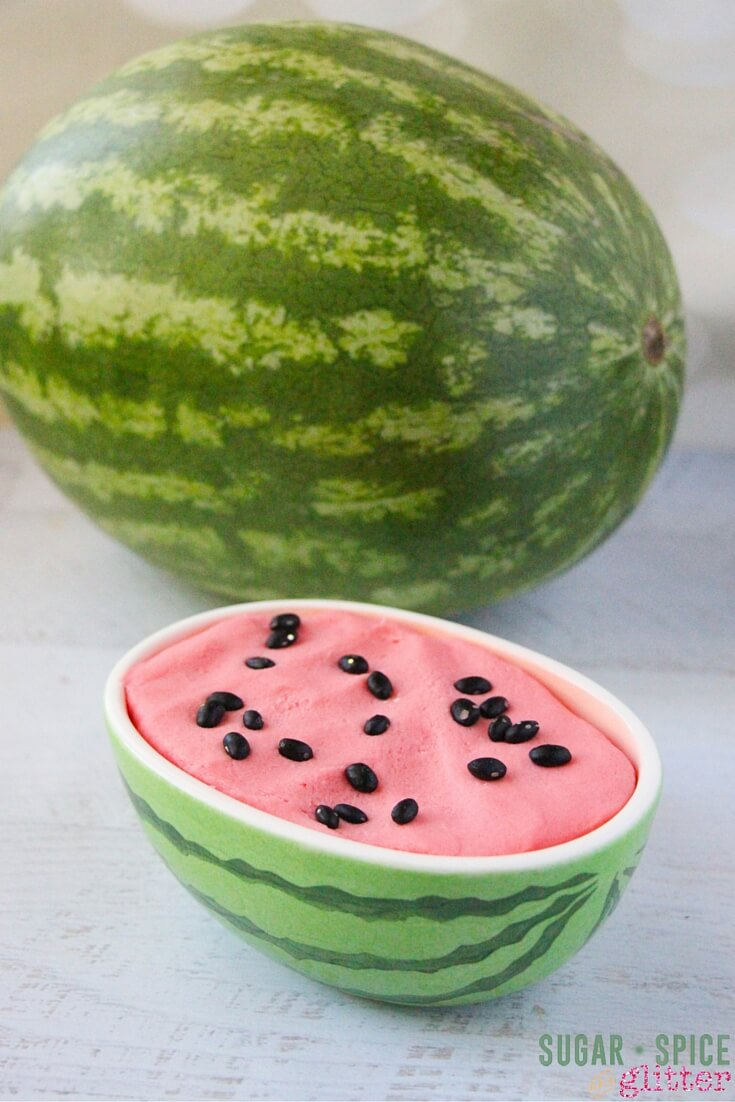
I put our play dough in this cute watermelon bowl and sprinkled some black beans (from our Space Sensory bin) on top. I gathered a few different materials before presenting it to my daughter, but she knows she can grab anything from our craft room or her kitchen cupboard for sensory play (as long as she is willing to help clean it…)
- Scooped the “watermelon” with a melon baller – a great fine motor activity and practical life activity
- Rolled the dough into perfect balls when the melon baller seemed not to satisfy Ella’s perfectionist tendencies
- Picked the black beans out of the play dough
- Made designs with the black beans in the play dough (a fun contrast between the hard beans and the squishy play dough)
- Counted black beans (with our Montessori sandpaper numbers)
- Practiced simple addition with the beans
- Smelled the play dough while squishing it
- Formed a letter “w” with the play dough
- Added some water to a handful of the play dough to explore what happened
After Ella was done with this watermelon play dough set-up, we added the dough to a summer play dough kit that she shared with our daycare kids.
When it’s just Ella, I will keep play dough for over a month, but when multiple kids are playing with it, I try to keep it under 2 weeks.
Would your kids enjoy this fun watermelon play dough set-up? What other tools would you provide with the play dough?
Grab your free printable recipe for this Kool-Aid Watermelon Play Dough:
Want to Save This Recipe?
Enter your email & I'll send it to your inbox. Plus, get great new recipes from me every week!
By submitting this form, you consent to receive emails from Sugar, Spice and Glitter.
Watermelon Play Dough for Counting
A fun summer sensory activity, this watermelon play dough math set-up is super simple and kids can play with the play dough in so many different ways. This is a great way to refresh math skills over the summer or help prepare kids for kindergarten
Materials
- 1 cup flour
- 1/2 cup salt
- 1 envelope Watermelon KOOL-AID Unsweetened Drink Mix
- 2 teaspoons cream of tartar
- 1 cup water
- 1 Tablespoon oil
Tools
- Mixing bowl
- Measuring cups and spoons
- Spatula
Instructions
- Start off by boiling the water while you stir the dry ingredients together.
- Measure out the boiling water and then add the oil into the measuring cup. This helps ensure the oil is evenly distributed through the play dough.
- Pour the water-oil mixture into the dry ingredients and stir carefully.
- Once the play dough is completely mixed and starts to form a ball, fold out the mixture onto a floured surface and knead for at least a minute.
- Avoid the temptation to add extra flour until you've kneaded the dough for a while; some of the stickiness will go away after a good kneading, and you don't want to dry out the dough with too much flour.
Notes
How We Played with our Watermelon Play Dough
Once the play dough is made, you're ready to play!
I put our play dough in this cute watermelon bowl and sprinkled some black beans (from our Space Sensory bin) on top. I gathered a few different materials before presenting it to my daughter, but she knows she can grab anything from our craft room or her kitchen cupboard for sensory play (as long as she is willing to help clean it...)
- Scooped the "watermelon" with a melon baller - a great fine motor activity and practical life activity
- Rolled the dough into perfect balls when the melon baller seemed not to satisfy Ella's perfectionist tendencies
- Picked the black beans out of the play dough
- Made designs with the black beans in the play dough (a fun contrast between the hard beans and the squishy play dough)
- Counted black beans (with our Montessori sandpaper numbers)
- Practiced simple addition with the beans
- Smelled the play dough while squishing it
- Formed a letter "w" with the play dough
- Added some water to a handful of the play dough to explore what happened
Recommended Products
As an Amazon Associate and member of other affiliate programs, I earn from qualifying purchases.
-
 La Preferida Black Beans, Dry, 16 oz (Pack of 1)
 -
Elite Montessori Toddler Sandpaper Numbers
-
Kool-Aid Unsweetened Watermelon Powdered Drink Mix, Caffeine Free, 0.15 oz Packet
-
Transpac Red Dolomite Spring Bright Watermelon Nested Bowls Set of 2
-
Cream of Tartar, 2 Cups by Unpretentious Baker, Highest Quality USP & Food Grade, Better than Restaurant Quality, Non-GMO, Kosher, Gluten Free, Vegan, Slotted Cap Spice Shaker


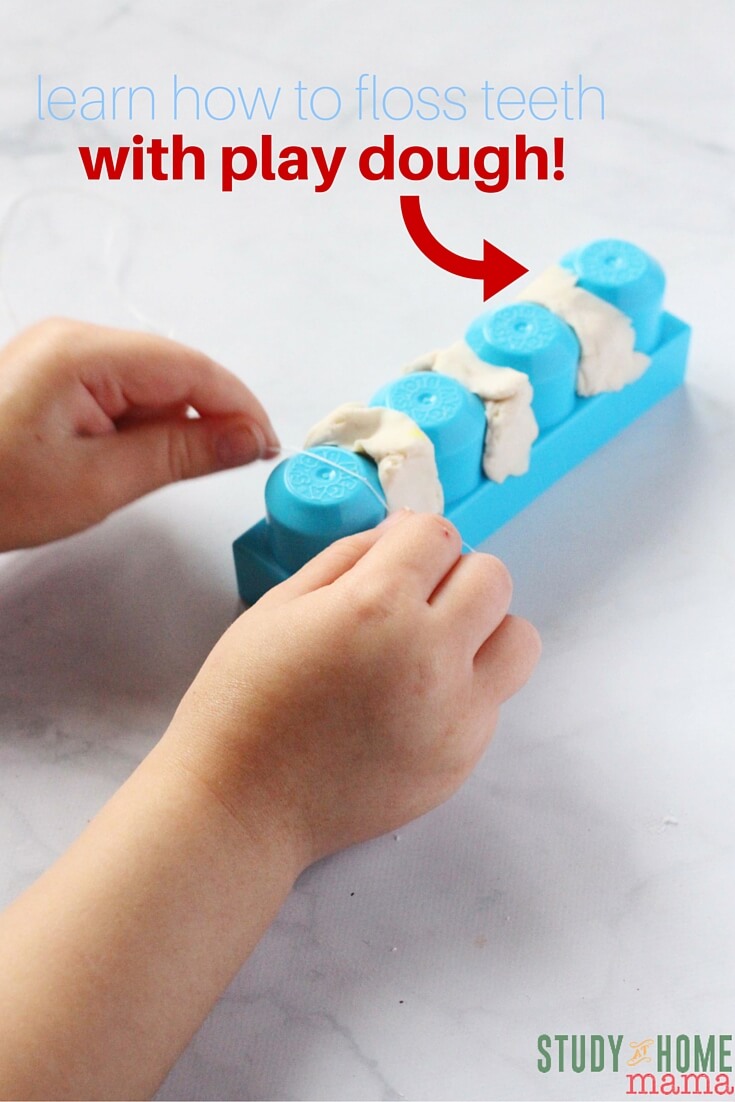
Be sure to check out some of our other play dough activities, including bath time play dough and teaching kids to floss with play dough!


Where did you get the watermelon bowl? It is adorable!
Thank you! I’m pretty sure I got mine at a vintage store (I love hitting them up for Montessori Practical Life materials and cute accessories for food pictures) – but there are a few affordable ones on Ebay as well:
http://www.ebay.com/bhp/ceramic-watermelon-bowl