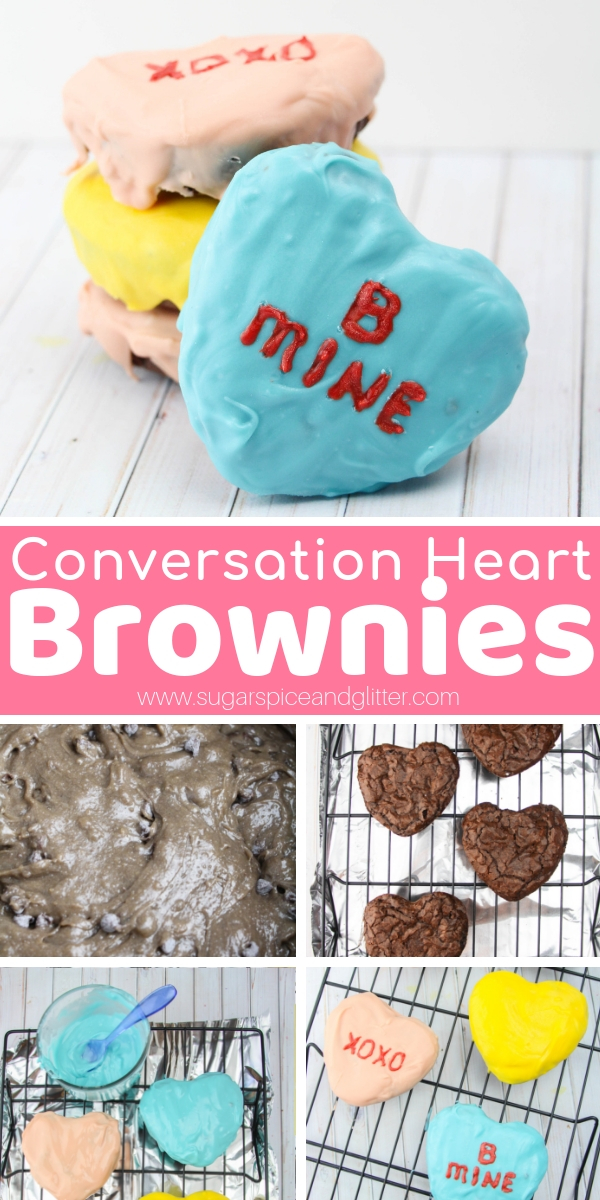
Valentine’s Day Brownies
Welcome to Sugar, Spice & Glitter! Please note, this post may contain affiliate links. For more details, see our Full Disclosure.
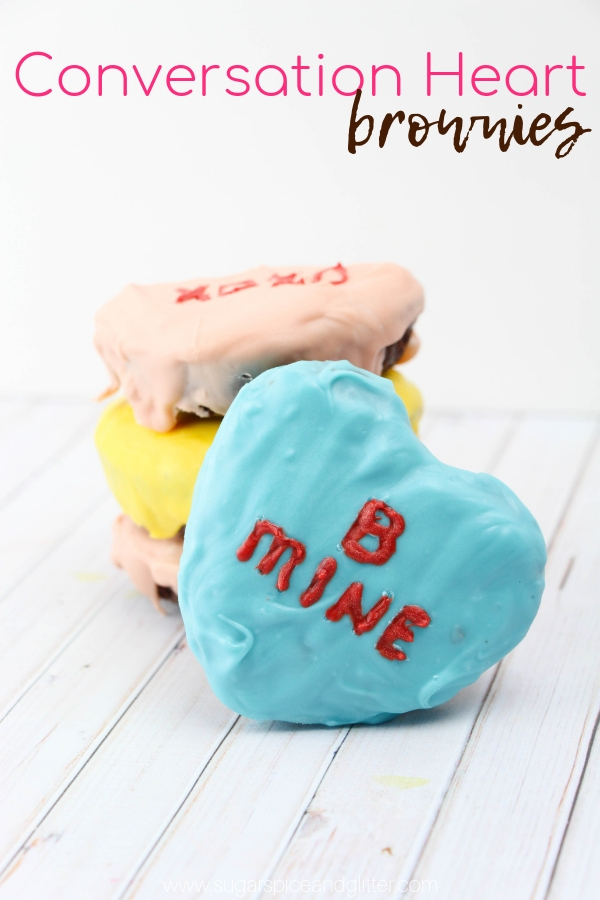
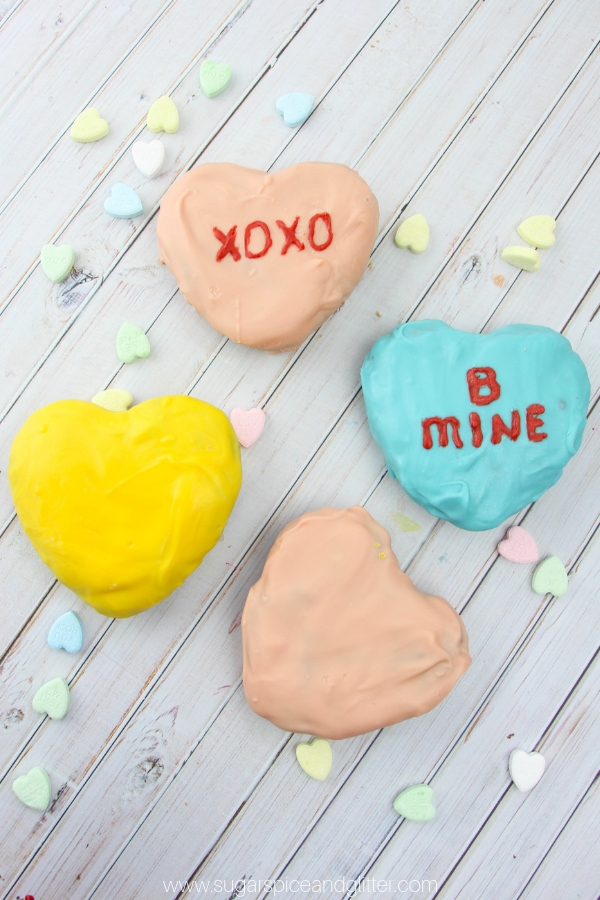
These cute Conversation Heart Brownies are a fun Valentine’s Day brownie recipe that is perfect for parties or lunch boxes.
I first shared this Conversation Heart Brownie recipe on my friend’s site, Amanda’s Cookin’.
Valentine’s Brownie Recipe
Is there anything more iconic for Valentine’s Day than a cute conversation heart?
Just like their Candy Corn cousin, the conversation heart is cute, nostalgic… but it leaves a lot to be desired when it comes to taste.
So, I figured – why not make a cute Conversation Heart-inspired dessert that tasted way better than those chalky little candies? (And just save the candies to make this conversation heart paint.)
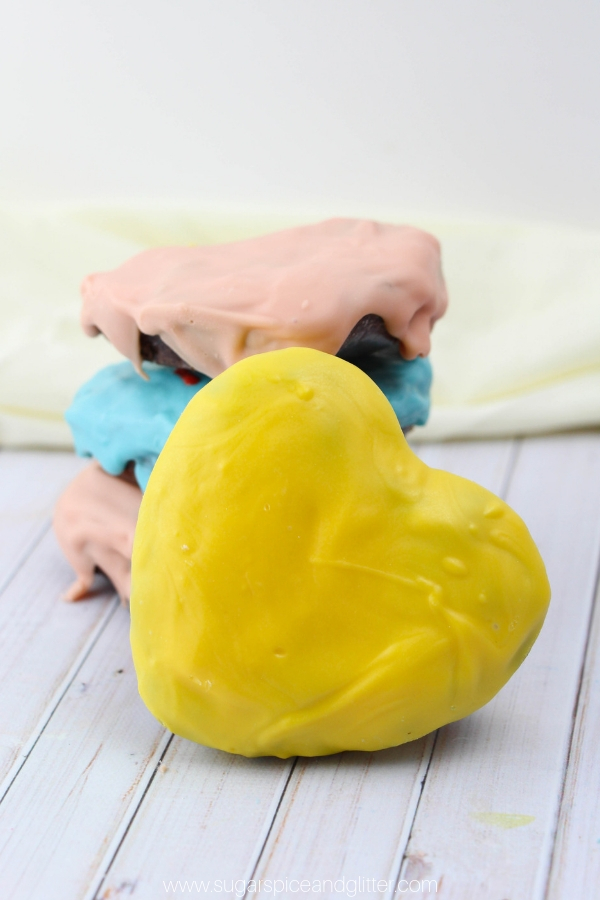
These conversation heart brownies are so cute and so incredibly simple to make – I even made them with Ella when she was just 5 years old!
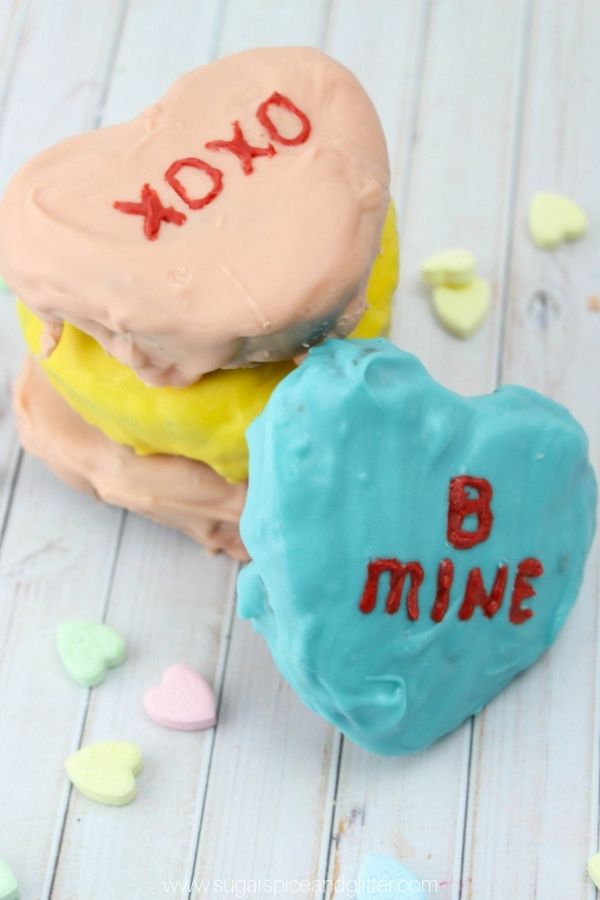
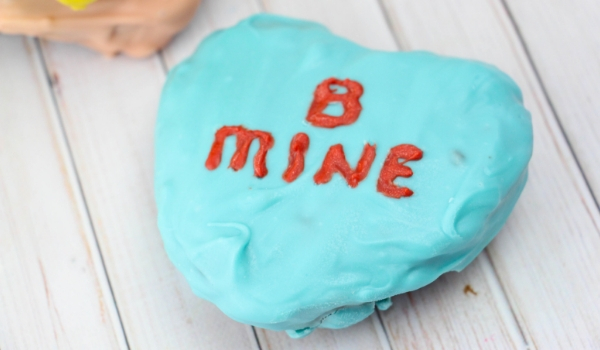
The trickiest part of this recipe is getting the cute messages on the brownies, which a good candy pen will help with, or you can just skip that step entirely (see the image below for evidence that they still turn out pretty cute either way!)
This conversation heart brownie tastes like the perfect mix of cake pop and brownie thanks to the candy coating, which is sweet, smooth and melts in your mouth.
We served these Conversation Heart-shaped brownies at our Love Bugs Valentine’s party, but they would also be super cute for a lunch box treat, classroom Valentine’s treat, or just a special dessert for your family on Valentine’s Day.
Because of the candy coating, I avoid refrigerating these brownies as the candy coating can “sweat” when it is brought back to room temperature. If you do need to keep them in the fridge, just keep this in mind and eat/serve them as soon as you take them out of the fridge (or just be preparing that they may get that little bit of condensation of the surface).
I hope you and your kids love this fun Valentine’s Day dessert – be sure to tag me on social if you make them!
Valentine’s Brownie Ingredients
- 1 1/3 cup butter
- 2 1/2 cups white sugar
- 1 1/2 cup cocoa powder
- 1 teaspoon salt
- 1/2 teaspoon baking powder
- 4 large eggs
- 2 teaspoons vanilla extract
- 1 1/3 cup flour
- 1 cup milk chocolate chips
- 1 cup pink candy melts
- 1 cup blue candy melts
- 1 cup pink candy melts
- 1/4 cup red candy melts
- 3 Tablespoons shortening
- Heart-shaped cake pan
- Medium saucepan
- 3-4 microwave-safe bowls
- Whisk or wooden spoon
- Measuring cups and spoons
- Toothpicks
- Spoons
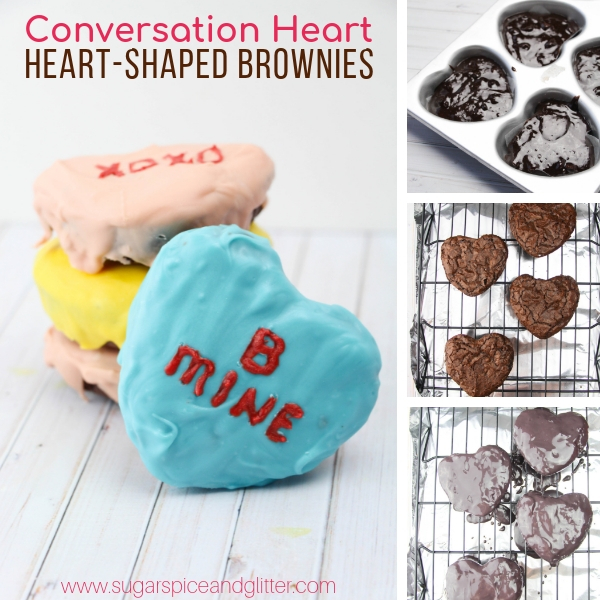
How to Make Conversation Heart Brownies
Preheat oven to 325F
Grease a heart-shaped cakes pan, or line and grease a large casserole pan – about 9×13″. Set aside.
In a small bowl, sift together the cocoa powder, salt and baking powder. Set aside.
Place the butter in a small saucepan over medium heat and cook for 8-10 minutes until slightly golden brown. Small pieces of milk fat will turn a chocolate brown and that’s okay.
Remove the pan from the stove and immediately stir in the white sugar with a wooden spoon.
Add in the cocoa mixture and then allow to cool to room temperature, about 5-8 minutes.
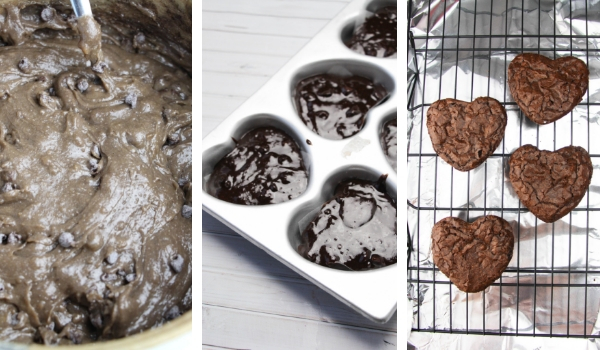
Add in the eggs one at a time, then the vanilla and flour, beating thoroughly after each addition. Beat for 2 minutes before adding in the chocolate chips.
Pour the brownie batter into the heart cavities or baking pan and bake for 22-25 minutes, until an inserted toothpick comes out clean and tops are cracked.
Allow brownies to cool in the pan to avoid breaking.
When ready to add the color glazes, place on a cooling rack and put each color of candy melt in a bowl along with a tablespoon of shortening.
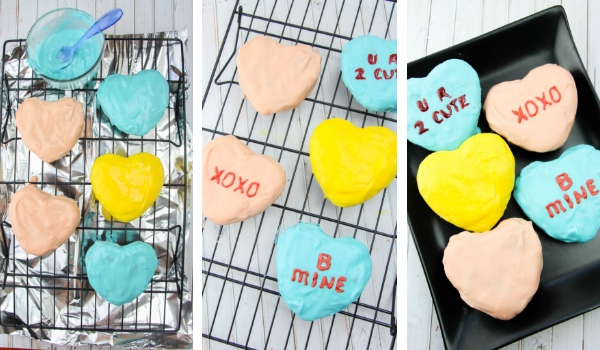
Microwave for 30 seconds and stir thoroughly. Pour 3-4 Tablespoons over each brownie, using the back of your spoon to smooth the candy coating to the edges.
Allow to dry completely before scratching your message into the candy coating.
Melt the red candy melts for 20-25 seconds before stirring to break down any remaining bits. Use a toothpick to pick up some red candy melts and apply to the scratched letters.
Allow to dry completely before storing or serving.
Pin this Cute Valentine’s Day Brownie recipe:
Grab your free printable for our conversation heart brownie recipe:
Want to Save This Recipe?
Enter your email & I'll send it to your inbox. Plus, get great new recipes from me every week!
By submitting this form, you consent to receive emails from Sugar, Spice and Glitter.
Valentine's Day Brownies
Ingredients
- 1 1/3 cup butter
- 2 1/2 cups white sugar
- 1 1/2 cup cocoa powder
- 1 teaspoon salt
- 1/2 teaspoon baking powder
- 4 large eggs
- 2 teaspoons vanilla extract
- 1 1/3 cup flour
- 1 cup milk chocolate chips
- 1 cup pink candy melts
- 1 cup blue candy melts
- 1 cup pink candy melts
- 1/4 cup red candy melts
- 3 Tablespoons shortening
Notes
Preheat oven to 325F
Grease a heart-shaped cakes pan, or line and grease a large casserole pan - about 9x13". Set aside.
In a small bowl, sift together the cocoa powder, salt and baking powder. Set aside.
Place the butter in a small saucepan over medium heat and cook for 8-10 minutes until slightly golden brown. Small pieces of milk fat will turn a chocolate brown and that's okay.
Remove the pan from the stove and immediately stir in the white sugar with a wooden spoon.
Add in the cocoa mixture and then allow to cool to room temperature, about 5-8 minutes.
Add in the eggs one at a time, then the vanilla and flour, beating thoroughly after each addition. Beat for 2 minutes before adding in the chocolate chips.
Pour the brownie batter into the heart cavities or baking pan and bake for 22-25 minutes, until an inserted toothpick comes out clean and tops are cracked.
Allow brownies to cool in the pan to avoid breaking.
When ready to add the color glazes, place on a cooling rack and put each color of candy melt in a bowl along with a tablespoon of shortening.
Microwave for 30 seconds and stir thoroughly. Pour 3-4 Tablespoons over each brownie, using the back of your spoon to smooth the candy coating to the edges.
Allow to dry completely before scratching your message into the candy coating.
Melt the red candy melts for 20-25 seconds before stirring to break down any remaining bits. Use a toothpick to pick up some red candy melts and apply to the scratched letters.
Allow to dry completely before storing or serving.
…