
Toward Reading and Writing: The Montessori Sandpaper Letters
Welcome to Sugar, Spice & Glitter! Please note, this post may contain affiliate links. For more details, see our Full Disclosure.
Last month we shared the Montessori Sound Games, and today Beth Holly is back with another installation of our Montessori Primary Language series, explaining How to Present the Montessori Sandpaper Letters.
Montessori Sandpaper Letters
Today’s post is the second in a series that we’re doing on the early Montessori language lessons that lead a child toward reading and writing.
Our first post introduced the Montessori Sound Games. The Sound Games precede any work with the Sandpaper Letters. After sufficiently playing the Sound Games, the child will be able to hear all the sounds in a spoken word. When the child can hear the sounds in a spoken word, we introduce the Sandpaper Letters, which is the first time the child sees a written symbol associated with the spoken sounds she already knows.
Meanwhile, the child has mastered some hand control through practical life activities, and shape recognition through various sensory activities. The child will have better success with the Sandpaper Letters, if she demonstrates good hand control and the ability to distinguish similar shapes.
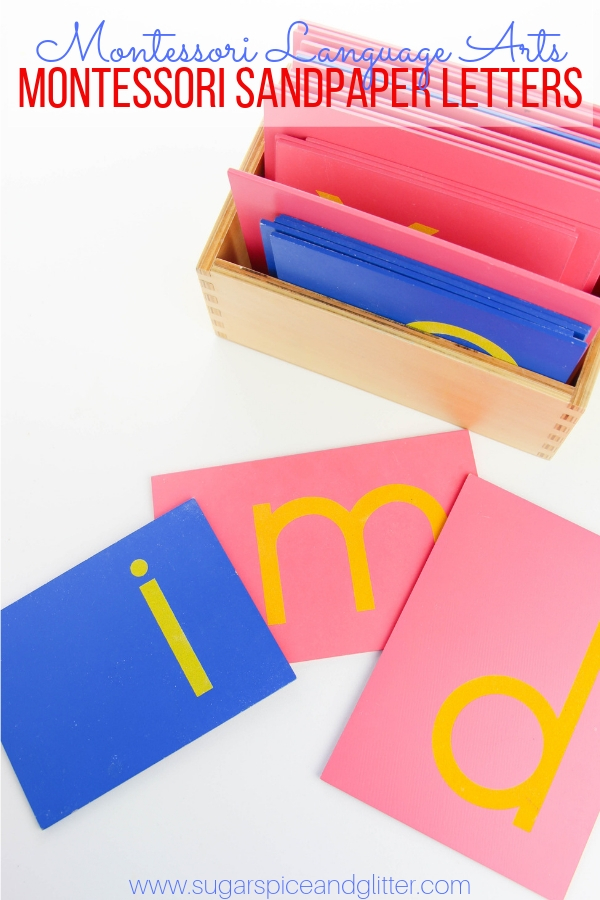
The Sandpaper Letters are rough letters mounted on board or cardstock, that the child traces with her first two fingers. Vowels are mounted on blue, consonants on pink, and two letter graphemes like “sh” or “ai” on green.
(To make your own, check out our DIY Sandpaper Letters tutorial.)
The Sandpaper Letters are not introduced in alphabetical order, but rather by choosing three letters at a time of contrasting shape and sound, such as m, a, and sh. The letters are introduced with a Three Period Lesson, which can be summed up as follows:
- This is m (the letter’s sound, not name!).
- Show me m.
- What is this? (pointing to m).
The second step is extended for greater repetition, saying things like:
- Point to m.
- Can you hand me m?
- Where is m?
- Trace m again.
You will find both manuscript and cursive Sandpaper Letters. Personally, I begin all my students with the cursive letters, for more easily flowing cursive handwriting later. Typically, children make an easy transition from recognizing the cursive letters to recognizing print letters.
Also, personally, I teach a child all the Sandpaper Letters, including the green ones, before introducing the Moveable Alphabet, which is the lesson that follows.
Lastly, and most importantly, we’re pronouncing the letter’s sound, not name! Try not to attach vowel sounds to consonants. It’s \b\, not buh, \t\ not tuh!
So let’s get tracing!

How To Present the Montessori Sandpaper Letters
Purpose: Direct: to unite the speech sounds by means of muscular and visual memory to their corresponding symbols; motor preparation for writing. Indirect: correlation of speech sounds with their symbols in preparation for writing and reading.
Material: lower case cursive letters representing the 40 speech sounds made out of sandpaper and mounted on thick cards or wood backing. Vowels are mounted on blue, consonants on pink, and two-letter graphemes such as ‘sh’ or ‘ai’ on green.
Age: 3 ½ +
Prerequisite: 1. remote motor preparation in practical life and in sensorial exercises, such as grasping cylinder knobs, touching the rough and smooth boards, and touching the geometric wooden insets.
2. extensive work with the sound games; the ability to aurally analyze any spoken word, that is, to hear each sound consecutively in a spoken word; awareness of all key speech sounds.
Control of Error: In the sandpaper–if the child’s fingers slip away from the sandpaper, she notices the different feeling of the surface. The teacher is the control of error in demonstrating the correct direction for tracing the letters.
Note: Remember to always include the tracing stage in all sandpaper letter lessons and games.
Presentation
1. Invite the child to come and do an exciting lesson.
2. Show her where the letters are kept. Choose three of contrast in sound, shape, and color–one blue, one pink, and one green.
3. Place the letters face down on the table.
4. Play a sound game with the first letter. Tell the child, “Let’s think of words with m” (or whatever sound). You and child say the words: mat, mom, movie, etc.
5. With a portrayal of excitement ask the child, “Would you like to see what ‘m’ looks like?”
6. Turn the letter over. If the child identifies the letter by name, saying, “That’s M” (the name), tell her, “That is its name. It is also the sound you know: ‘m’ ” (the sound).
7. Instruct the child to watch while you trace the letter. Trace the letter in the direction in which it is written with your index and middle finger. Say the sound.
8. Instruct the child to watch again. Trace as before and say the sound.
9. Give the child a turn. If she does not sound it, you sound it and encourage her to do so.
10. If the child begins in the wrong place, tell her, “Watch again. This time, watch where I start. That’s very important.”
11. Trace it and sound it.
12. Child traces it and sounds it.
13. Place this letter face down.
14. Proceed with the other two letters in the same way.
15. After all three letters are presented in this way, turn them face up and conduct an extended second period, tracing every time a letter is identified.
16. Conduct a third period, also tracing every time the letter is identified.
17. Put materials away.

Exercise: Child may trace and sound the letters she knows.
Extensions
Group Repetition: Gather children with known letters in common. Engage in a third period lesson. Teacher asks, “What is this?” First child answers and traces the letter. Then the letter is passed around the group, each child tracing and sounding. Repeat with all letters.
Memory Game: Child closes her eyes and the teacher takes a letter away. The child looks and tries to guess which sound has been removed. Later this game is repeated with the teacher rearranging the remaining letters.
Knock-Knock: Three or more letters are placed face down. Child knocks twice on the back of the letter, saying, “knock-knock.” Teacher answers, “Who’s there?” Child turns the letter over, identifies it, and traces. Mix the order of the letters and repeat.
Fetching at a Distance: Gather a small group of children. Ask the first child to fetch a particular sound from the display shelf. Child returns with the letter, traces and sounds it. Give each child a turn and continue as long as there is interest.
Sand Tray: Child “writes” the letters in a shallow tray of sand.
Tracing Blindfolded: Child chooses letters to trace, puts on a blindfold, and traces the letters blindfolded.
Tracing on the Body: Teacher traces the letter on the child’s back or on the back of her hand, and the child identifies the sound.
Tracing in the Air: Teacher “writes” the letter in the air and the child identifies the sound. (Teacher’s back is to the children so that they see it properly.)
To learn more about Montessori theory, please subscribe below and be sure to check out more of Beth’s work on Teachers Pay Teachers.
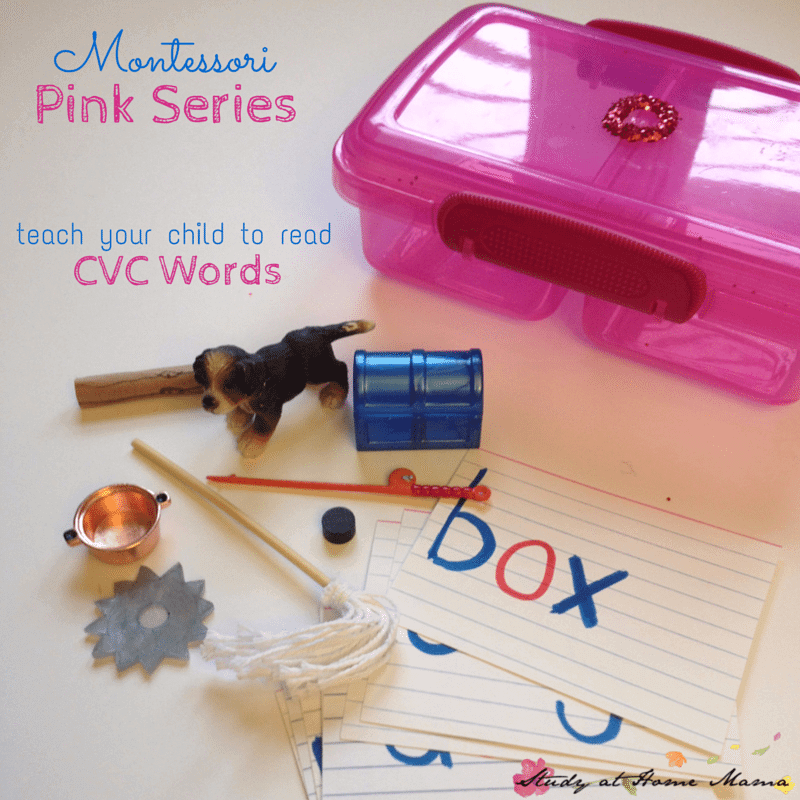
For more Montessori Language activities, check out our Montessori Pink Series and our Peter Rabbit Garden Writing Tray.


Nice post!
The more I read, the greater your material is.
I’ve covered lots of the other resources, however, only here,
I’ve found valid information with such necessary facts to keep in mind.
I suggest you will publish articles with many topics to upgrade our knowledge, mine in particular.
The language is another thing-just brilliant! I believe I have already found my perfect supply of
the most up-to-date information, thanks to you!
This article provides detailed and inspiring instructions on how to introduce Montessori sandpaper letters – helping children not only “see” the sounds but also feel them through their fingertips, creating a great foundation for learning to read and write later.
Thank you! Let me know if you need any more guidance on introducing sandpaper letters.
Thanks! I hope you have an amazing experience introducing sandpaper letters.
The tempo is maintained by the geometry dash rhythm-driven feedback and the instant restart following failure. There is only constant, unbroken flow—no downtime.
five nights at freddy’s give you 5 nights to survive in a dangerous pizza store. Can you solve it?
Explore the best casino games for real money with high payouts and smooth gameplay.
Enjoy slots, table games, and live dealers in one place.
Lightweight web utilities improve efficiency without system overload.
The SixGamez Web Utilities Platform offers smooth, browser-based solutions.
Improve consistency with DS4Windows controller setup reliability for smooth and error-free gameplay.
Ensure stable connections and dependable controller performance.
Designers benefit from using a single platform to discover multiple font styles. Browse curated typography at https://www.fontchase.com
.
I like how sandpaper letters connect touch with early literacy it makes letter recognition more concrete for young learners. Hands on tools like this work well alongside interactive resources like mathplayground.
The dynamic gameplay of subway surfers is a limitless runner that will keep you on the edge of your seat. Players commence the game as Jake or another unlockable character who is apprehended for graffiti-tagging on a train car. The objective is straightforward: to flee as far as possible without being apprehended once the pursuit commences.
Very helpful, clearly explaining how to use Sandpaper Letters to help children become familiar with sounds, free online games, and letters naturally and effectively.
Unlock endless entertainment using a torrentio addon for unlimited streaming access now.
Enjoy a vast library of movies and shows with smooth performance.
Get started with p999 game download for quick access to your favorite online games.
Enjoy fast installation, secure access, and exciting entertainment anytime and anywhere.
I really liked the reminder that the sound games need to come first before the sandpaper letters—that sequencing makes so much sense but I hadn’t thought about it. For anyone looking for more Montessori-style activities at home, I found stealabrainrot has some simple phonics games that work well alongside these lessons.
I really like how this activity combines touch, movement, and sound to make learning letters feel natural instead of repetitive, which is one of the reasons Montessori methods remain so effective for young children. Creative educational ideas like these pair nicely with simple artistic activities too, and resources such as Szinezokvilaga.com offer another enjoyable way for kids to practice focus, creativity, and fine motor skills through coloring.