
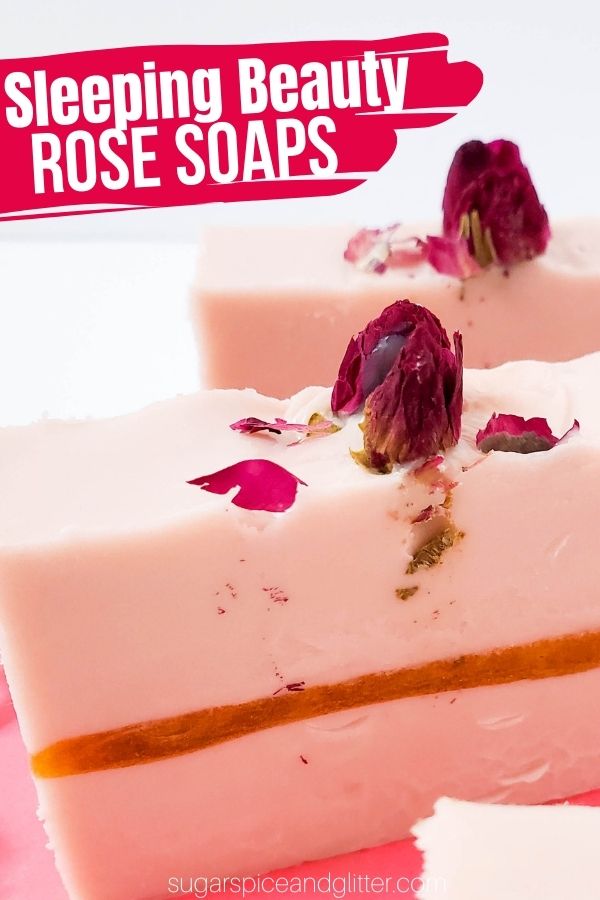
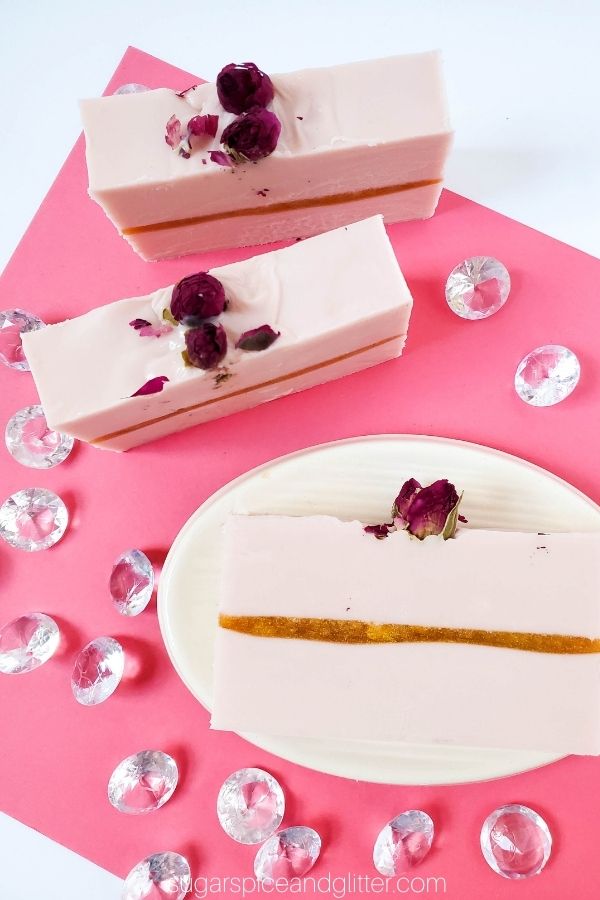
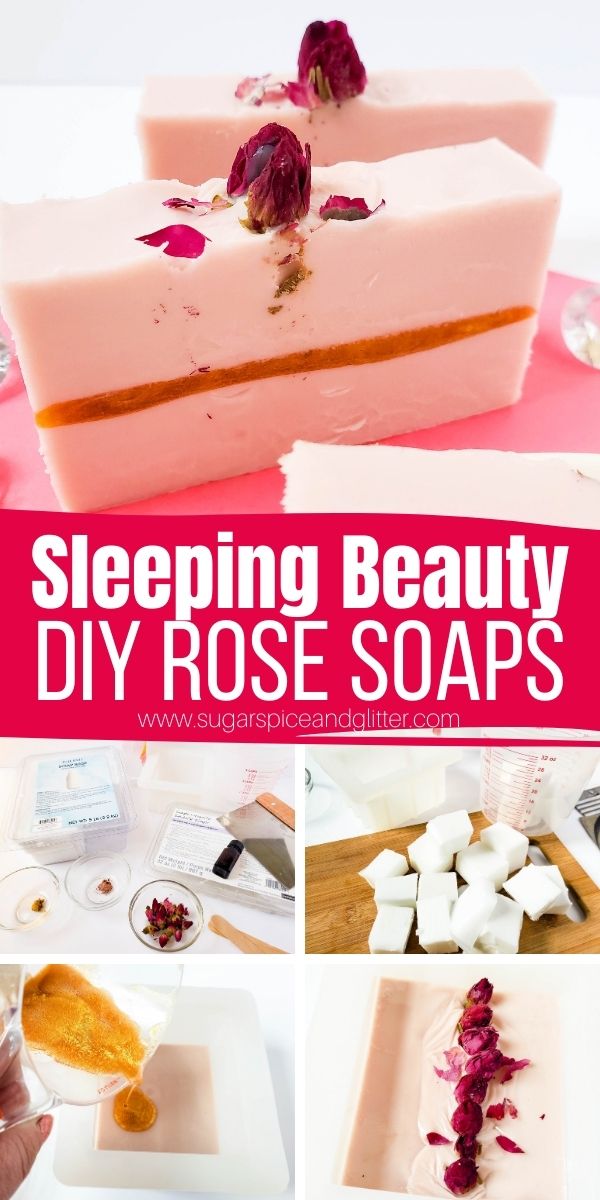
Sleeping Beauty Rose Soap
Welcome to Sugar, Spice & Glitter! Please note, this post may contain affiliate links. For more details, see our Full Disclosure.

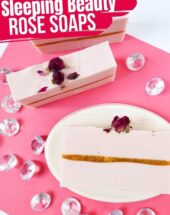
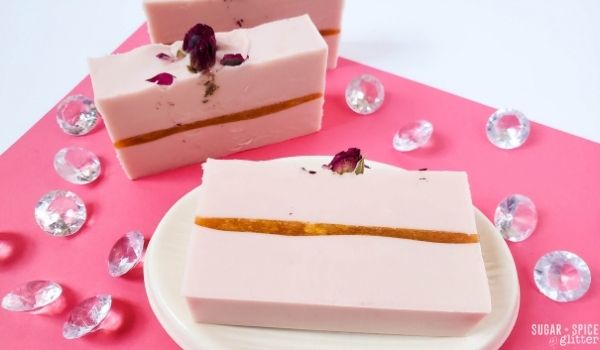
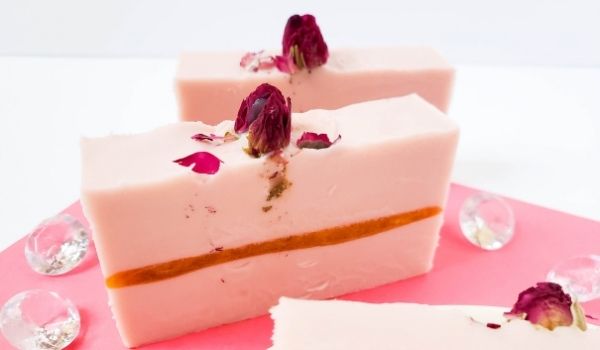
A fun Disney beauty DIY, these Sleeping Beauty Rose Soap Bars are super simple to make and add some serious princess-level luxury to your bathroom. They make a great gift – or can just be a nice way of pampering yourself!
Rose Soap Bar Craft
While I love going into fancy bath stores and seeing all of the fun products and concepts, I have a hard time justifying the price – even though I do believe pampering yourself is such a great form of self-care.
Instead of splashing out for a single $8 bar of soap, I prefer to have some fun and make my own that are customized to exactly the texture, scent and style that I want. I’ve now made everything from squishy jelly soaps to play dough soap – along with a crazy number of homemade sugar scrubs, bath bombs, etc.
While the initial investment of buying some of the materials may seem high, I get so many projects out of each purchase that it works out to be super affordable in the end. For example, I bought a variety of natural mica powders to provide non-staining color to my DIY beauty projects for $13 and even after making dozens of different recipes, I still have not had to replace them.
Today’s easy rose soap bar recipe was a special request from my daughter, Ella, who loves everything Disney. She wanted a Sleeping Beauty soap – and what could be more Sleeping Beauty than a pink and gold soap with a pretty rose theme. (Her alias was Briar Rose, after all!)
Not only do these soaps look super cute displayed in the bathroom, they would also make a really thoughtful gift.
Using Goat’s Milk Soap as our base is great for sensitive skin as it’s a gentle natural cleanser that is rich in nutrients. It helps maintain your skin’s natural microbiome while gently removing impurities.
The rose essential oil also has antibacterial and anti-fungal properties while providing a calming, luxurious scent.
For more DIY Rose Beauty ideas, check out:
- Rose Sugar Scrub Cubes
- Homemade Rose Water Toner
- Homemade Rose Oil (with Video)
- DIY Rose Bath Bombs from Life n Reflection
- Oatmeal Rose Face Mask from Kale and Caramel
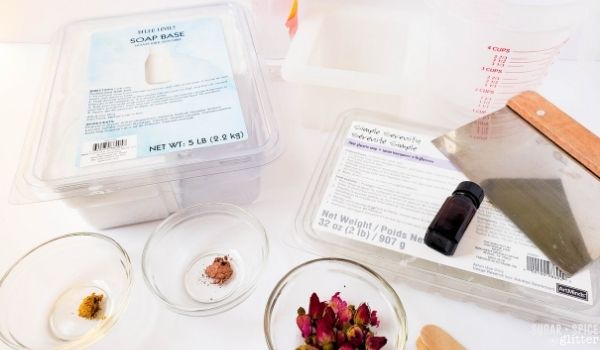
Rose Soap Bar Ingredients
- Goats Milk melt and pour soap base
- Clear Glycerin melt and pour soap base
- Rose Gold Mica
- Golden Mica
- Dried Rose Buds
- Rose Essential Oil
Scroll down to the printable recipe card for full measurements.
Tip: rubbing alcohol helps prevent bubbles from forming in your soap and also helps the different layers of the soap to stick together.
Tools You May Find Helpful
- Small loaf bar soap mold
- Straight soap cutter
- Microwave Safe Measuring Cups
- 2 wooden craft sticks for stirring
- Spray bottle with rubbing alcohol

How to Make Rose Soap Bars
Cut goats milk soap base into 1”x1” cubes and place half of the cubes in a microwave-safe measuring cup.
Heat the goats milk soap base in microwave on high for 30 seconds, remove and stir well. Heat for additional 10 second increments, stirring between, until completely melted.
Let cool off for a few minutes, stirring occasionally to keep the soap pourable.
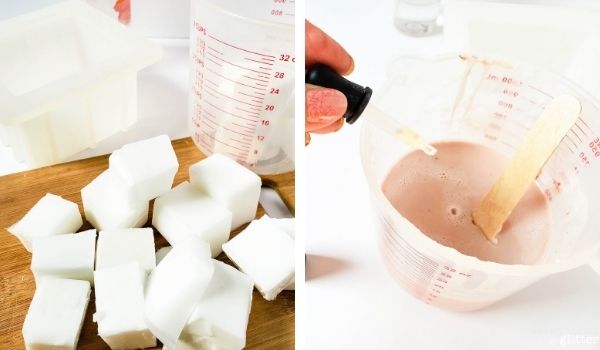
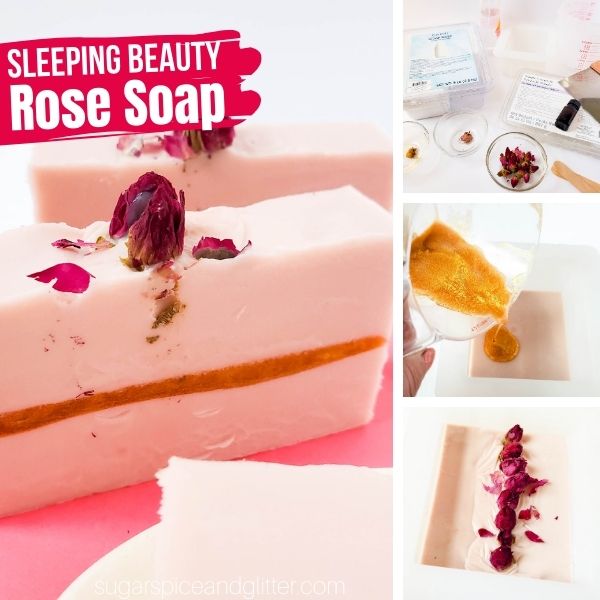
Add half the rose gold mica and half the rose essential oil to the melted soap and stir well.
Pour the dyed, scented soap into the silicone soap mold and spray with rubbing alcohol to get rid of bubbles.
Let soap set for about 10-15 minutes.
Place glycerin soap base in a clean measuring cup and heat in microwave on high for 30 seconds.
Stir well, then stir in the golden mica powder.
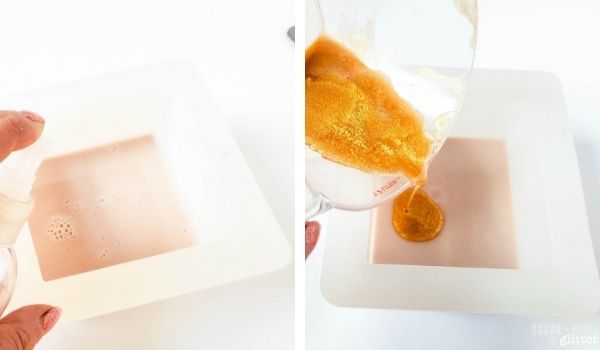
Spray the set layer of soap in the mold with rubbing alcohol again to allow the two colors to bond together.
Slowly pour the golden soap base over first layer of soap in soap mold. Spray with rubbing alcohol to reduce bubbles.

Place remaining half of goats milk soap base into a measuring cup.
Heat in microwave on high for 30 seconds, remove and stir well. Heat for additional 10 second increments, stirring between, until completely melted.
Let cool off for a few minutes, stirring occasionally. (This also gives the golden soap layer enough time to set.)

Add remaining half of the rose gold mica and rose oil. Stir well.
Spray the golden layer of soap in mold with rubbing alcohol (again to allow the two colors to bond together).
Pour Rose Gold soap base into soap mold. Spray with rubbing alcohol to get rid of bubbles.
Let set for a few minutes until a skin forms on top.
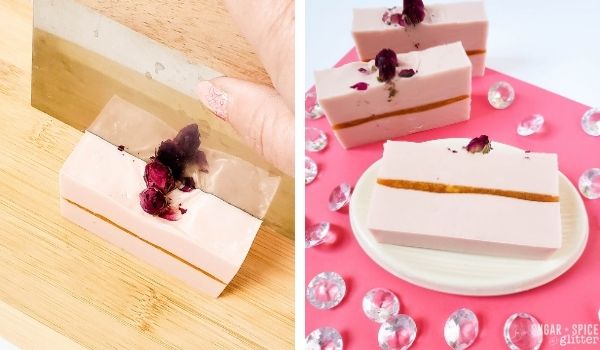
Poke a craft stick down the middle of soap filled mold, and add rose buds. Doing it this way allows the rose buds to stick in the soap without sinking, and also provides the textured look in the middle of the soap.
At this time, some tiny petals may fall off some of the rose buds, so allow them to and situate them around the rose buds in the soap for added beauty. You may also peel a couple of laters off an extra rose bud if this does not happen naturally.
Allow soap to fully set overnight.
Carefully remove soap from mold, and use a soap cutter to cut soap in between every two rose buds.
Pin this Easy Golden Rose Soap recipe:
Grab your free printable instructions for our golden rose soap recipe:
Want to Save This Recipe?
Enter your email & I'll send it to your inbox. Plus, get great new recipes from me every week!
By submitting this form, you consent to receive emails from Sugar, Spice and Glitter.
Sleeping Beauty Rose Soap
A super simple DIY rose soap recipe using goat's milk soap and dried rose buds. These pretty rose soaps with a golden ripple through the middle look gorgeous and are great for sensitive skin.
Materials
- 1.25 lbs Goats Milk melt and pour soap base
- 3 - 1”x1” cubes of Clear Glycerin melt and pour soap base
- ⅛ tsp Rose Gold Mica
- ⅛ tsp Golden Mica
- 8 dried rose buds
- 40-50 drops rose essential oil
Tools
- Small loaf bar soap mold
- Straight soap cutter
- 2 - 4 cup microwave safe measuring cups
- 2 wooden craft sticks for stirring
- Spray bottle with rubbing alcohol
Instructions
- Cut goats milk soap base into 1”x1” cubes and place half of the cubes in a microwave-safe measuring cup.
- Heat the goats milk soap base in microwave on high for 30 seconds, remove and stir well. Heat for additional 10 second increments, stirring between, until completely melted.
- Let cool off for a few minutes, stirring occasionally to keep the soap pourable.
- Add half the rose gold mica and half the rose essential oil to the melted soap and stir well.
- Pour the dyed, scented soap into the silicone soap mold and spray with rubbing alcohol to get rid of bubbles.
- Let soap set for about 10-15 minutes.
- Place glycerin soap base in a clean measuring cup and heat in microwave on high for 30 seconds.
- Stir well, then stir in the golden mica powder.
- Spray the set layer of soap in the mold with rubbing alcohol again to allow the two colors to bond together.
- Slowly pour the golden soap base over first layer of soap in soap mold. Spray with rubbing alcohol to reduce bubbles.
- Place remaining half of goats milk soap base into a measuring cup.
- Heat in microwave on high for 30 seconds, remove and stir well. Heat for additional 10 second increments, stirring between, until completely melted.
- Let cool off for a few minutes, stirring occasionally. (This also gives the golden soap layer enough time to set.)
- Add remaining half of the rose gold mica and rose oil. Stir well.
- Spray the golden layer of soap in mold with rubbing alcohol (again to allow the two colors to bond together).
- Pour Rose Gold soap base into soap mold. Spray with rubbing alcohol to get rid of bubbles.
- Let set for a few minutes until a skin forms on top.
- Poke a craft stick down the middle of soap filled mold, and add rose buds. Doing it this way allows the rose buds to stick in the soap without sinking, and also provides the textured look in the middle of the soap.
- At this time, some tiny petals may fall off some of the rose buds, so allow them to and situate them around the rose buds in the soap for added beauty. You may also peel a couple of laters off an extra rose bud if this does not happen naturally.
- Allow soap to fully set overnight.
- Carefully remove soap from mold, and use a soap cutter to cut soap in between every two rose buds.
Recommended Products
As an Amazon Associate and member of other affiliate programs, I earn from qualifying purchases.
-
 NOW Foods, Rose Absolute, 5% oil blend, 1 Ounce (Pack of 2)
 -
Soap Expressions Goats Milk Glycerine Soap Base- 2lb
-
Epoxy Resin Color Pigment - 23 Color(Total 230g) Mica Powder Pigment Dye with Spoon - Cosmetic Grade Epoxy Resin Coloring for Soap Making Supplies - Slime Colorant for Paint, Bath Bomb - 0.36oz Each


I hope you love this super simple rose soap recipe and enjoy pampering yourself – or a special princess – with them!
For more DIY Beauty Ideas, check out our full collection here.

For more fun Disney crafts, check out our full collection here.


I came across your article “Sleeping Beauty Rose Soap” and was blown away by the wonderful soap you have created. It is inspiring to see how creativity can be turned into something functional and beautiful.
Aw, thank you so much for your comment, Sarah.