Rainbow Wall Decor
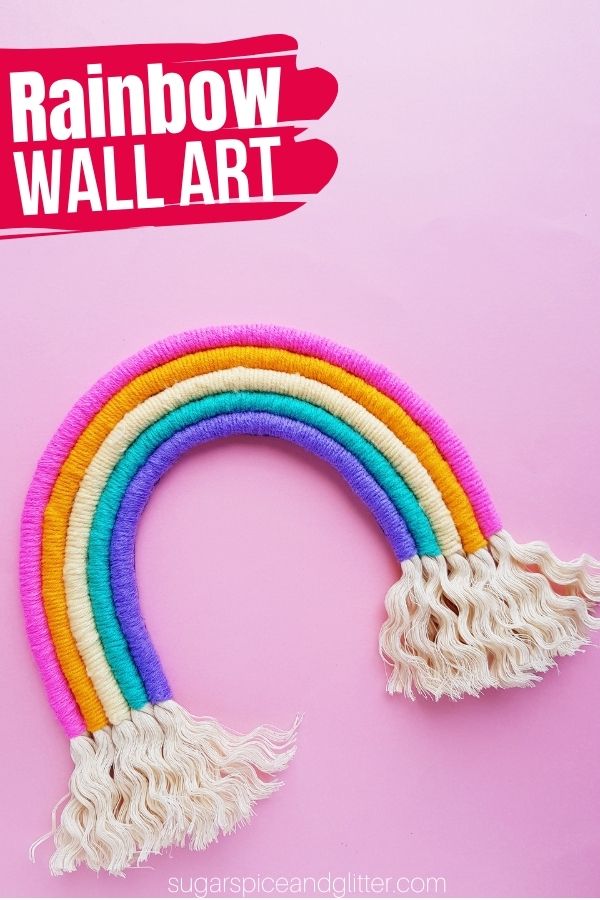
A fun DIY Rainbow Decor Project for a Macrame Rainbow Wall Hanging – perfect for adding a pop of color and whimsy to any room. Customize the colors to suit your personal taste and existing decor.
Macrame Rainbow Wall Decor Craft
I’ve always loved yarn art – tapestries, macrame, felted paintings. I love the warmth and texture they add to a room without a huge investment or taking up precious floor space.
Today’s rainbow wall art is a fun DIY option that looks professional but is super easy to make. It’s a great way to dip your toes into the world of yarn or rope art without having to worry about braiding or intricate patterns.
You can use this method to create a variety of different wall hangings by cutting your felt backing into different shapes, adding different embellishments (beads, fake flowers, acrylic gems, etc) or swapping out your color scheme. You can use any assortment of yarn colors to make your rainbow – I just used what we already had on hand leftover from other yarn crafts we’ve done.
More DIY Rainbow Decor Ideas:
- Rainbow Tassel Wall Art
- Cricut Rainbow Ornament
- Unicorn Rainbow Mason Jar Night Light
- DIY Rainbow Roses
- Rainbow Yarn Art with Cardboard Circle Loom
Rainbow Wall Art Materials
- Natural Twisted Cotton Rope
- Assortment of Colorful Yarn <– as many colors as you want for the rainbow, you can do a traditional rainbow or a modified one like we did
- Sharp Scissors
- Hot Glue Gun
- Felt
- Yarn Needle
Scroll down to the printable recipe card for full measurements.
Tip: for added interest, you can add fake flowers, acrylic gems, or beads to your rainbow.
How to Make a Macrame Rainbow
First, cut your rope to your chosen lengths. Decide the length you want for the smallest curve of the rainbow and add 4 inches extra to it; and then cut the rope.
Lay the rope on a flat surface and form into an arched ‘U’ shape for the rainbow. Lay the other lengths of rope around the smallest length and cut each length to end at the same place. Cut one length of rope for each color you plan to include in your rainbow.
Starting from the smallest rope strand, select a yarn and tie a tight knot around the rope, about 2″ up from the bottom of the rope.
Neatly wrap the yarn around the rope and try not to leave any gap between the wrappings. (You can add small dabs of hot glue if your yarn keeps shifting.)
Continue to wrap the yarn around the rope until you reach 2 inches away from the other open end of the rope. You can simply tie another tight knot or you can use a needle to make a neat ending for the yarn wrapping.
(To sew the yarn in place, cut the yarn an extra 3″ and then insert the yarn into a yarn needle and draw the needle through the rope, adjacent to the last yarn wrapping, then draw the needle through the wrapped yarn. Pull the needle out and cut off extra yarn.)
Repeat this process with the other rope strands and yarn colors.
Grab a piece of felt and warm up your hot glue gun. Attach the smallest rope to the felt using the hot glue in an arch shape. Leave the bare ends of the rope off the edge of the felt.
Repeat this process, attaching all of the yarn-wrapped ropes to the arch shape and felt. (Use glue to secure the ropes to the felt and to each other.)
Use a sharp pair of fabric scissors to cut the felt along the outer border of the glued ropes. Trim so that you cannot see the felt by looking at the rainbow head-on.
Now un-twist the open ends of the cotton rope. Attach a hanging mechanism (like a command hook) to the back side of the rainbow and hang it on a wall.
Pin this Easy Rainbow Wall Art Idea for your next crafting session:
Grab your free printable instructions for our easy rainbow wall art idea:
Want to Save This Recipe?
Enter your email & I'll send it to your inbox. Plus, get great new recipes from me every week!
By submitting this form, you consent to receive emails from Sugar, Spice and Glitter.
Rainbow Wall Decor
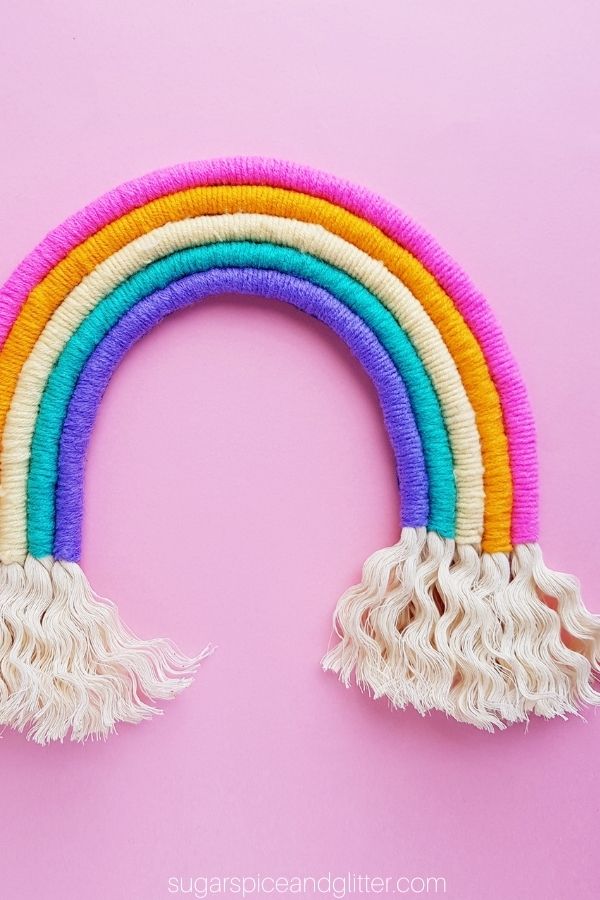
A fun DIY Rainbow Wall Hanging inspired by macrame, this yarn and rope rainbow adds a pop of color and a touch of whimsy to your decor, while also adding warmth and texture.
Materials
- Natural Twisted Cotton Rope
- Assortment of Colorful Yarn
- Felt
Tools
- Sharp Scissors
- Hot Glue Gun
- Yarn Needle
Instructions
- First, cut your rope to your chosen lengths. Decide the length you want for the smallest curve of the rainbow and add 4 inches extra to it; and then cut the rope.
- Lay the rope on a flat surface and form into an arched ‘U’ shape for the rainbow. Lay the other lengths of rope around the smallest length and cut each length to end at the same place. Cut one length of rope for each color you plan to include in your rainbow.
- Starting from the smallest rope strand, select a yarn and tie a tight knot around the rope, about 2" up from the bottom of the rope.
- Neatly wrap the yarn around the rope and try not to leave any gap between the wrappings. (You can add small dabs of hot glue if your yarn keeps shifting.)
- Continue to wrap the yarn around the rope until you reach 2 inches away from the other open end of the rope. You can simply tie another tight knot or you can use a needle to make a neat ending for the yarn wrapping.
- (To sew the yarn in place, cut the yarn an extra 3" and then insert the yarn into a yarn needle and draw the needle through the rope, adjacent to the last yarn wrapping, then draw the needle through the wrapped yarn. Pull the needle out and cut off extra yarn.)
- Repeat this process with the other rope strands and yarn colors.
- Grab a piece of felt and warm up your hot glue gun. Attach the smallest rope to the felt using the hot glue in an arch shape. Leave the bare ends of the rope off the edge of the felt.
- Repeat this process, attaching all of the yarn-wrapped ropes to the arch shape and felt. (Use glue to secure the ropes to the felt and to each other.)
- Use a sharp pair of fabric scissors to cut the felt along the outer border of the glued ropes. Trim so that you cannot see the felt by looking at the rainbow head-on.
- Now un-twist the open ends of the cotton rope. Attach a hanging mechanism (like a command hook) to the back side of the rainbow and hang it on a wall.
Recommended Products
As an Amazon Associate and member of other affiliate programs, I earn from qualifying purchases.

I hope you love the whimsy and color that this rainbow yarn art adds to your room – and please let me know any tweaks you make to this craft to make it your own!
For more fun DIY Decor Ideas, check out our full collection here:
And, for more grown-up crafts, check out our full collection here:


