
Rainbow Smash Sensory Activity for Kids (with Video)
Welcome to Sugar, Spice & Glitter! Please note, this post may contain affiliate links. For more details, see our Full Disclosure.
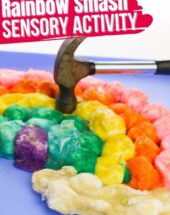
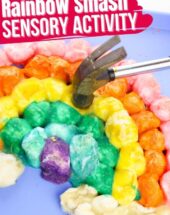
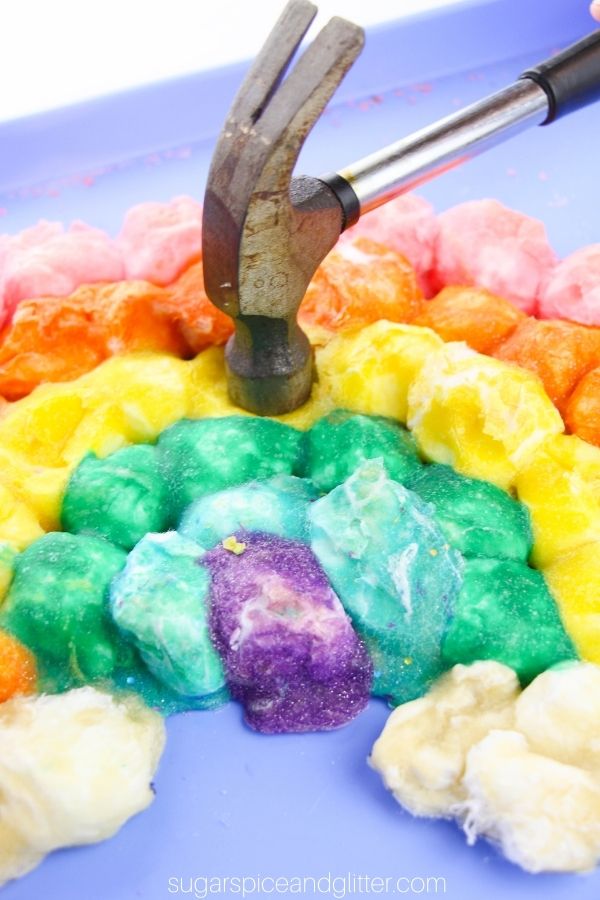
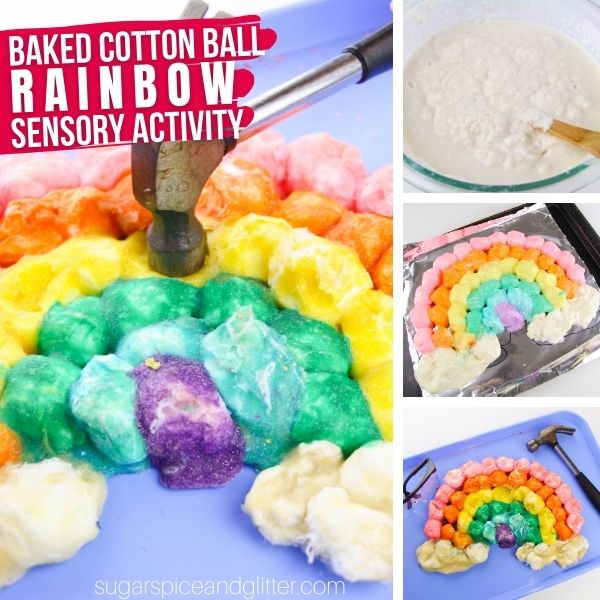
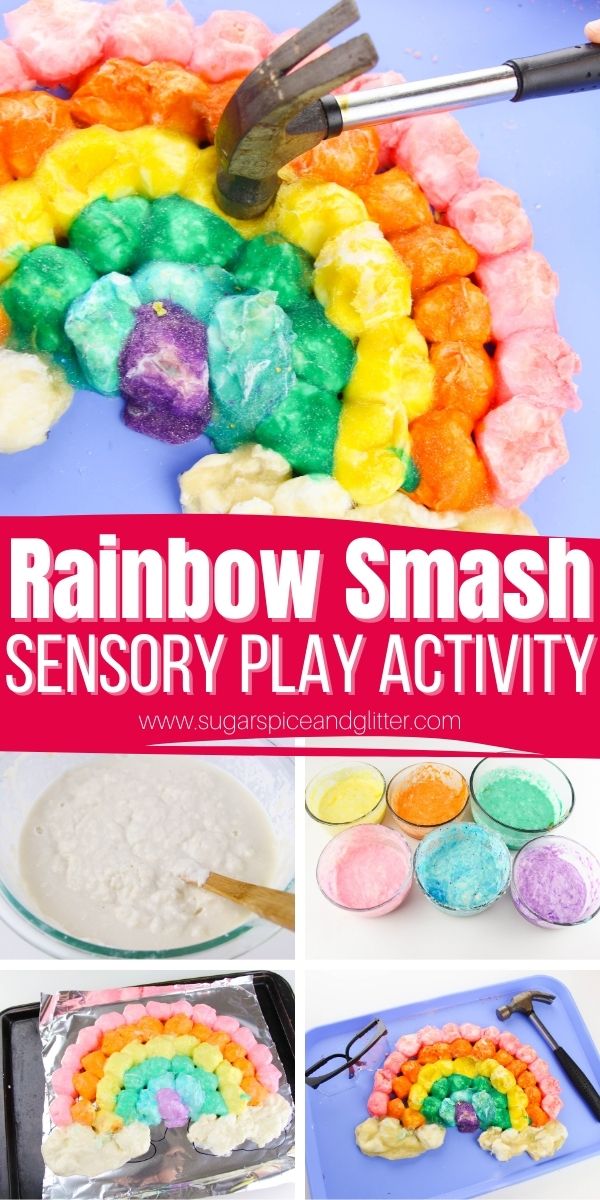
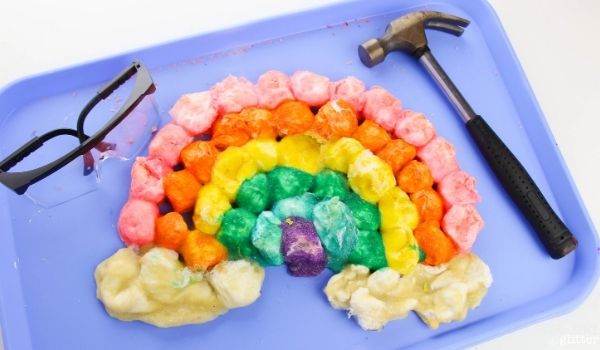
A fun rainbow sensory activity for kids, this Rainbow Smash activity is made with baked cotton balls for a crunchy, satisfying sensory activity that lets kids crush their own rainbows using a hammer or kitchen mallet.
Baked Cotton Ball Rainbow Sensory Activity for Kids
Ever since I learned how to make baked cotton balls, they have been a favorite sensory play material for my daycare kids.
Cotton balls are coated in a flour and water paste then baked to form a crunchy, hard coating that kids can smash using play tools, real tools, or even a kitchen meat mallet.
Not only does this activity help develop hand strength and hand-eye coordination, it is a great way to let kids get some energy out and empower them to use real tools. The fibers of the cotton balls hold onto the shattered plaster casing pretty well, so there aren’t flying bits of plaster in the air but I still always had my kids wear safety googles – just in case. (Most of them loved it because they were just like what they see grown ups wear when using tools.)
This sensory activity is one-time use, as after the cotton balls are smashed they no longer have that same crunchy effect, but it is so easy to make these and you can make them up to a week in advance. You can do shapes like we did here (or with our heart-shaped baked cotton balls) or bake the balls individually.
Tips for Best Experience:
The baking time for your baked cotton ball rainbow may differ slightly from ours – it has to do with how thick your plaster coating is and how much water your cotton balls retain. The rainbow should feel hard to the touch when it is done baking and make a hollow sound when tapped with a fingernail.
Try not to smush the cotton balls too close together as the coating won’t bake up to be as crunchy. Allow the coated cotton balls to touch slightly so they stick together, but that’s it.
Use a kitchen tray or cookie sheet to contain the mess. While the plaster doesn’t really go flying, it does create some dust when crushed. We also do this activity on the floor or outside so as not to damage furniture.
Teach your child how to properly hold the hammer and supervise their use closely, even if they are using play hammers or a kitchen mallet.
Check out our quick video to see how to make your own baked cotton ball rainbow (and how much fun it is to smash and tear up) – and then don’t forget to scroll down to grab your free printable recipe card to make your own:
Materials for Rainbow Baked Cotton Balls
- Flour
- Water
- Paint <– we used tempera paint but acyrlic or even washable finger paints can be used, as long as they are highly pigmented
- Cotton Balls
- Tinfoil or Parchment Paper
- Cookie Sheet
- Hammer
- Safety Goggles
Scroll down to the printable recipe card for full measurements.
Tip: I highly recommend grabbing a couple of these sturdy plastic lunch trays (we have one in the pictures in this post). I use these for almost all of our craft or kitchen activities, as well as in our Montessori practical life activities. Ours have lasted for over 6 years and are still going strong, plus they are so great for containing messes and allowing the kids to set a project to the side while it dries (or if you have to clear off the table for supper).
How to Make a Baked Cotton Ball Rainbow
Preheat your oven to 300ºF.
Place a large piece of tinfoil or parchment paper on a cookie sheet and draw a large rainbow shape directly onto the tinfoil or parchment paper. Set aside.
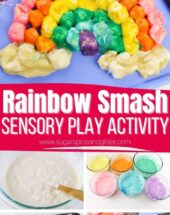
In a large mixing bowl, combine the flour and water and stir until no flour clumps remain and mixture is uniformly combined.
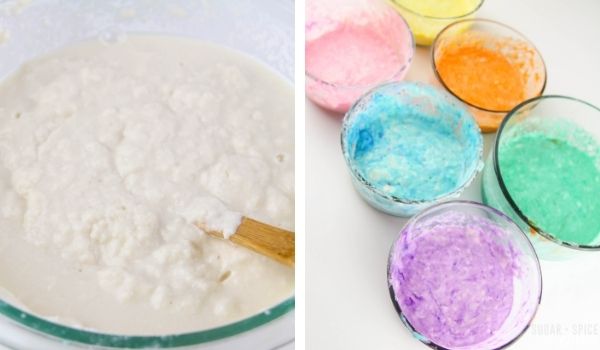
Divide the plaster mixture into six bowls, but do not divide evenly as you will need more pink or red plaster than you will need purple plaster. (Starting on the outermost edge of the rainbow is which color will require the most plaster mix, while the innermost layer will require the least.) I also reserved a bit of the plain plaster to create white clouds.
Dye the individual bowls of plaster to correspond to the colors of the rainbow.
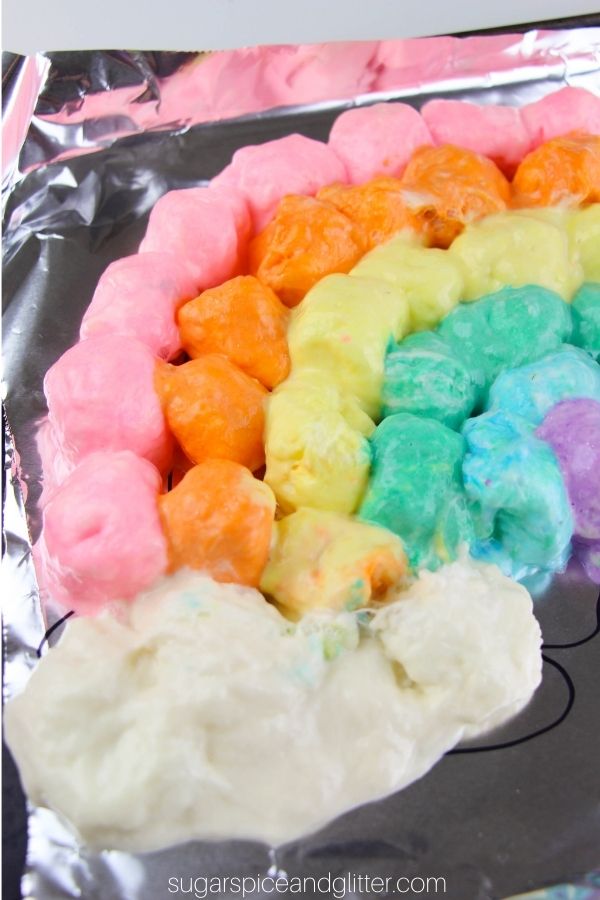
Dip a cotton ball into the red or pink plaster and then place on the prepared tinfoil, on the outermost edge of the rainbow. Repeat with as many cotton balls as is necessary to fill out that arc of the rainbow.
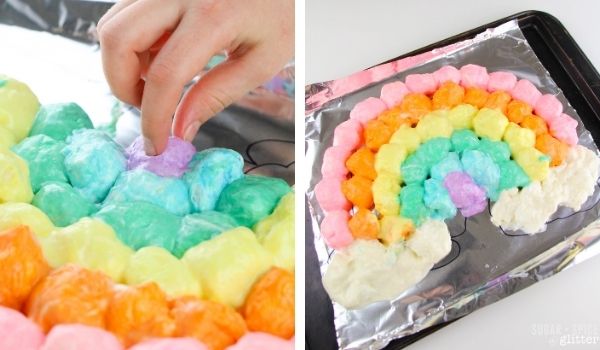
Repeat this process with each rainbow color and optional white clouds at the bottom of the rainbow arc.
Bake in the preheated oven for 45 minutes, until the cotton balls are hard to the touch and sound hollow when tapped with your fingernail.
Allow to cool completely before removing from the cookie sheet.

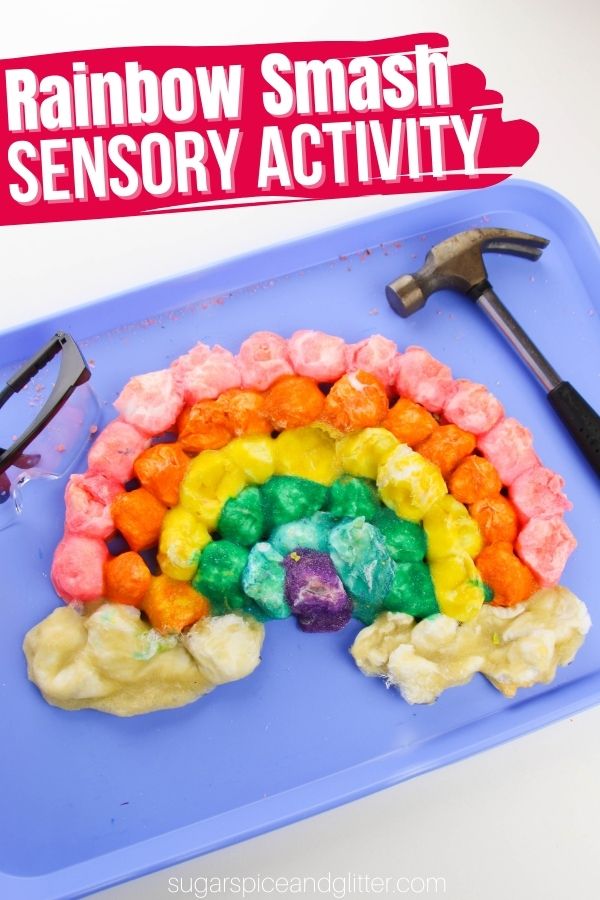
Set the cooled cotton ball rainbow on a kitchen tray, along with a hammer and safety googles.
Allow your child to use the hammer to smash the cotton balls to their heart’s content.
Pin this Fun Rainbow Smash Sensory Activity for Kids:
Grab your free printable recipe card for how to make your own rainbow smash activity:
Want to Save This Recipe?
Enter your email & I'll send it to your inbox. Plus, get great new recipes from me every week!
By submitting this form, you consent to receive emails from Sugar, Spice and Glitter.
Rainbow Smash Sensory Activity for Kids
A fun rainbow sensory activity for kids, this Rainbow SMASH activity allows kids to use real tools to smash a baked cotton ball rainbow. A crunchy, satisfying sensory activity made with everyday household materials.
Materials
- 2 cups Flour
- 2 cups Water
- Paint: all rainbow colors
- 1lb bag Cotton Balls
Tools
- Mixing Bowl
- Spoon
- Tinfoil or Parchment Paper
- Cookie Sheet
- Hammer
- Safety Goggles
Instructions
- Preheat your oven to 300ºF.
- Place a large piece of tinfoil or parchment paper on a cookie sheet and draw a large rainbow shape directly onto the tinfoil or parchment paper. Set aside.
- In a large mixing bowl, combine the flour and water and stir until no flour clumps remain and mixture is uniformly combined.
- Divide the plaster mixture into six bowls, but do not divide evenly as you will need more pink or red plaster than you will need purple plaster. (Starting on the outermost edge of the rainbow is which color will require the most plaster mix, while the innermost layer will require the least.) I also reserved a bit of the plain plaster to create white clouds.
- Dye the individual bowls of plaster to correspond to the colors of the rainbow.
- Dip a cotton ball into the red or pink plaster and then place on the prepared tinfoil, on the outermost edge of the rainbow. Repeat with as many cotton balls as is necessary to fill out that arc of the rainbow.
- Repeat this process with each rainbow color and optional white clouds at the bottom of the rainbow arc.
- Bake in the preheated oven for 45 minutes, until the cotton balls are hard to the touch and sound hollow when tapped with your fingernail.
- Allow to cool completely before removing from the cookie sheet.
- Set the cooled cotton ball rainbow on a kitchen tray, along with a hammer and safety googles.
- Allow your child to use the hammer to smash the cotton balls to their heart's content.
Recommended Products
As an Amazon Associate and member of other affiliate programs, I earn from qualifying purchases.
-
 New Star Foodservice 28010 6-Piece Fast Food Tray, 12 by 16-Inch, Assorted Colors
 -
Crayola Washable Kids Paint, 6 Count, Kids At Home Activities, Painting Supplies, Gift, Assorted
-
DecorRack 300 Small Cotton Balls for Make-Up, Nail Polish Removal, Applying Oil Lotion or Powder, Multi-Purpose Balls Made from 100% Natural Cotton, Soft and Absorbent for Household Needs (300 Count)

Want to Save This Recipe?
Enter your email & I'll send it to your inbox. Plus, get great new recipes from me every week!
By submitting this form, you consent to receive emails from Sugar, Spice and Glitter.
Rainbow Smash Sensory Activity for Kids
A fun rainbow sensory activity for kids, this Rainbow SMASH activity allows kids to use real tools to smash a baked cotton ball rainbow. A crunchy, satisfying sensory activity made with everyday household materials.
Materials
- 2 cups Flour
- 2 cups Water
- Paint: all rainbow colors
- 1lb bag Cotton Balls
Tools
- Mixing Bowl
- Spoon
- Tinfoil or Parchment Paper
- Cookie Sheet
- Hammer
- Safety Goggles
Instructions
- Preheat your oven to 300ºF.
- Place a large piece of tinfoil or parchment paper on a cookie sheet and draw a large rainbow shape directly onto the tinfoil or parchment paper. Set aside.
- In a large mixing bowl, combine the flour and water and stir until no flour clumps remain and mixture is uniformly combined.
- Divide the plaster mixture into six bowls, but do not divide evenly as you will need more pink or red plaster than you will need purple plaster. (Starting on the outermost edge of the rainbow is which color will require the most plaster mix, while the innermost layer will require the least.) I also reserved a bit of the plain plaster to create white clouds.
- Dye the individual bowls of plaster to correspond to the colors of the rainbow.
- Dip a cotton ball into the red or pink plaster and then place on the prepared tinfoil, on the outermost edge of the rainbow. Repeat with as many cotton balls as is necessary to fill out that arc of the rainbow.
- Repeat this process with each rainbow color and optional white clouds at the bottom of the rainbow arc.
- Bake in the preheated oven for 45 minutes, until the cotton balls are hard to the touch and sound hollow when tapped with your fingernail.
- Allow to cool completely before removing from the cookie sheet.
- Set the cooled cotton ball rainbow on a kitchen tray, along with a hammer and safety googles.
- Allow your child to use the hammer to smash the cotton balls to their heart's content.
Recommended Products
As an Amazon Associate and member of other affiliate programs, I earn from qualifying purchases.
-
New Star Foodservice 28010 6-Piece Fast Food Tray, 12 by 16-Inch, Assorted Colors
-
Crayola Washable Kids Paint, 6 Count, Kids At Home Activities, Painting Supplies, Gift, Assorted
-
DecorRack 300 Small Cotton Balls for Make-Up, Nail Polish Removal, Applying Oil Lotion or Powder, Multi-Purpose Balls Made from 100% Natural Cotton, Soft and Absorbent for Household Needs (300 Count)
I hope your kids have a smashing time with this activity! (Sorry, couldn’t help myself.)
For more sensory play activities for kids, check out our full collection here:


This is really a very nice activity for kids.