
DIY Ornament Wreath
Welcome to Sugar, Spice & Glitter! Please note, this post may contain affiliate links. For more details, see our Full Disclosure.


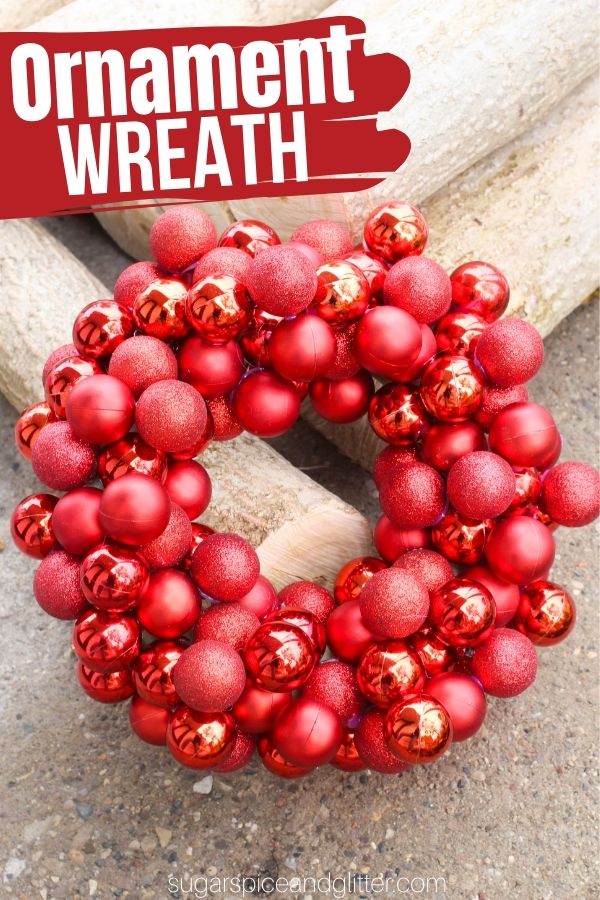
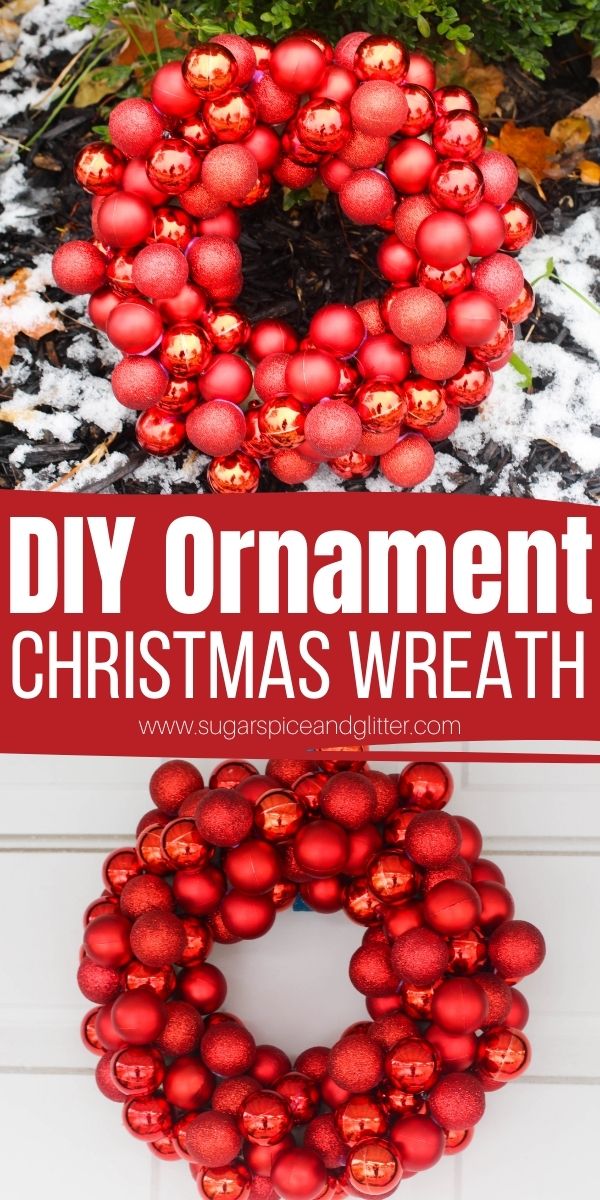
A DIY Winter Wreath you can customize with any color scheme, this DIY Ornament Wreath is a super simple craft that adds some serious drama to your door.
DIY Ornament Wreath Craft
Another amazing craft idea from one of my daycare parents, Melissa.
Melissa is so crafty and creative – she’s the mastermind behind our pine cone wreath and reindeer planter, too.
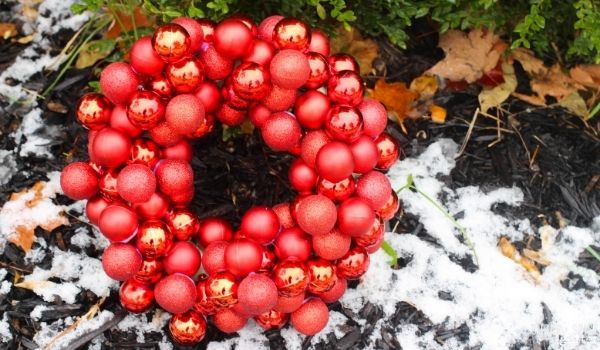
Her most recent creation is this phenomenal Christmas wreath made using a couple packs of plastic ornaments and a simple foam wreath frame. I think it turned out amazing, and it’s one of those crafts that you can personalize in so many different ways.
Ways to Customize this Wreath
- swap out the colors to suit your existing Christmas decor
- use a mix of ornaments and jingle bells for the wreath
- add a string of pearls to add some glamour
- add a bow or ribbon with bells at the bottom
- add a cut-out wooden sign across the front with a festive message
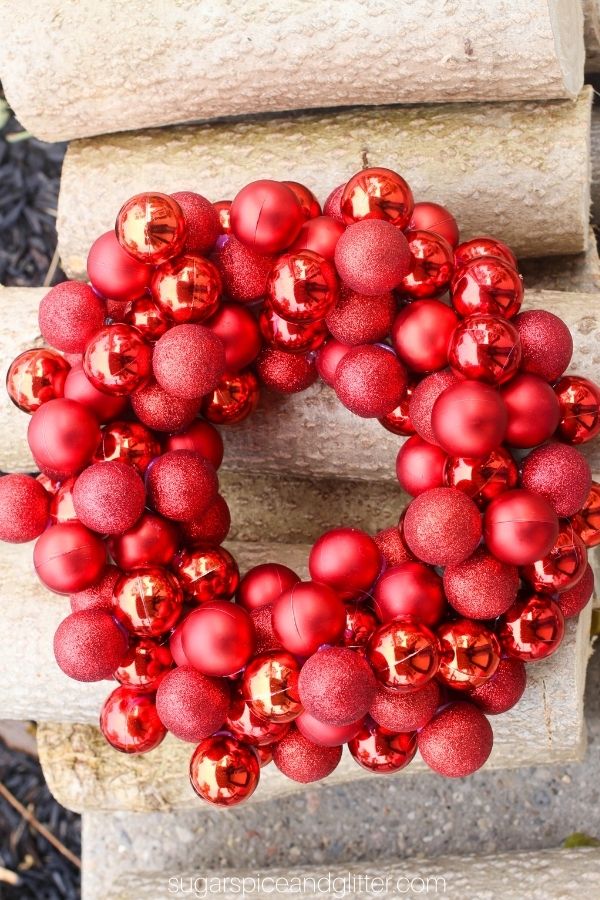
I really love the mixture of different cranberry-colored ornaments in this wreath. The mix of shiny, glittery and matte ornaments adds visual interest, while staying with the same shade of red keeps it looking uniform and cohesive.
I think sticking with similar hues, finishes, or color families is essential to prevent the wreath from looking mismatched. Set the ornaments beside each other before you start to ensure that you like the way they look together.
You may want to spray paint your wreath in the same color of the ornaments before adding the ornaments, in case any of the foam wreath peeks through. Alternatively, you can paint it white or in a color that matches your door.
While Melissa used hot glue and it worked well for display purposes, I found that when I was moving the wreath around to take pictures that a few of the ornaments popped off. This would definitely be an issue if you plan to store your wreath and use it year after year. That’s why I amended the instructions to use a strong craft glue, like e600.
More DIY Wreath Ideas
Materials for an Ornament Wreath
Tip: make sure your ornaments look cohesive before starting to assemble your wreath. If you pick different colors or finishes, decide on a pattern before you start gluing in place.
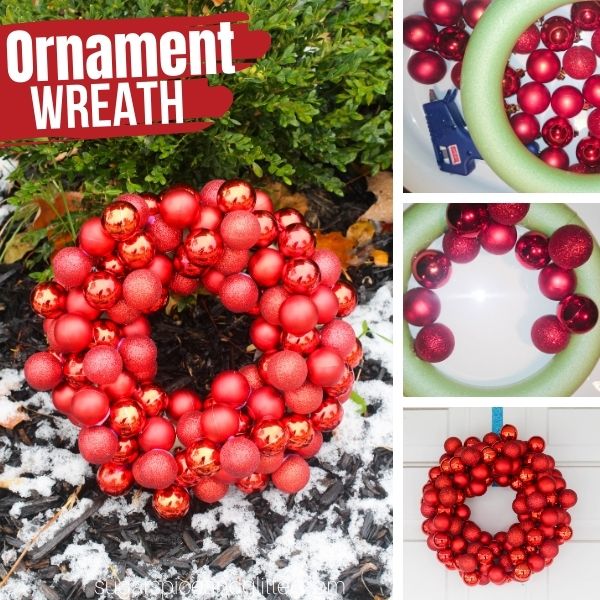
How to Make an Ornament Wreath
Spray paint your wreath in a color that matches your ornaments or door. Follow the spray paint’s directions for how long to let it dry before proceeding with the craft. (If the can doesn’t say, I would be conservative and let it cure for 24 hours.)
Starting on the inside of the foam wreath, use a strong craft glue to start attaching the ornaments. Place them as close together as possible. Repeat this process, working your way towards the outside of the wreath. Ensure that wreath can still lay somewhat flat.
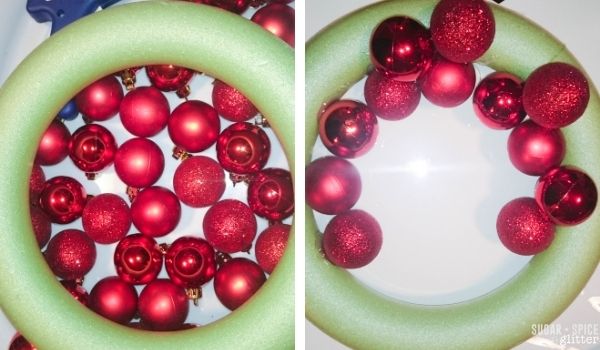
After creating the first layer of ornaments, allow the glue to completely dry and cure before adding a second or third layer.
Try to create patterns while positioning the additional layers of ornaments to add visual interest, and cover up as much of the foam wreath as possible.
Attach any desired additional embellishments and allow the glue to cure for 24 hours before packaging or hanging your wreath. If the wreath is too large to fit on your wreath hook, you may want to add a loop of ribbon to hang it with.
Pin this Christmas Ornament Wreath for your holiday crafting:
Grab your free printable instructions for our Christmas ornament wreath craft:
Want to Save This Recipe?
Enter your email & I'll send it to your inbox. Plus, get great new recipes from me every week!
By submitting this form, you consent to receive emails from Sugar, Spice and Glitter.
DIY Ornament Wreath
An incredibly easy step-by-step Christmas ornament wreath to add some serious glamour and drama to your door for the holidays. There are so many ways to make this easy DIY ornament wreath your own using different color schemes or added embellishments.
Materials
- 30-50 Shatterproof ornaments
- Strong Craft Glue
- Foam Wreath
- Spray Paint that Matches Your Ornaments
Instructions
- Spray paint your wreath in a color that matches your ornaments or door. Follow the spray paint's directions for how long to let it dry before proceeding with the craft. (If the can doesn't say, I would be conservative and let it cure for 24 hours.)
- Starting on the inside of the foam wreath, use a strong craft glue to start attaching the ornaments. Place them as close together as possible. Repeat this process, working your way towards the outside of the wreath. Ensure that wreath can still lay somewhat flat.
- After creating the first layer of ornaments, allow the glue to completely dry and cure before adding a second or third layer.
- Try to create patterns while positioning the additional layers of ornaments to add visual interest, and cover up as much of the foam wreath as possible.
- Attach any desired additional embellishments and allow the glue to cure for 24 hours before packaging or hanging your wreath. If the wreath is too large to fit on your wreath hook, you may want to add a loop of ribbon to hang it with.
Recommended Products
As an Amazon Associate and member of other affiliate programs, I earn from qualifying purchases.
-
 Rust-Oleum 327893 American Accents Spray Paint, 12 Oz, Gloss Cranberry
 -
Juvale Craft Foam Wreath - 6-Pack Polystyrene Foam Ring for DIY Arts and Crafts, Floral Projects, Wedding and Home Decorations, 8 x 1.2 x 8 inches
-
Sea Team 86 Pieces of Assorted Christmas Ball Ornaments Shatterproof Seasonal Decorative Hanging Baubles Set with Reusable Hand-held Gift Package for Holiday Xmas Tree Decorations, Red
-
E6000 230010 Craft Adhesive, 3.7 Fluid Ounces


For more Christmas craft ideas, check out our full collection here.


Wow! What a wonderful idea and creativity. Thanks for sharing this. I really like the concept very much. Nice efforts.