Quilled Poinsettia Wreath
Welcome to Sugar, Spice & Glitter! Please note, this post may contain affiliate links. For more details, see our Full Disclosure.

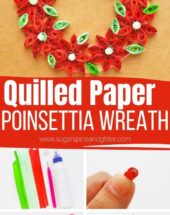
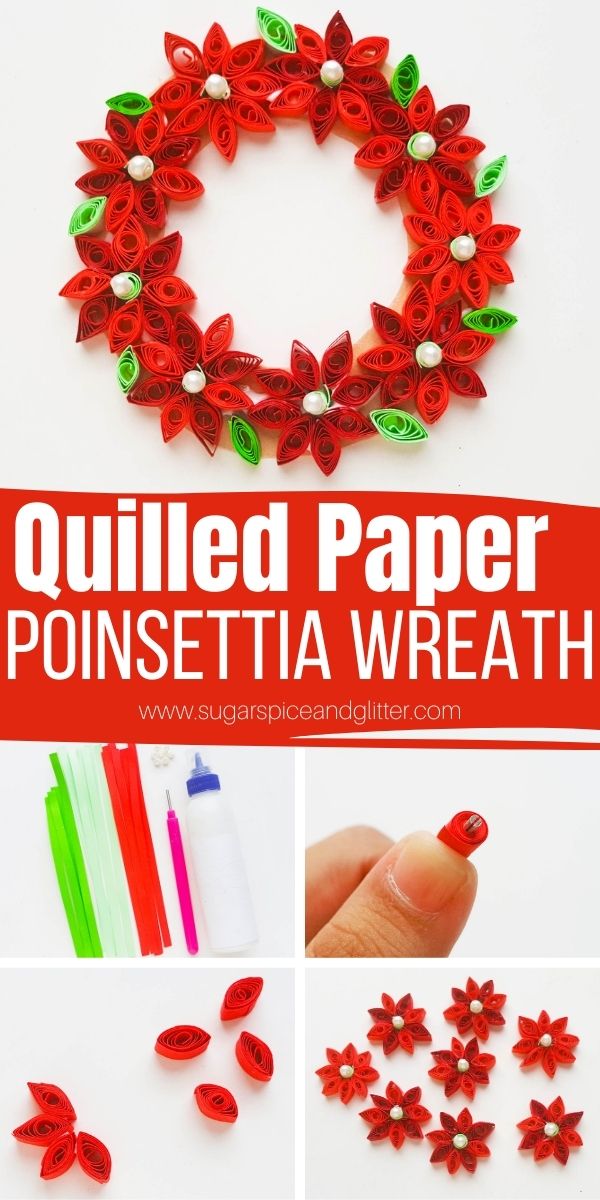
A gorgeous and incredibly easy quilled paper craft just in time for the holidays, this Quilled Paper Poinsettia Wreath makes a gorgeous addition to your Christmas tree or an embellishment for a homemade Christmas card.
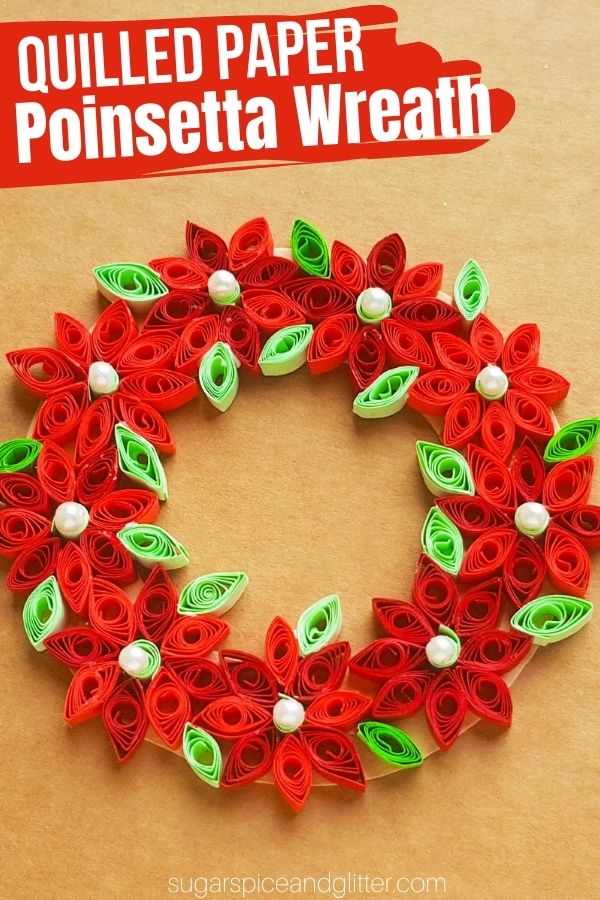
DIY Quilled Paper Poinsettia Wreath Craft
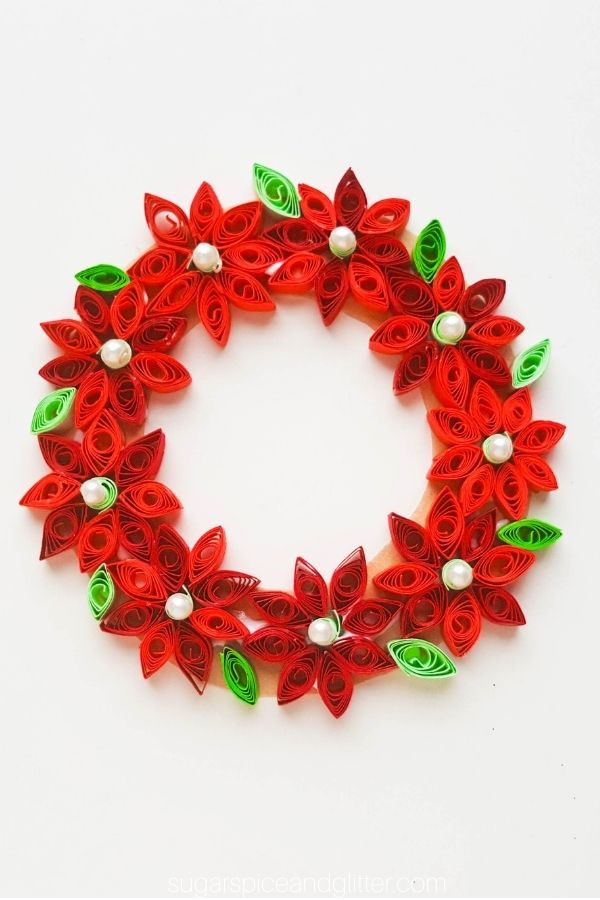
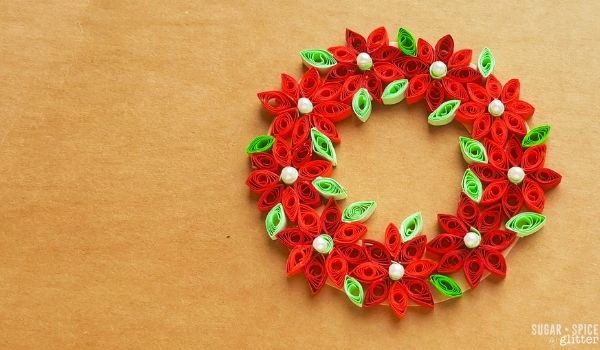
How gorgeous did this super simple quilled paper wreath turn out?!
My friend and I were experimenting with paper quilling a few nights ago and this was her creation. It looks intricate and difficult, but it was deceptively simple to make.
If you’ve never done a quilled paper craft before, rest assured that they are incredibly easy to make and not nearly as tricky as they look. They are time consuming, but I find it very relaxing and almost meditative.
While there are some hacks out there to make your own paper quilling tools, I really think the $6 to buy a slotted quilling tool is well spent. It will make the process a lot easier, and this quilling paper kit also has a little “quilling coach” that holds the tool in place as you twirl and has a built-in measuring guide to help ensure you make your quills all the same size.
There are so many ways to display your quilled paper poinsettia wreath:
- hang on a wall
- attach a loop of ribbon to turn into a Christmas tree ornament
- glue onto a homemade Christmas ornament
- attach a magnet to the back for a cute Christmas fridge magnet
More Quilled Paper Christmas Crafts
- Quilled Paper Christmas Lights Card from the Soccer Mom Blog
- Quilled Paper Christmas Tree from My Nourished Home
- Quilling Paper Snowflakes from The Paper Craftery
- Quilled Paper Reindeer from She Saves
- Peacock Quilled Paper Necklace
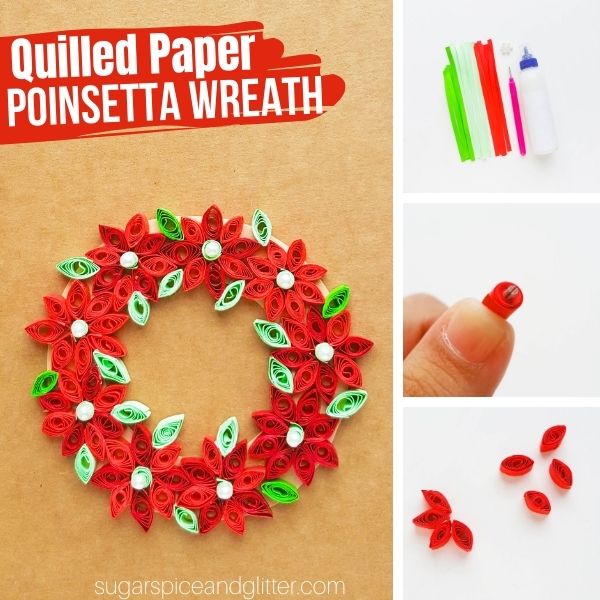
Materials to Make a Quilled Paper Wreath
- Quilling Strips
- Cardstock Paper
- Small Beads
- Slotted Quilling Tool <– I love that this set comes with a “curling coach” to help twirl the tool and also measure the size of the quills
- Craft Glue or Glue Stick
How to Make Quilled Paper Poinsettia Wreath
Select a colored quilling strip for the flower (I prefer red). Prepare the strip into 6 inches and quill the whole strip with the slotted quilling tool.

Once done coiling, take out the coil from the tool and allow it loosen up a little.
Press any one sides of the loose coil.
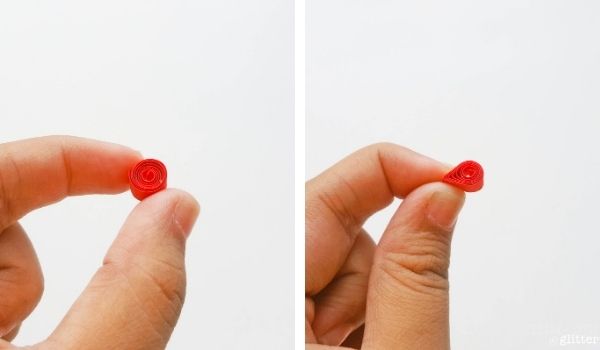
Now press the opposite side of the previously pressed point. This will form a lens shape.
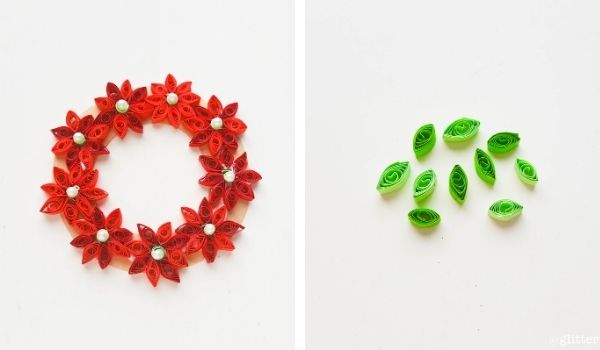
Similarly prepare 7 more (total 8 lens shapes for each flower) shapes. Start to glue the shapes together side by side.
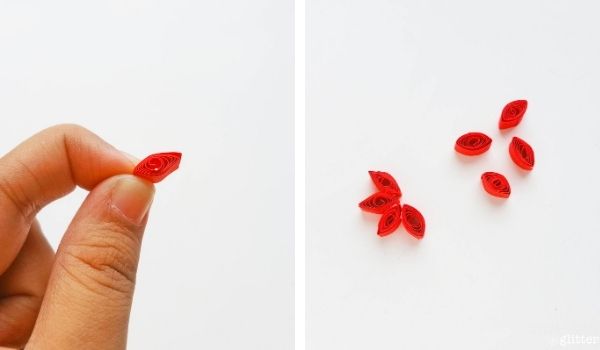
Gluing all the 8 lens shapes together on their sides will form a round pattern (the flower); with a hole on the center.
Use any colored quilling strip to form a tight coil shape and insert it into the hole on the center of the flower pattern.
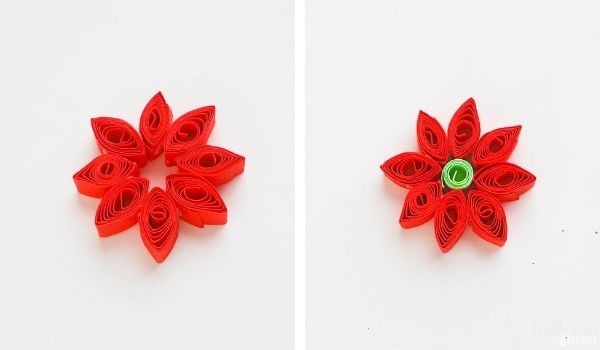
Now select a small bead (I used a small faux white pearl bead) and glue it on the center of the flower pattern.
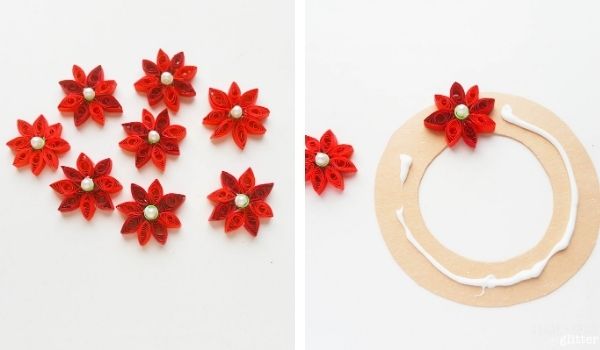
Similarly prepare 7 more (total 8 flowers) quilled flowers. I used 2 different shades of red colored quilling strips for the flowers.
Use green colored quilling strips to make the leaves (lens shapes).
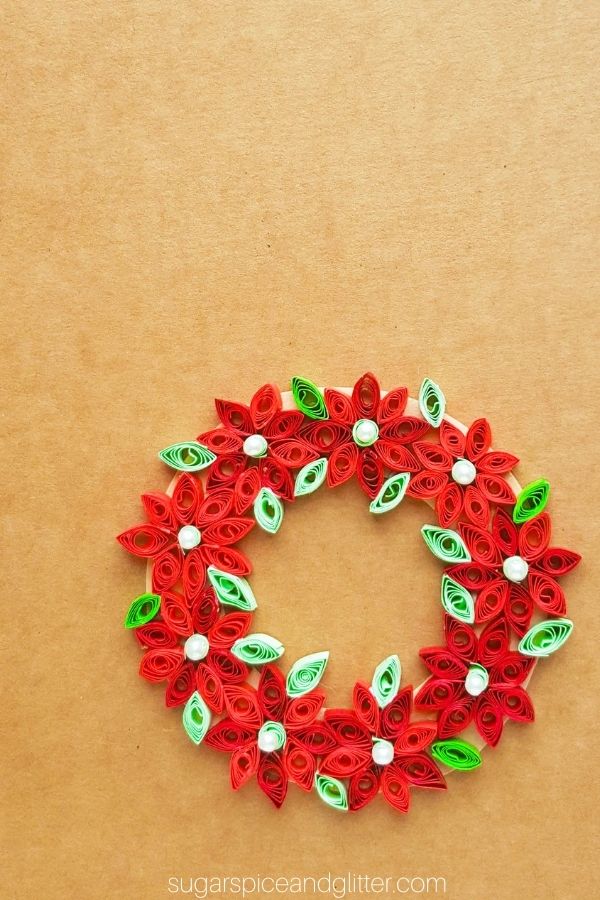
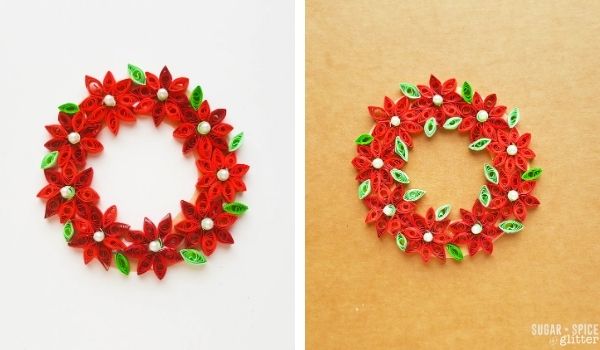
Cut out a round base, of at least an inch width, for the wreath from cardstock paper. Start to glue the flowers on the base.
Glue the flowers on the base one by one. Try to fill the whole base with the flowers. Make more flowers if needed to fill the base.
Finally, add the leaves between the flowers.
Allow the glue to dry before hanging or using to decorate.
Pin this Quilling Christmas Ornament for your Christmas crafting:
Grab your free printable instructions for our Christmas quilled poinsettia craft:
Want to Save This Recipe?
Enter your email & I'll send it to your inbox. Plus, get great new recipes from me every week!
By submitting this form, you consent to receive emails from Sugar, Spice and Glitter.
Quilled Poinsettia Wreath
A gorgeous quilled paper Christmas ornament, this quilled paper poinsettia wreath can be hung on the wall, made into an ornament or used to decorate a Christmas card.
Materials
- Quilling strips
- Cardstock paper
- Small beads
- Craft glue or glue stick
Tools
- Slotted quilling tool
Instructions
- Select a colored quilling strip for the flower (I prefer red). Prepare the strip into 6 inches and quill the whole strip with the slotted quilling tool.
- Once done coiling, take out the coil from the tool and allow it loosen up a little.
- Press any one sides of the loose coil.
- Now press the opposite side of the previously pressed point. This will form a lens shape.
- Similarly prepare 7 more (total 8 lens shapes for each flower) shapes. Start to glue the shapes together side by side.
- Gluing all the 8 lens shapes together on their sides will form a round pattern (the flower); with a hole on the center.
- Use any colored quilling strip to form a tight coil shape and insert it into the hole on the center of the flower pattern.
- Now select a small bead (I used a small faux white pearl bead) and glue it on the center of the flower pattern.
- Similarly prepare 7 more (total 8 flowers) quilled flowers. I used 2 different shades of red colored quilling strips for the flowers.
- Use green colored quilling strips to make the leaves (lens shapes).
- Cut out a round base, of at least an inch width, for the wreath from cardstock paper. Start to glue the flowers on the base.
- Glue the flowers on the base one by one. Try to fill the whole base with the flowers. Make more flowers if needed to fill the base.
- Finally, add the leaves between the flowers.
- Allow the glue to dry before hanging or using to decorate.
Recommended Products
As an Amazon Associate and member of other affiliate programs, I earn from qualifying purchases.
-
 ELMERS 2024691 Elmer's Liquid School Glue, Clear, Washable, 32 Ounces - Great for Making Slime
 -
Paper Quilling Strips Set,36 Colors 900 Strips Width 3mm Length 39cm
-
zanyu 12 Pack Paper Quilling Tools Slotted Kit, Different Sizes Rolling Curling Quilling Needle Pen Curling Coach Paper Cardmaking Project Tools Set


I hope you enjoy making this quilled paper Chrsitmas ornament – and I’d love to hear how you end up displaying it!
For more Christmas craft ideas, check out our full collection here.