
DIY Ocean Resin Table
Welcome to Sugar, Spice & Glitter! Please note, this post may contain affiliate links. For more details, see our Full Disclosure.

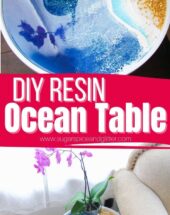
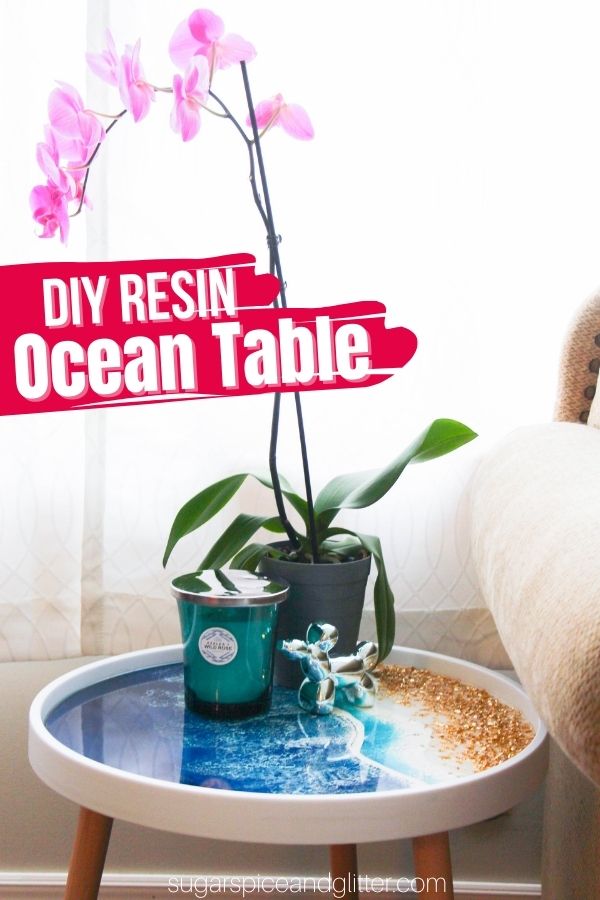
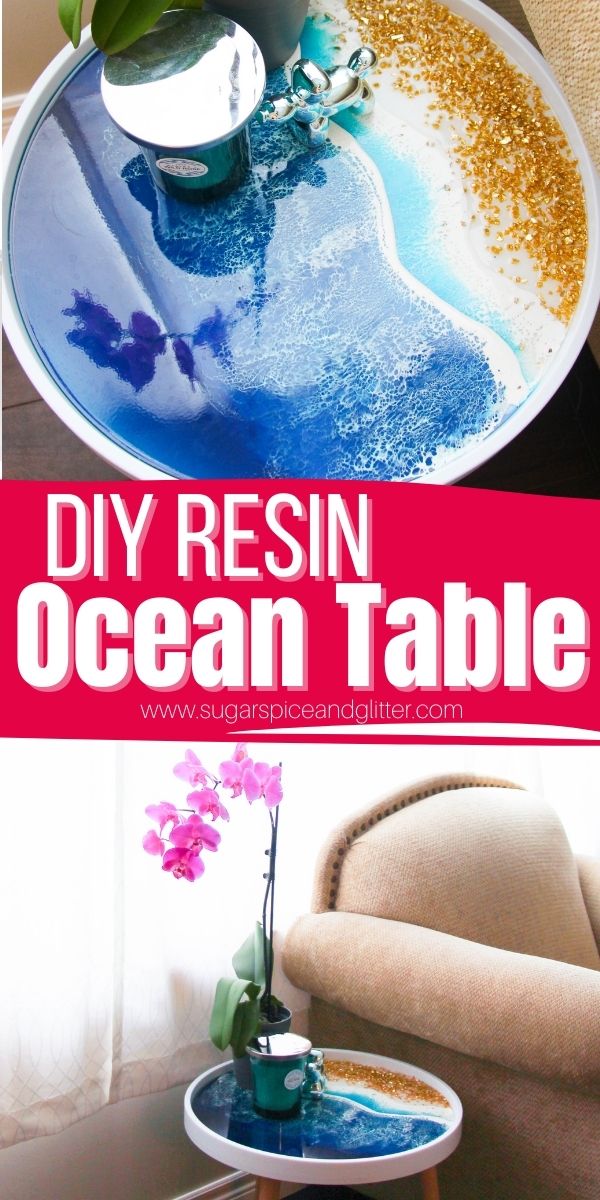
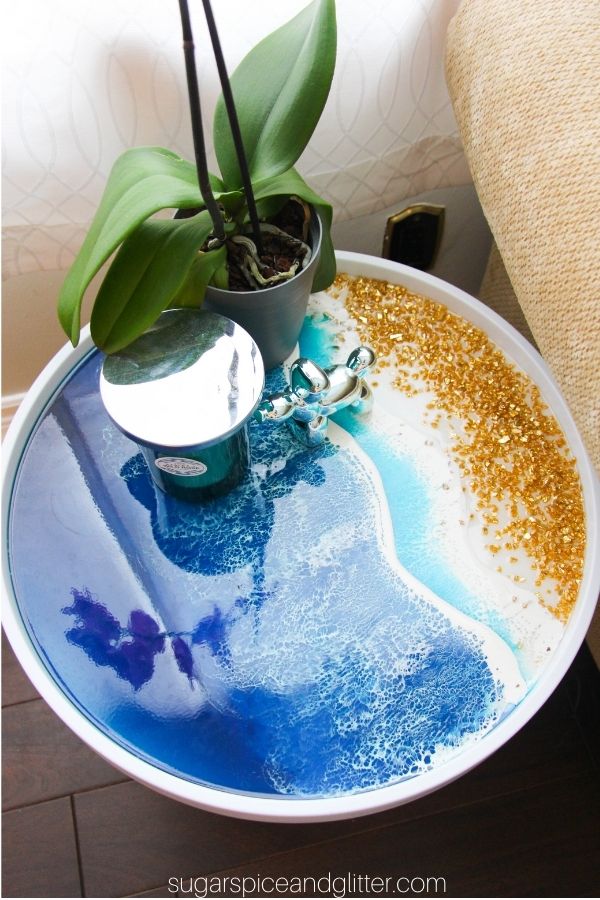
Today we’re sharing a tutorial for one of my favorite home decor pieces – a DIY Resin Ocean Table. This table is so gorgeous and unique while remaining understated and seamlessly fitting into our existing home decor. It’s a fun way to bring a bit of the beach home with you – without dealing with all that sand.
DIY Ocean Resin Table
I really struggle with home decor decisions.
I want each piece that I bring into my home to be gorgeous and somewhat unique (why waste time or money on boring pieces?) but my tastes can create a couple problems.
First, unique and gorgeous home decor usually comes with a hefty price tag.
Second, when every piece is unique in it’s own right, sometimes it’s hard to make your home decor flow and work together.
But with my latest addition, I didn’t run into either of those problems! This Ocean Resin Table is a great DIY project that can be made using an existing end table or a cheap thrifted one along with some versatile and affordable resin products from Into Resin. But if you don’t want to DIY it, Into Resin also sells these tables for only $150!
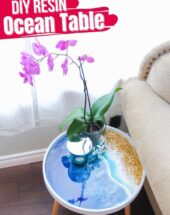
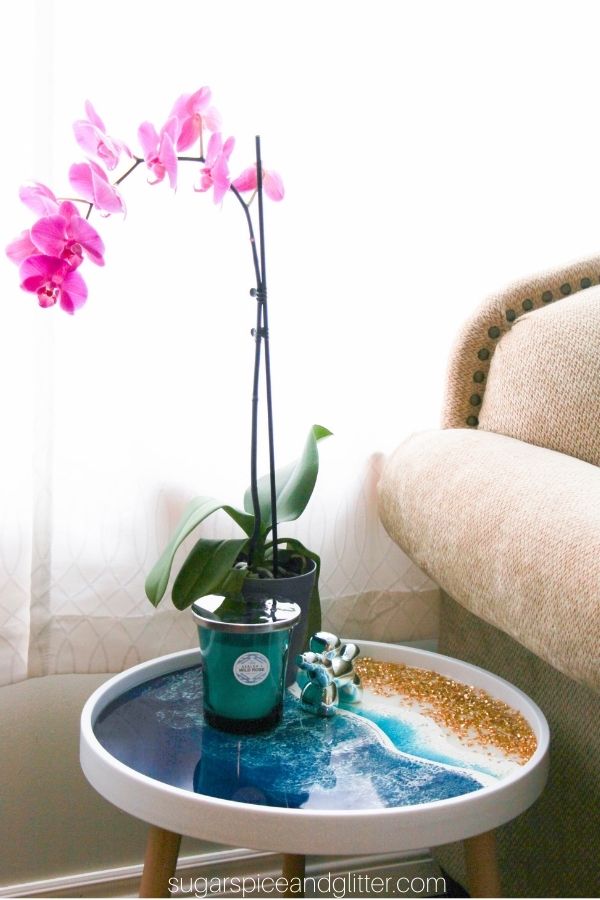
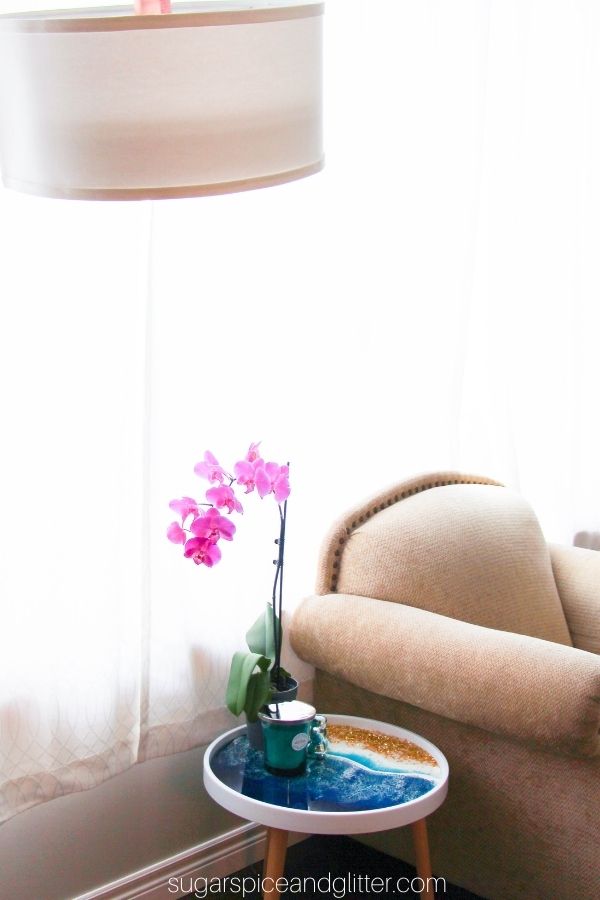
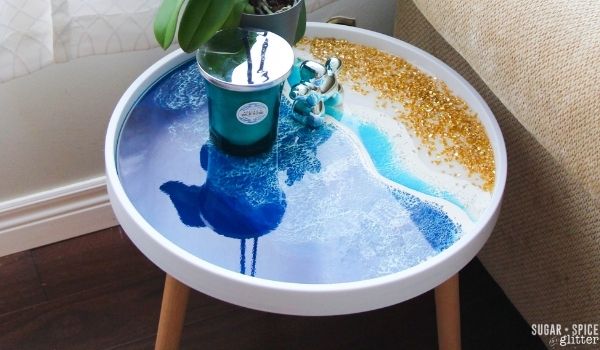
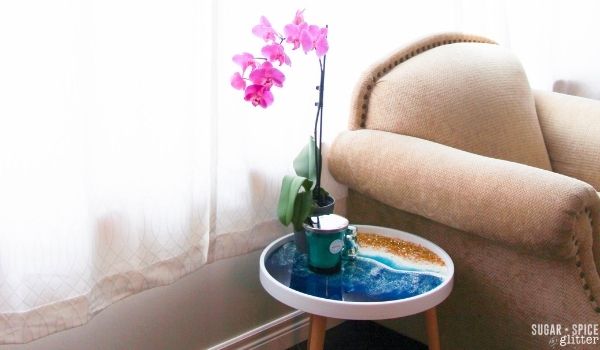
I also love how subtle this end table is. With it’s small stature and raised edges, it doesn’t take over the room, but once it catches your eye, it’s beauty and artistry is undeniable. It fits in and doesn’t overpower my existing decor while adding a gorgeous touch.
I was worried that a resin table would scratch easily or need to be handled gently, but we’ve had ours for two months and despite my cats constantly jumping onto the table to attack my orchid and my daughter and her friends’ refusal to acknowledge the existence of coasters, it’s held up great and there isn’t a single scratch or watermark yet.
And just a note – Into Resin is not sponsoring this blog post. However, when I shared with them how much I loved the ocean tables, they offered to gift one to a lucky reader!
They’ve also generously shared with me how they make these DIY Ocean Resin Tables so that other DIY-lovers can make one themselves. Below you fill find their video on how they make their Ocean Tables and a step-by-step written tutorial (with printable instructions) to assist you in making your own gorgeous ocean table. (If you’re a resin beginner, you’ll find even more tips on their website.)
My favorite part about making one of these tables yourself is that you can style it after any beach or coastal image that you like – whether it’s a picture from one of your favorite vacations or a dream destination you’ve yet to visit. You can also incorporate sand that you’ve saved from a vacation or even small seashells or sand dollars.
This method can be used to make a variety of ocean-inspired decor pieces: wall decor, breakfast trays, charcuterie boards, shelving units, etc.
To enter into the giveaway, comment on my Instagram post here with which color Resin Ocean Table you would want and where in your home you would display yours!
Watch IntoResin’s video on how to make one of their gorgeous resin ocean tables here:
Materials to Make an Ocean Resin Table
- Inspiration Image <– it’s helpful to have a coastal image that you are using as a guide, even if you deviate and add your own flourishes
- Three Mica Colors <– using three colors creates a realistic gradient. Ours features all blue colors but you can change this up based on the image you are working off of
- White Mica
- Resin/Epoxy
- Crushed Gold Glass or Real Sand
- Small Side Table
Scroll down to the printable recipe card for full measurements.
Tip: when mixing your resin colors, it is easiest to use clear cups or containers. Tip the cup to the side to see the true color of the resin before proceeding with your project.
Tools You May Find Helpful
- Respirator mask
- Nitrile gloves
- Level
- Heat gun
- Mixing cups and stirring sticks
- Blocks or Stands to Prop up the Table
How to Make an Ocean Table Using Resin/Epoxy
In a disposable container, mix together and equal amount of hardener and resin. Mix well for at least 3-4 minutes.
Divide the resin mixture amongst 4 containers, then add use your coloring to dye each cup to create your gradient color palette (we used white, turquoise, blue and dark blue). Once you have achieved your desired colors, allow the resin to sit and thicken for 15 minutes.
(For our table, we used 200g for the white resin, 100g for the turquoise, 400g for the blue and 300g for the light blue.)
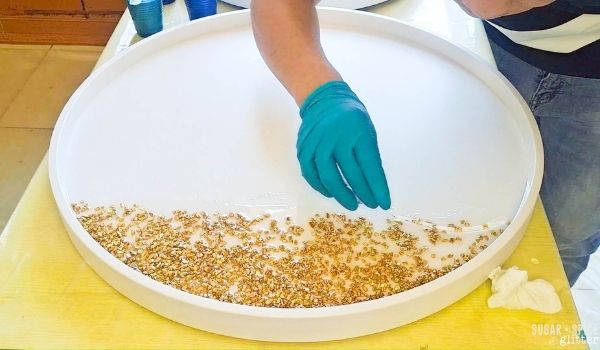
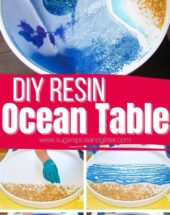
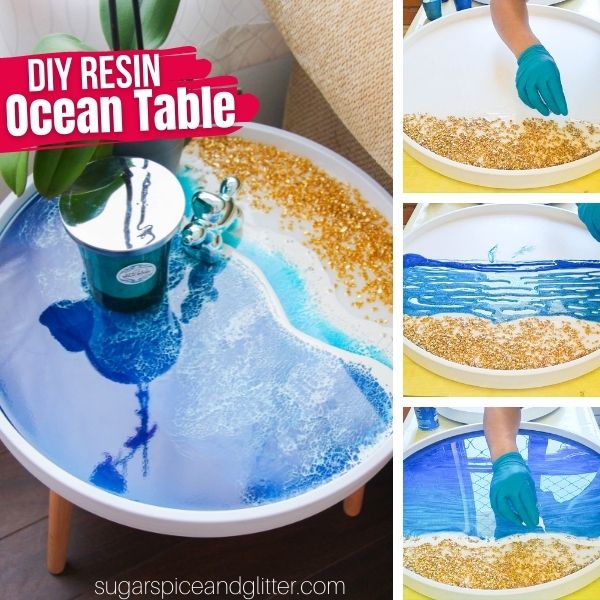
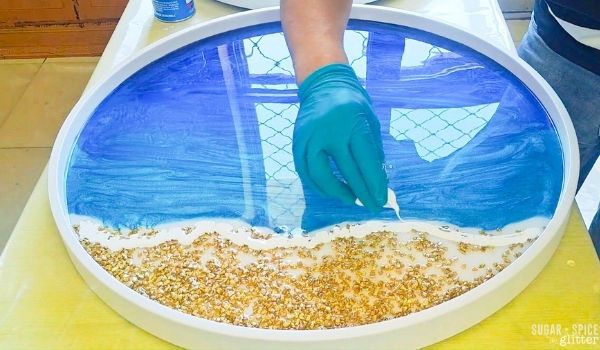
Distribute your sand or crushed glass onto the clean table top. Arrange it how you would like it to be set – you can make small adjustments later.
Affix the sand in place using a bit of the white resin. Leave space between the end of the “sand resin” area and where you want the first layer of the ocean resin (turquoise) to go. This will be filled in later to avoid muddying the ocean effect.
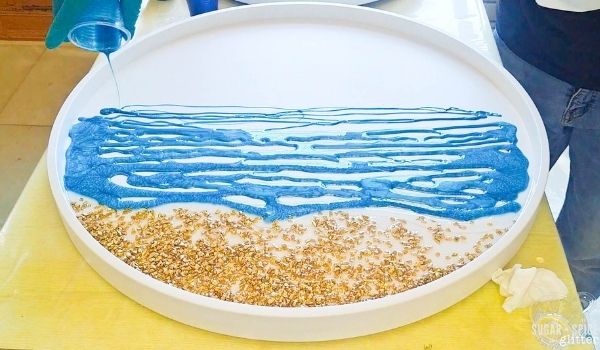
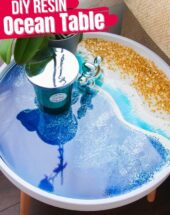
Pour the turquoise-colored resin onto the table to create the “shallow” part of the ocean closest to the beach, leaving at least an inch gap between the turquoise resin and the “sandy resin.” (This will be filled in later when we create the foamy shoreline.)
Next, pour on the blue then the dark blue resins, covering up the rest of the table’s surface. Overlap the colors a bit to create more gradients of color.
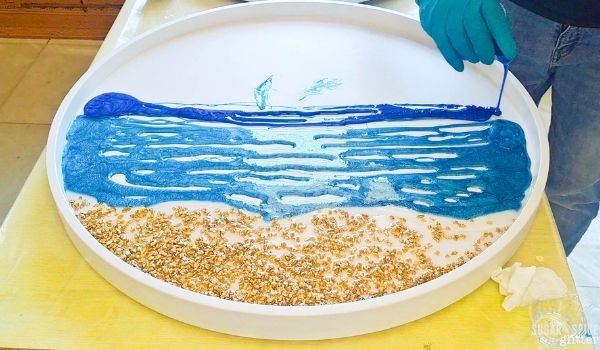
Use a plastic knife or spatula (or glove-covered hands) to spread the colors evenly and then use a heat gun to remove air bubbles.
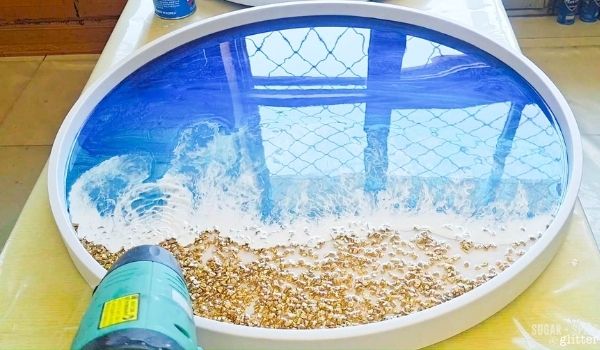
Take some of the remaining white resin and use it to fill in the gap between the sandy resin and the turquoise resin. Start slow, you can add more white crashing waves as you go.
Set your heat gun to it’s lowest setting and aim it across the white resin line to gently push the resin out to create the wave effect. Slowly move the heat gun back and forth while keeping it focused on the white resin line.
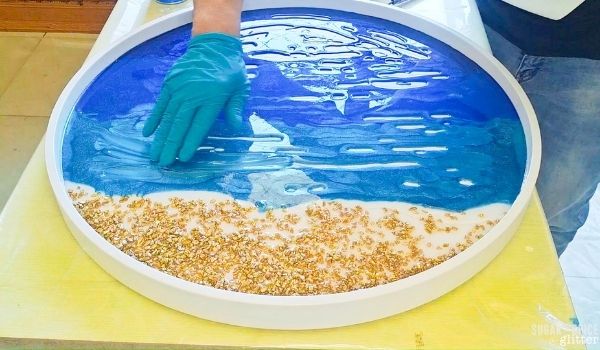
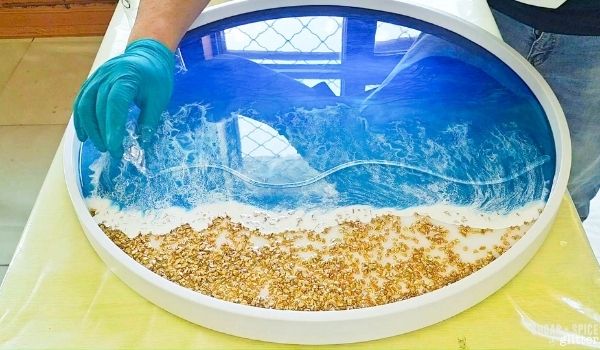
Add more white resin, as desired, to create a thicker and more pronounced wave pattern.
Add additional lines of white resin overtop of the turquoise and blue layers, as desired, to create additional waves.
(Tip: you can also use a toothpick or skewer to help elongate the white lines of the waves.)
Place a cardboard box or tote overtop of the tabletop to protect it from dust as it cures for at least 24 hours.
If desired, apply a second protective coat of epoxy/resin after 24 hours and allow to cure and additional 24 hours before using.
Pin this Gorgeous Ocean Table DIY to your Home Decor inspiration board:
Grab your free printable instructions for our DIY Ocean Table:
Want to Save This Recipe?
Enter your email & I'll send it to your inbox. Plus, get great new recipes from me every week!
By submitting this form, you consent to receive emails from Sugar, Spice and Glitter.
DIY Ocean Resin Table
How to make a gorgeous DIY Resin Ocean Table - a unique and customizable side table that can be styled after your favorite beach and even incorporate sand brought home from a special vacation
Materials
- Three Mica Colors (Do not exceed 6% of the resin/epoxy mixture)
- White Mica
- 900g Resin/Epoxy
- 200g Crushed Gold Glass or Real Sand
- Small Side Table
Tools
- Inspiration Image
- Respirator mask
- Nitrile gloves
- Level
- Heat gun
- Mixing cups and stirring sticks
- Blocks or Stands to Prop up the Table
Instructions
- In a disposable container, mix together and equal amount of hardener and resin. Mix well for at least 3-4 minutes.
- Divide the resin mixture amongst 4 containers, then add use your coloring to dye each cup to create your gradient color palette (we used white, turquoise, blue and dark blue). Once you have achieved your desired colors, allow the resin to sit and thicken for 15 minutes.
- (For our table, we used 200g for the white resin, 100g for the turquoise, 400g for the blue and 300g for the light blue.)
- Distribute your sand or crushed glass onto the clean table top. Arrange it how you would like it to be set - you can make small adjustments later.
- Affix the sand in place using a bit of the white resin. Leave space between the end of the "sand resin" area and where you want the first layer of the ocean resin (turquoise) to go. This will be filled in later to avoid muddying the ocean effect.
- Pour the turquoise-colored resin onto the table to create the "shallow" part of the ocean closest to the beach, leaving at least an inch gap between the turquoise resin and the "sandy resin." (This will be filled in later when we create the foamy shoreline.)
- Next, pour on the blue then the dark blue resins, covering up the rest of the table's surface. Overlap the colors a bit to create more gradients of color.
- Use a plastic knife or spatula (or glove-covered hands) to spread the colors evenly and then use a heat gun to remove air bubbles.
- Take some of the remaining white resin and use it to fill in the gap between the sandy resin and the turquoise resin. Start slow, you can add more white crashing waves as you go.
- Set your heat gun to it's lowest setting and aim it across the white resin line to gently push the resin out to create the wave effect. Slowly move the heat gun back and forth while keeping it focused on the white resin line.
- Add more white resin, as desired, to create a thicker and more pronounced wave pattern.
- Add additional lines of white resin overtop of the turquoise and blue layers, as desired, to create additional waves.
- (Tip: you can also use a toothpick or skewer to help elongate the white lines of the waves.)
- Place a cardboard box or tote overtop of the tabletop to protect it from dust as it cures for at least 24 hours.
- If desired, apply a second protective coat of epoxy/resin after 24 hours and allow to cure and additional 24 hours before using.
If you make this Ocean table (or a different ocean-inspired resin craft), I’d love to see it!
For more DIY Home Decor Projects, check out our full home decor collection here:

For more craft ideas for adults, check out our full adult craft collection here:


Will this work if you do t have an edge on your table? Yours is beautiful
Vedant Artisans creates beautiful epoxy resin table tops perfect for your home or office. We offer high-quality epoxy resin tabletops and stylish epoxy table tops at great prices. Check out our epoxy table tops for sale today! For more details, call us at +1 6807783343.
Enquiry Now – https://vedantartisans.com/category/epoxy-table-top
Wow, such a beautiful and creative project! The details are incredible. 👏