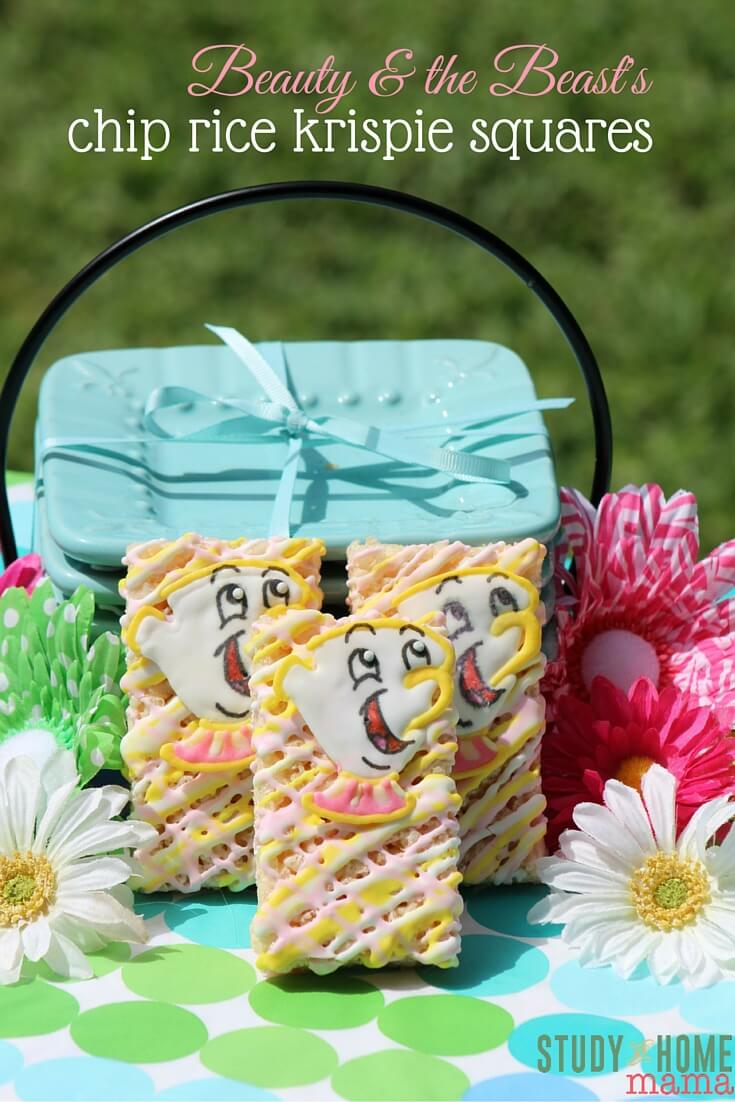
Beauty & the Beast: Chip Rice Krispie Treats
Welcome to Sugar, Spice & Glitter! Please note, this post may contain affiliate links. For more details, see our Full Disclosure.
If you’ve been around Sugar, Spice & Glitter before, you know that we are a Disney family. After making these Beauty & the Beast Belle-inspired Cupcakes for my friend, we just had to acknowlege one of Ella’s favorite characters, Chip, with these Beauty & the Beast: Chip Rice Krispie Treats!

I usually only use piping bags for decorating sugar cookies or making character figures, but our food writer markers came in handy with this detailed sugar project. Food writers are filled with food coloring, making them essentially an edible ink. I use them often when I make themed lunch boxes for Ella.
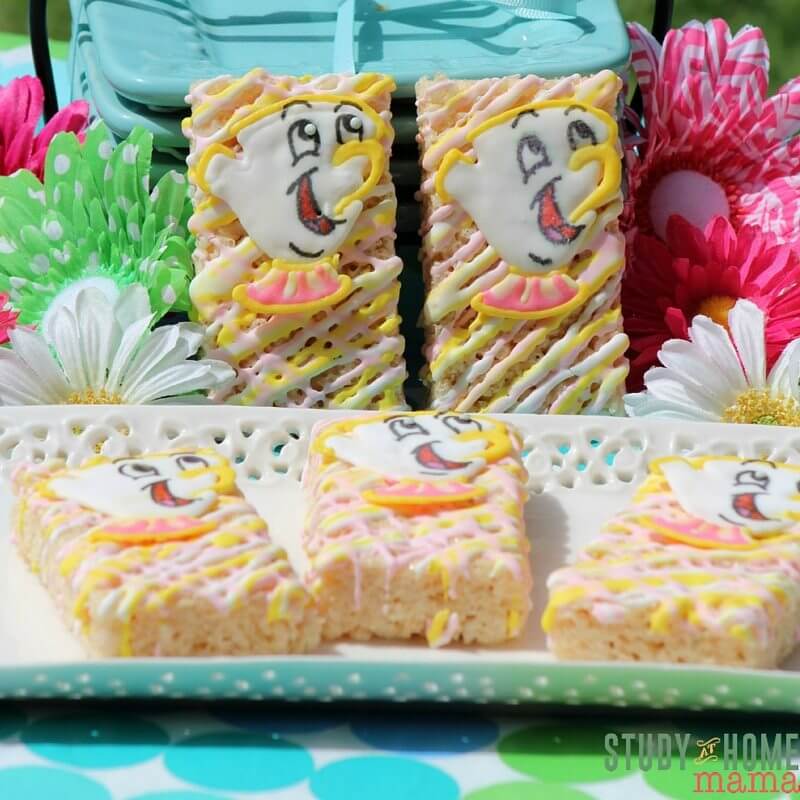
We made these Disney Rice Krispie Treats at a friend’s house for a fun day of baking followed by a little party for the kids (we also made these Cherry Coke Cupcakes that day). The kids helped make the rice krispie squares, drizzle the melted candy coating over top, and then carefully attach the chip sugar pieces on top.
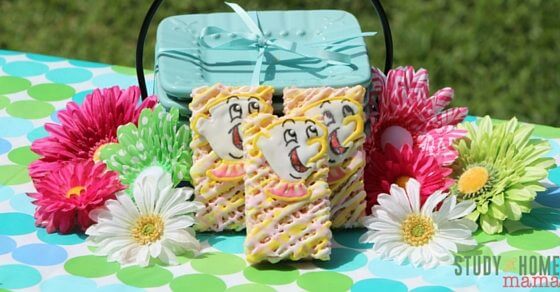
If you’re looking for a cute dessert for a Beauty & the Beast movie night (or a birthday party) these simple treats are a great option!
How to Make Disney Rice Krispie Treats
For this recipe, you need to make the frosting decorations at least 5 hours before you want the rice krispies to be ready, but to be safe you should start the night before.
Chip’s Royal Icing
Royal icing Ingredients
- 2 egg whites
- 1 cup powder sugar
- 1/2 teaspoon cream of tartar
- Yellow and Pink gel food coloring
- Black, pink and red Food Writer
- Frosting Bags
- #2 Frosting Tip
Royal Icing Directions
Combine all ingredients, except food coloring, and mix for 4 minutes. You want a stiff, glossy icing – if not stiff enough, add and additional 1/4 cup of powder sugar.
Place 2 tablespoons of the icing in a small bowl and add a bit of yellow food coloring. Repeat to make the pink frosting, as well. (Leave the remaining icing white.)
Prepare 3 icing bags with #2 Wilton tips, or just snip a small corner off of the bags when full. Scoop white icing into one bag, yellow frosting into another, and pink frosting into the last bag.
Place a printed image of Chip underneath a square of parchment or wax paper, and tape in place to secure. Start first with the yellow outlines, then fill in with the white icing. Slide the picture of Chip out and repeat, allowing each decoration to dry for 30 minutes.
Once the icing has dried, use your black Food Writer to draw in the eyebrows, eyes, mouth and other special markings. Use the pink and red Food Writers to color in the tongue and mouth. Using the white royal icing place two white dots for his eyes if you’d prefer the 3D effect.
Using the pink icing, fill in the bottom of Chip‘s cup to make the yellow and pink stripes.
Allow to dry overnight.
Disney Rice Krispies
Ingredients:
- 3 Tablespoons unsalted butter
- 1 package (approx. 40) marshmallows
- 6 cups Kellogg’s Rice Krispies cereal
- Pink, yellow and white candy melts, optional
- 3 Tablespoons shortening, optional
Directions:
In your microwave, heat butter and marshmallows on high for 45 seconds. Stir and then heat again for 30 seconds if needed, until butter and marshmallows are smooth.
Add rice krispies to the marshmallow mixture and mix well.
Pour in rice krispie mixture into a prepared cake pan and use wax or parchment paper to press mixture down evenly in the pan.
Refrigerate for at least an hour, and then cut into 2 inch squares or rectangles as we did.
Place cut rice krispie treats on a parchment lined cookie sheet.
If you’d like to do the same drizzle effect that we used, you can either use leftover icing (from making the Chip decorations) or melt 1 cup of each color of melts with 1 Tablespoon of shortening. Use a spoon to drizzle each color over the Rice Krispie Treats. (It’s best to do this right before adding the Chip Decorations so they will stick.)
To add the Chip decorations, carefully peel them off of the wax paper and place on the wet candy melts or icing. If you’re not doing the drizzle effect, use a bit of melted chocolate or remaining icing to attach them to the rice krispies squares.
If you’d like, you can insert popsicle or cake pop sticks into the bottom to make them Rice Krispie Treats on a Stick!
Here’s your free printable for these Beauty & the Beast’s Chip Rice Krispies:
Want to Save This Recipe?
Enter your email & I'll send it to your inbox. Plus, get great new recipes from me every week!
By submitting this form, you consent to receive emails from Sugar, Spice and Glitter.
Beauty & the Beast: Chip Rice Krispie Treats
A simple Disney dessert for a Beauty & the Beast party or movie night, these Chip Rice Krispie Treats are cute and super easy to make!
Ingredients
For the Chip decorations:
- 2 egg whites
- 1 cup powder sugar
- 1/2 teaspoon cream of tartar
- Yellow and Pink gel food coloring
- Black, pink and red Food Writer
- Frosting Bags
- #2 Frosting Tip
- Royal Icing Directions
For the Rice Krispies:
- 3 Tablespoons unsalted butter
- 1 package (approx. 40) marshmallows
- 6 cups Kellogg's Rice Krispies cereal
- Pink, yellow and white candy melts, optional
- 3 Tablespoons shortening, optional
Instructions
- Combine all ingredients, except food coloring, and mix for 4 minutes. You want a stiff, glossy icing - if not stiff enough, add and additional 1/4 cup of powder sugar.
- Place 2 tablespoons of the icing in a small bowl and add a bit of yellow food coloring. Repeat to make the pink frosting, as well. (Leave the remaining icing white.)
- Prepare 3 icing bags with #2 Wilton tips, or just snip a small corner off of the bags when full. Scoop white icing into one bag, yellow frosting into another, and pink frosting into the last bag.
- Place a printed image of Chip underneath a square of parchment or wax paper, and tape in place to secure. Start first with the yellow outlines, then fill in with the white icing. Slide the picture of Chip out and repeat, allowing each decoration to dry for 30 minutes.
- Once the icing has dried, use your black Food Writer to draw in the eyebrows, eyes, mouth and other special markings. Use the pink and red Food Writers to color in the tongue and mouth. Using the white royal icing place two white dots for his eyes if you'd prefer the 3D effect.
- Using the pink icing, fill in the bottom of Chip's cup to make the yellow and pink stripes.
- Allow to dry overnight.
- For the rice krispies, in your microwave, heat butter and marshmallows on high for 45 seconds. Stir and then heat again for 30 seconds if needed, until butter and marshmallows are smooth.
- Add rice krispies to the marshmallow mixture and mix well.
- Pour in rice krispie mixture into a prepared cake pan and use wax or parchment paper to press mixture down evenly in the pan.
- Refrigerate for at least an hour, and then cut into 2 inch squares or rectangles as we did.
- Place cut rice krispie treats on a parchment lined cookie sheet.
- If you'd like to do the same drizzle effect that we used, you can either use leftover icing (from making the Chip decorations) or melt 1 cup of each color of melts with 1 Tablespoon of shortening. Use a spoon to drizzle each color over the Rice Krispie Treats. (It's best to do this right before adding the Chip Decorations so they will stick.)
- To add the Chip decorations, carefully peel them off of the wax paper and place on the wet candy melts or icing. If you're not doing the drizzle effect, use a bit of melted chocolate or remaining icing to attach them to the rice krispies squares.
- If you'd like, you can insert popsicle or cake pop sticks into the bottom to make them Rice Krispie Treats on a Stick!
Nutrition Information:
Yield:
12Serving Size:
1Amount Per Serving: Calories: 217Total Fat: 8gSaturated Fat: 4gTrans Fat: 0gUnsaturated Fat: 4gCholesterol: 9mgSodium: 102mgCarbohydrates: 36gFiber: 0gSugar: 24gProtein: 2g
Sugar, Spice and Glitter uses an auto-generate nutrition calculator. Nutrition information isn’t always accurate unless analyzed in a scientific lab, so these should be considered more of a guideline than medical information.
Will you be attempting these Chip Rice Krispie Treats? What Disney movie would you like us to make desserts for next?
For more fun party dessert ideas, check out our Honey Layer Cake and our easy Mermaid Cake tutorial.