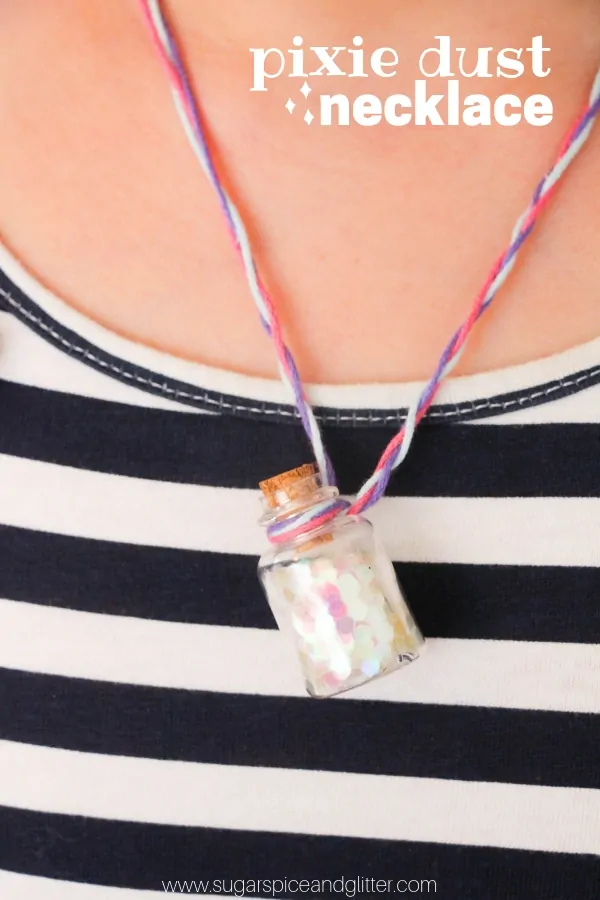
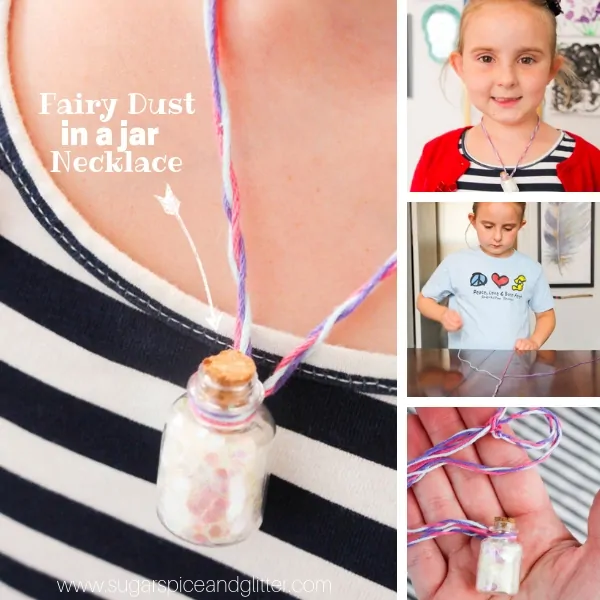
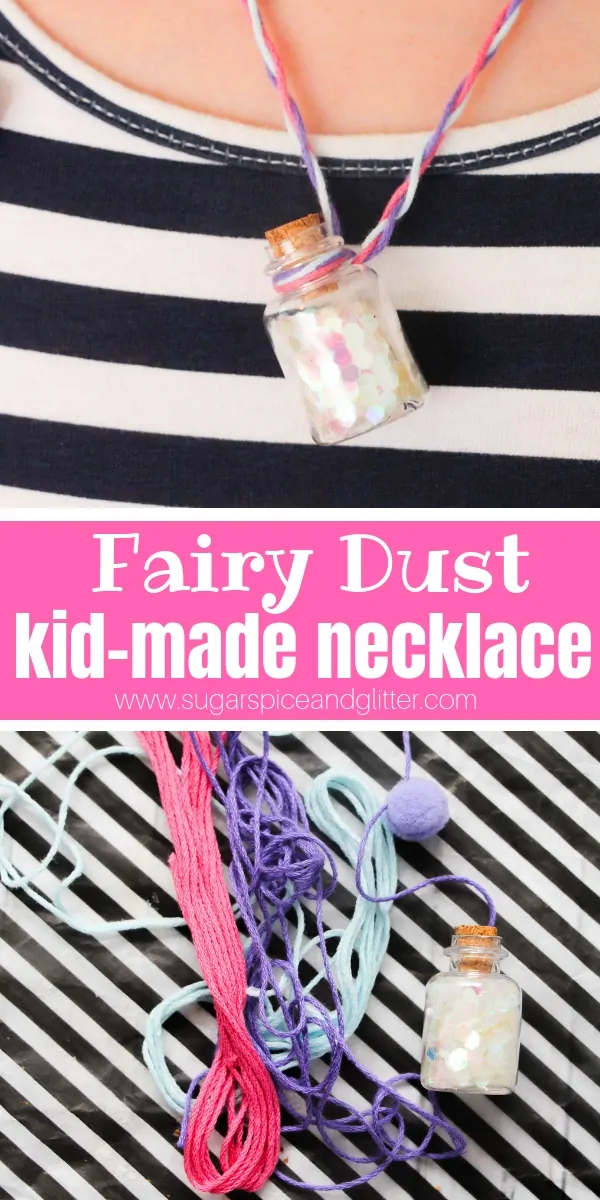
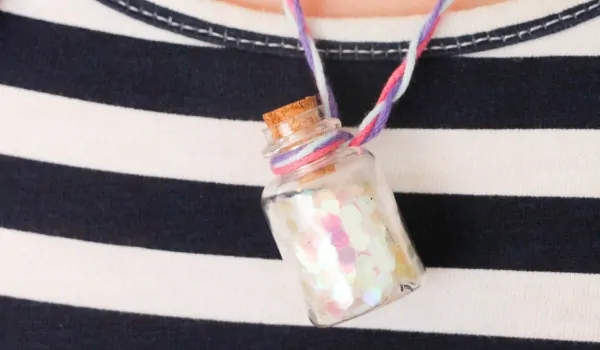
Pixie Dust Jar Necklace
We love all things magical in this house, and sometimes it’s nice to add a bit of magic to the scary or not-so-nice things that we face, which is why we made this super simple Pixie Dust Jar Necklace.
Fairy Dust Necklace Craft
Ella had a rough experience during her last year of school and was understandably nervous and apprehensive about starting again.
While I had heard great things about her new teacher and we had several assurances in place that the issues we encountered would not happen again, Ella needed something a bit “extra” to help her feel ready to face the new school year.
In addition to having lots of empowering chats, I thought it might be fun to send her to school with a bit of magic – and what’s more magical than a jar of pixie dust?
There are a couple of different ways that you can prepare this – and you don’t have to stick to just Pixie Dust, either! You could add “dragon eggs,” or “unicorn spit,” or just about any magical substance you can think of. (The galaxy method seen in our Crystal ball craft could also work for this necklace craft.)
We decided to glue our jar lid securely in place so that there were no issues with it tipping or getting onto things in the classroom (because that would not endear us to the new teacher), however, if you were making these necklaces for a different setting/occasion, it might be fun to let the kids actually empty out pinches of the glitter-dust and sprinkle it onto things.
Ella loved wearing this jar necklace the first week of school and so far, everything has gone smoothly, proving that sometimes all you need is Faith, Trust and a Little Bit of Pixie Dust.
Materials for Fairy Dust Bottles Necklace
- Small glass jar
- Glitter of choice
- Hot glue gun and glue
- Embroider floss, 3 colors preferably
- Necklace clasp, optional
Tip: feel free to customize this jar craft to your child’s preferences. Some kids may like slime jars, galaxy jars, etc.

How to Make A Pixie Dust Necklace
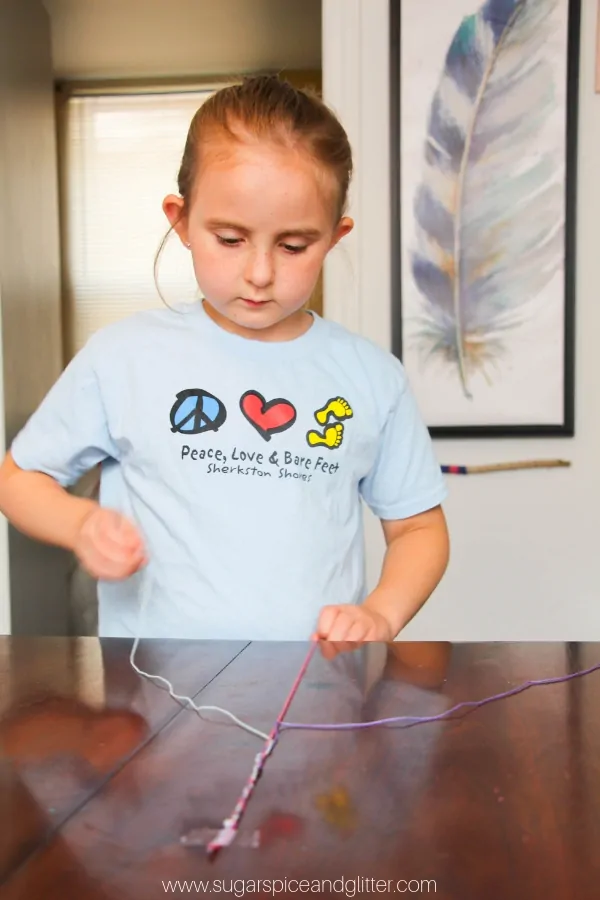
Start off by braiding your embroidery floss. You can do whichever style of braid or design that you like, and you can add additional elements like beads or feathers, as desired.
Make sure that the length of each piece of the embroidery floss is about 1 1/2 times the desired length of the final necklace. Securely knot the ends, and add a necklace clasp, if using.
Fill the tiny glass jar with glitter (or your chosen alternative). A little funnel or straw can be helpful with this step.
You can simply pop the cork back into the jar, but I decided to secure it in place with a dab of hot glue.
Tie the embroidery floss around the neck of the jar to securely attach it to the necklace. Double knot tightly.
Wear and spread a little bit of magic wherever you go!
Pin this Super Simple Pixie Dust Necklace Idea:
Grab your free printable for our easy Fairy Dust Jar Necklace craft:
Want to Save This Recipe?
Enter your email & I'll send it to your inbox. Plus, get great new recipes from me every week!
By submitting this form, you consent to receive emails from Sugar, Spice and Glitter.
Pixie Dust Jar Necklace
A Disney-inspired Pixie Dust Necklace lets you bring a bit of magic wherever you go
Materials
- Small glass jar
- Glitter of choice
- Hot glue gun and glue
- Embroider floss, 3 colors preferably
- Necklace clasp, optional
Tools
- Pliers, optional
- Scissors
- Hot Glue Gun
Instructions
- Start off by braiding your embroidery floss. You can do whichever style of braid or design that you like, and you can add additional elements like beads or feathers, as desired.
- Make sure that the length of each piece of the embroidery floss is about 1 1/2 times the desired length of the final necklace. Securely knot the ends, and add a necklace clasp, if using.
- Fill the tiny glass jar with glitter (or your chosen alternative). A little funnel or straw can be helpful with this step.
- You can simply pop the cork back into the jar, but I decided to secure it in place with a dab of hot glue.
- Tie the embroidery floss around the neck of the jar to securely attach it to the necklace. Double knot tightly.
- Wear and spread a little bit of magic wherever you go!
This Disney-inspired Pixie Dust Necklace lets you bring a bit of magic wherever you go.
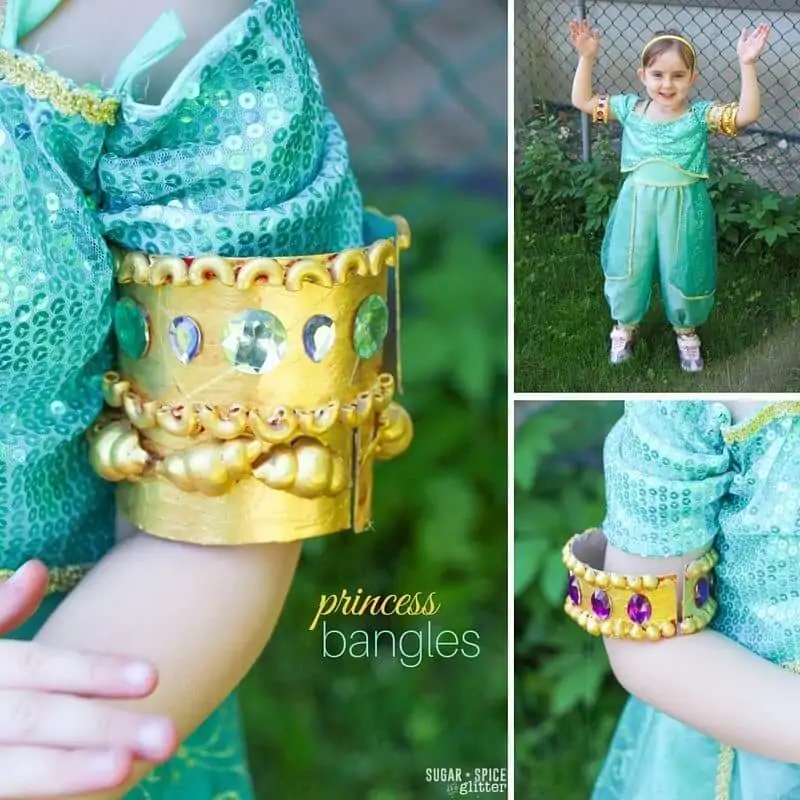
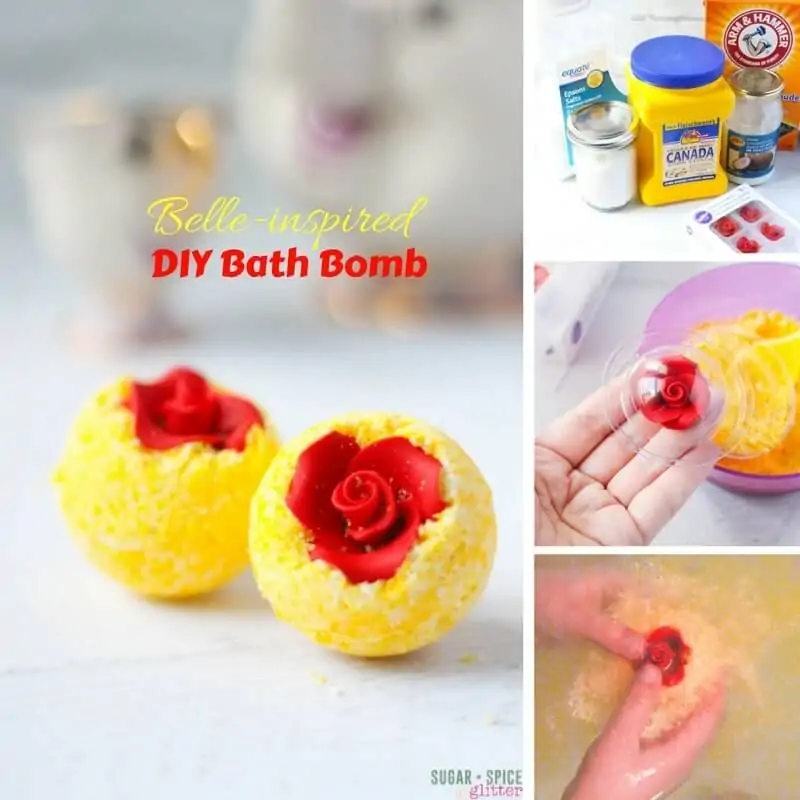
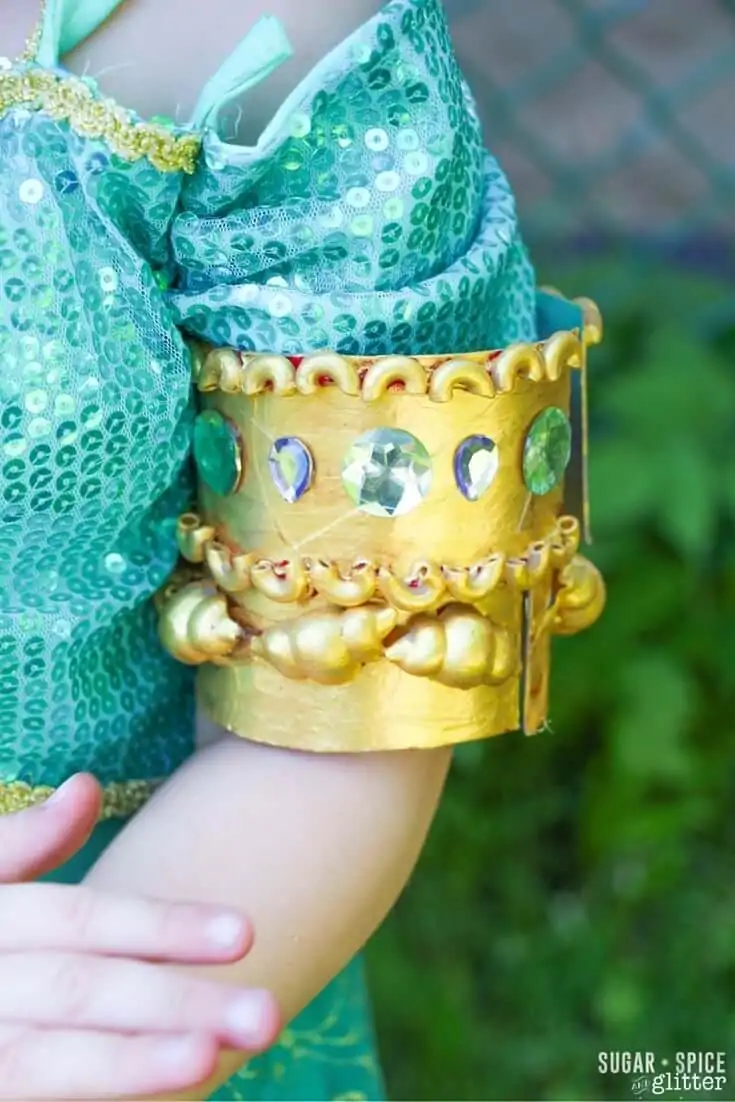
For more Disney craft ideas, check out our Princess Jasmine Bangles or our DIY Belle Bath Bombs.