
Paper Poppy Craft (with Video)
Welcome to Sugar, Spice & Glitter! Please note, this post may contain affiliate links. For more details, see our Full Disclosure.
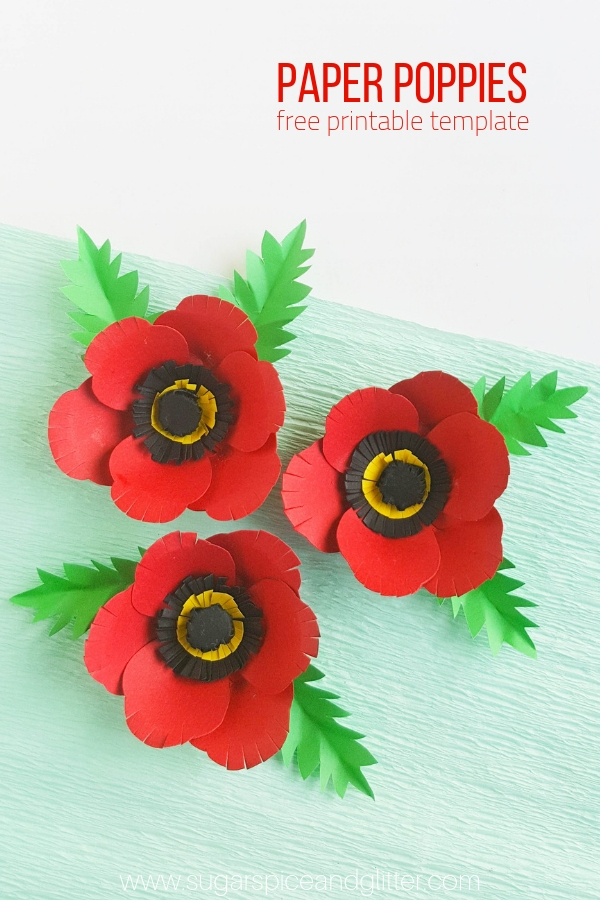
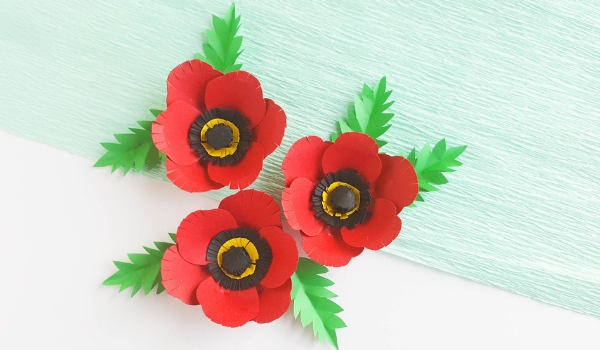
With Remembrance Day (or Memorial Day) coming up, I always like to share a new poppy craft for parents and teachers to make with kids to make talking about the day and it’s importance a bit easier. Today, I’m sharing how to make Red Poppy Paper Flowers which can be used as a decor piece or transformed into pins after you’re done.
DIY Paper Poppy Craft
I grew up in a military family, so discussing soldiers and their sacrifices is a conversation I have all year long with Ella. She understands that sacrifices come in lots of different forms and why it’s important for our family to honour the various people (including soldiers) who have contributed to our free nation – and our world – and her responsibilities as a citizen to help maintain that.
This year, we’ve started talking about the hard topics related to Remembrance Day. She’s 7 and I think she’s ready to understand more about the wars, what caused them, and the lasting effects that they have made on our world and the people in it. I find that having something to do with our hands, a quiet activity that allows for us to engage in conversation with natural breaks (allowing information to sink in, or questions to percolate), allows us to engage in that conversation in a meaningful way and really explore it in depth.
If we were just sitting face-to-face and talking about it, I think the conversation would be shorter and she wouldn’t have time to ask the same questions that happen when we are sitting together for 20-30 minutes on a craft.
Plus, after the conversation, the craft remains as a powerful representation and reminder of what we talked about. These paper poppies can be used to decorate picture frames, you can add magnets to the back, or you can turn them into pins. You could even glue pipe cleaners, kebab skewers or wire to them to make a bouquet. Ella wants to add them to a wreath so we’re probably going to experiment with that later this week.
This is a great poppy craft for grown-ups or older kids. For younger kids, we have several poppy crafts here.
These books about the significance of poppies would be great to pair with the craft:
- The Poppy Lady by Barbara Walsh
- Ava’s Poppy by Marcus Pfister
- In Flanders Field (this book contains both the famous poem and the background behind the poem)
Check out our how-to video to see how to make your own paper poppy craft – and then don’t forget to scroll down to grab your free printable template:

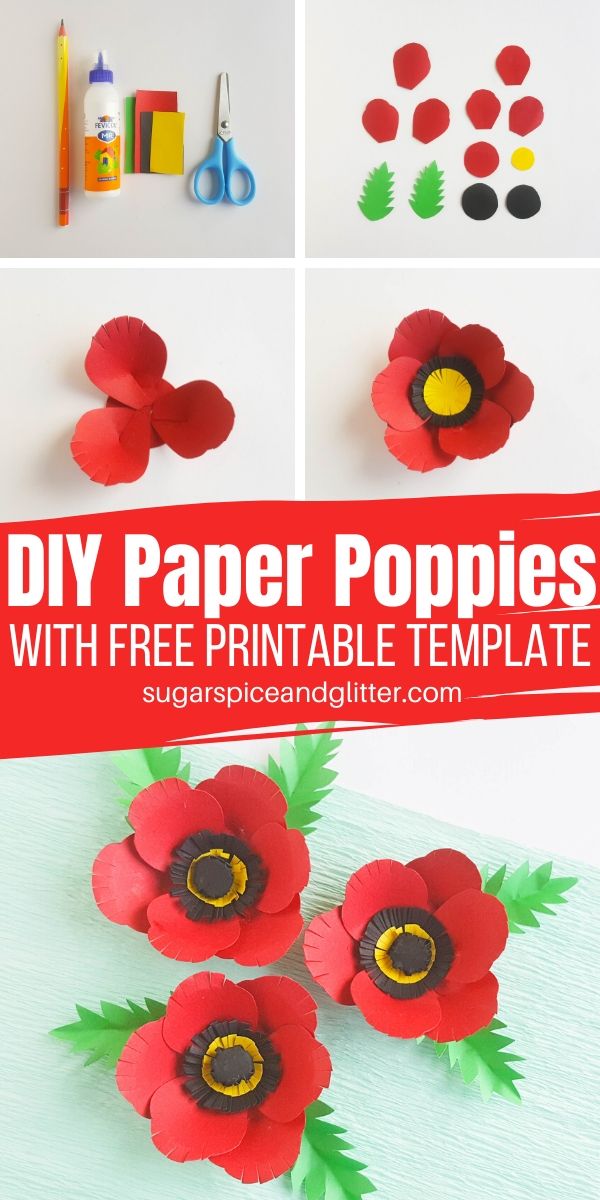
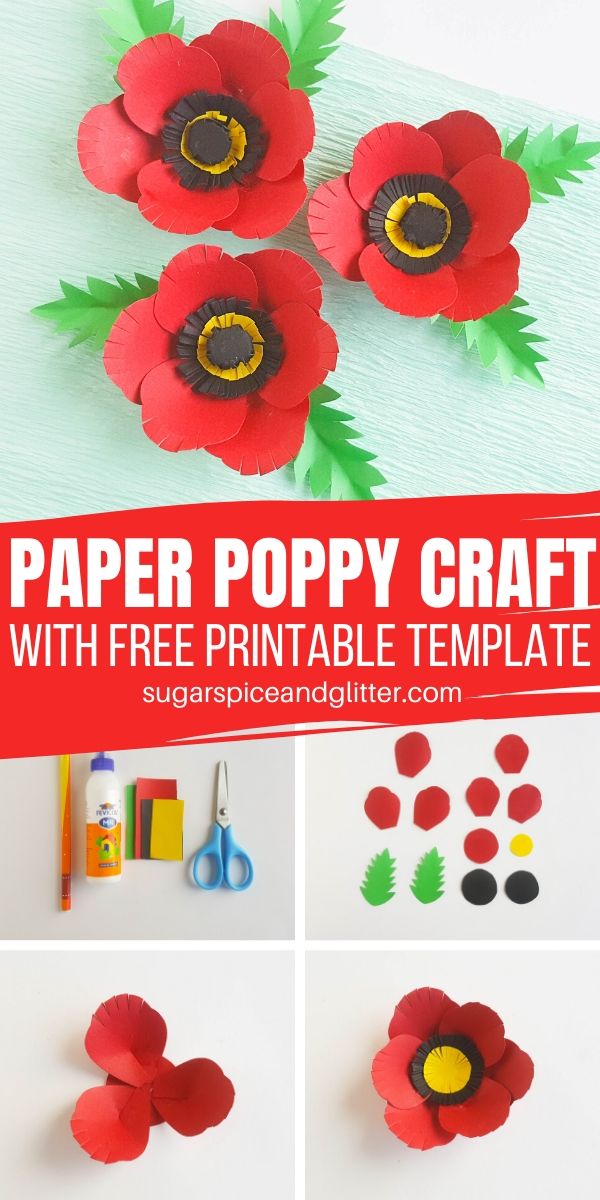
Paper Poppy Materials
- Colored cardstock– red, yellow, black and green.
- Scissors <– these are the ones we have and they have lasted for years in our daycare
- Craft glue
- Pencil – to trace the template
- Poppy Paper Flower Template
Tip: you can also print the poppy paper template directly onto your cardstock to skip the step of tracing.
How to Make Paper Flowers
Prepare the patterns from the template by printing and cutting them out.
Trace the patterns on the selected colored cardstock papers and cut them out:
- Red cardstock: 6 petals and one big circle
- Green cardstock: leaves
- Black cardstock: 2 other big circles
- Yellow cardstock: small circle
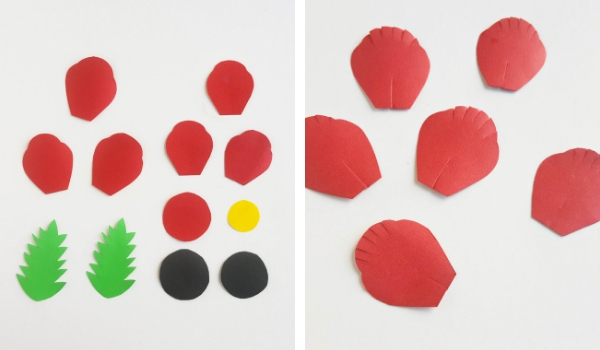
Take the 3 circles (2 black and 1 yellow) and cut thin and even fringe patterns around them.
Take the petals and cut 4-5 small (1 cm) slits along the top edge of the petals. Also cut a slit of 2 cm at the middle of the bottom edge of the petals.
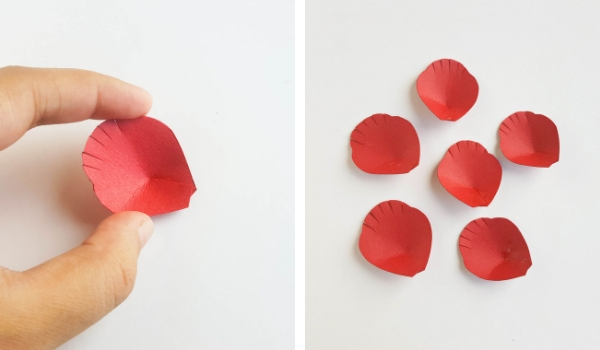
Apply glue on any one side of the bottom slit and overlap the other side of the slit on the top of the glued part. Overlap about a cm of both sides of the slits and press tightly to join the overlapped parts together.
Prepare the rest of the petals the same way.
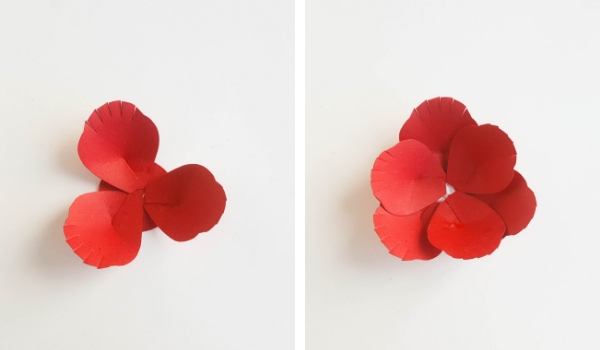
Take the red circle and place it on a flat surface and glue the 3 bigger petals near the edge of the circle, keeping even gaps between the 3 petals.
Glue the 3 other petals (second layer of petals) on the red circle but close to center of the red circle, placing each of the second layer petals between the first layer petals.
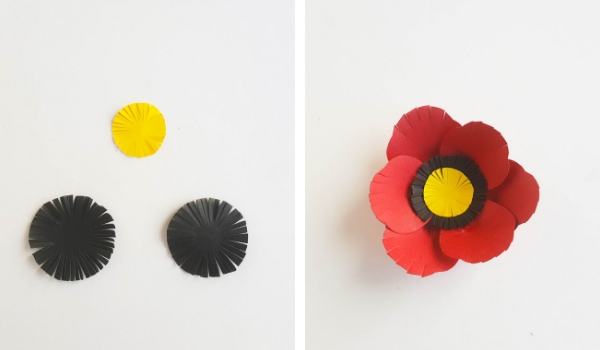
After you’re done gluing the petals, glue one of the black circles on the center of the flower and then glue the yellow circle on the black circle.
Take the last circle (the other black circle) and crumble the fringes towards the center to form a ball shape. Apply glue to secure the crumbled piece if required.
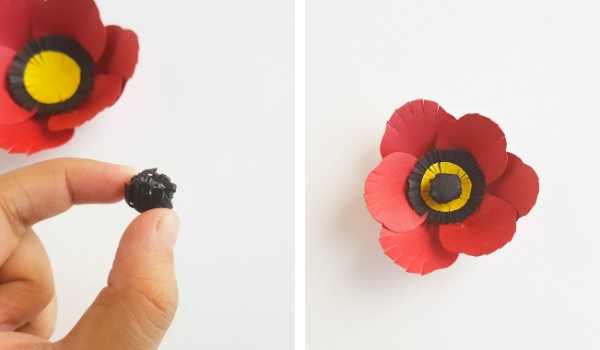
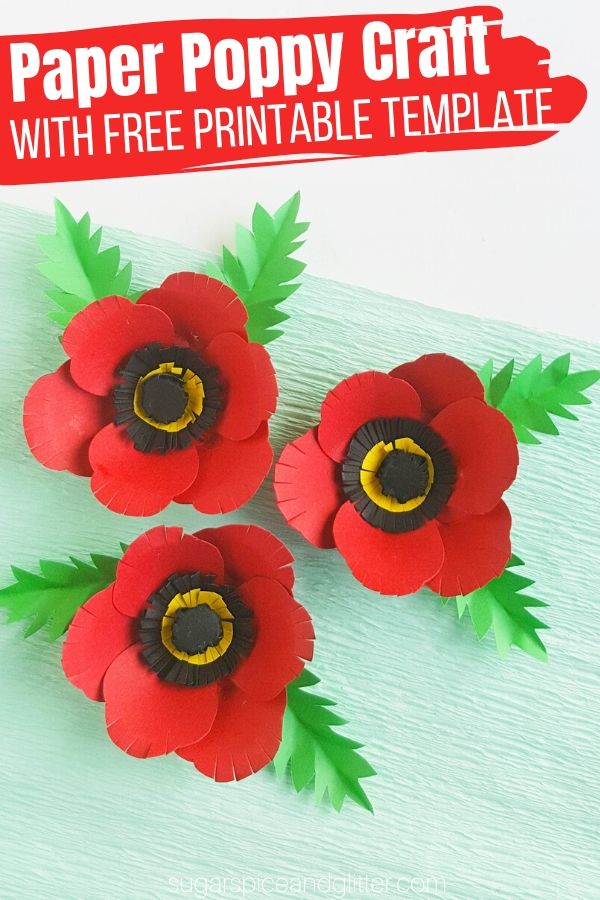
Glue the crumbled piece on the center of the yellow center from step 8. Glue the leaves at the bottom side of the flower and done!

Grab your free printable instructions for how to make paper flower that look like poppies:
Want to Save This Recipe?
Enter your email & I'll send it to your inbox. Plus, get great new recipes from me every week!
By submitting this form, you consent to receive emails from Sugar, Spice and Glitter.
Paper Poppy Craft
A super simple paper poppy craft for kids using a free printable poppy template. Use to make a wreath, pins, or adorn a picture.
Materials
- Colored cardstock paper– red, yellow, black and green
- Craft glue
- Pencil – to trace the template
- Poppy Paper Flower Template
Tools
- Scissors
Instructions
- Prepare the patterns from the template by printing and cutting them out.
- Trace the patterns on the selected colored cardstock papers and cut them out:
- Red cardstock: 6 petals and one big circle
- Green cardstock: leaves
- Black cardstock: 2 other big circles
- Yellow cardstock: small circle
- Take the 3 circles (2 black and 1 yellow) and cut thin and even fringe patterns around them.
- Take the petals and cut 4-5 small (1 cm) slits along the top edge of the petals. Also cut a slit of 2 cm at the middle of the bottom edge of the petals.
- Apply glue on any one side of the bottom slit and overlap the other side of the slit on the top of the glued part. Overlap about a cm of both sides of the slits and press tightly to join the overlapped parts together.
- Prepare the rest of the petals the same way.
- Take the red circle and place it on a flat surface and glue the 3 bigger petals near the edge of the circle, keeping even gaps between the 3 petals.
- Glue the 3 other petals (second layer of petals) on the red circle but close to center of the red circle, placing each of the second layer petals between the first layer petals.
- After you're done gluing the petals, glue one of the black circles on the center of the flower and then glue the yellow circle on the black circle.
- Take the last circle (the other black circle) and crumble the fringes towards the center to form a ball shape. Apply glue to secure the crumbled piece if required.
- Glue the crumbled piece on the center of the yellow center from step 8. Glue the leaves at the bottom side of the flower and done!
Recommended Products
As an Amazon Associate and member of other affiliate programs, I earn from qualifying purchases.


Making poppy crafts with kids is an easy way to talk about Remembrance or Memorial Day, and they serve as a powerful reminder about your chat long after you are done.
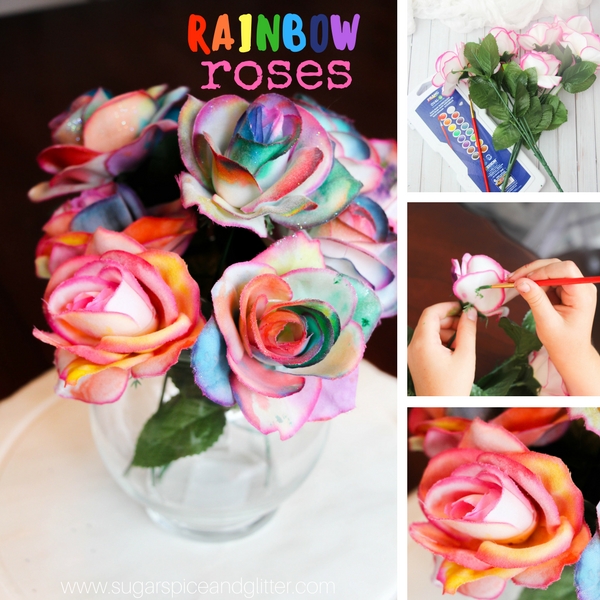
For more flower craft ideas, check out our Rainbow Roses Craft or our Handprint Roses.


Love this craft for my fifth grade students! We can’t see the video 🙁 Is it posted somewhere else we can view?
You should be able to see it in the recipe card – just above the recommended products. If you can’t see it there (probably due to ad blockers from your school computer) I can post it on social media.
Hey, after a long morning crafting red poppy paper flowers for Remembrance Day, I needed a break and stumbled upon betmatch . They have bonuses for players from Switzerland, which made trying the platform more fun. I started cautiously, lost a few small bets at first, but then scored a nice win that lifted my mood. Now it’s my little way to relax while still enjoying something entertaining.