Interactive Wand Experience at Wizarding World of Harry Potter
Welcome to Sugar, Spice & Glitter! Please note, this post may contain affiliate links. For more details, see our Full Disclosure.
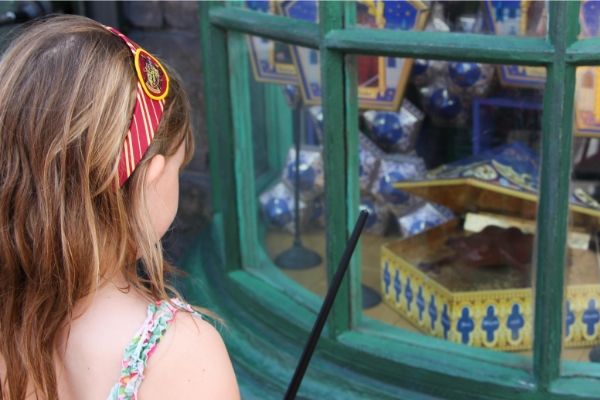
One of my daughter’s favorite things about our trip to the Wizarding World of Harry Potter at Universal Orlando was getting to buy her own real wand and take part in the Interactive Wand Experience at the Wizarding World of Harry Potter.
Today, I’m going to share with you everything you need to know about this experience – including some hidden spell locations!
, how much the wands cost, and more")
Wizarding World of Harry Potter Wands
There are two main types of wands available to purchase at the Wizarding World of Harry Potter: replica resin (decorative) wands around $25, and the interactive wands at $45-50. Each wand type has several designs modelled after the famous wands of all your favorite witches and wizards.
(For a list of all 49 of the character wands currently available at the Wizarding World of Harry Potter, look at the bottom of this post.)
You can buy the wands at Universal Studios hotels, at Universal CityWalk or at the wand shops in the park: Olliverander’s (at both Diagon Alley and Hogsmeade) and also Wands by Gregorovitch (which is generally less crowded). You can first decide to enter through the “wand selection” line where you can witness a wand choose a little witch or wizard before entering the shop, or just go straight for the shop.

Wand Selection
Whenever I read a review about the wand experience, people seemed to leave out one crucial detail: only one person out of about twenty participants gets chosen for the theatrical wand experience where a master wand maker helps a child or young adult pick out a wand, complete with special effects.
We’ve gone through the experience twice and there doesn’t seem to be a specific system they use to pick the child who gets the experience, so prepare your child that they may just be an observer (and the line for the experience can be quite long, so you’re not going to want to keep lining up to hope for selection). I think it’s still fun to see, but if your child will be jealous or upset at not getting that special experience, you may want to pretend it doesn’t exist.

After observing the wand selection, you get to choose your own wand. Olliverander’s can be a bit crowded and in my experience staff are busy, so plan to help your children look at the display wands and then let them check out a couple to ensure “the wand chooses the wizard.” (Staff don’t mind the boxes being opened.)
If buying an interactive wand for each child is not an option, I think having one shared wand for the family is fine. Only one person can do each spell at a time anyways, so unless you were going to let your children separate and hit different spell spots at the same time, it won’t change your experience.

What does an Interactive Wand do?
Each wand comes with a map that leads you to the main 25 interactive spell locations (and there are at least two more secret locations that I know of). Nine are at Hogsmeade and 16 are at Diagon Alley (well, 11 at Diagon Alley – 5 are in the creepy Knockturn Alley).
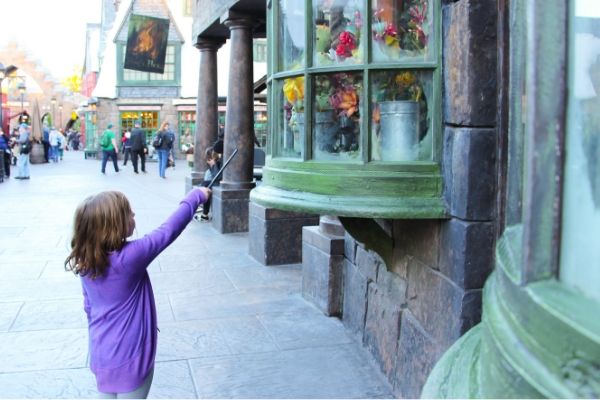
At each spell spot, there is a metal medallion on the floor that has both a symbol and an arrow. The arrow is the direction that you hold the wand in, and the symbol is the shape you must draw with the wand. (If you run into trouble, look for a sensor to point the wand at.)
The wands will cause small reactions at each location – some are more subtle than others, but I’ve listed out all of the reactions below so that you can double check if you think you (or your child) misfired their spell. (Personally, I would keep this page as a resource and not spoil the surprises by memorizing the effects if you can help it.)
We’ve been at two different times of year and have not encountered bad lines for the spells. Often you can just walk right up to do it, and sometimes you have to wait about 5 minutes.
Below, I’ve listed all of the spell locations at the Wizarding World of Harry Potter (including some secret spell locations), as well as some tips for effective spell casting.

Diagon Alley Spells and Locations:
1. Pilliwinkle’s Playthings
The spell: Tarantallegra
The effect: Trolls dance in Pilliwinkle’s window.
2. Flimflams Lanterns
The spell: Incendio
The effect: The lanterns light up.
3. Umbrella Sign
The spell: Metelojinx
The effect: It rains!
4. Magical Menagerie
The spell: Silencio
The effect: Stops the chirping noise.
5. Wiseacres Wizarding Equipment
The spell: Dark Detectors
The effect: Eyes open up in the window.
6. Wiseacres Wizarding Equipment
The spell: Specialis Revelio
The effect: Sagittarius (the archer in the stars) comes to life on a map and has a bit of fun firing arrows.
7. Scribbulus
The spell: Wingardium Leviosa
The effect: Levitates a quilled pen above parchment.
8 and 9. Bowman E. Wright Blacksmith
The spell: Reparo
The effect: A broken suit of armor is repaired.
The 2nd spell: Locomotor Bellows
The effect: An accordion fan pumps up the blacksmith’s fire
10. Mermaid Fountain
The spell: Aquamenti
The effect: Someone is going to get wet…
11. Weasley’s Wizard Wheezes
The spell: Descendo
The effect: A toilet flushes and swallows a plunger. (Oh, Weasley’s!)

Knockturn Alley Spells and Locations
1. Chimney Sweep Elf Sign
The spell: Locomotor Chimney Sweep
The effect: A little chimney sweep climbs up and down the chimney
2. Dystal Phaelanges
The spell: Moving Skeleton
The effect: The skeleton starts to mimic your movements.
3. Noggin and Bonce
The spell: Mimblewimble
The effect: Silences the talking heads in the window.
4. Tallow and Hemp Toxic Tapers
The spell: Incendio
The effect: This one changes each time, but keep an eye on the bird in the cage.
5. Trackleshanks Locksmith
The spell: Alohomora
The effect: A big gust of wind!
Hogsmeade Harry Potter Spell Locations
1. Zonko’s Joke Shop
The spell: Incendio
The effect: Sets off spinning wheels and rockets.
2. McHavelock’s
The spell: Arresto Momentum
The effect: Water stops pouring into a cauldron.
3. Honeydukes
The spell: Revelio
The effect: Opens a giant chocolate frog box to reveal a croaking chocolate frog.
4. Dogweed and Deathcap
The spell: Herbivicus
The effect: Watch the plant in the window.
5. Gladbags Wizardwear
The spells: Ascendio and Descendio
The effects: Raises and lowers a measuring tape on the school robe.
6. Madam Puddifoots
The spell: Locomotor Snowman
The effect: The snowman cake topper dances.
7. Dervish and Banges
The spells: Locomotor and Arresto Momentum
The effects: Starts and stops the music box.
8. Tomes and Scrolls
The spell: Alohomora
The effect: Unlocks a copy of Tales of Beedle the Bard.
9. Spintwitches
The spell: Wingardium Leviosa
The effect: Causes the Quidditch balls on display to levitate.

Hidden Spell Locations at Diagon Alley
There are a couple secret spell spots that I know of – but I’ve heard that there are more! If you discover any, be sure to let us know!
These secret spell spots do not have medallions and are not listed on the map.
- Slug and Jiggers Apothecary – the window to the right is slightly tilted forward. Point your wand at the barrel with a brown bubble on it and make a clockwise circle and then strike down the middle of it to have the barrel raise and bubble up and down.
- Scribbulus Writing Implements (far corner of Diagon Alley) – in the right-hand window, point your wand at the parchment and make a clockwise triangle (starting in the bottom). It allows several secret documents to appear, including the Marauder’s Map.
Tips on Casting Your Spells
Sometimes it takes several attempts for a spell to work. This could be due to arm placement, doing the movement a bit wrong, a difficult sensor, or even your wand not working.
- Stand directly on the medallion at first, but if needed, put your wand an inch from the glass if it’s still not working
- It’s all in the wrist: use small, precise movements
- Look for the sensor and point your wand directly at it
If your wand isn’t working at several locations, bring it to one of the wand shops. They can take a look at it and I’ve been told by staff that they will always replace a defective wand, even if it’s a couple years old.

Character Wands currently available at the Wizarding World of Harry Potter are:
- Harry Potter
- Hermione Granger
- Professor Dumbledore
- Sirius Black
- Lord Voldemort
- Professor Snape
- Death Eater (swirl, skull, stallion, thorns, brown and snake versions)
- Luna Lovegood
- Ginny Weasley
- Ron Weasley
- Bellatrix Lastrange
- Fleur Delacour
- Professor Slughorn
- Narcissa Malfoy
- Professor McGonagall
- Draco Malfoy
- George Weasley
- Cedric Diggory
- Professor Lupin
- Mad-Eye Moody
- Yaxley Wand
- Nympadora Tonks Wand
- Neville Longbottom
- Cho Chang
- Fred Weasley
- Viktor Krum
- Fenrir Greyback
- Rufus Scrimgeour
- Kingsley Shacklebolt
- Molly Weasley
- Arthur Weasley
- Lavender Brown
- Katie Bell
- Xenopilius Lovegood
- Dean Thomas
- Seamus Finnigan
- Mundungus Fletcher
- Parvati Patil
- Profesor Trelawney
- Professor Flitwick
- Bill Weasley

I hope I answered all of your questions about the interactive wands at Harry Potter World – please let me know if there is anything I left out.
For more great resources planning your family’s Universal Orlando vacation, check out our entire Universal Orlando section – or start with our Everything You Need to Know About Universal Studios with Young Kids.