
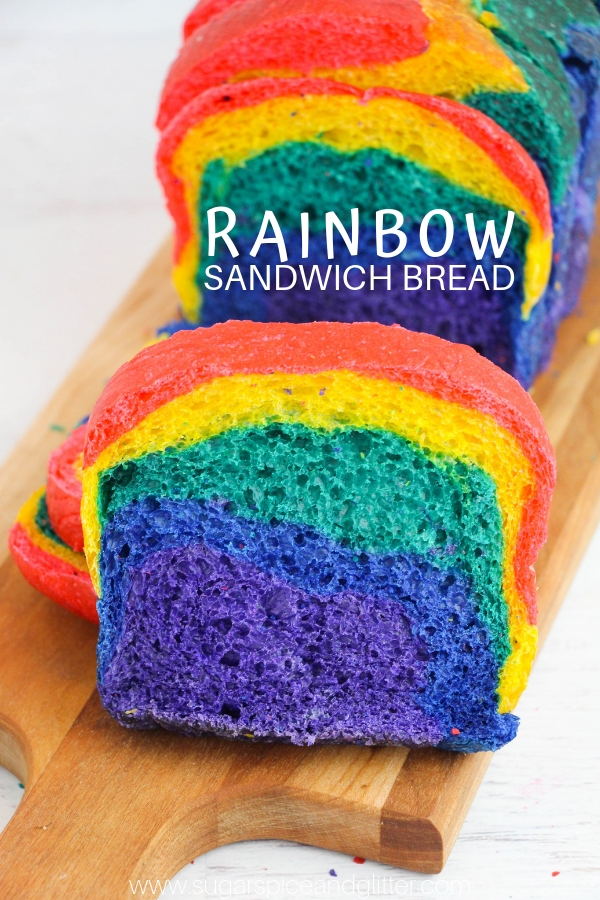
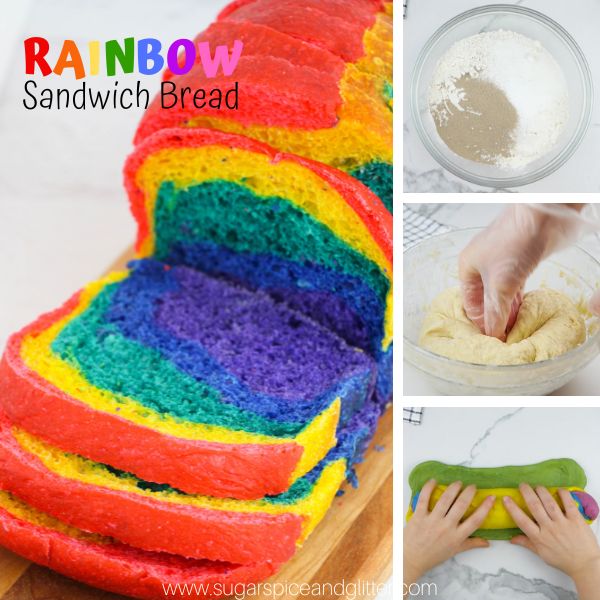
Homemade Rainbow Bread (with Video)
Welcome to Sugar, Spice & Glitter! Please note, this post may contain affiliate links. For more details, see our Full Disclosure.


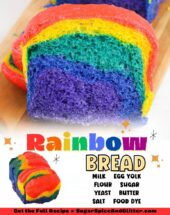

Today’s Rainbow Bread recipe is inspired by the Rainbow Grilled Cheese served at Disney World’s Contemporary Resort!
Rainbow Wonder Bread Recipe
Ella and I stayed at Disney’s Contemporary Resort a couple years ago during a conference I was attending.
For the majority of the sessions, I was able to bring her or trade off with other moms who had brought their kids along (because we would have all felt guilty going to a conference at Disneyworld without our kids) but a couple of times we had to hire a babysitting service to watch our kids for a few hours.
The babysitting service wasn’t allowed to take the kids out of the hotel room, but they brought lots of craft kits and there was room service available, which Ella was more than happy to make full use of.
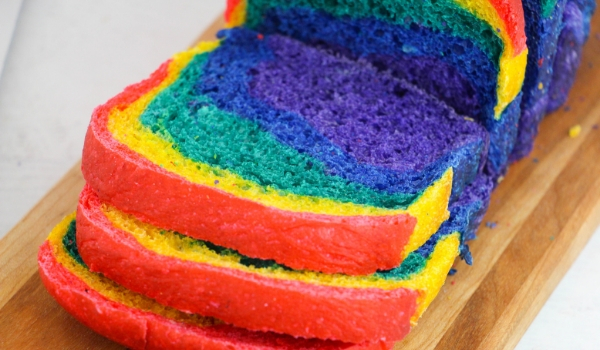
When Ella’s rainbow grilled cheese arrived, she was so excited that I received no fewer than 10 texts filled with pictures of the bright rainbow bread and requests to make rainbow bread as soon as we got home from our trip. It took a couple of attempts but I’m super excited at how this rainbow bread turned out!
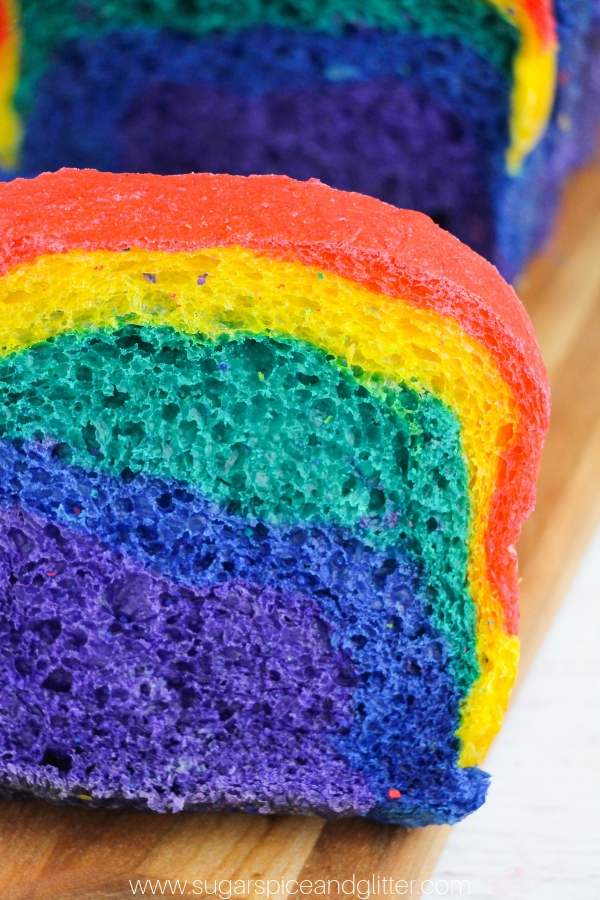
This recipe was super easy to make and it tastes just like regular sandwich bread! If you’d prefer to use natural food coloring you can, but I do find that my natural food coloring doesn’t make the colors quite as vibrant after making (red is usually maroon-ish, etc).
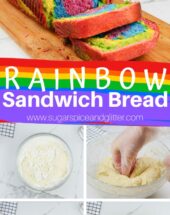
This is such a fun recipe for a rainbow party or some rainbow-themed lunch boxes.
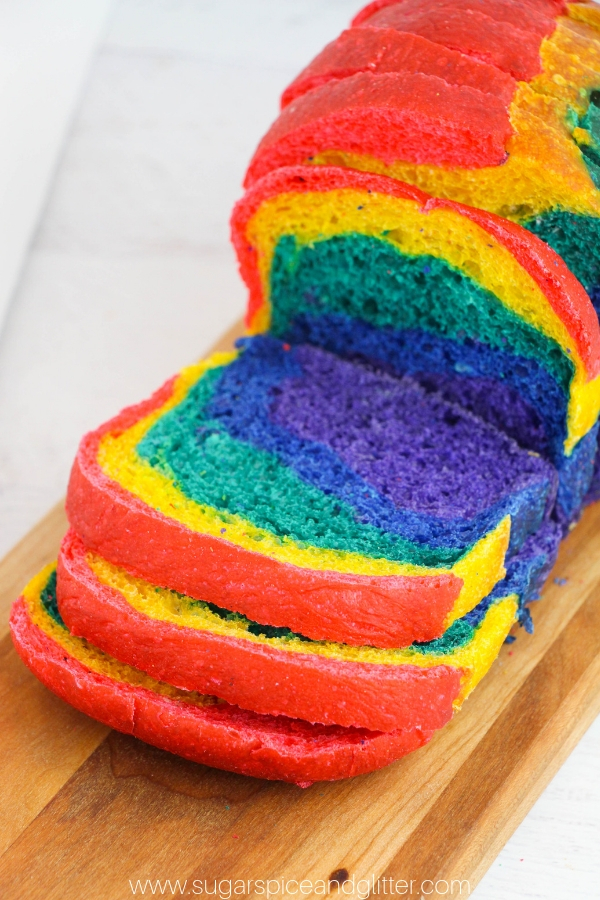
Now, I just layered the different colors of dough for this rainbow effect but you can also make a rainbow swirl bread by rolling out the bread, layering it together and then rolling it into a loaf shape.
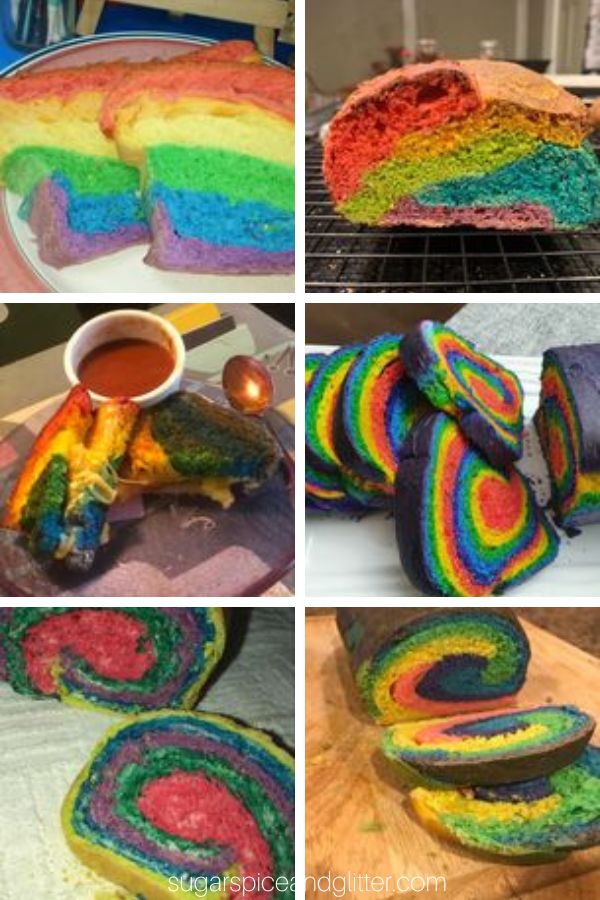
Below you can see various images provided by readers who have tried our rainbow sandwich bread recipe for themselves – so it gives you an idea of the various twists:
This bread can also be frozen, so it would be fun to make a double batch, cut and freeze one loaf and then surprise the kids every once in awhile with a couple slices of rainbow bread. (The loaf can also be frozen whole, without slicing.) Wrap and freeze for up to three months in an airtight freezer container or freezer bags. (This set of freezer containers is a crazy bargain.)
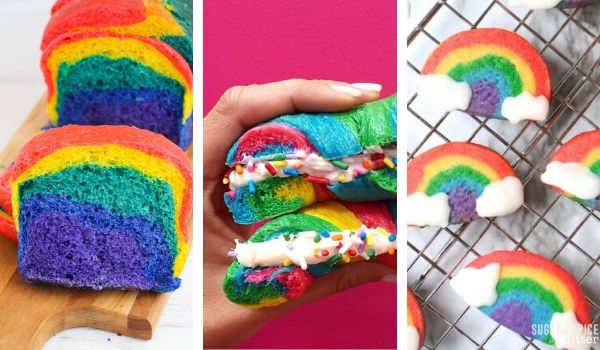
You can also use this rainbow bread to make homemade cinnamon buns! Just swap out the dough called for in our cinnabun recipe and then add the cinnamon-sugar filling and cream cheese frosting, as directed.
More fun Rainbow Recipes:
- Rainbow Pasta Salad (with the vegetables giving the color)
- Rainbow Fruit Salad
- Rainbow Sugar Cookies from In the Kids Kitchen
- Rainbow Grilled Cheese
- No-Cook Rainbow Fudge
- Rainbow Popsicles from the First Year Blog
- Fresh Rainbow Salsa
- Rainbow Bagels from Pop Sugar
Check out our quick recipe video to see how you can make this homemade rainbow sandwich bread for yourself – and then don’t forget to scroll down to grab your free printable recipe card:
Rainbow Wonder Bread Ingredients
- Milk
- Egg Yolk
- All-Purpose Flour
- White Granulated Sugar
- Active Dry Yeast
- Unsalted Butter, softened
- Salt
- Food Dye (red, yellow and blue) <– you can use natural food coloring if you prefer. I used this set of food coloring which has lasted me forever and I love that it creates highly saturated colors with just a drop
Scroll down to the printable recipe card for full measurements.
Tip: if you’re not sure of the freshness of your yeast, stir a small amount into some warm water along with some sugar and let it set for 5 minutes. If it doesn’t froth up, you need new yeast.
Kitchen Tools You May Find Helpful
- Measuring cups and spoons
- Mixing bowl
- 5 medium-sized bowls
- Electric mixer – this is a great hand mixer if you don’t want to make the investment into a stand mixer
- Wooden spoon
- 9″ x 5″ Loaf pan
How to Make Rainbow Bread
Grease 5 medium-sized bowls and set aside.
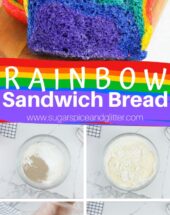
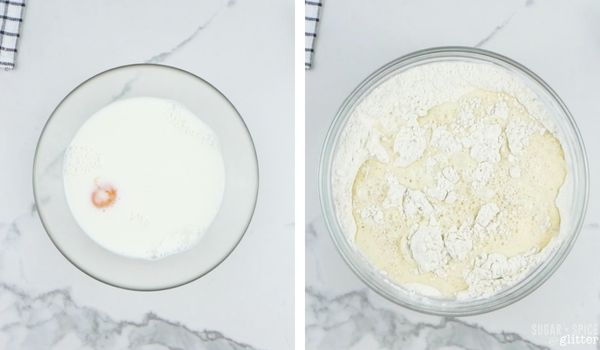
In a small, microwave-safe bowl, whisk together the milk and egg yolk. Microwave 30 seconds, and set aside.
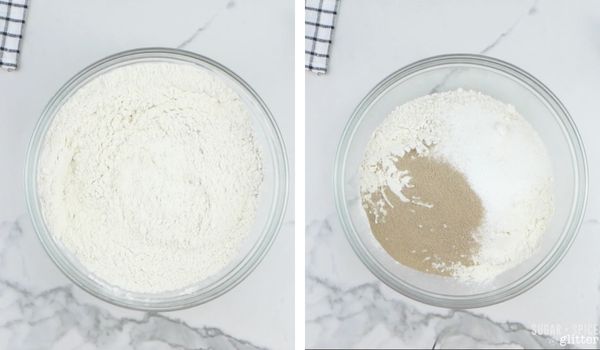
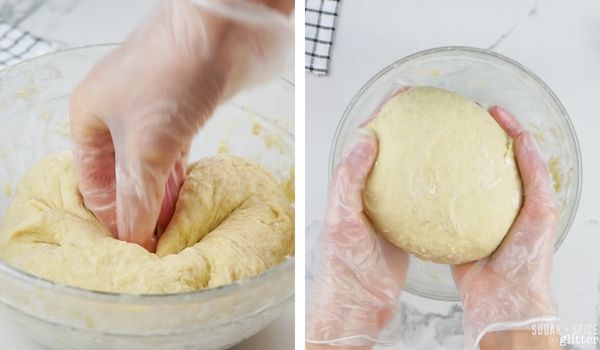
In a large bowl, combine the flour, sugar and yeast. Add the milk mixture, as well as the butter and salt and stir to combine.
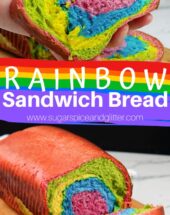
Using a dough hook on a stand mixer, or just your hands, knead the dough (5 minutes with a mixer, 10 minutes by hand) until the dough is smooth and elastic.
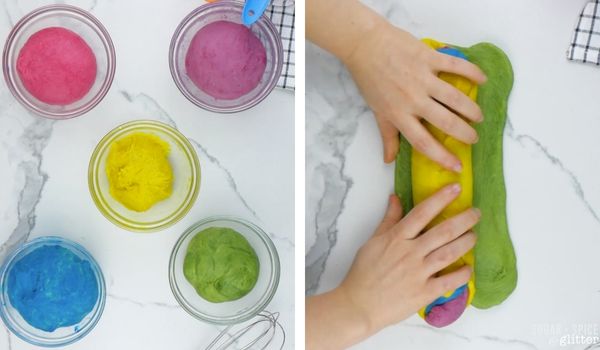
Divide the dough into 5 equal portions.
Working with one ball of dough at a time, dye each ball into one color of the rainbow – red, orange, yellow, green, blue, and purple. Add 5-10 drops of food coloring, knead until fully dyed and then place the dyed ball of dough in it’s own individual, greased bowl. Repeat with all of the dough.
Cover the bowls with a tea towel and let rise for 2 hours.
Grease a loaf pan and line with parchment paper. Set aside.
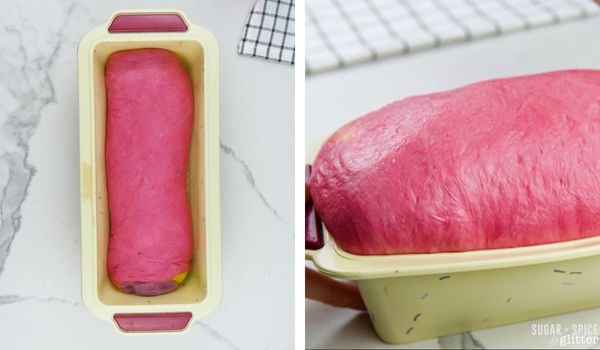
The dough should be at least doubled in size when the tea towel is removed. Punch the dough down and then remove from the bowl.
You can shape the dough into a log a couple of different ways:
- you can roll out the dough to equal-sized rectangles and then lay each layer on top of each other, then roll into a large log/loaf
- or, roll the purple dough into a log shape, then roll the other doughs into rectangles and wrap around the purple log to form the loaf
Place the dough in the prepared loaf pan. Cover with tea towel and allow to double for a second time, about 1 hour.
Preheat oven to 375ºF
Remove the tea towel and bake the bread for 30 minutes, until slightly browning on top and an inserted toothpick comes out clean.
Cool completely before slicing.
Pin this Rainbow Wonder Bread recipe:

Grab your free printable recipe card for our rainbow sandwich bread recipe:
Want to Save This Recipe?
Enter your email & I'll send it to your inbox. Plus, get great new recipes from me every week!
By submitting this form, you consent to receive emails from Sugar, Spice and Glitter.
Homemade Rainbow Bread
A super simple recipe for magical rainbow bread for making rainbow grilled cheeses or other fun sandwiches! This unique sandwich bread takes less than 30 minutes active time to prep.
Ingredients
- 1 cup milk
- 1 egg yolk
- 3 cups all-purpose flour
- 2 1/2 Tablespoons sugar
- 2 1/4 teaspoons active dry yeast (1 packet)
- 1 1/2 Tablespoons unsalted butter, softened
- 2 teaspoons salt
- Food dye (red, yellow and blue)
Instructions
- Grease 5 medium-sized bowls and set aside.
- In a small, microwave-safe bowl, whisk together the milk and egg yolk. Microwave 30 seconds, and set aside.
- In a large bowl, combine the flour, sugar and yeast. Add the milk mixture, as well as the butter and salt and stir to combine.
- Using a dough hook on a stand mixer, or just your hands, knead the dough (5 minutes with a mixer, 10 minutes by hand) until the dough is smooth and elastic.
- Divide the dough into 5 equal portions.
- Working with one ball of dough at a time, dye each ball into one color of the rainbow - red, orange, yellow, green, blue, and purple. Add 5-10 drops of food coloring, knead until fully dyed and then place the dyed ball of dough in it's own individual, greased bowl. Repeat with all of the dough.
- Cover the bowls with a tea towel and let rise for 2 hours.
- Grease a loaf pan and line with parchment paper. Set aside.
- The dough should be at least doubled in size when the tea towel is removed.
- Punch the dough down and then remove from the bowl.
- You can shape the dough into a log a couple of different ways: you can roll out the dough to equal-sized rectangles and then lay each layer on top of each other, then roll into a large log/loaf; OR, roll the purple dough into a log shape, then roll the other doughs into rectangles and wrap around the purple log to form the loaf
- Place the dough in the prepared loaf pan. Cover with tea towel and allow to double for a second time, about 1 hour.
- Preheat oven to 375ºF
- Remove the tea towel and bake the bread for 30 minutes, until slightly browning on top and an inserted toothpick comes out clean.
- Cool completely before slicing.
Recommended Products
As an Amazon Associate and member of other affiliate programs, I earn from qualifying purchases.


Nutrition Information:
Yield:
12Serving Size:
1Amount Per Serving: Calories: 154Total Fat: 3gSaturated Fat: 1gTrans Fat: 0gUnsaturated Fat: 1gCholesterol: 21mgSodium: 364mgCarbohydrates: 28gFiber: 1gSugar: 4gProtein: 4g
Sugar, Spice and Glitter uses an auto-generate nutrition calculator. Nutrition information isn’t always accurate unless analyzed in a scientific lab, so these should be considered more of a guideline than medical information.
This rainbow sandwich bread is such a fun lunch box surprise for the kids! It would be perfect for St Patrick’s Day or a Rainbow party.
For more St. Patrick’s Day-inspired recipes, check out our full collection here:

For more beautiful breads, check out our full bread recipe collection here:
For more homemade pantry staples, check out our full pantry staples recipe collection here:


How do you put the dyed dough on loaf pan to make rainbow coloured bread
?
Hi Maria,
You can shape the dough into a log a couple of different ways:
– you can roll out the dough to equal-sized rectangles and then lay each layer on top of each other, then roll into a large log/loaf
– or, roll the purple dough into a log shape, then roll the other doughs into rectangles and wrap around the purple log to form the loaf
My bread came out beautiful but I could not get the colors bright! I just kept dumping colors in. It’s perfect for spring, though
Is there a substitute for egg in the recipe?
You list the ingredients, but not the amounts to be added. Can you do that for me please? I would greatly appreciate it.
Hi Peggy, I only list the ingredients and not amounts further up in the recipe to encourage people to read through the recipe fully before reaching the recipe card. Unfortunately, I’ve had too many people not read the recipe before making a recipe and this seems to be the best way to encourage a thorough reading. Sorry for any confusion.
You need to make corrections to the recipe anyway. You have active yeast on the ingredient list, but no where is it listed in the recipe. For a first timer, this is huge. Also you state to prepare 5 bowls but you list 6 colors. Maybe reword it to say however many colors you use, have the same amount of bowls. Oh! And wear gloves or you’ll dye your hands. Lol.
Will this come out similar with dairy free butter and milk?
Hi Jessi,
I would imagine it would come out a bit more dense but it should still be tasty and rise.
This was soooooo good….the yellow portion fell on the floor during prep which was a bummer but it did not affect the funished product. I just adjusted the cooking time and had the most delicious loaf of bread ever….thank you so much.
Oh no to the yellow portion! But I’m so glad you liked it! Thank you for your comment 🙂
I have made this two times as trial runs. The colors come out great and it looks great but some of my layers separate. Am I doing something wrong?
Hi Ramona, I’m sorry that I missed your comment. Do you mean the layers of bread separate? That suggests to me that they were kneaded a bit too long and also didn’t have enough time to rise together to attach.
Could I ask why you microwave the milk and eggs.. would allowing them to come to room temp work just as well, or heating them on the stove for a bit? Just want to make sure I’m not missing something h that microwaving specifically does.. microwave scrambled eggs puff up a bunch and skillet eggs do t. Thank you!
Hi Christi,
In order to activate the yeast, we need our the “activating liquid” to be 90F. This won’t cook the eggs. I like adding the egg to the milk because sometimes when you add an egg to hot milk, some pieces will become cooked – but I don’t find that they do if the egg is whisked in prior to microwaving.
This looks amazing! I’m curious though, the dough is basically double-kneaded and then rolled out. How do you avoid a dense, flat loaf? Is there a reason to knead the whole mass of dough before adding dye, rather than dividing into portions after stirring the ingredients together and kneading each portion with dye just once?
One of your other reviewers mentioned that their coloring came out pale, but I’m going to try to get pastels on purpose- this would make awesome French toast for Easter breakfast!
Hi Ellie,
I can totally see how the dough seems like it’s double kneaded but you’re not fully kneading the dough when adding the food dye – you’re just kneading it enough to incorporate the color, about 30 seconds to a minute max. I haven’t had an issue with the bread coming out dense, but if you’re worried about that you can try to portion out the dough before kneading – but that will be messier and a bit harder than dividing the kneaded dough. You can also cut the kneading time short by a couple minutes and finish each dough ball off by hand.
I’d love to hear how yours turns out – Easter French Toast is such a great idea!
This is the worst bread recipe I have ever worked with! Yeast, eapecially when it is already mixed with the other dry ingredients, cannot possibly be activated by the milk and egg being heated to 90° (if it even reached 90° in 30 seconds). The minimum temperature of the liquids added to the yeast and other dry ingredients must 140°F. For this reason, the recipe was a fail TWICE!
I made this for a kid’s tv show and had a couple failed attempts before making it successfully! In the end I made a double batch and separated each batch into 3 colours for 6 colours total. I also added the food colouring to the wet ( microwaved milk, egg and melted butter ) before adding to the dry and which made for 6 kneading jobs but a much more uniform colour. I also HIGHLY recommend using Rapid-Rise yeast for a better, easier rise. Thank you ! 🙂
My daughter asked if I could make Rainbow Bread so I googled and your recipe was what came up. Tried it and successfully made it. Lesson learned, wear gloves when using dye! 😂 I have colorful cuticles! Wish I could send you a picture!! This is in the “will make again“ pile!! Thanks for the recipe.
Sheryl
Ps. Send an email and I’ll send a picture. I’m going to try and tag you on Instagram