
Ham & Cheese Lunch Pockets
Welcome to Sugar, Spice & Glitter! Please note, this post may contain affiliate links. For more details, see our Full Disclosure.
A sandwich-free lunch box idea, these Homemade Ham & Cheese Lunch Pockets are a delicious treat your kids will be so excited to find in their lunch boxes!

This is a sponsored post written by me on behalf of Tyson Foods, Inc. All opinions are entirely my own.
Homemade Lunch Pockets Recipe
We got into a real rut at the end of last school year.
I’m pretty sure I sent the same basic lunch for about three weeks straight – ham sandwich, guacamole and snap peas, green smoothie powder, cut up cheese, and a small container of whatever fruit was in the fridge that day. Healthy, but completely lacking any creativity and totally monotonous. As a result, my daughter started eating less and less of what was being sent because it just wasn’t interesting anymore. (Who could blame her?)
Why is it that we put so much effort into supper, but lunches tend to get the same old thing?
This school year, I’m making a better effort to give my daughter lunches she can get excited about.
As a bonus, putting a little extra effort into her lunches means my lunches will also be delicious – especially since today’s recipe makes 12 servings!

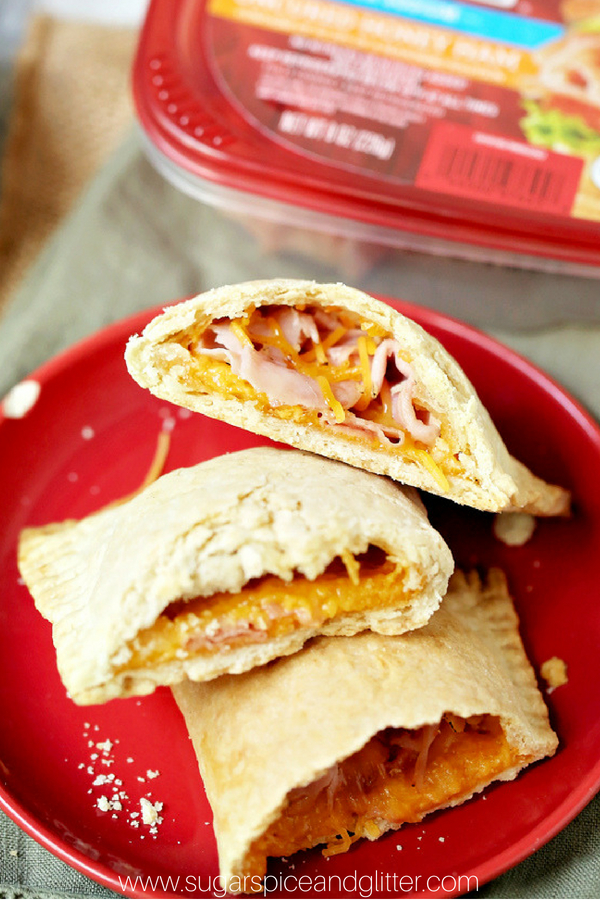
These Honey Ham & Cheese Lunch Pockets are a fun, homemade twist on a teenage classic.
This homemade meal is pretty quick and easy to whip up. The crust comes together in just a couple quick minutes, and then you just need to roll it out, cut into rectangles, fill and bake. The whole process takes less than 20 minutes to make, and then 20 minutes to bake – and you can get a whole week’s worth of lunches out of them! (Maybe a couple days less if you have more than two kids.)
Not only would these be great for lunch boxes, but they would also be fun for parties or curbing hunger after-school and between extra-curricular activities.
I wanted a thin pie-like crust for our homemade lunch pockets, but you could use pizza dough to make a denser, yeast-based dough that is more bread-y. Personally, I think that would be way too heavy to send in my daughter’s lunch and since we already make homemade pizza or panzerrotti every couple of weeks, I think she enjoys these as a welcome change. (Plus it’s easier to warm them completely through and send them in an insulated container.)
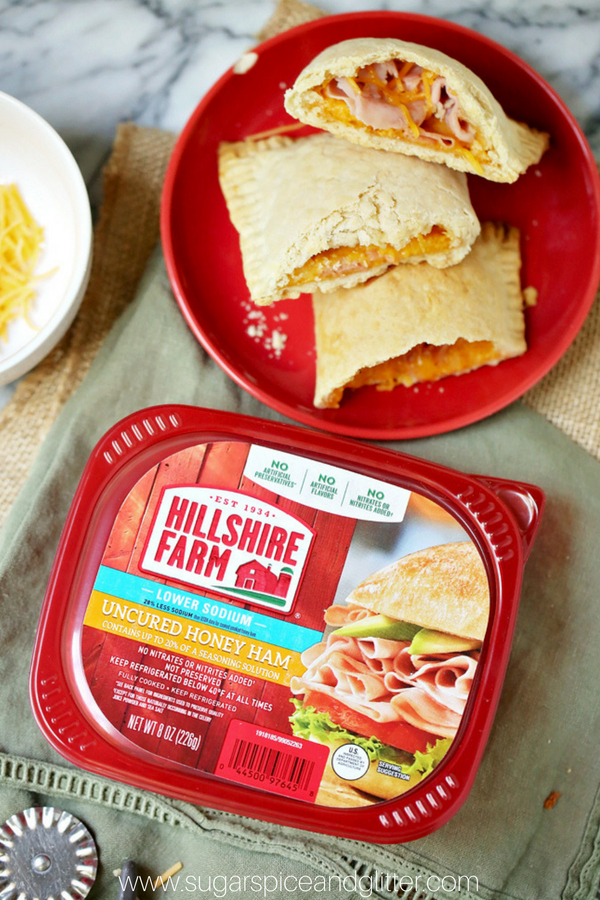
These homemade lunch pockets have a flaky, buttery crust and a satisfying filling of cheese and honey ham.
While at Walmart picking up a few back-to-school supplies, we also grabbed the ingredients to make this recipe – including Hillshire Farm® Honey Ham.

Ingredients for Ham & Cheese Lunch Pockets
For the crust:
- 2 cups flour
- 1 teaspoon salt
- 1 Tablespoon sugar
- 6 Tablespoon butter
- 6 Tablespoon lard or shortening
- 6-8 Tablespoon ice water
For the filling:
- 2 cups shredded cheese
- 1-8oz package Hillshire Farms Honey Ham
- 1/2 cup sauce, optional
Plus: additional 1/2 cup butter, for brushing
Tip: you can swap out the fillings listed here for your desired lunch fillings.
Kitchen Tools You May Find Helpful
- Mixing bowl
- Measuring cups and spoons
- Cheese grater
- Rolling pin
- Sharp kitchen knife or pizza cutter
- Silicone tray liner
- Baking sheet
- Pastry brush

How to Make Homemade Ham & Cheese Lunch Pockets
Preheat your oven to 400°F.
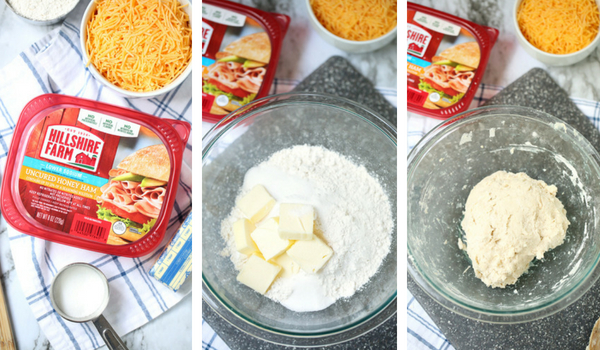
Shred your cheese and set aside.
Mix the crust ingredients together with a fork or your hands. You still want the dough to crack easily, this will not be smooth like a play dough.
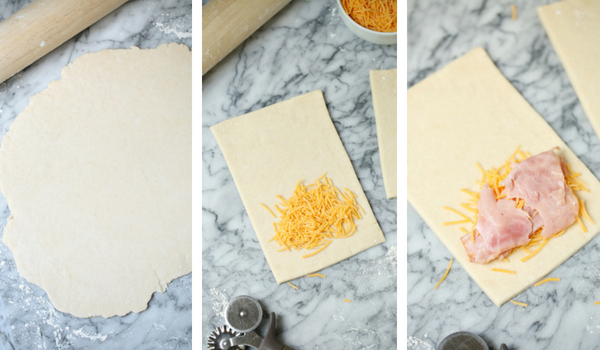
Roll your pie crust out to a 1/4″ to 1/2″ thickness – whichever you prefer.
Cut the dough into rectangles – the short end will be the “length” of your lunch pockets, and the long end will be double the width. (See above image)
We did approximately 4 inches across the bottom and 6 inches tall, which resulted in 4″x3″ lunch pockets. Adjust your sizing according to your desired final results.
Add 2-3 Tablespoons of cheese and a couple pieces of ham to the bottom half of each rectangle, then fold over the rectangle to cover.
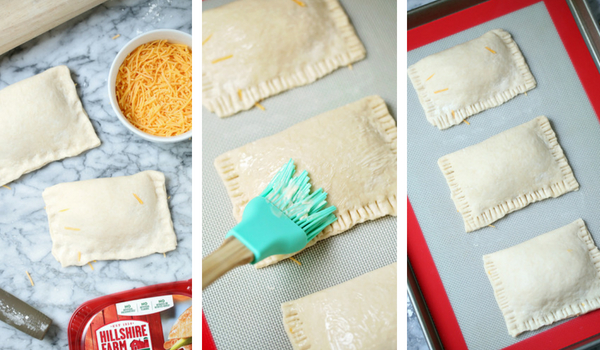
Press together the open edges of the lunch pockets and then crimp with a fork (if desired).
Place the assembled pastries on a silicone liner-lined baking tray (or parchment-paper lined) and bake for 20-25 minutes, though start checking at 15 minutes. The pastries should be lightly golden with only slight browning at the edges.
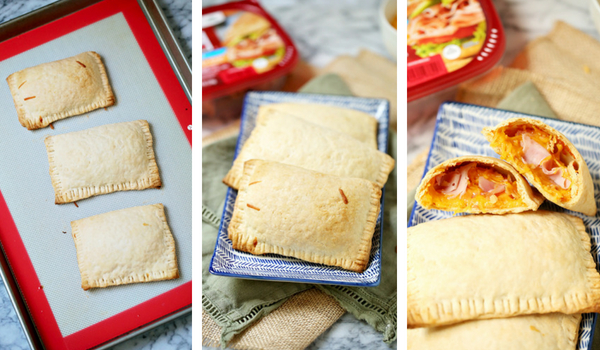
These lunch pockets can be enjoyed right away, or reheated later for 25-30 seconds in the microwave. (Some kids may even prefer them cold.)
Homemade Honey Ham & Cheese Lunch Pockets for a Sandwich-free Lunch:

Grab your free printable for our Homemade Lunch Pockets recipe:
Want to Save This Recipe?
Enter your email & I'll send it to your inbox. Plus, get great new recipes from me every week!
By submitting this form, you consent to receive emails from Sugar, Spice and Glitter.
Ham & Cheese Lunch Pockets
A delicious homemade ham and cheese lunch pocket is the perfect hot lunch box idea - these ham and cheese pastries are filling and budget-friendly
Ingredients
For the crust:
- 2 cups flour
- 1 teaspoon salt
- 1 Tablespoon sugar
- 6 Tablespoon butter
- 6 Tablespoon lard or shortening
- 6-8 Tablespoon ice water
For the filling:
- 2 cups shredded cheese
- 1-8oz package Hillshire Farms Honey Ham
- 1/2 cup sauce, optional
- Plus: additional 1/2 cup butter, for brushing
Instructions
- Preheat your oven to 400F.
- Shred your cheese and set aside.
- Mix the crust ingredients together with a fork or your hands. You still want the dough to crack easily, this will not be smooth like a play dough.
- Roll your pie crust out to a 1/4" to 1/2" thickness - whichever you prefer.
- Cut the dough into rectangles - the short end will be the "length" of your lunch pockets, and the long end will be double the width.
- We did approximately 4 inches across the bottom and 6 inches tall, which resulted in 4"x3" lunch pockets. Adjust your sizing according to your desired final results.
- Add 2-3 Tablespoons of cheese and a couple pieces of ham to the bottom half of each rectangle, then fold over the rectangle to cover.
- Press together the open edges of the lunch pockets and then crimp with a fork (if desired).
- Place the assembled pastries on a silicone liner-lined baking tray (or parchment-paper lined) and bake for 20-25 minutes, though start checking at 15 minutes. The pastries should be lightly golden with only slight browning at the edges.
Nutrition Information:
Yield:
12Serving Size:
1Amount Per Serving: Calories: 371Total Fat: 28gSaturated Fat: 15gTrans Fat: 1gUnsaturated Fat: 11gCholesterol: 65mgSodium: 625mgCarbohydrates: 20gFiber: 1gSugar: 2gProtein: 10g
Sugar, Spice and Glitter uses an auto-generate nutrition calculator. Nutrition information isn’t always accurate unless analyzed in a scientific lab, so these should be considered more of a guideline than medical information.

These Homemade Ham & Cheese Lunch Pockets are a delicious alternative to sandwiches and a filling choice for lunch boxes or afterschool snacks.
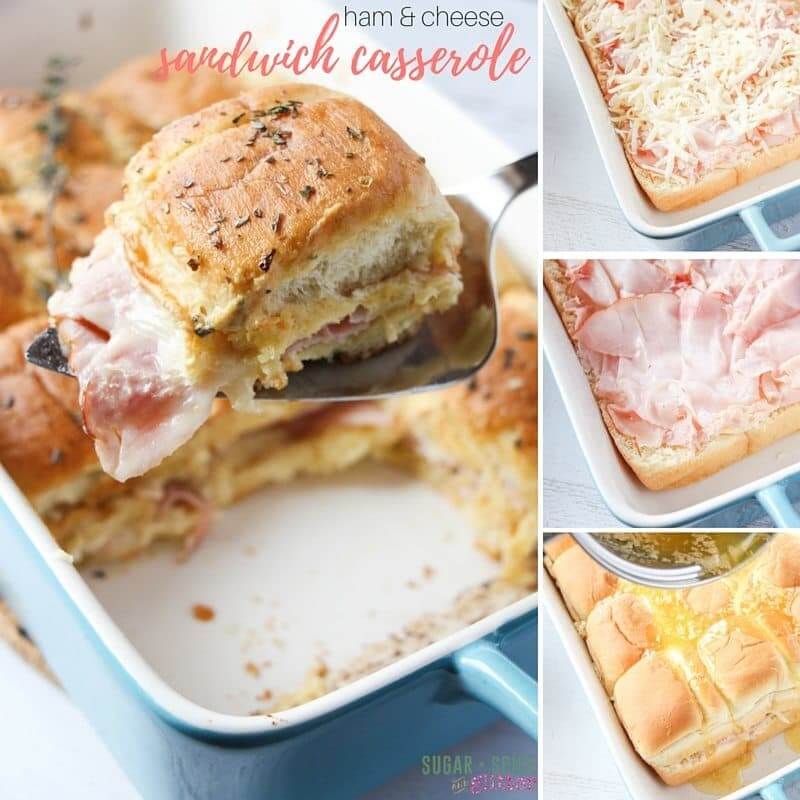
For another delicious recipe using Hillshire Farm Lunch Meats, check out our Ham & Cheese Sliders.


These will be perfect for the kids as an afternoon snack.
They are big fans of ham and cheese…..aren’t we all 😉
Yum! I’m always looking for delicious & easy breakfast! Love this idea!