
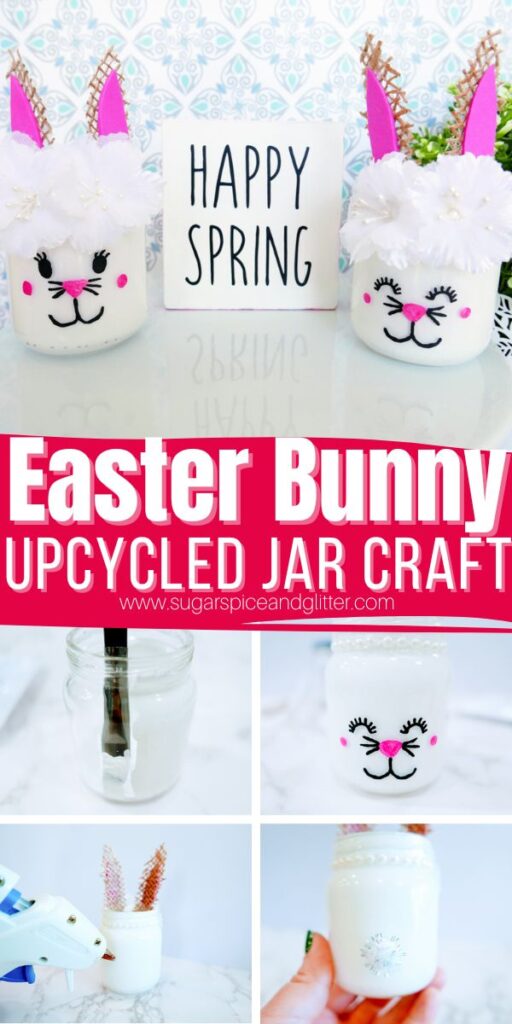
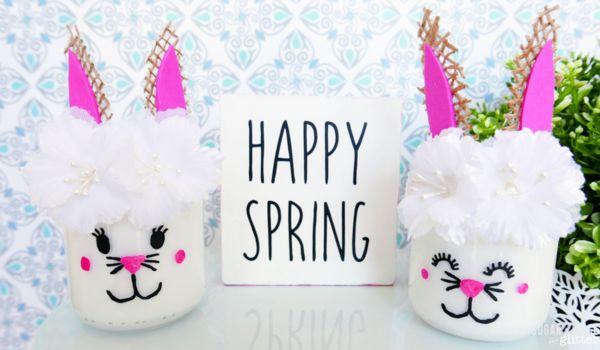
Bunny Mason Jar Craft (with Video)
Welcome to Sugar, Spice & Glitter! Please note, this post may contain affiliate links. For more details, see our Full Disclosure.
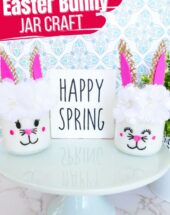
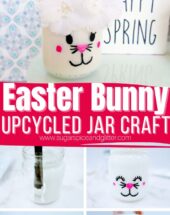
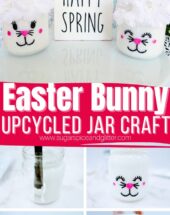
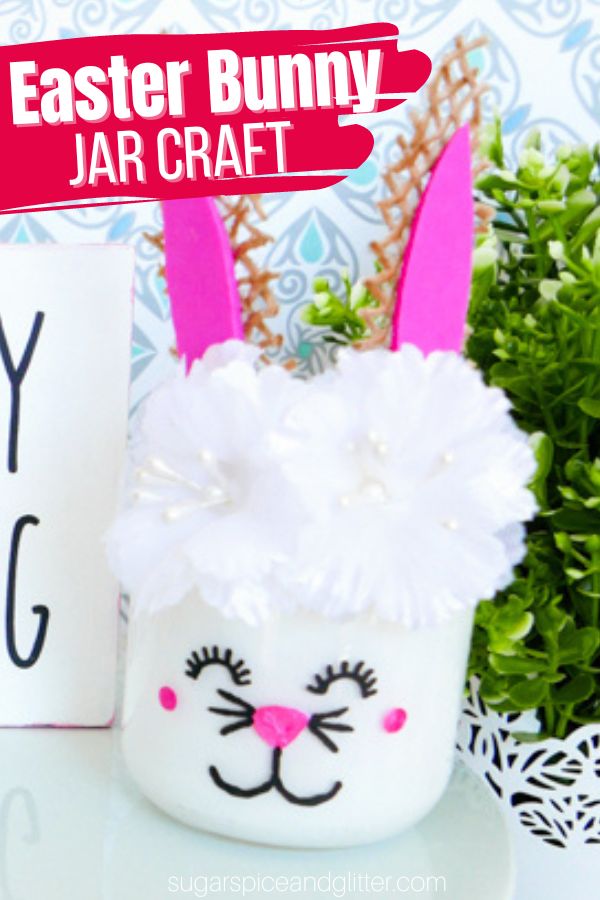
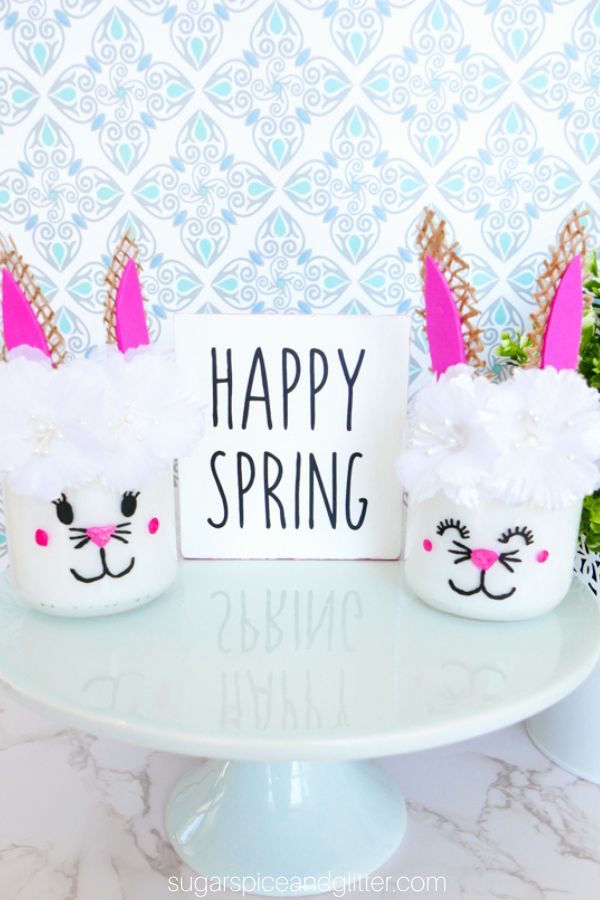
A cheap and cheerful homemade Easter decor idea using an upcycled glass jar, these Easter Bunny Mason Jars are a fun addition to your Easter decor and can serve a multitude of purposes – from holding Easter treats, corralling party supplies or even as a seasonal candle holder.
Easter Bunny Jar Craft
I love decorating my home for the holidays – no matter how small the holiday is. However, the flip side of my desire to decorate is that I’m also extremely frugal.
I’m happy to treat myself to a couple new pieces of seasonal home decor items each year so I can slowly build a collection, but I’m not about to drop $500+ to outfit the whole house in a seasonal theme… especially since I’ll be taking down and storing that decor in less than a month.
So to fill up the rest of our space, I like to go the DIY route.
These easy Easter Bunny Jars are a cheap and cheerful way to add a bit of Easter whimsy to your decor using empty glass jars and everyday craft supplies.
Personally, all of these craft supplies are items that we already had in our craft collection (except for the pearl wrap) and I encourage you to use what you have before shopping for more craft supplies to make this a budget-friendly decor item. However, even if a couple items had been purchased new there are so many other ways we can use them throughout the year.
Use these Mason Jar Bunnies to hold party supplies, Easter treats, straws, electric candles or just display as-is.
Be sure to check out our step-by-step video to see how to make your Easter bunny mason jar craft – and then don’t forget to scroll down to grab your free printable recipe card:
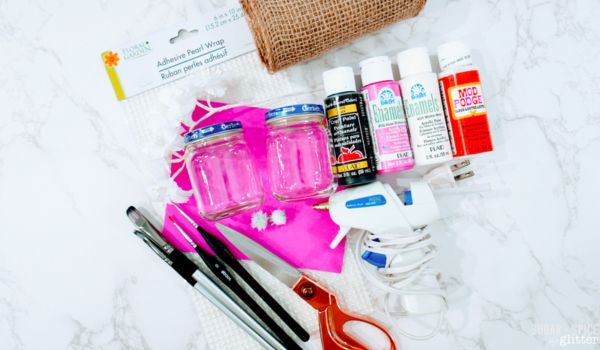
Materials to Make a Bunny Jar Craft
- 2 clean and empty baby food jars
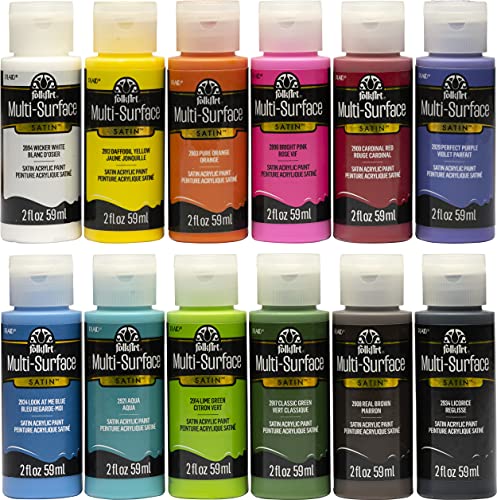
- White, pink and black acrylic glass paint <– This is a good set that has multiple colors, and can be used on glass
- Craft paint brushes <– I like these for doing small details, such as the face on the bunny and I like these for painting broader areas, such as the inside of the jar
- Burlap ribbon or material
- Mod Podge
- Pink self-adhesive foam sheet
- Scissors
- 4 small white flowers (Hobby Lobby has a great assortment in their wedding section)
- Self adhesive pearl wrap
- Hot glue gun and glue sticks
- 2 small white craft pom poms
Tip: swap out any of these craft materials for supplies you already have on hand that will still achieve the same purposes – the pearl wrap can be swapped for ribbon, the burlap can be swapped for craft foam or cardstock, etc.
How to Make a Bunny Jar
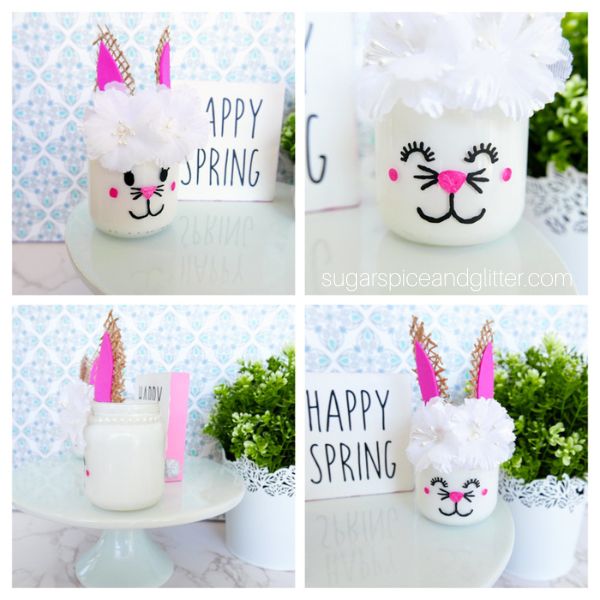
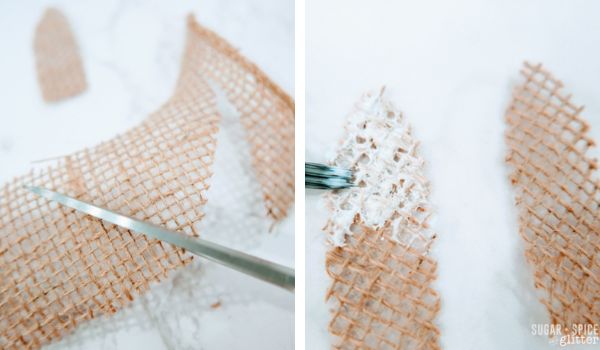
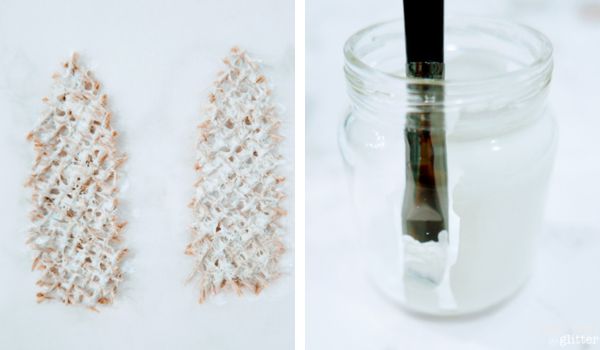
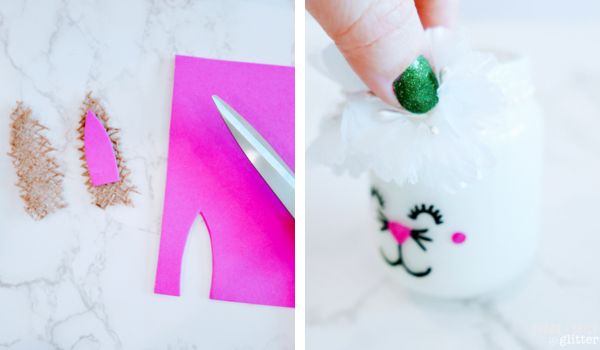
Cut bunny shaped ears out of the burlap ribbon. I cut at an angle to keep the material from fraying. Using a paint brush, lightly cover each ear with Mod Podge. Set aside to dry completely. It will take approximately 30 minutes for them to fully dry. (Alternatively, you can spray them in a well ventilated area with clear acrylic sealer, and they will dry much quicker)
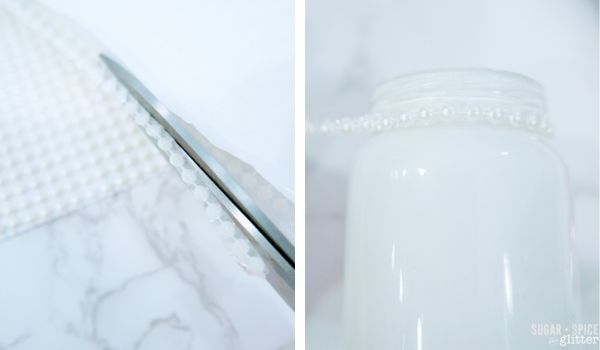
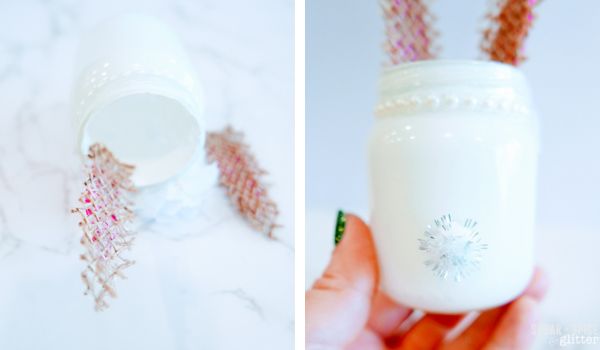
Next, paint the entire inside of the empty jars with white paint. If you see streaks, let the paint dry, and then paint a second coat.
Cut a strip of the self adhesive pearl wrap, and attach around the top of the jar, right below the ridges.
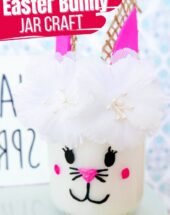
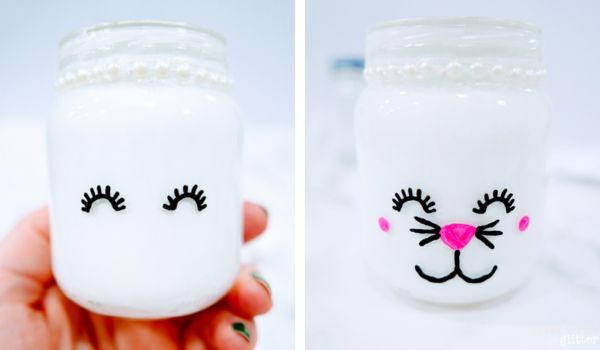
Using a small detail paint brush, paint the eyes, nose, whiskers and rosy cheeks on the outside of the glass jar, with the black and pink paint. I painted one bunny with closed eyes, and one open just to give them some character.
Cut bunny shaped ears out of the pink adhesive foam, slightly smaller than the burlap shaped ears. Remove backing, and stick to the burlap ears, leaving extra burlap at the bottom.
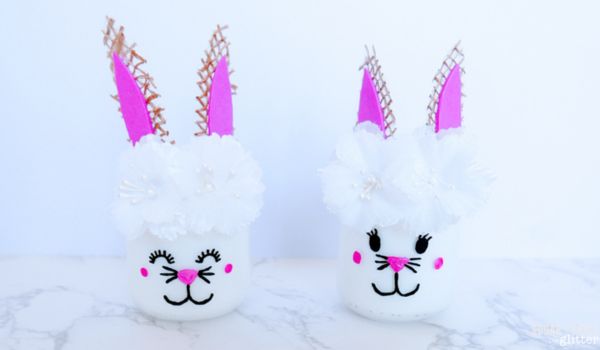
With a hot glue gun, attach two small white flowers above the eyes of the bunny. Next, hot glue the ears to the inside of the jar, and lastly, hot glue the pom pom tail to the back of the jar.
Repeat all steps with the second jar to make another bunny.
Pin this Upcycled Easter Bunny Jar Craft for a cheap and cheerful homemade Easter decor idea:
Grab your free printable instructions for our Easter Bunny jar craft idea:
Want to Save This Recipe?
Enter your email & I'll send it to your inbox. Plus, get great new recipes from me every week!
By submitting this form, you consent to receive emails from Sugar, Spice and Glitter.
Easter Bunny Mason Jar Craft
How to make an Easter Bunny Mason Jar craft using everyday craft supplies and an empty glass jar. Use these Mason Jar Bunnies to hold party supplies, Easter treats, straws, electric candles or just add to your decor for a touch of Easter whimsy.
Materials
- 2 clean and empty baby food jars
- White, pink and black acrylic glass paint
- Burlap ribbon or material
- Mod Podge
- Pink self-adhesive foam sheet
- 4 small white flowers
- Self adhesive pearl wrap
- 2 small white craft pom poms
Tools
- Craft paint brushes
- Scissors
- Hot glue gun and glue sticks
Instructions
- Cut bunny shaped ears out of the burlap ribbon. I cut at an angle to keep the material from fraying. Using a paint brush, lightly cover each ear with Mod Podge. Set aside to dry completely. It will take approximately 30 minutes for them to fully dry. (Alternatively, you can spray them in a well ventilated area with clear acrylic sealer, and they will dry much quicker)
- Next, paint the entire inside of the empty jars with white paint. If you see streaks, let the paint dry, and then paint a second coat.
- Cut a strip of the self adhesive pearl wrap, and attach around the top of the jar, right below the ridges.
- Using a small detail paint brush, paint the eyes, nose, whiskers and rosy cheeks on the outside of the glass jar, with the black and pink paint. I painted one bunny with closed eyes, and one open just to give them some character.
- Cut bunny shaped ears out of the pink adhesive foam, slightly smaller than the burlap shaped ears. Remove backing, and stick to the burlap ears, leaving extra burlap at the bottom.
- With a hot glue gun, attach two small white flowers above the eyes of the bunny. Next, hot glue the ears to the inside of the jar, and lastly, hot glue the pom pom tail to the back of the jar.
- Repeat all steps with the second jar to make another bu
Notes
Tip: swap out any of these craft materials for supplies you already have on hand that will still achieve the same purposes - the pearl wrap can be swapped for ribbon, the burlap can be swapped for craft foam or cardstock, etc.
Recommended Products
As an Amazon Associate and member of other affiliate programs, I earn from qualifying purchases.
-
 FolkArt PROMO830 Multi Satin Finish Acrylic Craft Paint Set Designed for Beginners and Artists, Non-Toxic Formula That Works on All Surfaces, 2 oz, 2 Fl Oz (Pack of 12), 12 Colors May Vary, 24
 -
LaRibbons 3" Wide Burlap Fabric Craft Ribbon 10 Yards, 01 Tan
-
85 Sheets Bright Craft Foam Sheets Glitter Craft Foam Sheets 17 Assorted Rainbow Colors 9x6" 2mm Thick with Scissor Stencils Ruler Pencils for Kids Classroom Party Scrapbooks Artwork Projects 9" x 6"


I’d love to hear if you end up making this craft – and any twists you add to make it your own!
For more easy Easter crafts for kids, check out our full collection here:
For more crafts we’ve loved over the years, check out our full craft collection here:


My daughter made this for me as a surprise so I had to come and thank you for providing such a great tutorial for kids to follow.
So fun! What a great idea. Thnks.
Hope you enjoy it! Thanks for stopping by and commenting.
A very insightful article. I got a lot of useful information from this.
Such a cute Easter decoration! I love how simple materials can be transformed into something special.