Unicorn Wall Hanging (with Video)
Welcome to Sugar, Spice & Glitter! Please note, this post may contain affiliate links. For more details, see our Full Disclosure.
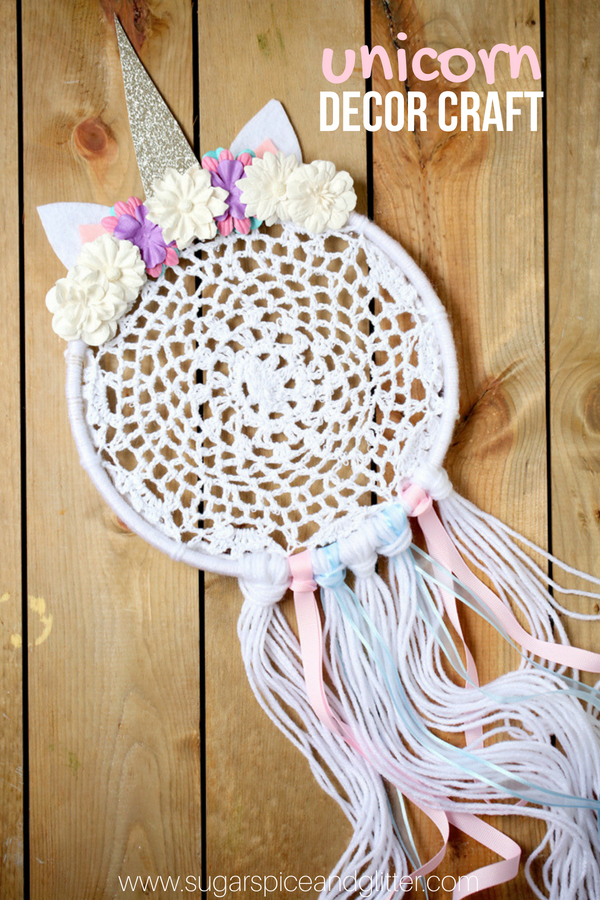
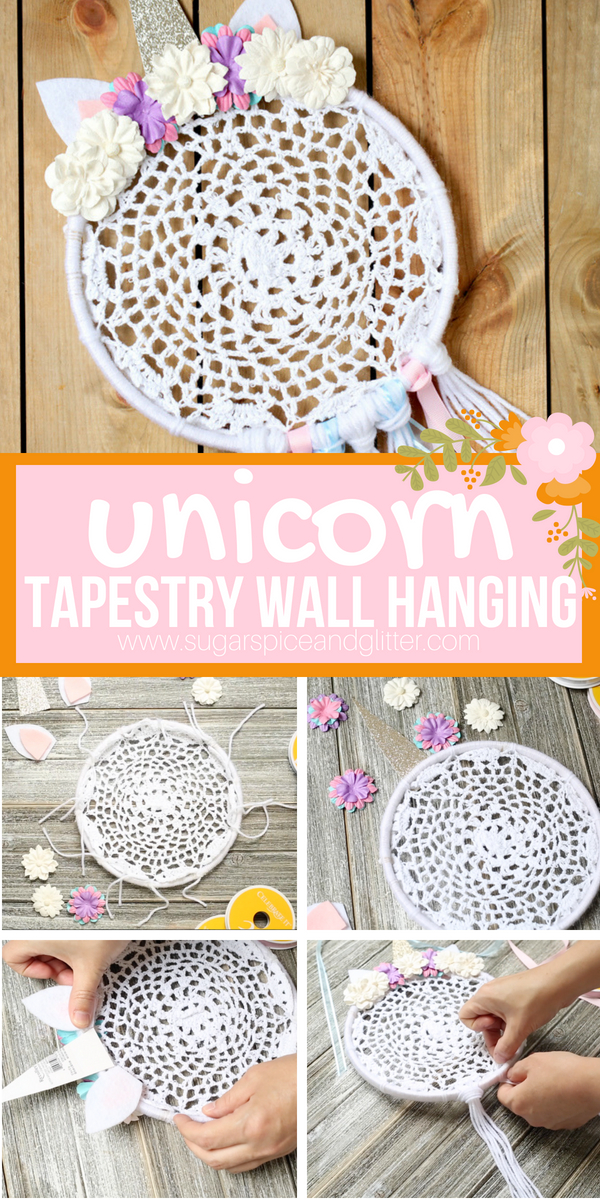
A cute unicorn craft for the playroom or a kid’s bedroom, this magical Unicorn Wall Hanging uses leftover craft supplies that you probably already have on hand!
Unicorn Tapestry Craft
I love adding some fun and whimsy to our home decor, while keeping things somewhat sophisticated and classy.
Being an all-girls household means that we don’t have to keep our girly decor to just Ella’s bedroom or the playroom – every room in the house is fair game!
I’ve always loved using doilies in unexpected ways for our home decor, and at our old house had some pretty doilies displayed in embroidery hoops for some textured wall art. And with a unicorn-obsessed 6 year old in the house, I thought a unicorn twist on my doily displays was in order!
This cute DIY Unicorn Tapestry is super simple to make and you can do a few different sizes and colors to make a wall of them! (Or just add some plain embroidery-framed doilies to let the main unicorn wall hanging be the star of the show.)
We used leftover felt and gold glitter paper for the ears and horn and added bunches of yarn to suggest the unicorn’s main. We had lots of white yarn on hand, and some pastel colored ribbons, but feel free to use what you have or design your own color scheme. I think a rainbow version would be super cute, too! (We just have a pink, white and gold color scheme in our dining room with pops of blue.)
I want to take a moment and clarify that this isn’t a unicorn dreamcatcher. (Although if you’re looking to make one, definitely check out this one from Hello, Wonderful.)
Personally, I think if you want to make a dreamcatcher with your child, you should take some time to understand the cultural significance and history of them – and if possible, contact a local Friendship Centre or Anthropology Museum and see if they have dream catcher workshops so children can experience a bit more of the culture as they create.
There is some debate whether or not dreamcatchers are actually sacred, and I think it’s safest to say that some tribes consider them sacred while others are more open to seeing dreamcatchers in popular culture.
For us, this unicorn wall hanging is not intended to be a dreamcatcher – it is a pretty tapestry-inspired piece of wall art that is meant to be pretty and magical. We did not “weave a web” to catch bad dreams, or attach beads and feathers which are culturally significant in a dreamcatcher. (You can ready more about dreamcatchers here.)
Check out our quick how-to make a unicorn wall hanging craft video and then don’t forget to scroll down to grab your free printable instructions.
Materials for Unicorn Wall Hanging
- Embroidery hoop
- Doily
- Pastel colors of yarn and ribbons
- Pastel fabric flowers
- Yarn needle
- Scissors
- Hot glue
- Glitter gold paper
Tip: instead of pastels, you can use rainbow flowers and rainbow colors of yarn for this unicorn craft.

How to Make a Unicorn Wall Hanging
There are two ways to do this craft: use the embroidery hoop to “hold your doily and leave it unwrapped/bare, or wrap the embroidery hoop with yarn and tie the doily securely in place.
For this craft, we used the second method, but either method produces cute crafts! If using the first method, ensure the embroidery hoop is secure within the two halves of the embroidery hoop – this step is easier for adults than kids.
After you are done completely wrapping your embroidery hoop with yarn (preferably in a color that matches the doily), use 6″ strips of yarn to tie the doily to the sides of the embroidery hoop. Single tie the knots at first and then only double knot once you are sure that the doily is in the correct position.
After double knotting the strips of yarn, cut off the excess ends.
NOTE: you can leave one set of ends uncut to serve as a hanging loop, if desired.
Cut the unicorn horn out of the gold glitter paper, and the ears out of the felt. (I am not providing a template for these as I want you to feel free to be creative and make the horn as long and sharp or as short and stubby as you wish!) The ears are essentially two larger white triangles and two smaller pink triangles.
Glue the pink felt into the white felt and let dry.
Using your choice of glue, attach the horn in what will become the “center top” of your embroidery hoop, gluing the glitter side directly to the yarn.
Flip over the embroidery hoop so that the horn is touching the table and the glitter side is facing up.
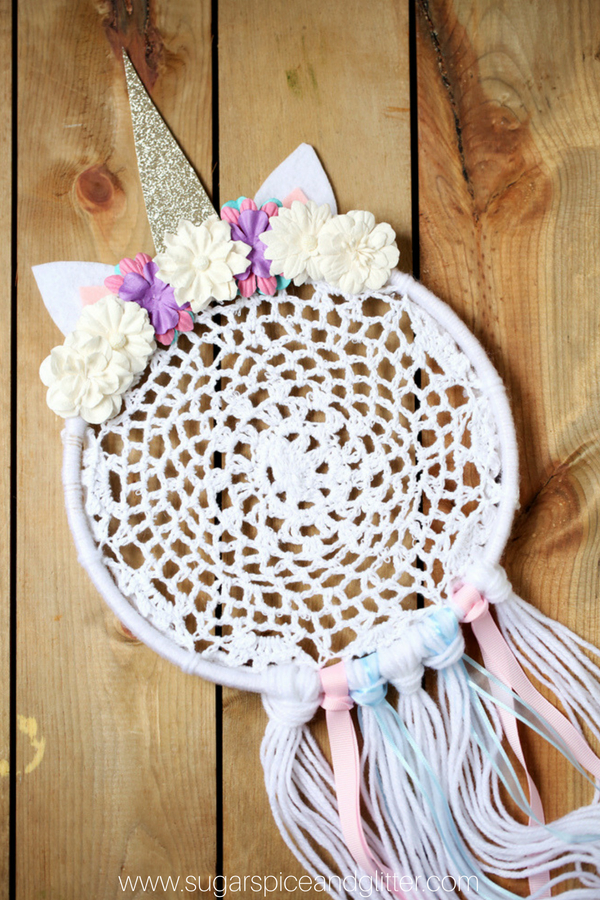
Attach the flowers in whatever pattern you’d like, ensuring that they keep the horn in the center of their arrangement.
Once the flowers are dry and secure, flip the embroidery hoop back over and attach the unicorn horns, ensuring that you are gluing the pink side to the embroidery hoop (towards the flowers) so that they face out when the tapestry is finished.
Cut strands of yarn in 10″ or larger strips (depending on how long you’d like your “unicorn mane” to hang – 10″ will give approximately a 5″ hang, while 20″ will add 10″ of length). You will need 5-6 groups of 5 strands.
Gather one group of yarn strands together, and using a simple knot (like the simple square knot seen here) tie off on the bottom of the embroidery hoop, opposite the flowers (as shown in the video). Repeat with the additional groups of yarn, and also add in some strands of ribbon, as desired.
Hang your unicorn tapestry up and enjoy your handiwork!
Pin this Unicorn Tapestry Craft to add some magical decor to your home:
Grab your free printable instructions for our unicorn decor craft:
Want to Save This Recipe?
Enter your email & I'll send it to your inbox. Plus, get great new recipes from me every week!
By submitting this form, you consent to receive emails from Sugar, Spice and Glitter.
Unicorn Wall Hanging
Materials
- Embroidery hoop
- Doily
- Pastel colors of yarn and ribbons
- Pastel fabric flowers
- Glitter gold paper
- Hot glue, or glue of choice
Tools
- Yarn needle
- Scissors
Instructions
- There are two ways to do this craft: use the embroidery hoop to "hold your doily and leave it unwrapped/bare, or wrap the embroidery hoop with yarn and tie the doily securely in place.
- For this craft, we used the second method, but either method produces cute crafts! If using the first method, ensure the embroidery hoop is secure within the two halves of the embroidery hoop - this step is easier for adults than kids.
- After you are done completely wrapping your embroidery hoop with yarn (preferably in a color that matches the doily), use 6" strips of yarn to tie the doily to the sides of the embroidery hoop. Single tie the knots at first and then only double knot once you are sure that the doily is in the correct position.
- After double knotting the strips of yarn, cut off the excess ends.
- NOTE: you can leave one set of ends uncut to serve as a hanging loop, if desired.
- Cut the unicorn horn out of the gold glitter paper, and the ears out of the felt. (I am not providing a template for these as I want you to feel free to be creative and make the horn as long and sharp or as short and stubby as you wish!) The ears are essentially two larger white triangles and two smaller pink triangles.
- Glue the pink felt into the white felt and let dry.
- Using your choice of glue, attach the horn in what will become the "center top" of your embroidery hoop, gluing the glitter side directly to the yarn.
- Flip over the embroidery hoop so that the horn is touching the table and the glitter side is facing up.
- Attach the flowers in whatever pattern you'd like, ensuring that they keep the horn in the center of their arrangement.
- Once the flowers are dry and secure, flip the embroidery hoop back over and attach the unicorn horns, ensuring that you are gluing the pink side to the embroidery hoop (towards the flowers) so that they face out when the tapestry is finished.
- Cut strands of yarn in 10" or larger strips (depending on how long you'd like your "unicorn mane" to hang - 10" will give approximately a 5" hang, while 20" will add 10" of length). You will need 5-6 groups of 5 strands.
- Gather one group of yarn strands together, and using a simple knot (like the simple square knot seen here) tie off on the bottom of the embroidery hoop, opposite the flowers (as shown in the video). Repeat with the additional groups of yarn, and also add in some strands of ribbon, as desired.
- Hang your unicorn tapestry up and enjoy your handiwork!

This easy unicorn wall decor would be super cute in a little unicorn fan’s bedroom or in a nursery for a touch of homemade magic! I love all of the creative possibilities for this craft – you can really adjust and customize it to your room’s color scheme, or even use the same “base” to get a variety of other whimsical wall hangings!
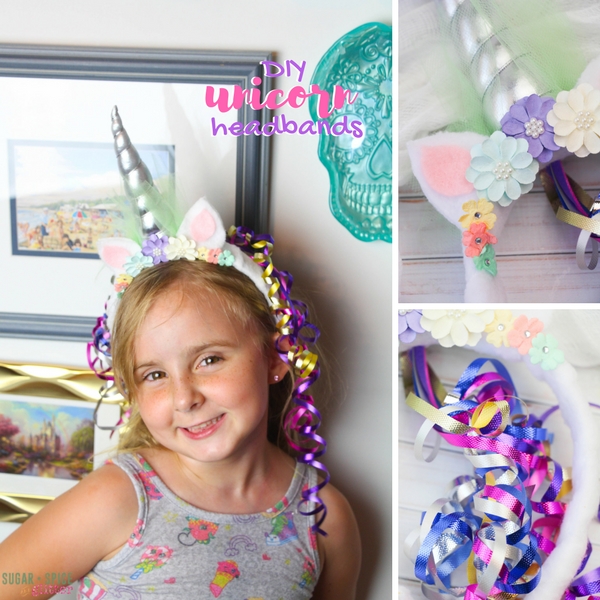
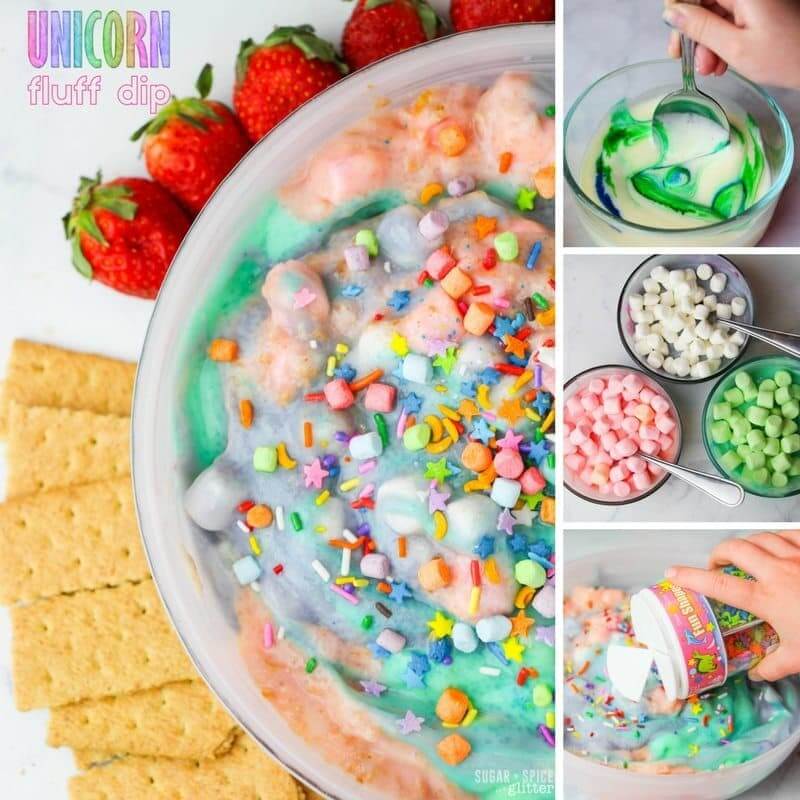
For more magical unicorn crafts, check out our Homemade Unicorn Headbands (also with video), or for a magical unicorn dessert check out our Unicorn Fluff Dip that kids can make.