
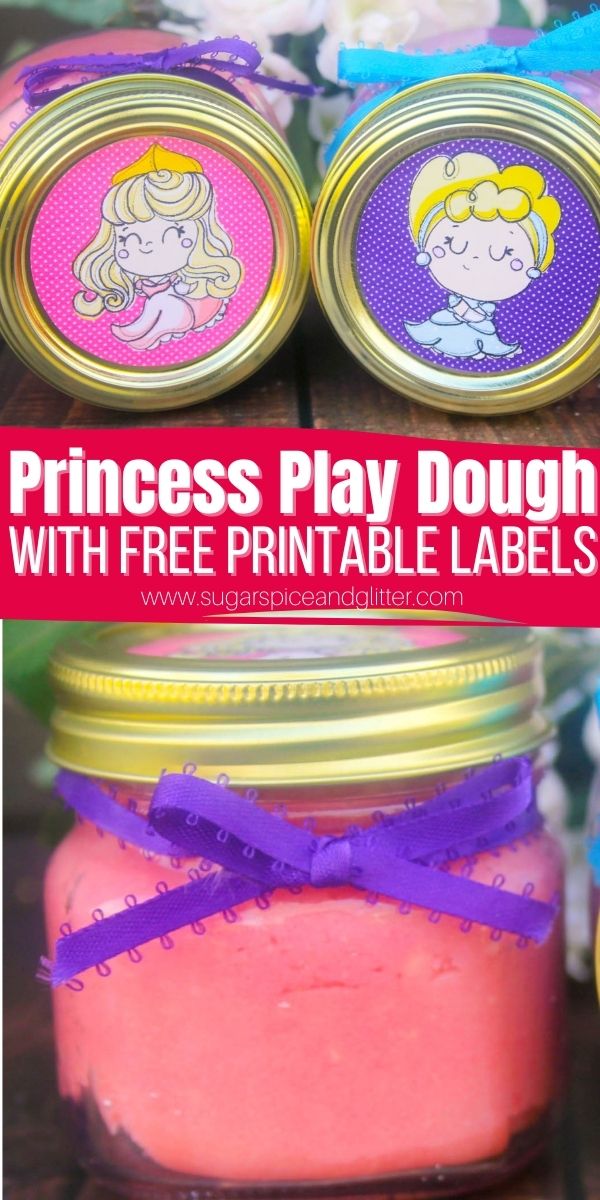
Princess Play Dough (with Video)
Welcome to Sugar, Spice & Glitter! Please note, this post may contain affiliate links. For more details, see our Full Disclosure.
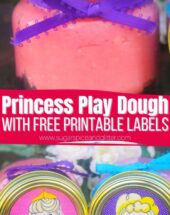
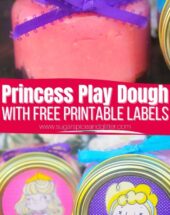
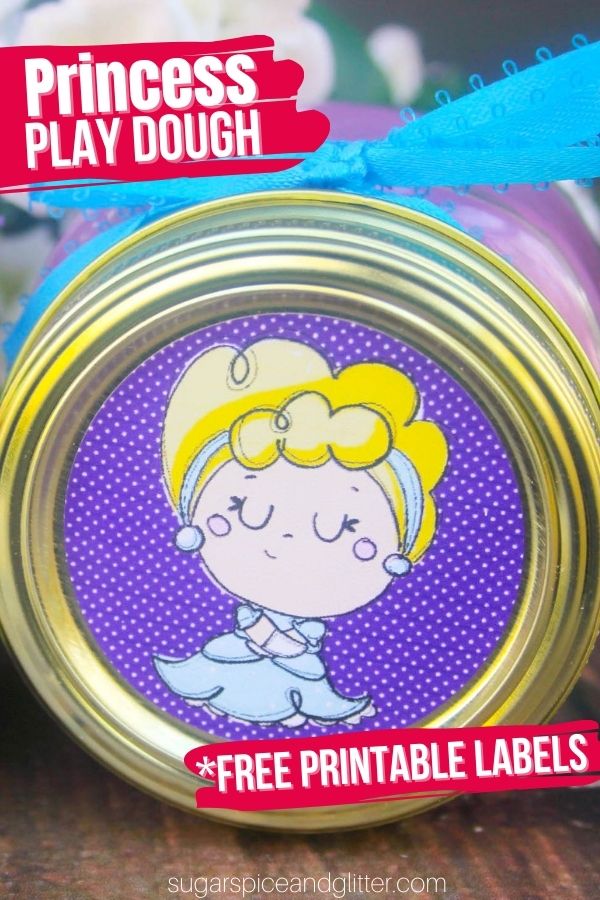
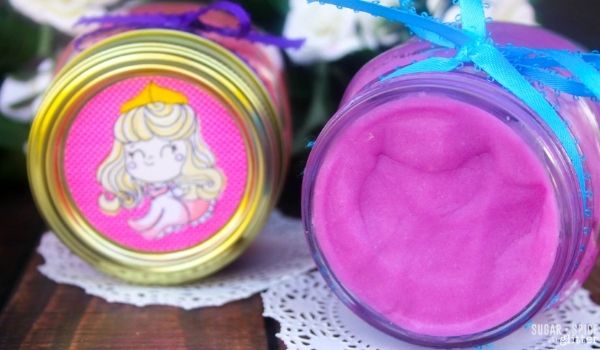
A fun play dough gift idea, this Princess Play Dough Mason Jar Gift is super soft and squishy and is prettily packaged in mason jars with princess labels. It’s a great homemade gift idea for kids who love sensory play and all things princesses!
Princess Play Dough Recipe
With all of the social media trends and marketing around kids’ activities, sometimes we forget about the classics.
Play dough is one of those universally loved sensory play activities because it is so versatile, fun to play with and it’s cheap and easy to whip up a fresh batch.
I love watching all of the creative ideas that my daycare kids come up with while playing with play dough – it really lets their individual personalities shine. Plus, it has an amazing array of benefits including developing hand and finger muscles, allowing children to explore descriptive language and of course, co-operative play in sharing our play dough and play dough tools.
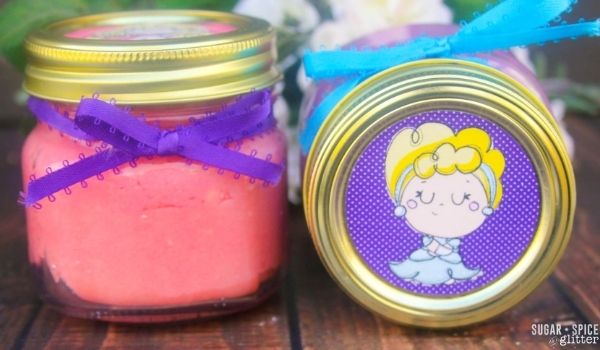
Today, we’re sharing a fun play dough gift idea. Homemade play dough is packaged in little mason jars and topped with our free printable princess labels to make a special gift. You can also include a few favorite play dough tools along with this the play dough – my preference is for kid-safe versions of everyday kitchen tools.
While I tend to make no-cook play dough recipes, I used a cooked play dough recipe for this princess play dough since we knew we would be gifting it. Cooked play dough lasts a lot longer than no-cook versions – it can last up to three months if stored in an airtight container, like these mason jars.

Is play dough safe to eat? While play dough is considered taste-safe for toddlers who may sneak a small sample (thanks to all natural, food-based ingredients), play dough is not safe to eat in large quantities due to the large amount of salt in the recipe. So, don’t freak out if they sneak a taste, but try to encourage not eating it (though most will be deterred by the strong salty taste if they do give in to their curiosity.)
How do I keep play dough soft? This play dough will stay soft for over a month if stored in an airtight container thanks to the cream of tartar. It should last for up to three months and will slowly get harder towards the end of that time.
More Play Dough Gift Ideas
- Play Dough Soap
- Princess and the Frog Play Dough Kit
- Homemade Butterfly Play Dough Kit
- Christmas Play Dough Kit
- Mermaid Play Dough Kit
- Edible Ice Cream Play Dough

Check out our quick video to see how to make this easy homemade play dough for yourself – and then don’t forget to scroll down to grab your free princess labels and printable instructions:
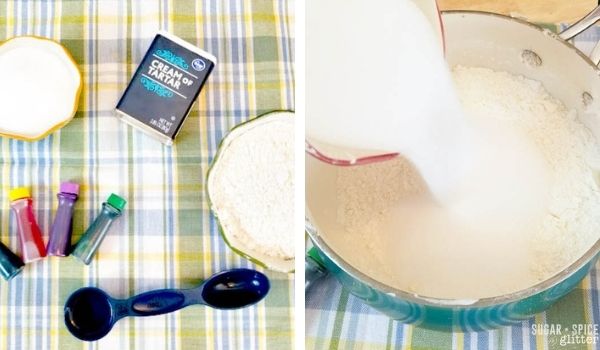
Princess Play Dough Ingredients
- All-Purpose Flour
- Salt
- Water
- Vegetable Oil
- Cream of Tartar <– I buy the big container or from a bulk store as those little jars are so expensive! A bulk container will last us for months of play dough making – and can also be used for soft sugar cookies, snickerdoodle cookies, etc.
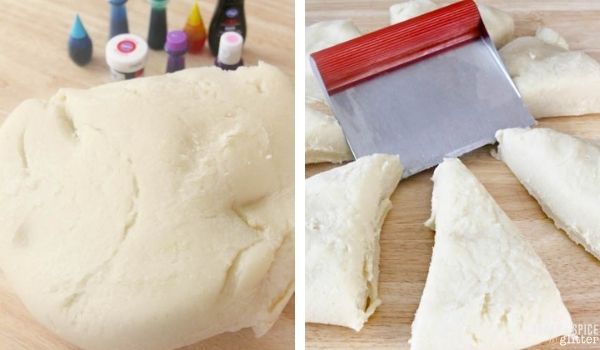
- Food Coloring <– this set of food coloring has lasted me forever and I love that it creates highly saturated colors with just a drop
For Packaging the Play Dough:
- Scissors
- Glue
- Printable Princess Labels
- Ribbon
Scroll down to the printable recipe card for full measurements.
Tip: if gifting this play dough, it’s a great idea to write out the recipe on an index card or print out our recipe card at the bottom of the post so that the recipient can make more when this play dough starts to harden.
Kitchen Tools You May Find Helpful
- Measuring Cups and Spoons
- Large Saucepan
- Whisk or Wooden Spoon
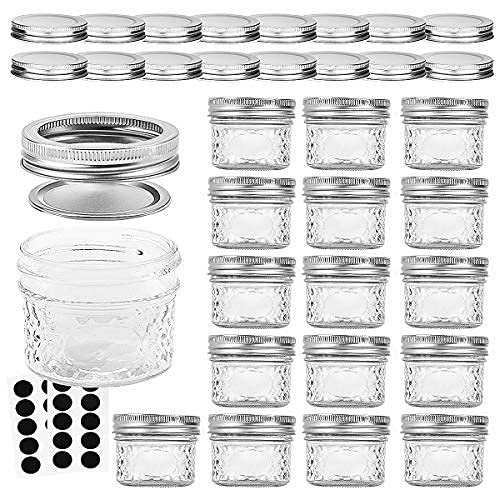
- Mason Jars, for Storing
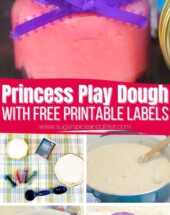
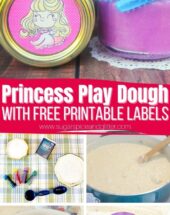
How to Make Princess Play Dough Gifts
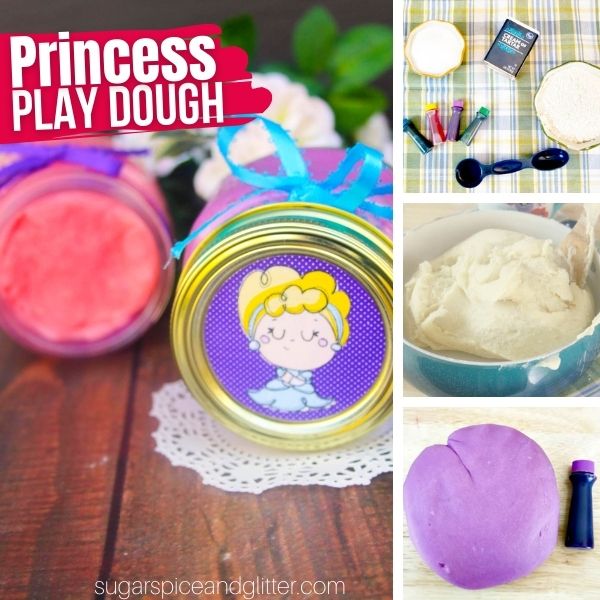
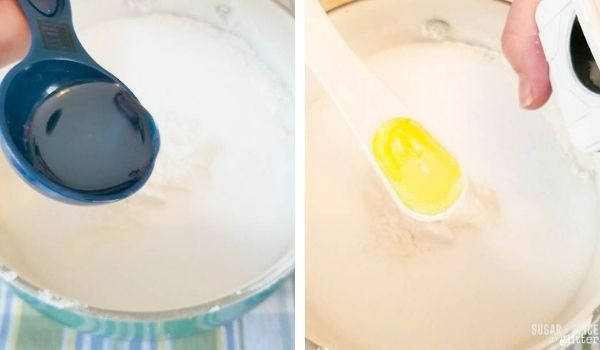
Place all the ingredients together in a big pot.
Stir well and then put it onto the stove over medium heat.
Stir frequently as the mixture heats up, making sure to get down to the bottom of the pot so the play dough doesn’t burn.
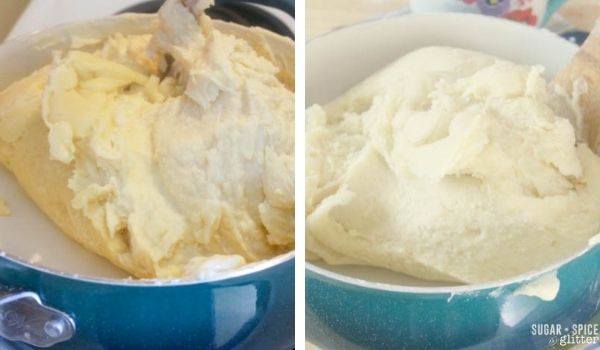
It will take about 3-4 minutes for the play dough to start to form and not appear runny.

Remove the pot from the heat and allow to cool until comfortable to touch.
Fold out onto a clean surface and knead for 2 minutes, adding additional flour or oil, as needed.
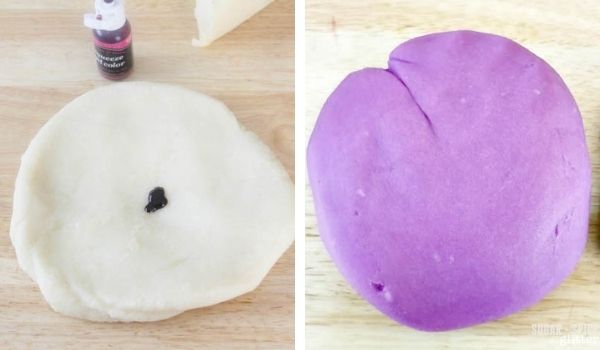
Divide the dough and knead in food coloring now, or you can add it with the water in the dough making process and just make a separate batch for each color.
Print off the play dough princess labels and glue to the top of your mason jars.
Portion the play dough into the mason jars and seal with princess lids.
Add additional embellishments, like ribbons or name tags, onto each jar.
Pin this Easy Homemade Gift Idea for the Little Princess in your life:
Grab your free printable recipe card for how to make our princess play dough – and don’t forget to grab your free printable princess labels:
Want to Save This Recipe?
Enter your email & I'll send it to your inbox. Plus, get great new recipes from me every week!
By submitting this form, you consent to receive emails from Sugar, Spice and Glitter.
Princess Play Dough
A super soft and squishy homemade play dough packaged to be the perfect gift for a little princess! This princess play dough mason jar gift is a thoughtful homemade gift that will encourage hours of creative sensory play.
Materials
- 2 cups All-Purpose Flour
- 1 cup Salt
- 2 cups Water
- 1 Tablespoon Vegetable Oil
- 4 teaspoons Cream of Tartar
- Food Coloring
- Printable Princess Labels
- Ribbon
Tools
- Measuring Cups and Spoons
- Large Saucepan
- Whisk or Wooden Spoon
- Mason Jars, for Storing
- Scissors
- Glue
Instructions
- Place all the ingredients together in a big pot.
- Stir well and then put it onto the stove over medium heat.
- Stir frequently as the mixture heats up, making sure to get down to the bottom of the pot so the play dough doesn't burn.
- It will take about 3-4 minutes for the play dough to start to form and not appear runny.
- Remove the pot from the heat and allow to cool until comfortable to touch.
- Fold out onto a clean surface and knead for 2 minutes, adding additional flour or oil, as needed.
- Divide the dough and knead in food coloring now, or you can add it with the water in the dough making process and just make a separate batch for each color.
- Print off the play dough princess labels and glue to the top of your mason jars.
- Portion the play dough into the mason jars and seal with princess lids.
- Add additional embellishments, like ribbons or name tags, onto each jar.
Recommended Products
As an Amazon Associate and member of other affiliate programs, I earn from qualifying purchases.
-
 Wilton Icing Colors, 12-Count Gel-Based Food Color
 -
VERONES Mason Jars Canning Jars, 4 OZ Jelly Jars With Regular Lids and Bands, Ideal for Jam, Honey, Wedding Favors, Shower Favors, Baby Foods, DIY Magnetic Spice Jars, 16 PACK,Extra 16 Lids
-
Cream of Tartar, 2 Cups by Unpretentious Baker, Highest Quality USP & Food Grade, Better than Restaurant Quality, Non-GMO, Kosher, Gluten Free, Vegan, Slotted Cap Spice Shaker


Want to Save This Recipe?
Enter your email & I'll send it to your inbox. Plus, get great new recipes from me every week!
By submitting this form, you consent to receive emails from Sugar, Spice and Glitter.
Princess Play Dough
A super soft and squishy homemade play dough packaged to be the perfect gift for a little princess! This princess play dough mason jar gift is a thoughtful homemade gift that will encourage hours of creative sensory play.
Materials
- 2 cups All-Purpose Flour
- 1 cup Salt
- 2 cups Water
- 1 Tablespoon Vegetable Oil
- 4 teaspoons Cream of Tartar
- Food Coloring
- Printable Princess Labels
- Ribbon
Tools
- Measuring Cups and Spoons
- Large Saucepan
- Whisk or Wooden Spoon
- Mason Jars, for Storing
- Scissors
- Glue
Instructions
- Place all the ingredients together in a big pot.
- Stir well and then put it onto the stove over medium heat.
- Stir frequently as the mixture heats up, making sure to get down to the bottom of the pot so the play dough doesn't burn.
- It will take about 3-4 minutes for the play dough to start to form and not appear runny.
- Remove the pot from the heat and allow to cool until comfortable to touch.
- Fold out onto a clean surface and knead for 2 minutes, adding additional flour or oil, as needed.
- Divide the dough and knead in food coloring now, or you can add it with the water in the dough making process and just make a separate batch for each color.
- Print off the play dough princess labels and glue to the top of your mason jars.
- Portion the play dough into the mason jars and seal with princess lids.
- Add additional embellishments, like ribbons or name tags, onto each jar.
Recommended Products
As an Amazon Associate and member of other affiliate programs, I earn from qualifying purchases.
-
Wilton Icing Colors, 12-Count Gel-Based Food Color
-
VERONES Mason Jars Canning Jars, 4 OZ Jelly Jars With Regular Lids and Bands, Ideal for Jam, Honey, Wedding Favors, Shower Favors, Baby Foods, DIY Magnetic Spice Jars, 16 PACK,Extra 16 Lids
-
Cream of Tartar, 2 Cups by Unpretentious Baker, Highest Quality USP & Food Grade, Better than Restaurant Quality, Non-GMO, Kosher, Gluten Free, Vegan, Slotted Cap Spice Shaker
I hope whoever you give this fun princess gift to loves it!
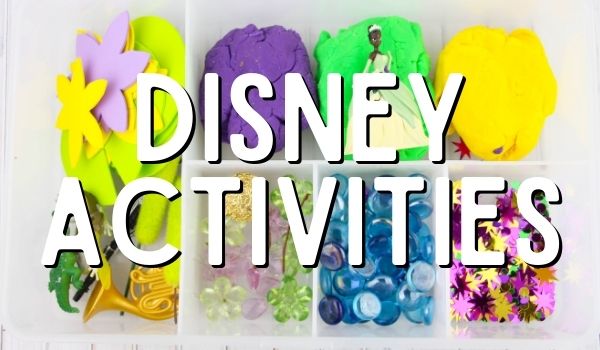
For more Disney play ideas, check out our full Disney activities collection here:
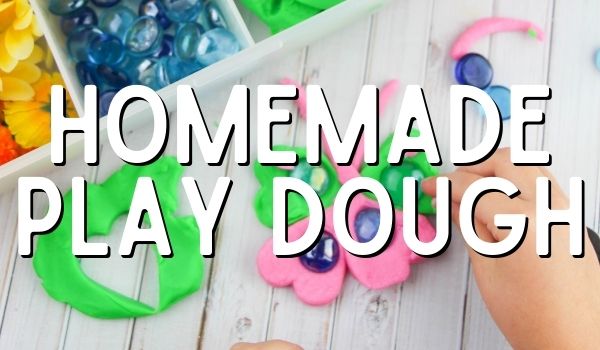
For more play dough ideas, check out our full homemade play dough collection here:
For more DIY Disney Party ideas, check out our full Disney Party collection here:


Thanks for sharing this information with us. I found your blogs very interesting. I am looking forward to the new blogs from you.
I’m so glad I found this dental office! From the moment I stepped in, I could tell I was in good hands. The team was incredibly welcoming, and the entire process—from check-in to the actual treatment—was smooth and stress-free. The hygienist was gentle but thorough, and the dentist made sure to explain everything to me in a way I could understand. It was refreshing to experience such personal care. I could really tell they use advanced technology to make things easier and more comfortable for their patients. Whether you need a check-up, cleaning, or something more, this place is worth checking out. I highly recommend them to anyone who’s looking for a top-notch dental experience. You can learn more and schedule your visit by clicking here!
This thoughtful, handmade play dough encourages creativity and care, a great activity for little kids and big kids will like it too!
Thanks!
This looks like such a fun activity for kids, especially for rainy days or birthday parties. Homemade play dough is honestly way better than I expected the first time I tried it, and adding a princess theme makes it even cuter. I’ve bought random craft and party supplies online before and learned pretty quickly to read reviews first. I remember seeing very mixed LightInTheBox reviews https://light-in-the-box.pissedconsumer.com/review.html —some people loved the prices for decorations and accessories, while others mentioned slow shipping.