Easy Homemade Bird Feeder Kids Can Make
Welcome to Sugar, Spice & Glitter! Please note, this post may contain affiliate links. For more details, see our Full Disclosure.
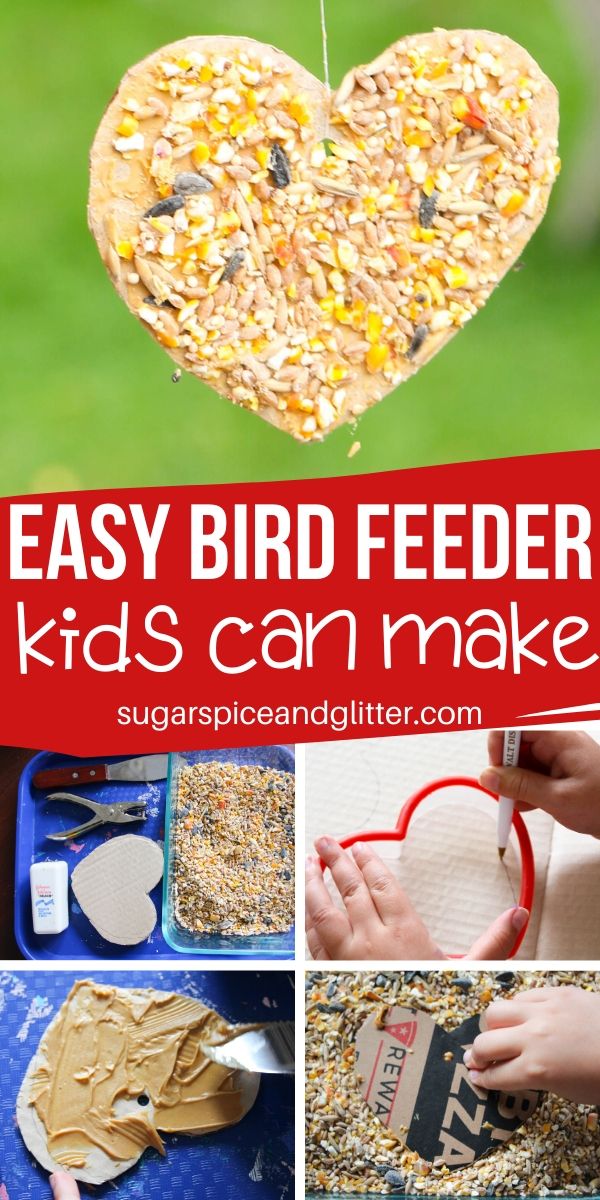
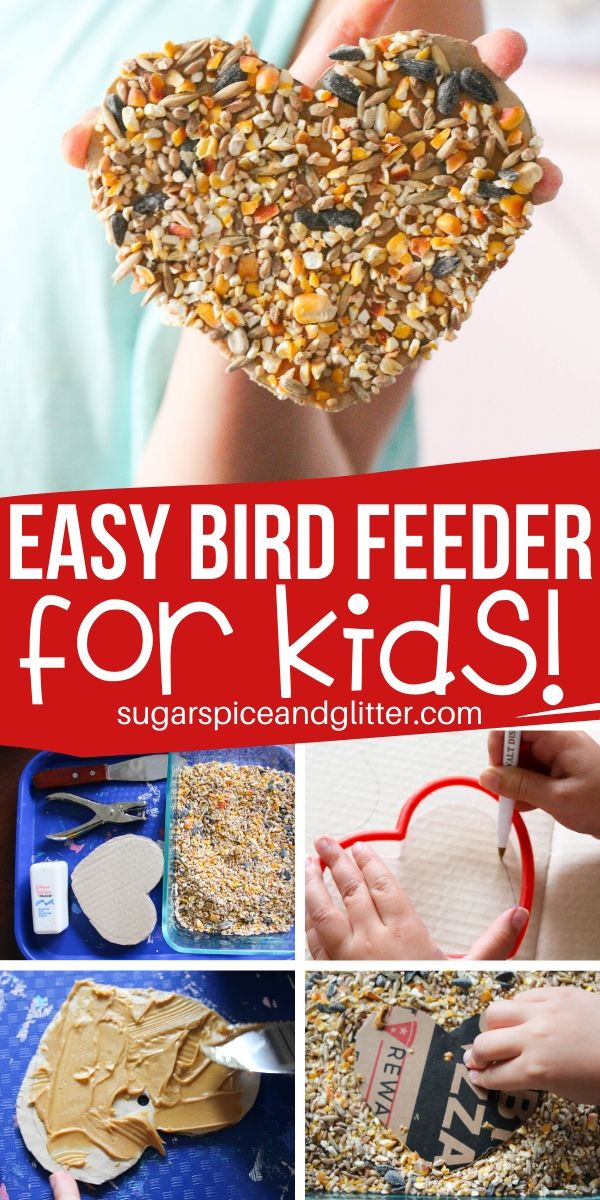
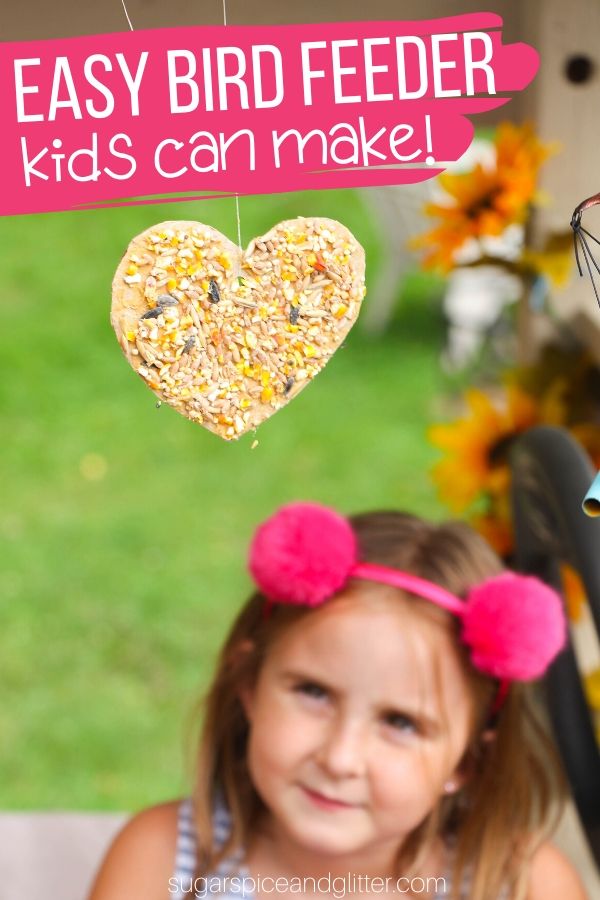
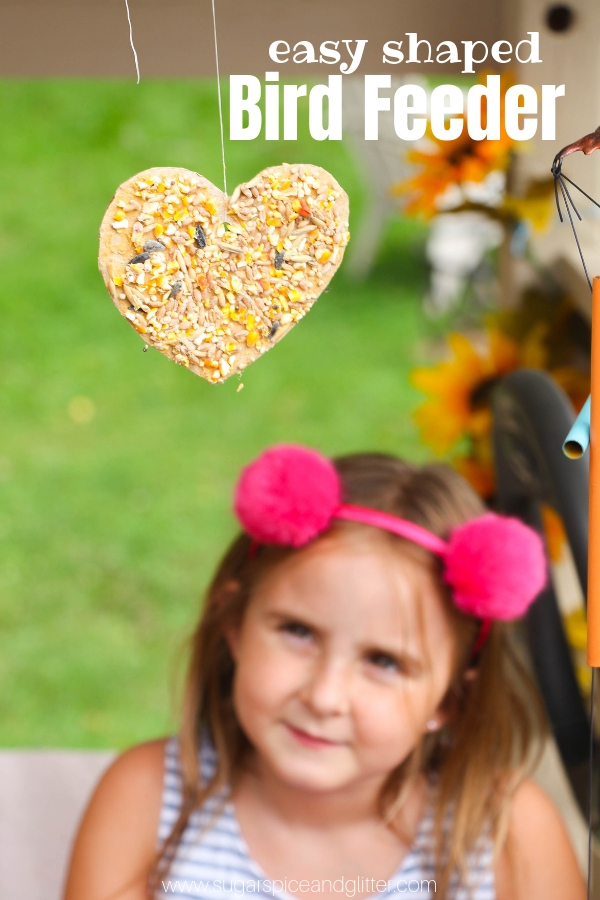
A fun and easy Cookie Cutter Bird Feeder, this Homemade Bird Feeder is simple enough for kids to make and only requires a couple of materials you probably already have at home!
DIY Bird Feeder Kids Can Make
Every Fall and Spring, one of my daycare kids’ favorite activities is making homemade bird feeders and watching in anticipation for birds to come visit.
We’ve made so many different types of homemade bird feeders, including:
- Bird Feeder Wreaths
- PB&J Cookie Cutter Bird Feeders
- Pinecone and Peanut Butter Feeders
- Wooden dollar store feeders (similar to these)
By far, the kids’ favorite type of bird feeder has been our cookie cutter shaped bird feeders, but they can be a lot of work with a group of kids – and if you’re experiencing the same “Indian Summer” that we are (with a mixture of cold and hot days), a gelatin-based bird feeder could end up being a royal mess.

I think the kids’ favorite thing about those bird feeders is that they were able to pick out fun shapes for their ornaments, so I wanted to figure out a different way to let them do that.
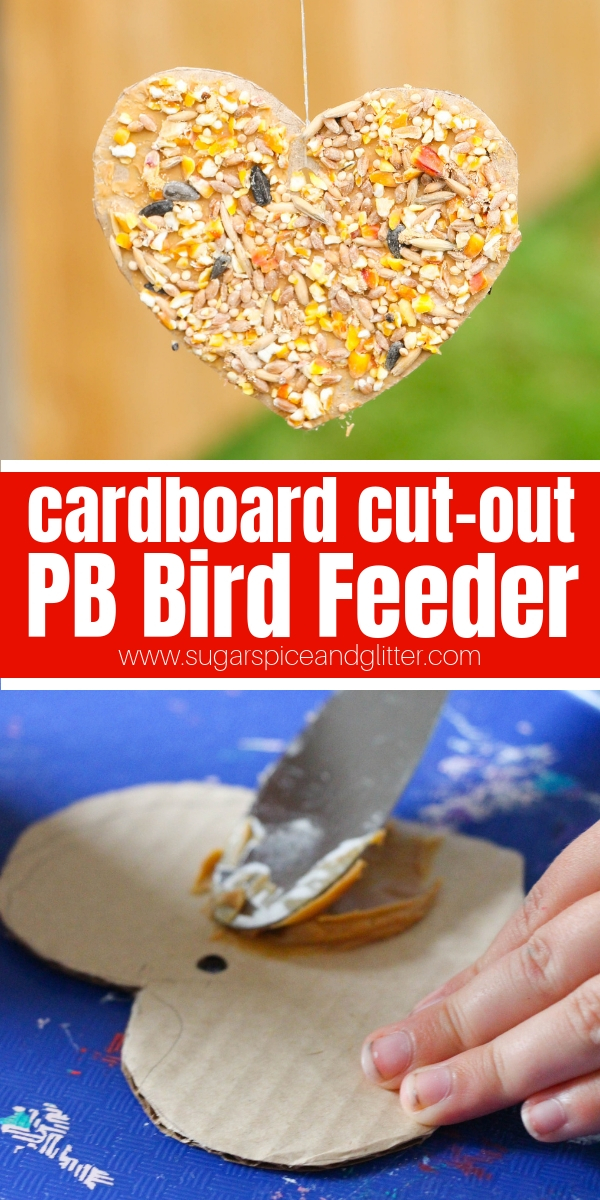
This simple Cardboard Cookie Cutter Bird Feeder is super simple, but the kids loved it!
Plus, since you don’t have to wait for gelatin to set, you can make and hang up your bird feeders in less than 30 minutes. (Less than 10 if you’re not working with toddlers!)
We’ve had to be really strategic with where we hang our bird feeders to ensure that it’s birds that are getting to eat the seeds, and not our resident squirrels. Our best results have been hanging them somewhere that the squirrels can’t easily reach, like suspended off of the tree house or the clothes line.
This fun craft would be a great addition to a Bird Unit Study, or a fun activity after reading any of our favorite bird books.
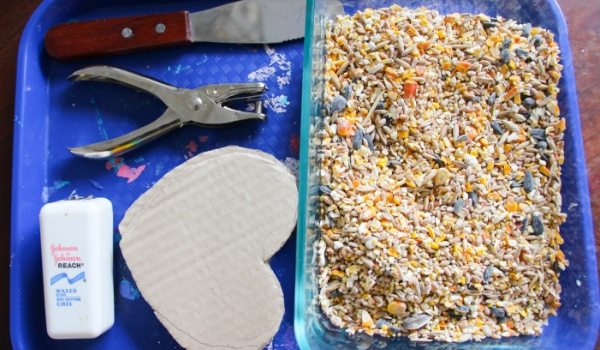
Materials for a Cooke Cutter Bird Feeder
- Cardboard
- Pen or pencil
- Cookie Cutters <– we have this giant pack and use it for everything from baking to play dough (and then crafts like this)
- Scissors <– these are the ones we have in our daycare, super easy to use and actually cut through things (unlike a lot of safety scissors). They’ve lasted for over 5 years
- Hole punch
- Dental Floss
- Knife <– these spreaders are awesome for kids (I originally bought mine from Montessori Services but they appear to have switched brands and there are some complaints about the quality)
- Peanut Butter
- Bird Seed
- Shallow Container
I highly recommend grabbing a couple of these sturdy plastic lunch trays (we have one in the pictures in this post). I use these for almost all of our craft or kitchen activities, as well as in our Montessori practical life activities. Ours have lasted for over 6 years and are still going strong, plus they are so great for containing messes and allowing the kids to set a project to the side while it dries (or if you have to clear off the table for supper).
Tip: if peanut butter allergies are a concern, sunflower or Wow Butters are a good alternative.

How to Make Cardboard Bird Feeders
Assemble all of your materials. For my daycare kids, I presented mine on a tray in the typical Montessori fashion (with pre-cut cardboard shapes).
This keeps all of your materials tidy and organized, and also reinforces the order of the steps to make this bird feeder.
The tray also serves as a defined work space and makes cleaning up a lot easier.
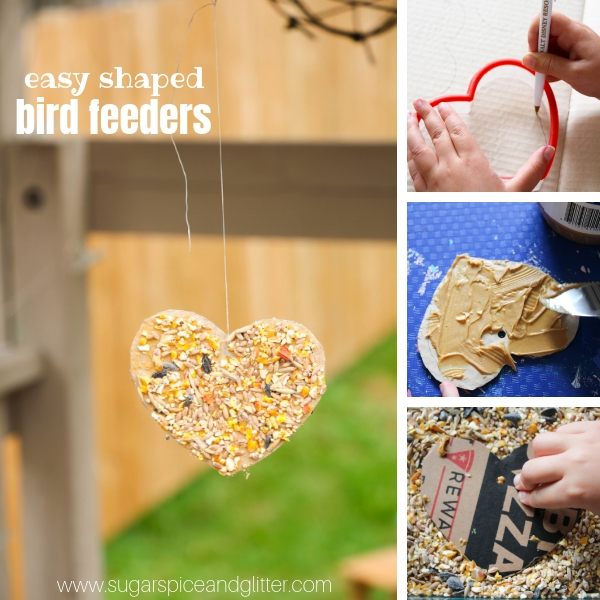
If working with older kids, have them pick their desired cookie cutter shape and trace onto cardboard.
Cut the shapes out, and then add a hole to the top of the shape (at least an inch from the edge).
You can add the dental floss now or later to serve as the string for hanging the bird feeder. I found it easier to add it at this stage.
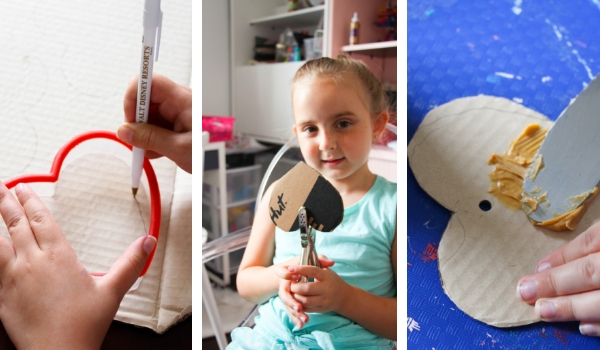
Using your knife, spread a generous layer of peanut butter on the cardboard shape.
You can spread peanut butter on one side or both.
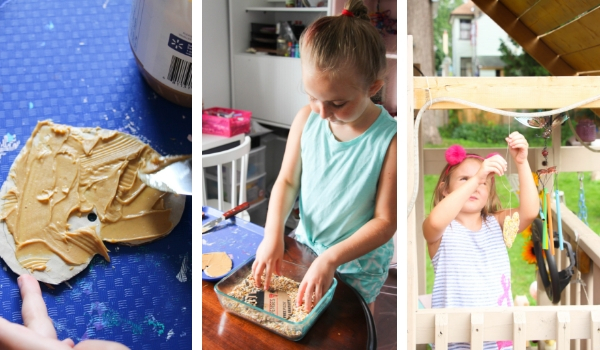
Fill your shallow container with bird seed.
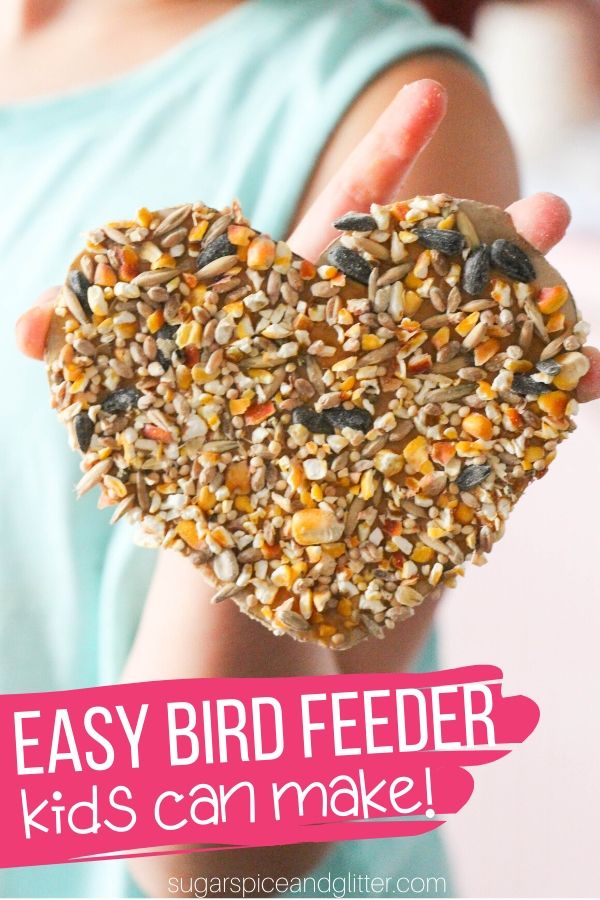
Finally, dip the peanut butter-slathered side of the shape into the bird seed to cover.
Hang up the ornament somewhere that the birds can access it – but the squirrels can’t!
Enjoy bird watching.
Pin this Simple DIY Bird Feeder for Kids:
Grab your free printable instructions for our easy Peanut Butter Bird Feeder:
Want to Save This Recipe?
Enter your email & I'll send it to your inbox. Plus, get great new recipes from me every week!
By submitting this form, you consent to receive emails from Sugar, Spice and Glitter.
Cardboard Bird Feeder
Materials
- Cardboard
- Peanut Butter
- Bird Seed
Tools
- Pen or pencil
- Cookie Cutters
- Scissors
- Hole punch
- Dental Floss
- Knife
- Shallow Container
Instructions
- Assemble all of your materials. For my daycare kids, I presented mine on a tray in the typical Montessori fashion (with pre-cut cardboard shapes).
- This keeps all of your materials tidy and organized, and also reinforces the order of the steps to make this bird feeder.
- The tray also serves as a defined work space and makes cleaning up a lot easier.
- If working with older kids, have them pick their desired cookie cutter shape and trace onto cardboard.
- Cut the shapes out, and then add a hole to the top of the shape (at least an inch from the edge).
- You can add the dental floss now or later to serve as the string for hanging the bird feeder. I found it easier to add it at this stage.
- Using your knife, spread a generous layer of peanut butter on the cardboard shape.
- You can spread peanut butter on one side or both.
- Fill your shallow container with bird seed.
- Finally, dip the peanut butter-slathered side of the shape into the bird seed to cover.
- Hang up the ornament somewhere that the birds can access it - but the squirrels can't!
- Enjoy bird watching.

Check out these other fun Montessori-inspired Nature Activities from my fellow Montessori Moms:
Human Anatomy Body Systems Printable 3-Part Cards | The Natural Homeschool
Summer Nature Collections | The Kavanaugh Report
Human Body Montessori-Friendly Learning Materials | The Pinay Homeschooler

This simple homemade bird feeder was super easy to make with the kids and they loved getting to pick their favorite shapes for their bird feeders! This is a great fall craft to do with a crowd or a classroom.
For more bird-inspired activities, check out our Collection of 20+ Bird Crafts or our Bird Seed Slime. Or for more garden activities for kids, check out our DIY Seed Bombs or our Garden Wind Chimes.